
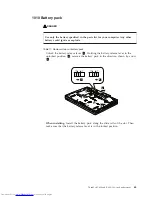


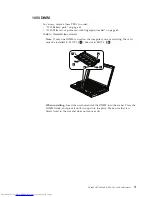


1050
DIMM
For
access,
remove
these
FRUs
in
order:
v
“1010
Battery
pack”
on
page
63
v
“1040
Palm
rest
or
palm
rest
with
fingerprint
reader”
on
page
68
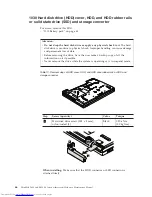
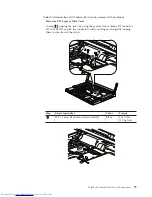
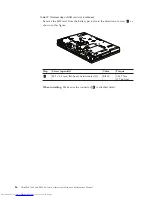
Table
15.
Removal
steps
of
dimm
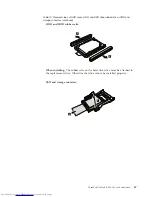
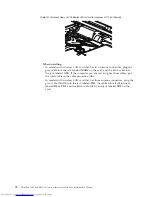
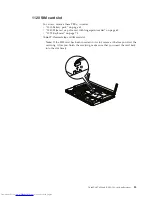
Note:
If
only
one
DIMM
is
used
on
the
computer
you
are
servicing,
the
card
must
be
installed
in
SLOT-0
(
a
),
but
not
in
SLOT-1
(
b
).
1
2
a
1
b
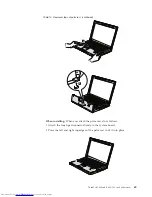
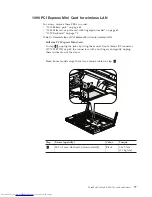
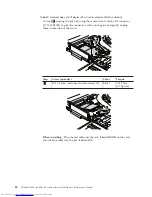
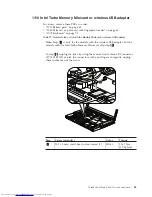
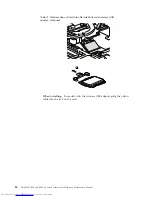
When
installing:
Insert
the
notched
end
of
the
DIMM
into
the
socket.
Press
the
DIMM
firmly,
and
pivot
it
until
it
snaps
into
the
place.
Make
sure
that
it
is
firmly
fixed
in
the
slot
and
does
not
move
easily.
ThinkPad
T400
and
R400
(14.1-inch
widescreen)
71
Содержание XT904UT
Страница 1: ...ThinkPad T400 and R400 14 1 inch widescreen Hardware Maintenance Manual ...
Страница 2: ......
Страница 3: ...ThinkPad T400 and R400 14 1 inch widescreen Hardware Maintenance Manual ...
Страница 8: ...vi ThinkPad T400 and R400 14 1 inch widescreen Hardware Maintenance Manual ...
Страница 24: ...16 ThinkPad T400 and R400 14 1 inch widescreen Hardware Maintenance Manual ...
Страница 30: ...22 ThinkPad T400 and R400 14 1 inch widescreen Hardware Maintenance Manual ...
Страница 40: ...32 ThinkPad T400 and R400 14 1 inch widescreen Hardware Maintenance Manual ...
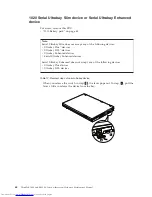
Страница 73: ...Table 12 Removal steps of serial ultrabay device continued 3 ThinkPad T400 and R400 14 1 inch widescreen 65 ...
Страница 232: ...224 ThinkPad T400 and R400 14 1 inch widescreen Hardware Maintenance Manual ...
Страница 235: ......
Страница 236: ...Part Number 43Y6629 1P P N 43Y6629 ...


