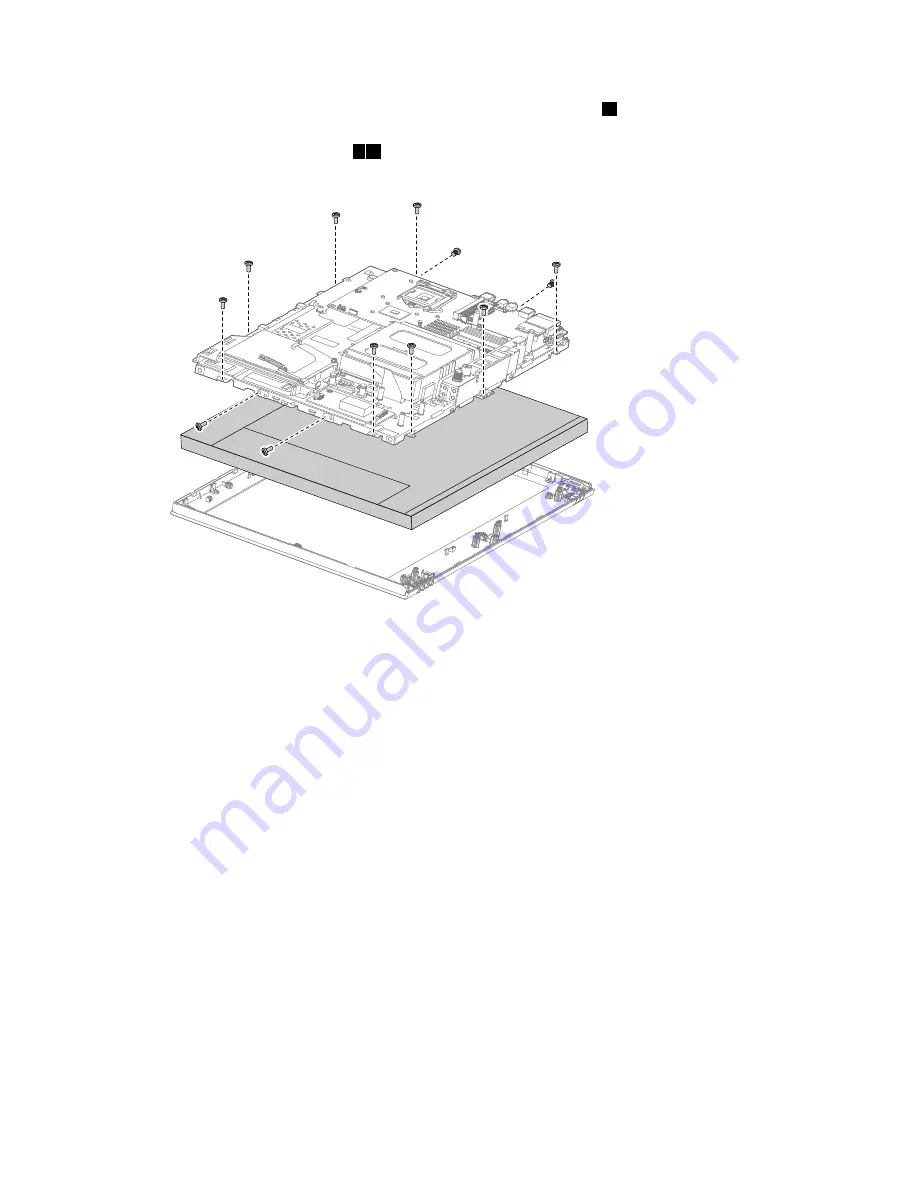
Step 16. Remove the 9 screws that secure the chassis to the front bezel.
1
Step 17. Remove the four screws that secure the LED panel to the chassis, and then disconnect the power
cable from the LED panel.
2 3
Step 18. Lift up the chassis to separate the LED panel from the chassis.
Step 19. To install the new the LED panel:
a.
Line up the chassis with new LED panel, and then place it into position.
b.
Secure the LED panel to the chassis with the four screws.
c.
Connect the converter cable to the new LED panel.
d.
Line up the chassis and new LED panel with the front bezel, and then place it into position.
e.
Secure the chassis to the front bezel with the nine screws.
f.
Connect all the cables to the connectors on the motherboard.
Step 20. Reattach the heat-sink, system fan, rear I/O module, speaker system, EMI cover, middle cover,
optical drive, stand holder, foot cover and stand base.
Chapter 8
.
Replacing hardware
53
Содержание C345
Страница 2: ......
Страница 6: ...iv Lenovo C345 C445 All In One PCHardware Maintenance Manual ...
Страница 8: ...2 Lenovo C345 C445 All In One PCHardware Maintenance Manual ...
Страница 16: ...10 Lenovo C345 C445 All In One PCHardware Maintenance Manual ...
Страница 18: ...12 Lenovo C345 C445 All In One PCHardware Maintenance Manual ...
Страница 24: ...18 Lenovo C345 C445 All In One PCHardware Maintenance Manual ...
Страница 32: ...26 Lenovo C345 C445 All In One PCHardware Maintenance Manual ...
Страница 60: ...54 Lenovo C345 C445 All In One PCHardware Maintenance Manual ...


