


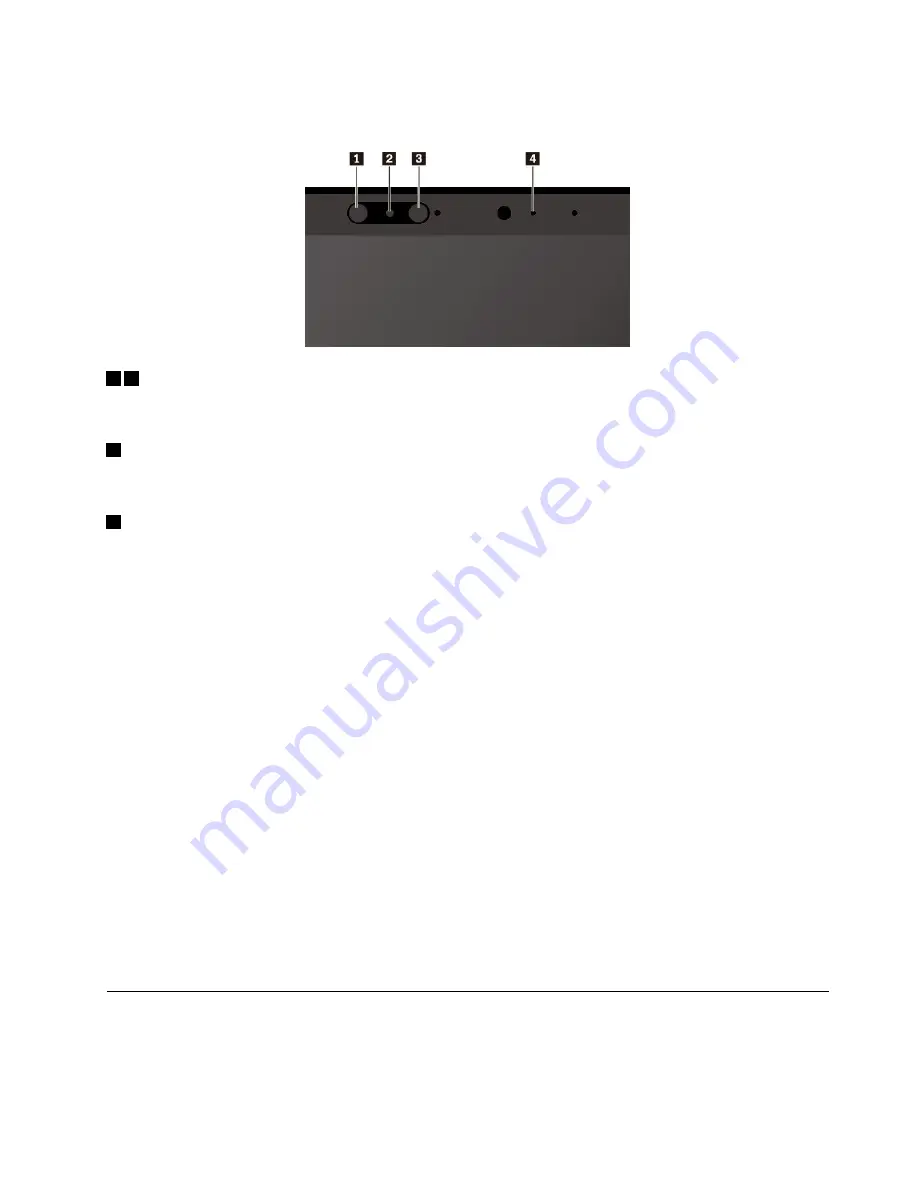
The infrared camera has the following components:
1 3
Infrared light-emitting diode (LED)
The infrared LED emits infrared light. Normally the infrared light is invisible to the naked eye.
2
Infrared camera lens
The infrared camera lens is used to create images of user’s face.
4
Camera indicator
When the camera indicator is on, the infrared camera is in recognition mode.
To set the infrared camera for face authentication, do the following:
1. Open the Start menu and click
Settings
➙
Accounts
➙
Sign-in options
.
2. Follow the instructions on the screen to create a Personal Identification Number (PIN).
3. Click the
Set up
button under
Face Recognition
. Then click
Get Started
.
4. Input the PIN you set earlier and the camera preview starts.
5. Position your computer in landscape (camera at the top) and place your face right in front of the infrared
camera. Keep a distance of about 30 cm to 75 cm (11.8 inches to 29.5 inches) away from the front of
the infrared camera during the scanning. The bar under the preview image indicates the process.
You can click
Improve Recognition
to improve the image. Then
Windows Hello
can recognize you in
different ambient light or when your appearance is changed.
To use the infrared camera to unlock your computer, do the following:
1. Position your computer in landscape (camera at the top) and place your face right in front of the infrared
camera. Keep a distance of about 30 cm to 75 cm (11.8 inches to 29.5 inches) away from the front
of the infrared camera.
2. Follow the instructions displayed on the screen and ensure that you are centered and looking directly
at the camera. When the program recognizes your face, it unlocks the screen and signs you into the
Windows operating system automatically.
Using a media card or a smart card
Your computer has a media-card slot. Depending on the model, your computer might also have a
smart-card slot.
33
Содержание 20JW
Страница 1: ...T570 and P51s User Guide ...
Страница 6: ...iv T570 and P51s User Guide ...
Страница 54: ...38 T570 and P51s User Guide ...
Страница 68: ...52 T570 and P51s User Guide ...
Страница 74: ...58 T570 and P51s User Guide ...
Страница 82: ...66 T570 and P51s User Guide ...
Страница 152: ...136 T570 and P51s User Guide ...
Страница 154: ...138 T570 and P51s User Guide ...
Страница 166: ...China RoHS 150 T570 and P51s User Guide ...
Страница 167: ...Taiwan RoHS Appendix D Restriction of Hazardous Substances RoHS Directive 151 ...
Страница 168: ...152 T570 and P51s User Guide ...
Страница 170: ...5 Clear the Allow this device to wake the computer check box 6 Click OK 154 T570 and P51s User Guide ...
Страница 174: ...158 T570 and P51s User Guide ...
Страница 175: ......
Страница 176: ......