background image

504,626M

*P504626M*

01/04

*2P0104*

Page 1

E

 2002 Lennox Industries Inc.

Dallas, Texas, USA

RETAIN THESE INSTRUCTIONS

FOR FUTURE REFERENCE

WARNING

Do not store or use gasoline or other flammable va-
pors and liquids in the vicinity of this or any other ap-
pliance.

WARNING

Improper installation, adjustment, alteration, ser-
vice, or maintenance can cause injury or property
damage. Refer to this manual. For assistance or
additional information, consult a qualified installer
or service agency.

INSTALLATION
INSTRUCTIONS

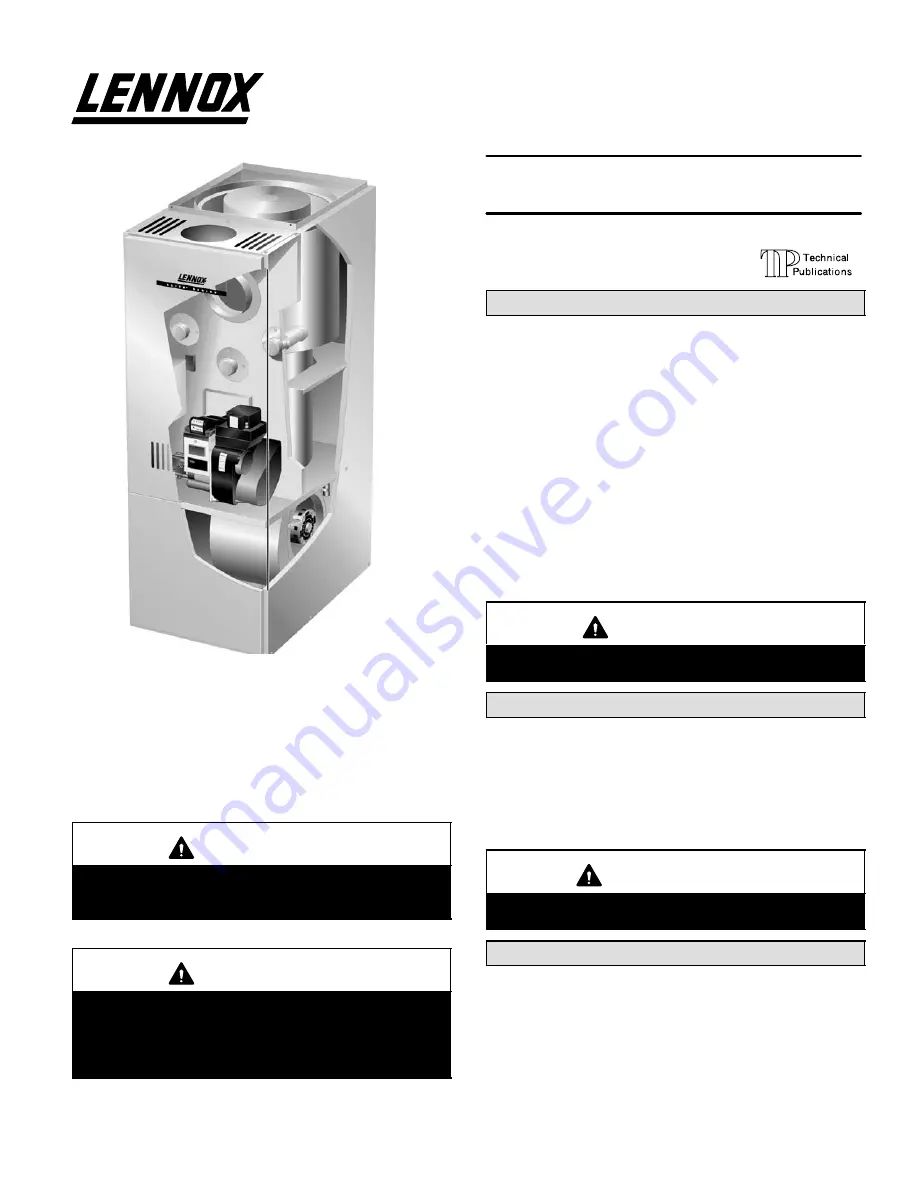
O23 SERIES UNITS

OIL UNITS

504,626M
38152A059 
01/04
Supersedes 04/02

Table of Contents

General

1

. . . . . . . . . . . . . . . . . . . . . . . . . . . . . . . . . . . . . 

Shipping & Packing 

1

. . . . . . . . . . . . . . . . . . . . . . . . . . 

Requirements

4

. . . . . . . . . . . . . . . . . . . . . . . . . . . . . . . . 

O23 Unit Dimensions

2

. . . . . . . . . . . . . . . . . . . . . . . . . . . 

O23 Start−Up & Performance Check List

2

. . . . . . . . . 

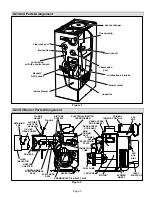
O23 Unit Parts Arrangement

3

. . . . . . . . . . . . . . . . . . . . . 

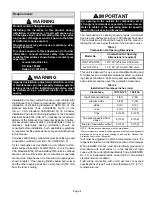
O23 Oil 

Burner Parts Arrangement

3

. . . . . . . . . . . . . . . . 

Locate & Level the Unit

5

. . . . . . . . . . . . . . . . . . . . . . . . 

Setting the Unit

5

. . . . . . . . . . . . . . . . . . . . . . . . . . . . . . . 

Unit Adjustments

5

. . . . . . . . . . . . . . . . . . . . . . . . . . . . . 

Venting

6

. . . . . . . . . . . . . . . . . . . . . . . . . . . . . . . . . . . . . 

Flue Connections

10

. . . . . . . . . . . . . . . . . . . . . . . . . . . . 

Supply & Return Air Plenums

11

. . . . . . . . . . . . . . . . . 

Oil Supply Line & Filter Connections

12

. . . . . . . . . . . 

Leak Check

13

. . . . . . . . . . . . . . . . . . . . . . . . . . . . . . . . . 

Electrical Wiring

13

. . . . . . . . . . . . . . . . . . . . . . . . . . . . . 

Unit Start-Up & Adjustments

15

. . . . . . . . . . . . . . . . . . 

Service

16

. . . . . . . . . . . . . . . . . . . . . . . . . . . . . . . . . . . . 

Troubleshooting

17

. . . . . . . . . . . . . . . . . . . . . . . . . . . . . 

CAUTION

When venting this appliance, keep vent terminal free
of snow, ice and debris.

General

These instructions are intended as a general guide and do
not supersede local codes in any way. Only qualified tech-
nicians can install and service the Lennox Elite

®

 Series

O23 oil furnaces. In Canada, refer to CSA B139 for recom-
mended installation procedures. Consult authorities who
have jurisdiction before installation.

CAUTION

Never burn garbage or paper in the heating system.
Never leave papers near or around the unit.

Shipping & Packing List

 1− Assembled oil furnace
 1− Barometric draft control
 1− Side exhaust pipe collar
 1− Direct intake collar (AFII burner units only)
Check the components for shipping damage. If you find any
damage, immediately contact the last carrier.

Litho U.S.A.

Содержание O23

Страница 1: ...the Unit 5 Unit Adjustments 5 Venting 6 Flue Connections 10 Supply Return Air Plenums 11 Oil Supply Line Filter Connections 12 Leak Check 13 Electrical Wiring 13 Unit Start Up Adjustments 15 Service 1...

Страница 2: ...120 mm 495 778 457 498 406 O23Q5 140 154 in 22 1 2 33 1 8 21 22 1 8 18 O23Q5 140 154 mm 572 841 533 562 457 O23 Start Up Performance Check List Filter Clean Secure Supply Voltage Electrical Connectio...

Страница 3: ...igure 2 FB HEAD HEAD INSULATOR CLIP RETAINING 1 4 HEX HEAD SCREW FB HEADS ASSY FOR AIR TUBE ASSY ELECTRODE HEAD NOZZLE LINE PEDESTAL ADAPTER NOZZLE AIR SCOOP INLET WHEEL BLOWER FLANGE GASKET MOTOR 4X4...

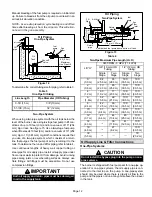
Страница 4: ...nings are required Dimensions of combustion air openings are shown in table 1 One opening shall be below burner level and the other opening shall be no more than 6 152 mm from the room s ceiling IMPOR...

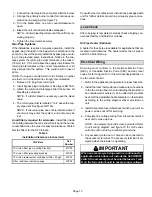
Страница 5: ...llowing D Draft gauge D CO2 or O2 analyzer D Smoke tester D Pressure gauge D High temperature thermometer D Beckett T 500 gauge D Oil vacuum gauge D Knowledge of proper test equipment operation CAUTIO...

Страница 6: ...ss steel rather than aluminum Prior to installation of unit make a thorough inspection of the chimney to determine whether repairs are necessary Make sure the chimney is properly constructed and sized...

Страница 7: ...needs to exit from side of cabinet use the pilot hole located on either side of the unit to cut a 6 152 mm round hole Attach finishing plate provided with four sheet metal screws to cover rough edges...

Страница 8: ...alled so that supply ducts carry air circulated by the furnace to areas outside the space con taining the furnace the return air must be handled by ducts which are sealed to the furnace casing and whi...

Страница 9: ...square inch 6 4 square centimeters per 4 000 Btu 1172 W per hour of the total input rating of all other equip ment in the enclosure OIL FURNACE When ducts are used they shall be of the same cross sec...

Страница 10: ...operation Adjust ther mostat so appliance will operate continuously 5 Test for spillage using a draft gauge 6 After it has been determined that each appliance re maining connected to the common ventin...

Страница 11: ...raft control at least 12 inches beyond the furnace If there is no space to install the draft control in the flue pipe it may be installed in the vent above the flue pipe Follow the instructions packed...

Страница 12: ...ar walls to protect it from damage Avoid running pipes along joists or reverberating surfaces Always use flare fittings All fittings must be accessible Do not use compression fittings IMPORTANT Both o...

Страница 13: ...mm Oil Filters Cat Number 10 micron filter no mounting bracket 81P89 10 micron filter mounting bracket 53P92 10 micron replacement cartridge for filter 45 gph 53P93 Filter restriction indicator gauge...

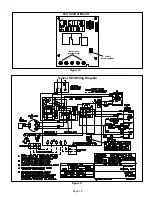
Страница 14: ...Page 14 Figure 16 Fan Control Board thermostat terminal strip fan off delay switches Figure 17 Typical O23 Wiring Diagram...

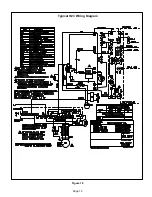
Страница 15: ...Page 15 Figure 18 Typical O23 Wiring Diagram...

Страница 16: ...o its highest setting to start unit After plenum thermometers have reached their highest and steadiest readings subtract the readings The difference in tempera tures in the supply and return air plenu...

Страница 17: ...rol 7 Stack Temperature Take a stack temperature reading in the vent pipe Subtract the room air temperature from the stack temperature This will give you the net stack temperature Use the efficiency c...

Страница 18: ...ergized Circulating fan is energized at the cool speed Cooling compressor turns on immediately Thermostat ends call for cool G and Y terminals are de energized Circulating fan and cooling compressor t...

Страница 19: ...ry control If the burner starts fault is in the Flame detector exposed to light Seal off false source of light the burner starts fault is in the detector circuit short circuit in the flame detec tor R...

Страница 20: ...ugged Nozzle strainer plugged Replace nozzle with the same size spray angle and spray type Inspect the nozzle for plugged orifice or carbon build up around orifice Poor or off center spray type Fouled...

Страница 21: ...lace nozzle Too much air lean short fire Reduce combustion air check combustion Too little air long dirty fire Increase combustion air check combustion Poor Fire If burner con tinues to run does not l...

Страница 22: ...operly rotating wheel Restrictions in return or supply air system Correct cause of restriction Adjustable limit control set too low Reset limit to maximum stop setting Power If voltage fluctuates faul...

Страница 23: ...ack tem reading more than a trace Incorrect burner head adjust ment Correct burner setting CO2 stack tem perature and smoke Too little combustion air Increase combustion air smoke Too little blower ai...

Отзывы: