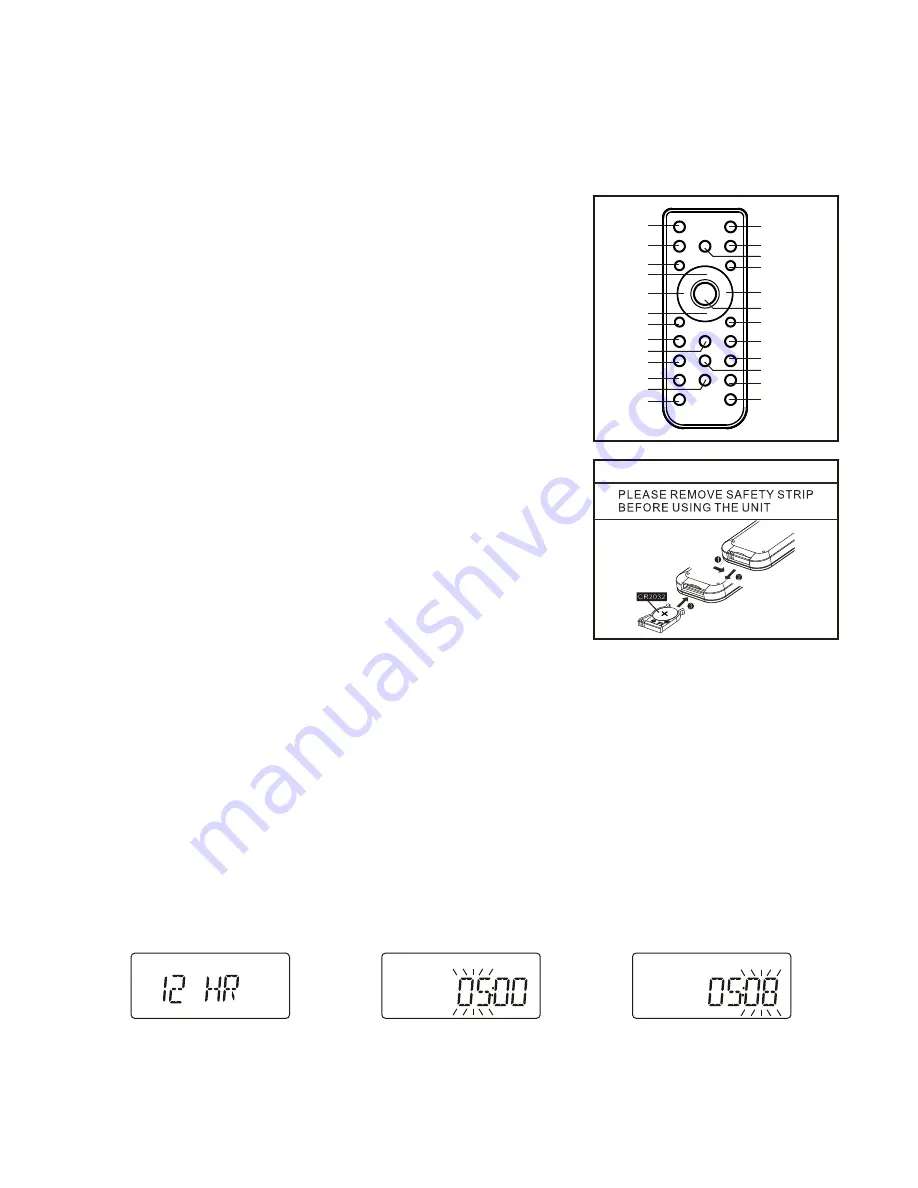
REMOTE CONTROL
1. STANDBY/ON BUTTON
2. iPod/CD BUTTON
3. BACKLIGHT BUTTON
4. PLAY/PAUSE BUTTON
5.
I
◀◀
BUTTON
6. STOP/MENU BUTTON
7. RANDOM BUTTON
8. PROGRAM BUTTON
9. PS/FOL/MENU
▼
BUTTON
10. X-BASS BUTTON
11. BUTTON
12. EQ BUTTON
13. VOLUME - BUTTON
TOUCH SENSING CONTROL
The unit is utilizing a human capacitive sensing technology, the front panel controls are designed to be touch
sensing key pads; you can operate the unit by the touch of your finger tips. The blue light dots on the CD front
panel will be flashing up every time when you perform your touch operation.
CLOCK SETTING
When the unit is powered up for the first time, it will be in standby mode, the display will show the clock and flash.
To perform the clock setting, ensure the unit is in standby mode.
1. Setting the clock display format - Keep touching the
CLOCK/DISPLAY
touch pad on the front panel until the
display shows “12 HR” or “24 HR”, then touch on the
I
◄◄
or
►►I
touch pad to select the “12 HR” (12-
Hour) or “24 HR” (24-Hour) clock display format, when your desired format appears in the display, touch on
the
CLOCK/DISPLAY
to confirm. (F. 1)
2.
After the clock display format is set, the display will show the clock with the hour digits flash, touch on the
I
◄◄
or
►►I
to set to the correct hour, then touch on the
CLOCK/DISPLAY
to confirm, first set the hour
and then the minute, when the display shows the correct time, touch on the
CLOCK/DISPLAY
again to
confirm, the clock setting is now completed. (F. 2)(F. 3)
3.
The clock is displayed during unit standby. To see the clock during unit operation, repeatedly touch on the
CLOCK/DISPLAY
until the display shows the clock and it will be displayed for 5 seconds.
LISTENING TO YOUR RADIO
When the unit is first switched on from standby, it will automatically enter into the FM radio mode. You should fully
extend the FM lead wire antenna located at the back of the unit and adjust its position and direction until you find
the best reception.
To select radio mode during other operation modes, touch on the
TUNER
touch pad on the front panel, the
display will show the FM frequency. (F. 4)
PUTTING THE BATTERY INTO THE REMOT E CONTROL UNIT
UK-2
**BATTERY INCLUDED**
14. OPEN/CLOSE BUTTON
15. AUX/USB/SD BUTTON
16. TUNER BUTTON
17. CLOCK/DISPLAY BUTTON
18.
▶▶
I
BUTTON
19. SELECT/REPEAT
BUTTON
20. INTRO BUTTON
21. PS/FOL/MENU
▲
BUTTON
22. SLEEP BUTTON
23. TIMER BUTTON
24. SURROUND BUTTON
25. MUTE BUTTON
FEATURES AND CONTROLS
1. CD DOOR
2. CD DOOR OPEN/CLOSE(touch pad)
3. SELECT/REPEAT(touch pad)
4. (touch pad)
5. VOLUME -(touch pad)
6. HEADPHONE JACK
7. IR SENSOR
8. LCD DISPLAY
9. SKIP
/TUNE
▼
(touch pad)
10. SKIP
▶▶
I
/TUNE
▲
(touch pad)
I
◄◄
11. PLAY/PAUSE(touch pad)
12. STOP/MENU(touch pad)
13. CLOCK/DISPLAY(touch pad)
14. iPod/CD(touch pad)
15. TUNER(touch pad)
16. AUX/USB/SD(touch pad)
17. STANDBY/ON(touch pad)
18. iPod DECK
19. FM WIRE ANTENNA
20. AUX IN(RIGHT) JACK
F.2
F.3
F.1
1
2
3
4
5
6
7
8
9
12
14
13
15
16
17
18
19
20
21
22
23
24
25
10
11
21. AUX IN(LEFT) JACK
22 SPEAKER TERMINALS
23. BATTERY DOOR
24. AC CORD
25. USB DEVICE IN PORT
26. SD CARD IN SLOT
BATTERY COMPARTMNT
OPEN/CLOSE
CHANGE OF BATTERY
1. Press the battery compartment gently according to the direction
indicated in the illustration.
2.
Slide to open the battery compartment.
3.
Insert the supplied CR2032 battery into the compartment according to
the polarity markings ("+" and "-") inside the compartment and on the
battery. Replace the battery compartment until it clicks.
NOTE
:Remove the battery from the remote control if not in use for long
period of time. Replace with new battery when the battery become weak,
otherwise the remote control will not function properly.


