background image

9


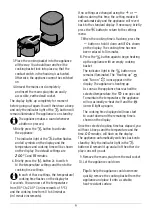
3. Place the cooking basket into the appliance 

all the way. You should hear and feel the 
cooking basket lock into place so that the 
contact switch in the housing is activated. 
Otherwise, the appliance cannot be switched 
on.

4. Unravel the mains cord completely  

and insert the mains plug into an easily  
accessible, earthed wall socket.

The display lights up completely for moment  
before going out again. You will then hear a beep 
and only the indicator light of the 

 button will 

remain illuminated. The appliance is on stand-by.

The appliance makes a sound whenever  
a button is pressed.

5. Briefly press the 

 button to activate  

the appliance:


 The indicator light of the 

 button flashes 

and all symbols on the display and the  
temperature and cooking time will be shown 
on the display. The default settings are 

200

 °C and 

15

 minutes. 

6. Briefly press the 

 button 2x to switch  

to the temperature settings and then to the 
cooking time settings. 

In each of these settings, the temperature/
cooking time flashes on the display for  

4 seconds. You can now set the temperature 
from 80 °C to 200 °C (in increments of 5 °C)  
and the cooking time from 0 to 60 minutes  
(in 1 minute increments).  

If no settings are changed using the   or   
buttons during this time, the setting mode will 
end automatically and the appliance will revert 
back to the standard display. If necessary, briefly 
press the 

 button to return to the settings 

menu.

7. When the cooking time is flashing, press the 

 button or hold it down until 

10

 is shown 

on the display. The cooking time has now 
been reduced to 10 minutes. 

8. Press the 

 button again to begin heating 

up the appliance with an empty cooking  
basket.


 The indicator light in the 

 button now  

remains illuminated. The “Heating up” 


and ”Fan on” 

 icons appear on the  

display. The appliance is heating up.


 As soon as the appliance has reached the  
selected temperature, the 

 icon goes out.  

To maintain the temperature, the appliance 
will occasionally re-heat itself and the 


icon will light up again.


 The cooking time displayed will now start  
to count down and the remaining time is 
shown on the display. 

 Once the selected cooking time has elapsed, you 
will hear 6 beeps and the temperature and the 
time, 

00

 minutes, will flash on the display.  

The appliance automatically switches back onto 
stand-by. Only the indicator light in the 


button will remain lit up and all of the other dis-
play icons will go out. 

9. Remove the mains plug from the wall socket.

10. Let the appliance cool down. 


Tip:

 To help the appliance cool down more 

quickly, remove the cooking basket from the 
appliance and place it onto a suitable, 
heat-resistant surface. 

Содержание 618 161

Страница 1: ...116424AS65XXI 2021 05 en Instructions for use Product number 618 161 Digital Hot Air Fryer ...

Страница 2: ...art the cooking process 14 During the cooking process 15 After use 15 Cleaning and storage 15 Technical specifications 16 Problems solutions Contents About these instructions This product is equipped with safety features Nevertheless read the safety warnings carefully and only use the product as described in these instructions to avoid accidental injury or damage Keep these instructions for future...

Страница 3: ...of the reach of children Do not leave the mains cord hanging down from the work surface to prevent children pulling the appliance down DANGER due to electricity Never immerse the appliance mains cord or mains plug in water as this could cause an electric shock Also protect it from splashes and drops of water Do not touch the appliance with wet hands and do not use it outdoors or in rooms with high...

Страница 4: ... unwound mains cord is entirely free of the appliance Never use the appliance without the cooking basket and sieve inserted Always place the food you wish to cook into the sieve insert never place it directly into the cooking basket Otherwise the hot air is unable to circulate properly Do not overfill the cooking basket Observe the MAX mark Ensure that the food does not come into direct contact wi...

Страница 5: ... To be on the safe side you should not cook your food for too long as intense browning may also lead to an increased risk A rule of thumb is Golden not charred As research is set to continue beyond the issuing of these operating instructions keep an eye on this subject in the press It is also well documented on the Internet Symbols on the appliance This symbol warns of hot surfaces on the inside a...

Страница 6: ... a glance delivery contents Cooking basket Display with function buttons Removable sieve insert Symbol on the appliance Hot rising steam Handle Non slip feet Heating chamber Removable silicone cap MAX mark ...

Страница 7: ...time For the selected setting increase cooking temperature increase cooking time For the selected setting decrease cooking temperature decrease cooking time Cooking progams Cooking program Chips Cooking program BBQ Cooking program Chicken legs wings Cooking program Seafood Cooking program Steak Cooking program Cake Cooking program Vegetables Cooking program Fish Function buttons with indicator lig...

Страница 8: ... all parts thoroughly before putting the appliance back together and using it as described below There must be no moisture on any part of the appliance Before using it to cook food for the first time the cleaned appliance needs to be heat sterilised at 200 C for 10 minutes to remove any production residues Prior to initial use without food This appliance is designed for frying with hot air without...

Страница 9: ...or buttons during this time the setting mode will end automatically and the appliance will revert back to the standard display If necessary briefly press the button to return to the settings menu 7 When the cooking time is flashing press the button or hold it down until 10 is shown on the display The cooking time has now been reduced to 10 minutes 8 Press the button again to begin heating up the a...

Страница 10: ...erally all food that can be cooked in the oven is also suitable to be cooked in the hot air fryer If you want to cook frozen chips ensure that they are suitable to be cooked in the oven and not just for a deep fryer Refer to the instructions provided under Making home made chips if you wish to make home made chips Do not use any foods which have a high fat content e g sausages etc To make filled d...

Страница 11: ...e rolls 100 500 13 15 200 Chicken drumsticks 100 500 25 30 180 Chicken breast 100 500 15 20 180 Snacks Spring rolls 100 400 8 10 200 Yes ready made food Frozen chicken nuggets 100 500 6 10 200 Yes ready made food Fish fingers 100 400 6 10 200 ready made food Frozen breaded cheese 100 400 8 10 180 ready made food Stuffed vegetables 100 400 10 160 Baked goods Cake 300 20 25 160 use a baking tin Quic...

Страница 12: ...k of fire Do not place the appliance under wall cup boards near flammable objects or directly against a wall or in a corner Make sure that the mains cord does not hang down from the work surface Keep the ventilation openings free Do not place anything onto the appliance Never use the appliance without the cooking basket or the sieve insert Do not put any oil or fat into the cooking basket M M Set ...

Страница 13: ...one of the buttons To quickly toggle the cooking time hold down the corresponding button Tip If you have not preheated the appliance add an additional 3 minutes to the cooking time In each of these settings the temperature cooking time flashes on the display for 4 seconds If no settings are changed using the or buttons during this time the setting mode will end automatically and the appliance will...

Страница 14: ...appliance switches onto stand by and only the button remains illuminated The icon may remain illuminated briefly after the appliance has been switched off while the fan is still running After the cooking process Once the selected cooking time has elapsed you will hear 6 beeps and the temperature and the time 00 minutes will flash on the display The appliance automatically switches back onto stand ...

Страница 15: ...surfaces of the appliance with a slightly dampened cloth Then dry the appliance thoroughly 2 Check to see whether any bits of food have come into contact with the heating elements Clean the heating elements with a dry brush as required 3 Wash the cooking basket and removable sieve insert thoroughly with warm water a standard washing up liquid and a soft sponge To remove stubborn hardened on bits o...

Страница 16: ...oking in the oven Snacks which are specially designed to be deep fried will not get crispy in the hot air fryer If necessary put a small amount of oil onto the food before you place it in the basket Do not put any oil into the cooking basket Home made chips do not become crispy Did you used a suitable potato variety You need to use waxy potatoes Cut the chips thinner if necessary Did you wash the ...

Отзывы: