background image

EN

162

Pictur

e mode

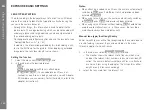
Histogram

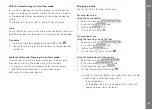
The histogram depicts the brightness distribution in the picture. 

The horizontal axis shows the tone values from black (left) through 

gray to white (right). The vertical axis corresponds to the number of 

pixels at each brightness level.

This form of representation – in conjunction with the impression of 

the picture itself – provides an additional quick and easy assess-

ment of the exposure setting.

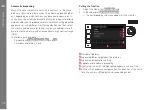
Setting the function

1.  Select the menu item 

Capture Assistants

,

2.  in the sub-menu 

Histogram

, and

3.  there 

On

 or 

Off

.

Note:

If 

Release half pressed

 (see previous page) is set, the histogram 

only appears when the button has been tapped.

Clipping

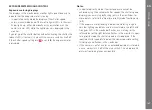
The clipping displays show the light (red flashing) and dark (blue 

flashing) areas of a picture that are over or under exposed. To 

adjust these displays to specific conditions or your compositional 

ideas, you can specify limit values, i.e. the level of over or under 

exposure at which they appear.

The clipping displays thus enable you to recognize affected pic-

tures very easily and to adjust the exposure setting very easily.

Setting the function

1.  Select the menu itemn 

Capture Assistants

, and

2.  in the sub-menu 

Exposure Clipping

.

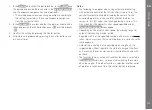
• A further sub-menu with the lines 

Clipping Enabled

Lower 

Limit

Upper Limit

 opens, and below this a scale, which rep-

resents both the threshold values set and the setting limits.

3.  In the 

Clipping Enabled

 line, switch the function 

On

 or 

Off

. If it is 

switched off, the two other lines are not available (= gray).

4.  (Optional) In the 

Lower Limit

 and 

Upper Limit

 lines, set the 

desired lower and upper threshold values.

Содержание M 10

Страница 1: ...LEICA M10 ANLEITUNG INSTRUCTIONS ...

Страница 2: ...1 10 11 13 15 14 12 12b 19 20 17 18 18a 12c 16a 12a 16 2 3 4 5 2 8 9 6 7 ...

Страница 3: ...35 36 37 21 22 23 24 25 26 27 28 30 31 29 33 34 32 ...

Страница 4: ......

Страница 5: ...LEICA M10 Anleitung ...

Страница 6: ...en Ihnen viel Freude und Erfolg beim Fotografieren mit Ihrer neuen Kamera Damit Sie alle ihre Möglichkeiten richtig nut zen können empfehlen wir Ihnen zunächst diese Anleitung zu lesen Ihre Leica Camera AG Bedeutung der unterschiedlichen Kategorien von Informationen in dieser Anleitung Hinweis Zusätzliche Informationen Wichtig Nichtbeachtung kann zur Beschädigung der Kamera des Zubehörs oder der A...

Страница 7: ...DE 3 ...

Страница 8: ...r vorgesehenen Stellen der Kameraverpackung Änderungen in Konstruktion und Ausführung vorbehalten ZUBEHÖR Wenden Sie sich für eine aktuelle Auflistung und Beschreibung der zu Ihrer Kamera verfügbaren Objektive und Zubehöre an die Home page der Leica Camera AG unter www leica camera com Wichtig Es dürfen ausschließlich die in dieser Anleitung und oder von der Leica Camera AG aufgeführten und beschr...

Страница 9: ... dieser Anleitung finden Sie im Kunden bereich unter https owners leica camera com Die Angaben in dieser Anleitung beziehen sich auf eine frühe Firmware Version Anleitungen und Erläuterungen zu Änderun gen auf Grund anderer Firmware Versionen finden Sie ebenfalls im Kundenbereich Mit welcher Firmware Version Ihre Kamera ausgestattet ist siehe auch S 87 können Sie folgendermaßen feststellen Menüpun...

Страница 10: ...E ANLEITUNG 16 VORBEREITUNGEN 16 TRAGRIEMEN ANBRINGEN 16 AKKU LADEN 16 AKKU UND SPEICHERKARTE WECHSELN 20 LEICA M OBJEKTIVE 23 Objektiv ansetzen 25 Objektiv abnehmen 25 DIE WICHTIGSTEN EINSTELLUNGEN BEDIENUNGSELEMENTE 26 EIN UND AUSSCHALTEN DER KAMERA 26 DER AUSLÖSER 27 Serien Aufnahmen 28 DAS ZEIT EINSTELLRAD 29 DIE MENÜSTEUERUNG 30 VOREINSTELLUNGEN 34 KAMERA GRUNDEINSTELLUNGEN 34 Menüsprache 34 ...

Страница 11: ...B 48 Belichtungssimulation 49 Weitere Anzeige Optionen 49 ENTFERNUNGSMESSUNG 52 Mit dem optischen Sucher 52 Mit dem Monitorbild im Live View Betrieb 53 Kennzeichnung scharf abgebildeter Motivteile 54 BELICHTUNGSMESSUNG UND STEUERUNG 55 Belichtungsmesser Anzeigen 55 Belichtungs Messmethoden 56 Wählen der Live View Messmethoden 56 Belichtungs Betriebsarten 57 Zeitautomatik 57 Messwertspeicherung 58 ...

Страница 12: ...EORTS MIT GPS 78 ANWENDER ANWENDUNGSSPEZIFISCHE PROFILE 80 ZURÜCKSTELLEN ALLER INDIVIDUELLEN EINSTELLUNGEN 81 FORMATIEREN DER SPEICHERKARTE 81 ORDNER VERWALTUNG 82 DRAHTLOSE DATENÜBERTRAGUNG UND FERNSTEUERUNG DER KAMERA 84 DATENÜBERTRAGUNG AUF EINEN RECHNER 86 ARBEITEN MIT DNG ROHDATEN 87 INSTALLIEREN VON FIRMWARE UPDATES 87 SICHERHEITS UND PFLEGEHINWEISE 88 ALLGEMEINE VORSICHTSMASSNAHMEN8 88 MONI...

Страница 13: ...s FEHLFUNKTIONEN UND IHRE BEHEBUNG 96 ANHANG 98 DIE ANZEIGEN IM SUCHER 98 DIE ANZEIGEN IM MONITOR 100 BEI AUFNAHME 100 BEI WIEDERGABE 103 DIE MENÜPUNKTE 105 STICHWORT VERZEICHNIS 106 TECHNISCHE 108 LEICA SERVICE ADRESSEN 112 ...

Страница 14: ...oder Leinentuch Wenn Sie vorher bewusst an ein Hei zungs oder Wasserrohr leit fähiges mit Erde verbundenes Material fassen wird Ihre eventuelle elektrostatische Ladung mit Sicherheit abgebaut Bitte vermeiden Sie Verschmutzung und Oxidation der Kontakte auch durch trockene Lagerung Ihrer Kamera mit aufgesetztem Objektiv oder Bajonettdeckel Verwenden Sie ausschließlich empfohlenes Zubehör um Störun ...

Страница 15: ...für den allgemeinen Bedarf vorgesehen Kategorie 3 Dieses Produkt kann bei Bedarf mit einem WLAN Zugangspunkt zu 2 4 GHz verbunden werden Français Svenska Försäkran om Överensstämmelse DoC Härmed försäkrar Leica Camera AG att den här produkten överensstämmer med väsentliga krav och andra relevanta föreskrifter i Direktivet 2014 53 EU Kunder kan ladda ner en kopia av originalförsäkran om överensstäm...

Страница 16: ... Objektive Ansicht von oben 10 ISO Einstellrad mit Rastpostionen für A Automatische Steuerung der ISO Empfindlichkeit 100 6400 ISO Werte M ISO für höhere Empfindlichkeiten 11 Index für ISO Einstellung 12 Feststehender Ring a Index für Entfernungseinstellung b Schärfentiefe Skala c Roter Indexknopf für Objekttivwechsel 13 Blenden Einstellring 14 Weißer Indexpunkt für Blendeneinstellung 15 Gegenlich...

Страница 17: ...angewählten Menüpunkte Funktionen zum Einstellen eines Belichtungs Korrekturwertes zum Vergrößern Verkleinern der betrachteten Aufnahmen zum Blättern im Aufnahmespeicher 29 Kreuzwippe zum Navigieren in den Menüs zum Einstellen der angewählten Menüpunkte Funktionen zum Blättern im Aufnahmespeicher zum Ansteuern des gewünschten Bildausschnitts bei der Verwendung von Graukarte 30 Mittentaste zum Aufr...

Страница 18: ...einsetzen s S 20 3 Speicherkarte einsetzen s S 20 4 Objektiv ansetzen s S 25 5 Kamera einschalten s S 26 6 Menüsprache einstellen s S 34 7 Datum und Uhrzeit einstellen s S 34 8 Speicherkarte ggf formatieren s S 81 FOTOGRAFIEREN 9 Zeit Einstellrad auf A stellen s S 29 10 Motivschärfe einstellen s S 46 11 Belichtungsmessung einschalten s S 27 12 Belichtung ggf korrigieren s S 29 13 Auslösen s S 27 ...

Страница 19: ...fte Wiedergabe einschalten jederzeit möglich PLAY Taste drücken s S 64 Andere Aufnahmen betrachten Linke oder rechte Seite der Kreuzwippe drücken Aufnahmen vergrößern Daumenrad nach rechts drehen LÖSCHEN DER AUFNAHMEN nur innerhalb der PLAY Wiedergabe möglich MENU Taste drücken um das Löschmenü aufzurufen Weitere Einzelheiten zu diesem Vorgang finden Sie auf S 68 ...

Страница 20: ...16 Vorbereitungen AUSFÜHRLICHE ANLEITUNG VORBEREITUNGEN TRAGRIEMEN ANBRINGEN AKKU LADEN Ladegerät A C D B A Buchse für Netzkabel B Buchse für KFZ Ladekabel C CHARGE LED D 80 LED E F E Kontakte F Rastnasen ...

Страница 21: ...r Akku auf mindestens 4 5 seiner Kapazität aufgeladen ist leuchtet zusätzlich die gelbe mit 80 gekennzeichnete LED Wenn der Akku voll ständig geladen ist geht auch die grüne LED in dauerhaftes Leuchten über Hinweis Die 80 LED leuchtet auf Grund der Lade Charakteristik bereits nach ca 2 Std auf Das Ladegerät sollte nach Beendigung des Ladevorgangs vom Netz getrennt werden Eine Gefahr der Überladung...

Страница 22: ...il im Akku gewährleistet dass ein bei unsach gemäßer Handhabung ggf entstehender Überdruck kontrolliert abgebaut wird Es darf ausschließlich das in dieser Anleitung aufgeführte und beschriebene Ladegerät BC SCL5 Bestell Nr 24002 verwen det werden Die Verwendung von anderen nicht von der Leica Camera AG zugelassenen Ladegeräten kann zu Schäden an den Akkus führen im Extremfall auch zu schwerwiegend...

Страница 23: ...e vollständige Kapazität erst nach dem er 2 3 Mal vollständig geladen und durch den Betrieb in der Kamera wieder entladen worden ist Dieser Entlade Vor gang sollte jeweils nach ca 25 Teillade Vorgängen wiederholt werden Für eine maximale Lebensdauer des Akkus sollte er nicht dauerhaft extrem hohen oder niedrigen Temperaturen z B in einem stehenden Fahrzeug im Sommer bzw Winter ausgesetzt werden Di...

Страница 24: ...nicht und entnehmen Sie weder Speicherkarte noch Akku solange als Zeichen für Aufnahme Auf zeichnung und oder Datenspeicherung auf der Karte die rote LED 21 links unten neben dem Monitor 31 blinkt Ansonsten könnten noch nicht vollständig gespeicherte Aufnahmedaten verloren gehen Bodendeckel abnehmen Akku einsetzen Akku herausnehmen ...

Страница 25: ...nded Capacity Karte SD SDHC SDXC Speicherkarten gibt es von verschiedenen Anbie tern und mit unterschiedlicher Kapazität und Schreib Lese Ge schwindigkeit Insbesondere solche hoher Kapazität und Schreib Lese Geschwindigkeit ermöglichen eine schnelle Aufzeichnung und Wiedergabe Die Karten besitzen einen Schreibschutz Schalter mit dem sie gegen unbeabsichtigte Speicherungen und Löschungen gesperrt w...

Страница 26: ...te nicht einsetzen lässt überprüfen Sie ihre korrekte Ausrichtung Wenn Sie bei eingeschalteter Kamera den Bodendeckel abneh men oder die Speicherkarte herausnehmen erscheinen im Mo nitor entsprechende Warnmeldungen anstatt der jeweiligen Anzeigen Achtung Bodendeckel offen Achtung Keine Speicherkarte vorhanden Da elektromagnetische Felder elektrostatische Aufladung sowie Defekte an Kamera und Karte...

Страница 27: ...m 1961 1995 Made in Canada lassen sich nicht an die Kamera ansetzen bzw nicht bis un endlich fokussieren Die Leica Customer Care Abteilung kann diese Objektive so modifizieren dass sie sich auch an der Kame ra verwenden lassen Verwendbar aber Gefahr der Kamera bzw Objektiv Be schädigung Objektive mit versenkbarem Tubus können ausschließlich mit ausgezogenem Tubus verwendet werden d h ihr Tubus dar...

Страница 28: ...den extrem enge Toleranzen eingehalten die in der fotografischen Praxis eine präzise Fokussierung jeder Kamera Objektiv Kombination ermöglichen Werden lichtstarke Objektive 1 4 bei offener Blende einge setzt kann es auf Grund der dann teilweise äußerst geringen Schärfentiefe und Ungenauigkeiten bei der Fokussierung mit dem Messsucher dennoch dazu kommen dass die addierte Gesamttoleranz von Kamera ...

Страница 29: ...triegelungsknopf 1 am Kameragehäuse niederdrücken 4 Objektiv nach links drehen bis dessen roter Indexknopf 12c dem Entriegelungsknopf gegenübersteht 5 Objektiv gerade herausnehmen Hinweise Grundsätzlich gilt Zum Schutz vor dem Eindringen von Staub etc in das Kamera Innere sollte immer ein Objektiv oder der Gehäusedeckel aufgesetzt sein Aus dem gleichen Grund sollten Objektivwechsel zügig und in mö...

Страница 30: ...r erscheinen Hinweis Die Betriebsbereitschaft wird beim Einschalten nach ca 1s er reicht Auschalten Auch wenn die Kamera nicht mit dem Hauptschalter ausgeschaltet wird geschieht dies automatisch wenn über die Menüsteuerung eine automatische Abschalt Zeit vorgegeben ist s S 36 und innerhalb dieser Zeit keine Bedienung erfolgt Wenn dagegen die automatische Ausschalt Zeit auf Aus gestellt ist und die...

Страница 31: ...es im Menü punkt Automatische Abschaltung s S 36 eingestellt wurde Hinweis Der Auslöser bleibt gesperrt wenn der interne Zwischenspeicher vorübergehend voll ist z B nach einer Serie von 16 Aufnahmen falls die eingesetzte Speicherkarte und der interne Zwischen speicher vorübergehend voll sind falls der Akku seine Leistungsgrenze erreicht hat Kapazität Temperatur Alter wenn die Speicherkarte schreib...

Страница 32: ...en nur kurz drücken erfolgen weiterhin Einzelaufnahmen Es können ca 40 Bilder im JPG Format in schneller Folge mit maximal ca 5 Bilder pro Sekunde erstellt werden Anschließend verringert sich die Bildfrequenz etwas Hinweise Die aufgeführte Aufnahme Frequenz und die maximal mögliche Anzahl von Aufnahmen in einer Serie beziehen sich auf eine Standard Einstellung ISO 200 und als Format L JPG Mit ande...

Страница 33: ...stehen ebenfalls zur Verfügung sowie die mit dem Symbol zusätzlich gekennzeichnete kürzest mögliche Synchronzeit 1 180s für den Blitzbetrieb und B für Langzeit Belichtungen Das Zeit Einstellrad besitzt keinen Anschlag d h es lässt sich aus jeder Position in beliebiger Richtung drehen Es rastet bei sämtli chen gravierten Positionen und den Zwischenwerten ein Zwischen stellungen außerhalb der Rastpo...

Страница 34: ...tzte rem jedoch kein Menüpunkt zugeordnet erfolgt der Einstieg in das HAUPTMENÜ direkt Dem FAVORITEN Menü können Sie bis zu 7 der insgesamt 26 Menü punkte des HAUPTMENÜs zuordnen Dies ermöglicht es die am häufigsten verwendeten Menüpunkte besonders schnell und ein fach aufzurufen und einzustellen Mehr zu diesem Menübereich erfahren Sie auf den nachfolgenden Seiten Die jeweiligen Einstellungen bzw ...

Страница 35: ...ite des HAUPTMENÜs erscheint Anwählen eines Menüpunkts 1 Wählen des gewünschten Menüpunkts Daumenrad 28 drehen nach rechts abwärts nach links aufwärts oder Obere oder untere Seite der Kreuzwippe 29 drücken Hinweise Die Verwendung des Daumenrades ist meistens nicht nur be quemer sondern auch schneller Einzelne Menüpunkte wie z B GPS und Speicherkarte forma tieren sowie auch manche Untermenüpunkte k...

Страница 36: ... Menüpunkt GPS besitzt als einziger kein Untermenü Einzelhei ten zur Einstellung finden auf Seite 78 3 Gewünschte Funktionsvariante gewünschten Wert wählen Daumenrad 28 in entsprechende Richtung drehen oder Entsprechende Seite der Kreuzwippe 29 drücken oben unten für Zeilenwechsel bzw für die Wahl der Funkti onsvarianten links rechts für Einstellungen innerhalb einer Zeile bzw auf einer Skala Bei ...

Страница 37: ...le Menüpunkte des HAUPTMENÜs zur Verfügung s S 104 für eine vollständige Auflistung 1 Im HAUPTMENÜ Individuelle Einstellungen wählen 2 im entsprechenden Untermenü Favoriten auswählen und 3 das dazugehörige Untermenü aufrufen 4 Gewünschten Menüpunkt wählen und 5 durch Drücken der Mittentaste 30 ihn dem FAVORITEN Menü hinzufügen An oder aus diesem entfernen Aus Eine Warnmeldung erscheint wenn beim V...

Страница 38: ...unktion 1 Menüpunkt Language wählen und 2 im Untermenü die gewünschte Sprache Bis auf wenige Ausnahmen Tastenbezeichnungen Kurzbe griffe wechseln alle sprachlichen Angaben Datum und Uhrzeit Einstellen der Funktionen 1 Menüpunkt Datum Zeit wählen und 2 das Untermenü aufrufen Es besteht aus den fünf Punkten Auto GPS Zeit Zeitzone Sommerzeit Datumseinstellung und Zeiteinstellung Hinweis Wir empfehlen...

Страница 39: ...usgestattete elektronische Sucher angesetzt ist als Zubehör erhältlich und im Menü der Punkt GPS An geschal tet ist s S 78 9 Im Datum Zeit Untermenü Auto GPS Zeit wählen und 10 dort die Funktion An oder Aus schalten Ist die Funktion aktiviert wird die an der Kamera eingestellte Uhr zeit laufend gemäß den empfangenen GPS Signalen korrigiert Einstellen des Datums Es stehen 3 Varianten für die Reihen...

Страница 40: ...en Monitor und Sucher Wenn Sie den als Zubehör erhältlichen Sucher verwenden können Sie sowohl für den Live View als auch den Wiedergabe Betrieb festlegen wann der Monitor oder der Sucher für die jeweiligen Anzeigen verwendet werden soll In der Werkseinstellung erfolgen die Wechsel automatisch unter Anwendung des Näherungssensors im Okular im Suchers Einstellen der Funktion 1 Menüpunkt EVF Monitor...

Страница 41: ...DE 37 Kamera Grundeinstellungen ...

Страница 42: ... Hilfe des Leica R Adapter M verwendet wird als Zubehör erhältlich weitere Einzelheiten hierzu entnehmen Sie bitte der Anleitung des Adapters Hinweise Beim Ansetzen eines kodierten Leica M Objektivs schaltet die Kamera automatisch auf Auto um auch wenn vorher in Manuell M ein anderes Objektiv eingegeben wurde Bei der Verwendung von Leica R Objektiven schaltet die Kamera automatisch auf Manuell R u...

Страница 43: ...tragen und daher auch nicht im EXIF Datensatz der Aufnahmen aufgeführt Sie können die jeweilige Brennweite jedoch auf Wunsch manuell eingeben Das Leica Tri Elmar M 1 4 28 35 50mm ASPH besitzt dagegen die für die Einspiegelung der passenden Leuchtrahmen im Su cher notwendige mechanische Übertragung der eingestellten Brennweite in die Kamera Dies wird von der Kameraelektronik abgetastet und zur Bren...

Страница 44: ...rchaus unterschiedliche Auflösungen aufweisen Die im Monitor angezeigte verbleibende Bildzahl wechselt nicht unbedingt nach jeder Aufnahme Dies hängt vom Motiv ab sehr feine Strukturen ergeben höhere Datenmengen homogene Flächen geringere JPG EINSTELLUNGEN Hinweis Die in diesem Abschnitt beschriebenen Funktionen und Einstellun gen betreffen ausschließlich Bilddaten im JPG Format Auf die Bilddaten ...

Страница 45: ...r hell dunkel Übergangsbereich an Kanten im Bild ist Durch Vergrößern oder Verkleinern solcher Bereiche kann also auch der Schärfe Eindruck verändert werden Die Farbsättigung bestimmt ob die Farben im Bild eher blass und pastellartig oder knallig und bunt erscheinen Während Lichtverhältnisse und Witterung dunstig klar als Aufnahmebe dingungen gegeben sind kann hier die Wiedergabe beeinflusst werde...

Страница 46: ...1 Leuchtstoffl Kühl für Aufnahmen mit vorherrschendem Licht von Leuchtstoffröhren z B für Arbeitsräume und Außen beleuchtung mit kühlem Licht von ca 5800K1 Blitz z B für Aufnahmen mit Elektronenblitz Beleuch tung Graukarte für die manuelle Einstellung durch Messung und Farbtemperatur1 für einen direkt einstellbaren Farbtempera turwert 1 Farbtemperaturen werden grundsätzlich in Kelvin angegeben Hin...

Страница 47: ...eißabgleich zu setzen 3 Die Aufnahme machen wobei darauf zu achten ist dass sich eine weiße oder neutral graue Referenz Fläche im Bildfeld befindet Im Monitor erscheint das Bild auf der Grundlage des automatischen Weißab gleichs ein Fadenkreuz in der Bildmitte rechts oben Vorschau als Hinweis auf die weitere Be dienung 4 Durch Drücken der entsprechenden Seite der Kreuzwippe Fadenkreuz auf das Moti...

Страница 48: ...Bildbear beitung können vor allem in größeren und gleichmäßig hellen Flä chen des Motivs Rauschen sowie vertikale und horizontale Streifen sichtbar werden 1 Bei der Verwendung von Blitzgeräten steht die Funktion nicht zur Verfügung Einstellen der Funktion Mit dem ISO Einstellrad 10 Zur Verfügung stehen die auf dem Rad gravierten Werte sowie die Positionen A für die automatische Einstellung und M f...

Страница 49: ... 1 2s und 1 500s Bei den Brennweiten bezogenen Einstellungen schaltet die Kamera erst dann auf eine höhere Empfindlichkeit wenn wegen geringer Helligkeit die Ver schlusszeit unter die jeweilige Schwelle sinken würde also z B mit einem 50mm Objektiv bei längeren Zeiten als 1 60s bei 1 f bzw 1 125s bei 1 2f oder 1 250s bei 1 4f 2 Diese Funktion setzt die Verwendung von kodierten Objektiven bzw die E...

Страница 50: ... Diese gerin gen in der Praxis selten ausschlaggebenden Abweichungen sind prinzipbedingt Leuchtrahmen einer Sucherkamera müssen auf die Bildwinkel der jeweiligen Objektiv Brennweiten abgestimmt werden Die Nenn Bildwinkel verändern sich jedoch leicht beim Fokussieren bedingt durch den sich dabei verändernden Auszug d h durch den Ab stand des optischen Systems von der Sensorebene Ist die einge stell...

Страница 51: ...en Objektiv gehören Sie sehen dann sofort ob es aus bildgestalterischen Gründen günstiger ist das jeweilige Motiv mit einer anderen Brennweite aufzunehmen 35mm 135mm 22 45PM 22 02 2012 999 9000 8234 9999 12MP 2 8 F 1 8000 12500 ISO EV INFO 50mm 75mm 22 45PM 22 02 2012 999 9000 8234 9999 12MP 2 8 F 1 8000 12500 ISO EV INFO 28mm 90mm 22 45PM 22 02 2012 999 9000 8234 9999 12MP 2 8 F 1 8000 12500 ISO ...

Страница 52: ... Mit dem Menüpunkt EVF Helligkeit kann auf die gleiche Weise wie oben beschrieben die Helligkeit eines solchen Suchers ein gestellt werden INFO Bildschirm Bei der Verwendung des Messsuchers können Sie den Monitor durch Drücken der Mittentaste zur Anzeige einer Reihe von Einstel lungen nutzen LIVE VIEW BETRIEB Der Live View Betrieb dieser Kamera ermöglicht bei der Aufnahme die Betrachtung des Motiv...

Страница 53: ...er Dauerhaft für manuelle Belichtungssteuerung 1 Dies gilt solange die Motivhelligkeit und die eingestellte Belichtung nicht allzu niedrige oder hohe Helligkeitswerte ergeben und solange die interne Belichtungs zeit nicht länger als 1 60s ist Weitere Anzeige Optionen Im Live View Monitorbild können verschiedene Informationen ange zeigt werden Die meisten erscheinen in einer Kopf und einer Fußzeile...

Страница 54: ...s an die ohne Zeichnung d h über oder unterbelichtet werden Um diese Anzeigen an spezifische Bedingungen oder Ihre gestalterischen Vorstellungen anzupassen können Sie Schwellenwerte festlegen d h bei welchem Grad der Über Unterbelichtung sie erscheinen Somit ermöglichen die Clipping Anzeigen es Ihnen betroffene Bildteile ganz einfach zu erkennen und die Belichtungseinstellung präzise anzupassen Ei...

Страница 55: ...Wiedergabe eines Bildes geringfü gig von dem bei der Aufnahme abweichen Das Histogramm steht bei gleichzeitiger Wiedergabe von mehre ren verkleinerten bzw von vergrößerten Aufnahmen nicht zur Verfügung Die Clipping Anzeige bezieht sich immer auf den gerade gezeig ten Ausschnitt der Aufnahme Gitter Es stehen zwei Gitterlinien Anzeigen zur Verfügung Sie unterteilen das Bildfeld in 3x3 oder in 6x4 Fe...

Страница 56: ...kann nach der Mischbild oder der Schnittbildmethode eingestellt werden Mischbildmethode Doppelbild Bei einem Portrait z B das Auge mit dem Messfeld des Entfer nungsmessers anvisieren und am Entfernungseinstellring des Ob jektivs so lange drehen bis die Konturen im Messfeld zur Deckung gebracht sind Danach Motiv Ausschnitt festlegen unscharf scharf Schnittbildmethode Bei einer Architektur Aufnahme ...

Страница 57: ...eige Varianten zur Verfügung Vergrößern eines zunächst mittigen Ausschnitts des Monitorbildes Kennzeichnen scharfer Motivteile im Monitorbild Beide Varianten können gemeinsam eingesetzt werden Vergrößern eines Ausschnitts Diese Funktion können Sie auf dreierlei Art aufrufen Für den gelegentlichen Einsatz Mit der Fokus Taste 1 Menüpunkt Aufnahme Assistenten wählen 2 im Untermenü Fokussierhilfe MF u...

Страница 58: ...nn zeichnen lassen so dass diese sehr einfach zu erkennen sind Die zur Verfügung stehenden vier Farben erlauben eine Anpassung an jeden Hintergrund Einstellen der Funktion 1 Menüpunkt Aufnahme Assistenten wählen 2 im Untermenü Fokus Peaking und 3 im dazugehörigen Untermenü die gewünschte Farbe bzw Aus wenn Sie die Funktion nicht nutzen möchten Anwendung 4 Bildausschnitt bestimmen 5 Fokus Taste 3 d...

Страница 59: ...schaltet Hinweise Ist eine korrekte Belichtung mit den zur Verfügung stehenden Verschlusszeiten bei Zeitautomatik nicht möglich blinkt als Warnung die Verschlusszeit Anzeige nur im Sucher Näheres dazu entnehmen Sie bitte dem Abschnitt Zeitautomatik auf S 57 Wird der Messbereich des Belichtungsmessers bei manueller Einstellung und sehr niedrigen Leuchtdichten unterschritten blinkt als Warnanzeige i...

Страница 60: ...chte Messmethode Spot Es wird ausschließlich ein kleiner durch einen Kreis in der Mitte des Monitorbildes angezeigter Bereich erfasst und bewertet Mittenbetont Diese Methode berücksichtigt das gesamte Bildfeld die in der Mitte erfassten Motivteile bestimmen jedoch sehr viel stärker als die Randbereiche die Berech nung des Belichtungswerts Mehrfeld Diese Messmethode beruht auf der Erfassung von meh...

Страница 61: ...hnung aller Parameter Verschlusszeiten ergeben die außerhalb ihres Arbeitsbereichs liegen d h Helligkeitswerte die kürzere Belichtungen als 1 4000s oder längere als 125s erfordern würden In solchen Fällen werden die genannten Minimal bzw Maximal Verschlusszeiten dennoch verwendet und im Sucher blin ken als Warnung diese Werte Hinweise Wie im Zusammenhang mit der ISO Einstellung auf beschrieben mac...

Страница 62: ... le und die Zeitangabe verändert sich auch bei veränderten Helligkeitsverhältnissen nicht mehr 3 Bei weiterhin gedrückt gehaltenem Auslöser Kamera auf den endgültigen Bildausschnitt schwenken und 4 auslösen Eine Veränderung der Blendeneinstellung nach erfolgter Messwert speicherung bewirkt keine Anpassung der Verschlusszeit d h es würde zu einer Fehlbelichtung führen Die Speicherung wird aufge hob...

Страница 63: ...en Punkts bzw als Wert für ca 0 5s beim Aktivieren der Anzeige Unabhängig von der Einstell Methode wird der Wert im Monitor bei Live View Betrieb ebenso wie im INFO Bildschirm bei Verwen dung des Suchers durch eine Marke im unteren Teil der Lichtwaa ge angezeigt sowie In der Ausgangs Menüliste durch EV _X1 Wichtig Eine an der Kamera eingestellte Belichtungskorrektur beeinflusst ausschließlich die ...

Страница 64: ...ren Verwendung auswählen oder mit ent sprechender Bildbearbeitungs Software daraus eine Aufnahme mit besonders hohem Kontrastumfang errechnen lassen Stichwort HDR Es stehen zur Verfügung 5 Abstufungen 0 3EV 0 7EV 1EV 2EV und 3EV 2 Aufnahmezahlen 3 oder 5 Einstellen der Funktion 1 Menüpunkt Bildfolge wählen und 2 im Untermenü Belichtungsreihe Im Monitor erscheint das dazugehörige Untermenü A B C D ...

Страница 65: ...omatisch für die unkorrigierte Aufnahme ermittelte Empfindlichkeit auch für alle anderen Aufnahmen einer Reihe verwendet d h dieser ISO Wert wird während einer Reihe nicht verändert Dies kann ggf dazu führen dass die unter Maximale Belichtungszeit einstellen vorgegebene längste Verschlusszeit überschritten wird Je nach Ausgangs Verschlusszeit kann der Arbeitsbereich der automatischen Belichtungsre...

Страница 66: ...ellung Die T Funktion Mit der B Einstellung bleibt der Verschluss solange geöffnet wie der Auslöser gedrückt gehalten wird bis maximal 125s abhängig von der ISO Einstellung Die B Funktion kann darüber hinaus verwendet werden um längere Verschlusszeiten als 8s fest einzustellen 1 Fokus Taste 3 ca 1s drücken Im Monitor erscheint das Untermenü mit den Verschlusszei ten bzw B Verfügbare Verschlusszeit...

Страница 67: ...rden Bei Verschlusszeiten ab 2s erscheint als Hinweis die Meldung Rausch Verringerung 12s1 im Monitor 1 Zeitangabe ist ein Beispiel Über und Unterschreiten des Messbereichs Wird der Messbereich des Belichtungsmessers bei manueller Ein stellung und sehr niedrigen Leuchtdichten unterschritten blinkt im Sucher als Warnanzeige die linke dreieckige LED entsprechend bei zu hohen Leuchtdichten die rechte...

Страница 68: ...be der Aufnahme Automatische Wiedergabe der jeweils letzten Aufnahme Im Automatische Wiedergabe Betrieb wird jedes Bild unmittelbar nach der Aufnahme gezeigt Auf diese Weise können Sie z B schnell und einfach kontrollieren ob das Bild gelungen ist oder wiederholt werden sollte Diese Funktion erlaubt die Wahl der Dau er für die das Bild gezeigt werden soll Einstellen der Funktion 1 Menüpunkt Automa...

Страница 69: ...FO Hinweise Das Histogramm und die Clipping Anzeigen stehen sowohl bei der Wiedergabe des gesamten Bildes als auch bei der eines Ausschnitts zur Verfügung nicht jedoch bei der gleichzeitigen Wiedergabe von 12 oder 20 verkleinerten Aufnahmen Das Histogramm und die Clipping Anzeigen beziehen sich immer auf den gerade gezeigten Ausschnitt der Aufnahme Betrachten anderer Aufnahmen Blättern im Speicher...

Страница 70: ...ttigen Ausschnitt vergrößern Vergrößerungen sind bis 1 1 mög lich d h bis 1 Pixel des Monitors 1 Pixel der Aufnahme wiedergibt Mit der Kreuzwippe 29 können Sie bei vergrößerter Abbildung die Lage des Ausschnitts beliebig verschieben Das Rechteck innerhalb des Rahmens in der linken unteren Ecke symbolisiert sowohl die jeweilige Vergrößerung als auch die Lage des gezeigten Ausschnitts Hinweis Auch b...

Страница 71: ...Aufnah men navigieren die jeweilige Aufnahme wird durch den roten Rah men gekennzeichnet Diese Aufnahme können Sie durch Drehen des Daumenrades nach rechts bzw in einem Schritt durch Drü cken der PLAY Taste wieder auf Normalgröße bringen Bei der Wiedergabe von 20 Bildern können Sie durch eine weitere Drehung des Daumenrades nach links den roten Rahmen um die gesamte Bilder gruppe legen so dass Sie...

Страница 72: ...s Vorgangs die LED 21 Aufnahmen löschen Solange eine Aufnahme abgebildet wird kann sie auf Wunsch auch gleich bei dieser Gelegenheit gelöscht werden Dies kann sinnvoll sein z B wenn die Aufnahmen bereits auf anderen Medien gespei chert wurden wenn sie nicht mehr benötigt werden oder wenn mehr Speicherplatz auf der Karte benötigt wird Sie haben dazu die Möglichkeit je nach Bedarf einzelne oder glei...

Страница 73: ...inkt die LED 21 Danach erscheint die Meldung Achtung Kein Bild zum Anzeigen Hinweise Markieren und Löschen ist nur aus der PLAY Wiedergabe heraus möglich Allerdings ist es unabhängig davon ob eine Aufnahme gerade in Normalgröße oder ob mehrere verkleinerte gezeigt werden nicht jedoch wenn bei der 20er Wiedergabe der rote Rahmen um die gesamte Gruppe gelegt wurde Auch bei aufgerufenem Lösch und Mar...

Страница 74: ...erner thyristorgesteuerter Elektronenblitzgeräte Studio Blitzanlagen Zündung über Synchronkabel 1 Werden nicht speziell auf die Kamera abgestimmte Blitzgeräte eingesetzt die den Weißab gleich der Kamera nicht automatisch umschalten sollte die Einstellung Blitz verwendet werden s S 42 Blitzgerät Aufsetzen Vor dem Aufsetzen eines Blitzgeräts in den Zubehörschuh 20 der Kamera muss die Abdeckung die d...

Страница 75: ...elt die Kamera die eingestellte Empfindlichkeit an das Blitzgerät Damit kann das Blitzgerät sofern es solche An zeigen besitzt und sofern die am Objektiv gewählte Blende manuell auch am Blitzgerät eingegeben wird seine Reichweiten Angabe automatisch entsprechend nachführen Die Empfindlichkeits Ein stellung kann bei systemkonformen Blitzgeräten nicht vom Blitzge rät aus beeinflusst werden da sie be...

Страница 76: ...nahmeblitz gezündet wird oder ein HSS Blitz 3 Die gewünschte bzw die für die jeweilige Entfernung zum Motiv erforderliche Blende einstellen Hinweis Wenn die automatisch gesteuerte oder manuell eingestellte Ver schlusszeit kürzer als 1 180s ist wird der Blitz nicht ausgelöst es sei denn das Blitzgerät ist HSS tauglich Die Blitzbelichtungs Kontrollanzeigen im Sucher mit system konformen Blitzgeräten...

Страница 77: ...ng A oder manuellen Betrieb M erscheint trotz eingeschaltetem und betriebsbereitem Blitzge rät nicht An der Kamera ist manuell eine kürzere Verschlusszeit als 1 180s eingestellt In solchen Fällen zündet die Kamera auch ein ein geschaltetes und betriebsbereites Blitzgerät nicht blinkt vor der Aufnahme langsam mit 2Hz Das Blitzgerät ist noch nicht betriebsbereit leuchtet vor der Aufnahme Das Blitzge...

Страница 78: ...gsten Verschlusszeiten nach der Faustregel für unverwackelte Aufnahmen aus der Hand z B 1 60s mit einem 50mm Objektiv Die entsprechenden Verschlusszeiten mit 1 2f und 1 4f wären in dem Beispiel 1 125s und 1 250s Wichtig Der Einstellbereich ist auf 1 125s begrenzt auch wenn die verwendete Brennweite länger ist Bei manueller Steuerung der Belichtung können ebenfalls sämtli che Verschlusszeiten bis z...

Страница 79: ...den Fällen gleich Einstellen der Funktion 1 Menüpunkt Blitz Einstellungen wählen 2 im Untermenü Blitzsnycronisation und 3 dort die gewünschte Variante Blitz Belichtungskorrekturen Mit dieser Funktion kann die Blitz Belichtung unabhängig von der Belichtung durch das vorhandene Licht gezielt abgeschwächt oder verstärkt werden z B um bei einer abendlichen Außenaufnahme das Gesicht einer Person im Vor...

Страница 80: ... MENU Taste 22 abgebrochen werden die jeweilige Einstellung bleibt erhalten bzw durch er neutes Antippen des Auslösers neu gestartet werden Wichtig Im Selbstauslöser Betrieb erfolgt die Einstellung der Belichtung nicht bei Druckpunktnahme des Auslösers sondern erst unmittel bar vor der Aufnahme INTERVALL AUFNAHMESERIEN Mit dieser Kamera können Sie Bewegungsabläufe über einen länge ren Zeitraum in ...

Страница 81: ...n einer Serie erfolgt sind wird bei beiden Wiedergabe Betriebsarten zunächst das letzte Bild der Serie bzw während eines noch laufenden Spei chervorganges das letzte auf der Karte bereits gespeicherte Bild der Serie gezeigt KENNZEICHNUNG DER BILDDATEIEN ZWECKS URHEBERSCHUTZ Diese Kamera ermöglicht es Ihnen Ihre Bilddateien durch Eingabe von Text und anderen Zeichen zu kennzeichnen Dazu können Sie ...

Страница 82: ...gewünschten Zeichen markieren 6 jeweils mit der Mittentaste 30 eingeben und 7 abschließend Ihre Eingaben mit der Taste bestätigen AUFZEICHNEN DES AUFNAHMEORTS MIT GPS Hinweis Dieser Menüpunkt steht nur mit aufgesetztem Leica Visoflex Su cher zur Verfügung als Zubehör erhältlich Das Global Positioning System ermöglicht es weltweit die jeweilige Position eines Empfängers zu bestimmen Der Leica Visof...

Страница 83: ...rde unter Bäumen in einem in Bewegung befindlichen Fahrzeug in der Nähe von hohen Gebäuden oder in engen Tälern in der Nähe von Hochspannungsleitungen in Tunnels in der Nähe von 1 5 GHz Mobiltelefonen Hinweis zur sicheren Anwendung Das vom GPS System erzeugte elektromagnetische Feld kann Instru mente und Messgeräte beeinflussen Bitte achten Sie daher z B an Bord eines Flugzeugs vor dem Starten ode...

Страница 84: ...termenü Liste das gewünschte Profil wählen entwe der eines der gespeicherten oder Standard Benutzerprofil entspricht der Kamera Werkseinstellung Der gewählte Speicherplatz wird in der Ausgangs Menüliste z B durch User 1 angegeben im Informationsbildschirm s S 102 durch das entsprechende Symbol in diesem Fall Hinweis Verändern Sie eine der Einstellungen des gerade verwendeten Profils erscheint in d...

Страница 85: ...CHERKARTE Normalerweise ist es nicht erforderlich bereits eingesetzte Spei cherkarten zu formatieren Wenn jedoch eine noch unformatierte Karte erstmals eingesetzt wird muss sie formatiert werden Hinweis Machen Sie es sich zur Gewohnheit alle Ihre Aufnahmen möglichst bald auf einen Massenspeicher wie z B auf die Festplatte Ihres Rechners zu kopieren Dies gilt insbesondere wenn die Kamera in einem S...

Страница 86: ...ch ein neuer Ordner angelegt und in diesem beginnt die Num merierung wieder bei 0001 Werden Ordnernummer 999 und Bild nummer 9999 erreicht erscheint im Monitor eine entsprechende Warnmeldung und die Nummerierung muss zurückgesetzt werden s u Dies kann durch Formatieren der Speicherkarte geschehen wie auch durch die Verwendung einer anderen Speicherkarte Mit dieser Kamera können Sie darüber hinaus ...

Страница 87: ... bei der Funktion Copyright in den Schritten 5 7 beschrieben In der Eingabezeile steht zunächst immer L100 0001 DNG Die ersten 4 Stellen können verändert werden Nach der letzten Eingabe erscheint wieder das Bildnumme rierung Untermenü Bildnummerierung Zurücksetzen 1 Menüpunkt Bildnummerierung wählen und 2 im dazugehörigen Untermenü Zurücksetzen Ein Abfrage Untermenü erscheint 3 Den Vorgang bestäti...

Страница 88: ...ion 1 Menüpunkt WLAN wählen 2 im Untermenü Funktion An schalten 3 im gleichen Untermenü Verbindung wählen und 4 dort WLAN beitreten oder WLAN bereitstellen Mit einem verfügbaren Netzwerk verbinden WLAN beitreten Mit dieser Funktion ist ein Zugriff auf die verfügbaren WLAN Netz werke möglich Einstellen der Funktion 5 Im WLAN Untermenü Setup wählen Die Kamera listet selbständig die verfügbaren Netzw...

Страница 89: ...mera die Funk Übertragungsbestimmun gen verletzt wenn sie in anderen als den Ländern benutzt wird in denen sie vertrieben wird Leica Camera AG übernimmt kei nerlei Haftung für derartige Verstöße Bitte beachten Sie dass die Gefahr eines Abhörens der über Funkübertragung gesendeten und empfangenen Daten durch Dritte besteht Es wird dringend angeraten die Verschlüsselung unter den Einstellungen des W...

Страница 90: ...T DNG ROHDATEN Wenn Sie das standardisierte und zukunftssichere DNG Digital Negative Format nutzen möchten benötigen Sie eine spezialisier te Software um die gespeicherten Rohdaten in höchster Qualität zu konvertieren beispielsweise einen professionellen Rohdatenkon verter Eine solche Bildbearbeitungs Software bietet qualitätsopti mierte Algorithmen für die digitale Farbverarbeitung die gleichzei ...

Страница 91: ...ware Update zur Verfügung steht Die Leica Camera AG wird Sie über alle neuen Updates benachrichtigen Wenn Sie feststellen möchten welche Firmware Version installiert ist Menüpunkt Kamera Informationen wählen In der Kamera Firmware Zeile wird rechts in der Zeile die Versi onsnummer angegeben Weitere Informationen zur Registrierung und zu Firmware Updates für Ihre Kamera sowie ggf Änderungen und Erg...

Страница 92: ...n Sie sie wieder ein Schützen sie die Kamera vor dem Kontakt mit Insektensprays und anderen aggressiven Chemikalien Benzin Verdünner und Alkohol dürfen ebenfalls nicht zur Reinigung verwendet werden Bestimmte Chemikalien und Flüssigkeiten können das Gehäuse der Kamera bzw die Oberflächenbeschichtung beschädigen Da Gummi und Kunststoffe manchmal aggressive Chemikalien ausdünsten sollten sie nicht l...

Страница 93: ... Kondensfeuchtigkeit auf dem Monitor bilden Wi schen Sie ihn vorsichtig mit einem weichen Tuch ab Sollte die Kamera beim Einschalten sehr kalt sein ist der Moni tor zunächst etwas dunkler als gewohnt Sobald er wärmer wird erreicht er wieder seine normale Helligkeit SENSOR Höhenstrahlung z B bei Flügen kann Pixeldefekte verursachen KONDENSATIONSFEUCHTIGKEIT Falls sich Kondensationsfeuchtigkeit auf ...

Страница 94: ... dafür dass sich dort keine Sandkörner oder ähnliche Teilchen festsetzen die das Bajonett verkratzen könnten Reini gen Sie dieses Bauteil ausschließlich trocken FÜR OBJEKTIVE Auf den Objektivaußenlinsen sollte Staubbeseitigung mit dem weichen Haarpinsel normalerweise völlig ausreichen Falls sie jedoch stärker verschmutzt sind können sie mit einem sehr sauberen garantiert fremdkörperfreien weichen ...

Страница 95: ...heiß werden und schwere Ver brennungen verursachen Sollte ein Akku hinfallen überprüfen Sie anschließend das Ge häuse und die Kontakte auf etwaige Schäden Das Einsetzen eines be schädigten Akkus kann die Kamera beschädigen Bei Geruchsentwicklung Verfärbungen Verformungen Überhit zung oder Auslaufen von Flüssigkeit muss der Akku sofort aus der Kamera oder dem Ladegerät entnommen und ersetzt wer den...

Страница 96: ... Aufnahme gespeichert oder die Speicherkarte aus gelesen wird darf sie nicht herausgenommen werden die Kamera ausgeschaltet oder Erschütterungen ausgesetzt werden Speicherkarten sollten zur Sicherheit grundsätzlich nur im mitge lieferten Antistatik Behältnis aufbewahrt werden Lagern Sie Speicherkarten nicht wo sie hohen Temperaturen direkter Sonneneinstrahlung Magnetfeldern oder statischen Entladu...

Страница 97: ...n wieder zugänglich gemacht werden Nur die Daten die anschließend durch das Speichern neuer Daten überschrieben werden sind tatsächlich endgültig ge löscht Machen Sie es sich dennoch zur Gewohnheit alle Ihre Aufnahmen immer möglichst bald auf einen sicheren Massen speicher wie z B die Festplatte Ihres Rechners zu überspielen Dies gilt insbesondere wenn die Kamera in einem Servicefall zusammen mit ...

Страница 98: ...de bis zum größten Wert 16 oder 22 und fotografieren Sie eine homogene Fläche defokussiert 3 Auslöser 18 betätigen Im Monitor erscheint nach kurzer Zeit ein Bild in dem schwarze Pixel die Staubkörner darstellen Hinweis Sollte die Stauberkennung allerdings nicht möglich gewesen sein erscheint stattdessen eine entsprechende Meldung Wenige Sekunden danach wechselt die Anzeige zurück zu der unter 2 Di...

Страница 99: ...gemäß deren vorgegebener Anwendung eingesetzt werden Sind die anhaftenden Partikel auf die beschriebene Weise nicht zu entfernen wenden Sie sich bitte an die Leica Product Sup port Abteilung Sinkt die Akku Kapazität bei offenem Verschluss auf weniger als 40 erscheint im Monitor die Warnmeldung Achtung Bitte Sensor Reinigung sofort beenden Durch das Ausschalten wird auch der Verschluss wieder gesch...

Страница 100: ...Ihrer Ausrüstung durch Feuchtigkeit und eventuell frei werdende Ledergerbmittel Rück stände auszuschließen Zum Schutz gegen Pilzbefall beim Einsatz in feuchtheißen Tro penklima sollte die Kameraausrüstung möglichst viel der Sonne und Luft ausgesetzt werden Ein Aufbewahren in dicht abge schlossenen Behältern oder Taschen ist nur empfehlenswert wenn zusätzlich ein Trockenmittel wie z B Silica Gel ve...

Страница 101: ...ität der Speicherkarte ist erschöpft Löschen Sie nicht mehr benötigte Aufnahmen bevor Sie neue erstellen Der Monitor ist zu dunkel oder zu hell Bei Betrachtung des Monitorbildes aus größeren Winkeln ist es prinzipbedingt schlechter zu erkennen Wenn es zu hell oder zu dunkel ist obwohl Sie senkrecht auf den Monitor blicken Stellen Sie eine andere Helligkeit ein oder verwenden Sie den als Zubehör er...

Страница 102: ...DE 98 Anhang ANHANG DIE ANZEIGEN IM SUCHER 1 2 3 ...

Страница 103: ... b Oben liegender Punkt Hinweis Aufleuchten auf die Verwendung der Mess wert Speicherung c Unten liegender Punkt Hinweis Blinken auf die Verwendung einer Belichtungs korrektur d Zwei dreieckige und eine runde LED Bei manueller Belichtungs Einstellung Gemeinsam als Lichtwaage für den Belichtungsabgleich Dreieckige LEDs geben die zum Abgleich erforderliche Drehrich tung sowohl für den Blendenring al...

Страница 104: ...O Empfindlichkeit Einstellung 16 Lichtwaage 17 Belichtungs Korrektursakala 18 Verschlusszeit 19 Belichtungssimulation 20 Verbleibende Aufnahme Anzahl inkl Tendenzanzeige durch Balkendiagramm 21 Darstellung der Ausschnittsgröße und Lage nur bei Vergrößerung eines Ausschnitts 1 Weißabgleich Betriebsart 2 Dateiformat Kompressionsstufe Auflösung 3 Belichtungs Messmethode 4 Auslöser Bildfolge Betriebsa...

Страница 105: ...4 5 6 24 20 18 17 16 22 23 7 14 15 22 Akku Kapazität im Vergleich zum Live View Betrieb mit zusätzlicher Tendenzanzeige durch Balkendiagramm 23 Speicherkarten Kapazität inkl Tendenzanzeige durch Balkendia gramm 24 Verwendeter Profil Speicherplatz nur wenn eingeschaltet ...

Страница 106: ...mm für Anzeige zur relativen Lage im Verhältnis zur Gesamt Aufnahmezahl 20 Angewähltes Bild gewählte Bildgruppe nur bei verkleinerter Wiedergabe von 12 20 Bildern 1 Weißabgleich Betriebsart 2 Dateiformat Kompressionsstufe Auflösung 3 Belichtungs Messmethode 4 Auslöser Bildfolge Betriebsart 5 WLAN nur wenn eingeschaltet unterschiedliche Anzeigen je nach Empfangssituation 6 GPS nur wenn eingeschalte...

Страница 107: ...2 1 21 Löschmenü mit Menüpunkten 1 Angabe des FAVORITEN Menübereichs nur wenn mindestens ein Menüpunkt diesem Menü zugeordnet ist 2 Menüpunkt 3 Einstellung des Menüpunkts 4 Hinweis auf Untermenü 5 Laufleiste mit Seiten Kennzeichnung nur beim Haupt menü ...

Страница 108: ...ichtungskorrektur 6 6 59 Blitz Einstellungen 6 6 74 75 ISO Setup 6 6 44 Weißabgleich 6 6 42 Dateiformat 6 6 40 JPG Einstellungen 6 6 40 41 JPG Auflösung Unterpunkt von JPG Einstellun gen Automatische Wiedergabe 6 64 Aufnahme Asistenten 6 49 EVF Monitor Umschaltung 6 49 52 53 54 Benutzerprofile 6 36 Individuelle Einstellungen 6 80 Monitor Helligkeit 6 48 EVF Helligkeit 6 48 ...

Страница 109: ...atische Abschaltung 6 36 WLAN 6 84 GPS1 6 78 35 Datum Zeit 6 34 35 Language 6 34 Kamera zurücksetzen 6 81 SD Karte formatieren 6 81 Bildnummerierung 82 83 Sensor Reinigung 94 Kamera Information 5 77 87 1 Menüpunkt nur mit aufgesetztem Leica Visoflex Sucher verfügbar als Zubehör erhältlich ...

Страница 110: ...t der Autom Wiederg Funktion automatische Wiedergabe 64 mit der PLAY Funktion 64 Bezeichnung der Teile 12 Bildfeldwähler 47 Bildeigenschaften Kontrast Schärfe Farbsättigung 41 Bildfrequenz 28 Blenden Einstellring 12 Blitzbetrieb 70 Synchronisation 74 Blitzgeräte 70 Copyright 77 Datenstruktur auf der Speicherkarte 86 Datenübertragung auf einen Rechner 86 DNG 40 87 Ein Ausschalten 26 Empfindlichkeit...

Страница 111: ...en Leica Customer Care 112 Rohdaten 40 87 Schärfe siehe Bildeigenschaften Schärfentiefe Skala 12 Selbstauslöser 76 Serienaufnahmen 28 Speicherkarte Einsetzen und Herausnehmen 22 Sucher Anzeigen 98 Leuchtrahmen 46 98 Technische Daten 108 Teile Bezeichnung der 12 Tragriemen 16 Uhrzeit und Datum 34 Vergrößern der Aufnahme 53 66 Verschluss siehe Auslöser und Technische Daten Vorsichtshinweise 88 Warnh...

Страница 112: ...B Menüsprachen Deutsch Englisch Französisch Spanisch Italienisch Portugie sisch Japanisch traditionelles Chinesisch vereinfachtes Chine sisch Russisch Koreanisch Belichtungsmessung Belichtungsmessung durch das Objektiv TTL bei Arbeitsblende Messprinzip methode Bei der Messung des von hellen Lamellen des 1 Verschlussvor hangs auf eine Messzelle reflektierten Lichts stark mittenbetont bei der Messun...

Страница 113: ...ium Fotodioden mit Sammellinse im Kameraboden Blitz Belichtungskorrektur 3 EV in 1 3 EV Stufen Anzeigen bei Blitzbetrieb nur im Sucher Mittels Blitzsymbol LED Sucher Bauprinzip Großer heller Leuchtrahmen Messsucher mit automatischem Par allaxen Ausgleich Okular Abgestimmt auf 0 5 dptr Korrektionslinsen von 3 bis 3 Dptr erhältlich Bildfeldbegrenzung Durch Aufleuchten von jeweils zwei Rahmen Für 35 ...

Страница 114: ...trieb Anzeigen Verschluss und Auslösung Verschluss Metall Lamellen Schlitzverschluss mit vertikalem Ablauf Verschlusszeiten Bei Zeitautomatik A stufenlos von 125s bis 1 4000s bei manueller Einstellung 8s bis 1 4000s in halben Stufen von 8s bis 125s in ganzen Stufen B Für Langzeitaufnahmen bis maximal 125s zusammen mit Selbstauslöser T Funktion d h 1 Auslösen Verschluss öffnet 2 Auslösen Verschluss...

Страница 115: ...zgebung nicht überall verfügbar d h dort automatische Zwangs Abschaltung Daten werden in den EXIF Header der Bilddateien geschrieben WLAN Erfüllt Norm IEEE 802 11b g n Standard WLAN Protokoll Kanal 1 11 Verschlüsselungsmethode WiFi kompatible WPA WPA2 Verschlüsselung Zugriffsmethode Infrastrukturbetrieb Kameragehäuse Material Ganzmetall Gehäuse aus Magnesium Druckguss Kunstleder Be zug Deckkappe u...

Страница 116: ...78 Wetzlar Telefon 49 0 6441 2080 421 Telefax 49 0 6441 2080 425 la leica camera com Leica Product Support Anwendungstechnische Fragen zu den Leica Produkten einschließ lich der ggf mitgelieferten Software beantwortet Ihnen schriftlich telefonisch oder per E Mail die Product Support Abteilung der Leica Camera AG Auch für Kaufberatungen und die Bestellung von Anleitungen ist sie Ihr Ansprechpartner...

Страница 117: ...LEICA M10 Instructions ...

Страница 118: ... success using your new camera In order to make best use of all the opportunities we recommend that you first read these instructions Your Leica Camera AG Meaning of the different categories of information in these instructions Note Additional information Important Failure to observe the instructions may result in damage to the camera the accessories or the pictures Attention Failure to observe th...

Страница 119: ...omplies with FCC IC radiation exposure limits set forth for an uncon trolled environment This device complies with FCC IC SAR limit of 1 6 W kg For body worn operation this equipment has been tested and meets the FCC IC RF exposure guidelines when used with the Leica Camera AG accessories supplied or designated for this product that have no metallic component in the assembly Use of other accessori...

Страница 120: ...g in the places in the camera packaging designed for this purpose Subject to changes in design and production ACCESSORIES For an up to date list and description of the lenses and accessories available for your camera please consult the Leica Camera AG website at www leica camera com Important Use only the accessories specified and described in these instruc tions and or by Leica Camera AG with the...

Страница 121: ... Customer Service at https owners leica camera com The information in these instructions refers to an earlier firm ware version Instructions and explanations of changes due to different firmware versions can also be found in the Customer area You can find out which firmware version your camera is fitted with also see p 199 as follows Select menu item Camera Information You will find the relevant n...

Страница 122: ...ETAILED INSTRUCTIONS 128 PREPARATIONS 128 ATTACHING THE CARRYING STRAP 128 CHARGING THE BATTERY 128 CHANGING THE BATTERY AND MEMORY CARD 132 LEICA M LENSES 135 Attaching the lens 137 Detaching the lens 137 THE MOST IMPORTANT SETTINGS CONTROLS 138 TURNING THE CAMERA ON AND OFF 138 SHUTTER RELEASE BUTTON 139 Serial exposures 140 SHUTTER SPEED DIAL 141 MENU CONTROL 142 PRESETS 146 BASIC CAMERA SETTIN...

Страница 123: ...0 Exposure simulation 161 Additional display options 161 DISTANCE METERING 164 With the optical rangefinder 164 With the monitor image in Live View mode 165 Marking of clearly focused subjects 166 EXPOSURE METERING AND CONTROL 167 Exposure metering displays 167 Exposure metering methods 168 Selecting the Live View metering methods 168 Exposure modes 169 Aperture priority 169 Metering memory lock 1...

Страница 124: ...89 RECORDING THE LOCATION WITH GPS 190 USER APPLICATION SPECIFIC PROFILES 192 RESETTING ALL CUSTOM SETTINGS 193 FORMATTING THE MEMORY CARD 193 FOLDER MANAGEMENT 194 WIRELESS DATA TRANSMISSION AND REMOTE CONTROL OF THE CAMERA 196 DATA TRANSFER TO A PC 198 WORKING WITH DNG RAW DATA 199 INSTALLING FIRMWARE UPDATES 199 PRECAUTIONS AND CARE INSTRUCTIONS 200 GENERAL PRECAUTIONS 200 MONITOR 201 SENSOR 20...

Страница 125: ...s MALFUNCTIONS AND THEIR RESOLUTION 208 APPENDIX 210 VIEWFINDER DISPLAYS 210 MONITOR DISPLAYS 212 WHEN TAKING A PICTURE 212 IN PLAYBACK MODE 215 MENU ITEMS 217 KEYWORD INDEX 218 TECHNICAL DATA 220 LEICA SERVICE ADDRESSES 224 ...

Страница 126: ...e a cotton or linen cloth instead Before touching the contacts you can make sure you discharge any electrostatic charge by deliberately touching a heating or water pipe conductive grounded material You can also avoid soiling and oxidization of the contacts by storing your camera in a dry place with the lens or bayonet cap attached Use only the recommended accessories to prevent faults short circui...

Страница 127: ...a camera com In case of further questions please contact Leica Camera AG Am Leitz Park 5 35578 Wetzlar Germany This product is intended for general consumer Category 3 This product on purpose to connect to access point of 2 4 GHz WLAN Deutsch Svenska Försäkran om Överensstämmelse DoC Härmed försäkrar Leica Camera AG att den här produkten överensstämmer med väsentliga krav och andra relevanta föres...

Страница 128: ...nses Top view 10 ISO dial with detent positions for A Automatic ISO sensitivity setting 100 6400 ISO settings M ISO for higher sensitivities 11 Index for ISO setting 12 Fixed ring a Index for distance setting b Depth of field scale c Red index button for changing lenses 13 Aperture setting ring 14 White index point for aperture setting 15 Lens hood 16 Focusing ring a Finger grip 17 Main switch wit...

Страница 129: ...etting the selected menu options functions for setting an exposure compensation value for enlarging reducing pictures viewed for scrolling through saved images 29 Direction pad for navigating in the menus for setting the selected menu options functions for scrolling through saved images for selecting the desired picture section when using Gray Card 30 Center button for calling up the status displa...

Страница 130: ... the memory card see p 132 4 Attach the lens see p 137 5 Turn on the camera see p 138 6 Set the menu language see p 146 7 Set the date and time see p 146 8 Format the memory card if necessary see p 193 TAKING PHOTOGRAPHS 9 Set the shutter speed setting dial to A see p 141 10 Set the subject focus see p 158 11 Turn on exposure metering see p 139 12 Correct the exposure if necessary see p 141 13 Rel...

Страница 131: ...n permanent review mode possible at any time Press the PLAY button see p 176 Viewing other pictures Press the left or right side of the direction pad Enlarging pictures Turn the thumbwheel to the right DELETING PICTURES only possible within PLAY mode Press the MENU button to call up the delete menu Details of this process can be found on p 180 ...

Страница 132: ...arations DETAILED INSTRUCTIONS PREPARATIONS ATTACHING THE CARRYING STRAP CHARGING THE BATTERY Charger A C D B A Socket for power cable B Socket for car charging cable C CHARGE LED D 80 LED E F E Contacts F Latches ...

Страница 133: ...ttery has charged to at least 4 5 of its capacity the yellow LED marked 80 also lights up When the battery is fully charged the green LED also chang es from flashing to continuously lit Note The 80 LED lights up after around 2 hours due to the charging characteristics The charger should be disconnected from the mains when charging is complete There is no risk of overcharging ...

Страница 134: ...in a risk of fire or explosion A safety valve in the battery guarantees that any excess pres sure caused by improper handling is discharged safely Only the charger specified and described in this manual BC SCL5 Order No 24002 is to be used The use of other chargers not ap proved by Leica Camera AG can cause damage to the batteries and in extreme cases can cause serious or life threatening injuries...

Страница 135: ...ty after it has been fully charged and by use in the camera discharged again 2 or 3 times This discharge procedure should be repeated every 25 cycles To ensure a maximum service life of the battery it should not be exposed to constant extremes of temperature e g in a parked car in the summer or winter Even when used under optimum conditions every battery has a limited service life After several hu...

Страница 136: ...bottom cover or remove the memory card or battery while the red LED 21 at the bottom right next to the monitor 31 is flashing indicating picture recording and or data saving to the card Otherwise the unsaved or not completely saved picture data may be lost Removing the bottom cover Inserting the battery Removing the battery ...

Страница 137: ... secure digital SDHC high capacity or SDXC eXtended capacity card SD SDHC SDXC memory cards are available from various suppli ers and with different capacities and read write speeds Particular ly those with high capacities and read write speeds allow data to be recorded and retrieved very quickly The cards have a write protection switch which can be used to prevent unintentional storage and deleti...

Страница 138: ...rectly If the memory card cannot be inserted check that it is aligned correctly If you remove the bottom cover or take out the memory card when the camera is turned on the monitor displays the corre sponding warning messages instead of the normal displays Attention Bottom cover removed Attention No card available Since electromagnetic fields electrostatic charges and defects on the camera or the c...

Страница 139: ...manufactured from 1961 1995 Made in Canada cannot be attached to the camera or will not focus to infinity The Leica Customer Care department can modify these lenses so that they can be used on the camera The following can be used but risk damaging the camera or lens Lenses with retractable barrel can only be used with the barrel extended i e their barrel must never be retracted into the cam era Th...

Страница 140: ...zlar with the greatest possible precision Extremely narrow tolerances are adhered to in this process which enable precise focusing of every camera lens combination in photographic practice If fast lenses 1 4 are used at full stop due to the sometimes extremely low depth of field and inaccuracies in focusing with the viewfinder there may be setting errors resulting from the added overall tolerance ...

Страница 141: ...fixed ring 12 3 Press down the release button 1 on the camera body 4 Turn the lens to the left until its red index button 12c is aligned with the release button 5 Remove the lens Notes As a rule To protect against ingress of dust etc into the interior of the camera it is important always to have a lens or a cap attacched to the camera body For the same reason when changing lenses work quickly and ...

Страница 142: ...Note After switching on the camera is ready to use after approx 1s Switching off Even if the camera is not switched off with the main switch it is switched off automatically if an automatic power off time has been set in the menu see p 148 and none of the controls are used during this time However if the automatic power off time is set to Off and the cam era is not operated for an extended period ...

Страница 143: ...ain switched on for as long as has been set in the menu item Automatic Power Saving see p 148 Note The shutter button remains blocked if the internal buffer memory is temporarily full e g after a series of 16 pictures if the memory card inserted and the internal buffer memory are temporarily full if the battery has exceeded its performance limits capacity temperature age if the memory card is writ...

Страница 144: ...ity on the memory card If you only press it briefly the camera continues to take single pictures Approx 40 pictures in JPG format can be taken in rapid succes sion at a maximum rate of approx 5 pictures per second After this the image frequency is reduced slightly Notes The specified picture frequency and the maximum possible num ber of pictures in a series relate to a default setting ISO 200 and ...

Страница 145: ...ter mediate values in step positions are also available the shortest possible sync speed of 1 180s for flash mode marked with the symbol and B for long exposures The shutter speed dial has no stop i e it can be turned in either direction from any position It detents at all marked positions and at the intermediate values Values between the detent positions cannot be used More details on setting the...

Страница 146: ...the latter entry is direct to the MAIN MENU You can assign up to 7 of the 26 menu options from the MAIN MENU to the FAVORITES menu This enables the most frequently used menu options to be accessed and set especially quickly and easily Details about this menu option can be found on the following pag es The relevant settings or setting steps of the menu options are made in the same way in both menus...

Страница 147: ...enu Press the MENU button 22 The first page of the MAIN MENU appears Selecting a menu option 1 Selecting the desired menu item Turn the thumbwheel 28 to the right down to the left up or Press up down on the direction pad 29 Notes Using the thumbwheel is normally not only more convenient but also significantly faster Some options such as GPS and Format SD as well as some sub menu options can only b...

Страница 148: ...he menu item GPS is the only one not to have its own sub menu Details on setting can be found on page 190 3 Select the desired function variant value Turn the thumbwheel 28 in the appropriate direction or Press the appropriate sides of the direction pad 29 up down to change lines or to select options left right for settings within a line or on a scale For sub menus with selectable options it is al...

Страница 149: ...RITES menu almost all of the menu items of the MAIN MENU are available see p 216 for a complete list 1 In the MAIN MENU select Customize Control 2 in the relevant sub menu Edit Favorites and 3 call up the sub menu 4 Select the desired menu option and 5 press on the Center button 30 to add it to the FAVORITES menu On or remove it Off A warning message appears if the FAVORITES menu already contains ...

Страница 150: ...n the sub menu the desired language Apart from a few exceptions button names short designa tions all linguistic information changes Date and time Setting the functions 1 Select the menu item Date Time and 2 call up the sub menu It comprises the five options Auto GPS Time Time Zone Daylight Saving Time Date Setting and Time Setting Note We recommend that you make the following three settings in the...

Страница 151: ...the electronic viewfinder with an integrated GPS aerial is attached available as an acessory and the GPS option is switched On in the menu see p 190 9 In the Date Time sub menu select Auto GPS Time and 10 switch the function On or Off there If this function is activated the time set on the camera is updated continuously based on GPS signals received Adjusting the date There are 3 options available...

Страница 152: ...r and viewfinder If you are using the viewfinder available as an accessory you can specify both for the Live View and the Review mode when the monitor or the viewfinder should be used for the displays in ques tion In the factory settings the change is automatic using the proximity sensor in the viewfinder eyepiece Setting the function 1 Select the menu item EVF Display Control and 2 in the sub men...

Страница 153: ...EN 149 Camera default settings ...

Страница 154: ...tached a Leica R lens is being used with a Leica R Adapter M available as an accessory for further details refer to the adapter instructionsl Notes When attaching a coded Leica M lens the camera automatically switches to Auto even if a different lens had previously been entered in Manual M When using Leica R lenses the camera automatically switches to Manual R even if Auto had previosuly been ente...

Страница 155: ...transferred to the camera and thus is not included in the EXIF data for pictures If required you can enter the relevant focal length manually By contrast the Leica Tri Elmar M 28 35 50mm f 4 ASPH fea tures mechanical transfer of the set focal length to the camera necessary to display the appropriate bright line frame in the viewfinder It is detected by the camera electronics and used for focal len...

Страница 156: ...tions The remaining number of pictures shown in the monitor does not necessarily change after every picture This depends on the subject very fine structures result in higher quantities of data homogeneous surfaces in lower quantities JPG SETTINGS Note The functions and settings described in this section refer exclusive ly to picture data in the JPG format If the DNG file format is specified these ...

Страница 157: ...small the transition area between light and dark is at edges in the picture The impression of being in focus can thus be changed by expanding or reducing these areas The color saturation determines whether the colors in the pic ture tend to appear as pale and pastel like or bright and col orful While the lighting and weather conditions hazy clear are given as conditions for the picture there is de...

Страница 158: ...mps at approx 3700K1 Fluorescent Cool e g for pictures with prevailing light from fluorescent tubes for example for working areas and external lighting with cool light at approx 5800K1 Flash e g for pictures with electronic flash lighting Greycard for manual setting by metering Color Temperature1 for a directly settable color temperature value 1 All color temperatures are specified in Kelvin Note ...

Страница 159: ... a picture for setting the white balance 3 Take the picture making sure that the image field contains a white or neutral gray reference surface The monitor shows the image based on the automatic white balance cross hairs in the middle of the image top right Preview as referece to further operation 4 Press the relevant side of the direction pad to move the cross hairs to the subject detail you want...

Страница 160: ...ell as vertical and horizontal stripes may become visible especial ly in large uniformly bright areas of the subject 1 The function is not available when using flash units Setting the function Using the setting dial 10 The values engraved on the dial are available as well as the posi tions A for automatic setting and M for intermediate values e g 250 and for values higher than 6400 In its idling p...

Страница 161: ...t shutter speed yourself be tween 1 2s and 1 500s In the focal length specific settings the camera only switches to a higher sensitivity if the shutter speed would fall below the threshold due to low brightness e g with a 50mm lens at speeds slower than 1 60s at 1 f or 1 125s at 1 2f or 1 250s at 1 4f 2 This function requires the use of coded lenses or setting of the lens type used in the menu see...

Страница 162: ...ght variations which are hardly ever critical in practice are due to the operating principle Bright line frames on a viewfinder camera must be matched to the angle of view of the relevant lens focal lengths However the nomi nal angles of view change slightly when focusing due to the chang ing extension i e the distance between the optical system and the sensor plane If the set distance is less tha...

Страница 163: ...an then see immediately if for image com position reasons it would be better to photograph the relevant subject using a different focal length 35mm 135mm 22 45PM 22 02 2012 999 9000 8234 9999 12MP 2 8 F 1 8000 12500 ISO EV INFO 50mm 75mm 22 45PM 22 02 2012 999 9000 8234 9999 12MP 2 8 F 1 8000 12500 ISO EV INFO 28mm 90mm 22 45PM 22 02 2012 999 9000 8234 9999 12MP 2 8 F 1 8000 12500 ISO EV INFO ...

Страница 164: ...can be used to set the brightness of this kind of viewfinder in exactly the same way as described above INFO screen When using the exposure meter you can use the monitor to display a number of settings by pressing the Center button LIVE VIEW MODE Live View mode on this camera enables you to view the subject in the monitor when taking a picture with a precise indication of how the attached lens wil...

Страница 165: ... manual exposure control 1 This applies as long as the subject brightness and the set exposure do not result in exceptionally low or high brightness values and provided internal exposure setting is not longer than 1 60s Additional display options Various pieces of information can be displayed in the Live View monitor image Most appear in a header or footer aslo see p 212 In the standard setting on...

Страница 166: ...ht red flashing and dark blue flashing areas of a picture that are over or under exposed To adjust these displays to specific conditions or your compositional ideas you can specify limit values i e the level of over or under exposure at which they appear The clipping displays thus enable you to recognize affected pic tures very easily and to adjust the exposure setting very easily Setting the func...

Страница 167: ...e histogram may differ slightly from that shown when taking the picture The histogram is not available for simultaneous review of several reduced pictures or for enlarged pictures The clipping indications always relate to the detail of the part of the picture currently being displayed Grid Two grid line displays are available They divide the image field into 3x3 or 6x4 fields They facilitate thing...

Страница 168: ...be set using either the superimposed image or split image method Superimposed image method double image In a portrait for example aim the metering field at the eye and turn the distance setting ring on the lens until the contours in the me tering field coincide Then compose the picture out of focus in focus Split image method When taking photographs of architecture for example aim the metering fie...

Страница 169: ...larging an initially central detail of the monitor image Identifying sharp subject parts in the monitor image Both variants can be used together Enlarging a detail You can call up this function in three ways For occasional use Using the Focus button 1 Select the menu item Capture Assistants 2 in the sub menu Focus Aid and 3 the function Manual there 4 Press the Focus button 3 For continuous use Us...

Страница 170: ...or image by coloring the relevant contours so that they can be easily recognized The four available colors permit adaptation to any background Setting the function 1 Select the menu item Capture Assistants 2 in the sub menu Focus Peaking and 3 in the respective sub menu the desired color or switch the function Off if you do not want to use it Use 4 Determine the trimming 5 Press the focus button 3...

Страница 171: ... disabled Notes In aperture priority mode if correct exposure cannot be achieved using the available shutter speeds the shutter speed display gives a warning by flashing only in the viewfinder for more details refer to the Aperture priority mode section on p 169 If the exposure meter reading is below the metering range in very low lighting conditions and in manual mode the left hand triangular LED...

Страница 172: ... sub menu the desired metering method Spot Only a small area indicated by a circle in the middle of the monitor image is captured and evaluated Center weighted This method takes account of the entire image field although the parts of the subject situated in the center have more influence on the exposure value calcula tion than the areas at the margins Multi field This metering method is based on d...

Страница 173: ...xtreme lighting conditions based on all the parameters the exposure meter may generate a shutter speed that is outside the working range i e brightness values that would require shorter exposures than 1 4000s or longer than 125s In such cases the speci fied minimum or maximum shutter speed is nevertheless used and these values flash in the viewfinder as a warning Notes As described in connection w...

Страница 174: ... the viewfinder at the top in the digits line for confirmation and the exposure time no longer changes even if the lighting conditions are different 3 Keeping the shutter buttone pressed move the camera to capture the final trimming and 4 release Changing the aperture setting after using exposure lock has no effect on the shutter speed and will lead to an incorrect exposure Metering memory lock is...

Страница 175: ...g dot at the bottom in the viewfinder or for about 0 5s when the display is activated Regardless of the setting method the value is displayed in the monitor in Live View mode and in the Information screen if the viewfinder is being used by means of a mark in the lower part of the light balance and in the output menu list by means of EV _ X1 Important An exposure compensation set on the camera only...

Страница 176: ...use or use appropriate soft ware to create a picture with an exceptionally high contrast range HDR The following are available 5 graduations 0 3EV 0 7EV 1EV 2EV and 3EV 2 numbers of pictures 3 or 5 Setting the function 1 Select the menu item Drive Mode and 2 in the sub menu Exposure Bracketing The corresponding sub menu appears in the monitor A B C D E F A Number of pictures B Exposure difference ...

Страница 177: ...matically determined by the camera for the uncorrected pictures is also used for all other pictures in a series i e this ISO value is not changed during a series This may mean that the slowest shutter speed specified under Maximum Exposure Time is exceeded Depending on the initial shutter speed the working range for automatic bracketing may be limited Regardless of this the specified numbers of pi...

Страница 178: ...wn and displayed in seconds after the shutter release The B setting The T function With the B setting the shutter remains open for as long as the shutter button is held down up to a maximum of 125s depending on the ISO setting The B function can also be used to permanently set shutter speeds that are slower than 8s 1 Press Focus button 3 for approx 1s The shutter speed sub menu appears in the moni...

Страница 179: ...peeds of more than 2s the message Noise reduction 12s1 appears in the monitor 1 Time data is an example Values above and below the metering range If the exposure meter reading is below its working range in very low lighting conditions and in manual mode the left hand triangular LED flashes as a warning in the viewfinder while the right hand LED does the same if there is too much light In aperture ...

Страница 180: ...ctures Full review display of the picture Automatic review of the last picture In Auto Review mode each picture is displayed immediately after it is taken This allows you to quickly and easily check whether the picture was successful or needs to be taken again This function enables you to select the time for which the picture will be dis played Setting the function 1 Select the menu itemn Auto Rev...

Страница 181: ... 12MP 2 8 F 1 8000 12500 ISO EV INFO Notes The histogram and the clipping indicators are available when viewing both the entire picture and a section of it but not when simultaneously viewing 12 or 20 reduced pictures The histogram and clipping indicators always relate to the detail of the part of the picture currently being displayed Viewing other pictures Scrolling in the memory You can open oth...

Страница 182: ...Enlargement is possible up to 1 1 i e until 1 pixel of the monitor displays 1 pixel of the picture You can use the direction pad 29 to select any position of the sec tion of an enlarged picture In addition to the enlargement the rectangle within the frame in the top left hand corner symbolizes the position of the section displayed Note You can also switch from an enlarged picture directly to anoth...

Страница 183: ...freely navigate among the reduced pictures the relevant picture is indicated by the red frame You can return this picture to normal size by turning the thumbwheel to the right or in a single step by pressing the PLAY button When 20 pictures are displayed turning the thumbwheel further to the left places the red frame around the entire group of pictures which then allows you to scroll more quickly ...

Страница 184: ...the process Deleting Images When a picture is displayed you have an opportunity to delete it if you wish to do so This can be useful for example if the pictures have already been saved to other media if you no longer require them or if you need to free up more space on the memory card You can delete single pictures only those that are not marked or all pictures at the same time as required Procedu...

Страница 185: ...ED 21 flashes Then the following message appears Attention No media file to display Notes Marking and deletion is possible only from PLAY review But regardless of whether a picture is being displayed at normal size or several reduced pictures are displayed but not if the 20 pic ture review is activated with a red frame around the entire group Even when the deletion and marking menu is called up yo...

Страница 186: ...end the use of modern thyristor controlled electronic flash units Studio flash units fired via synchronization cable 1 However if flash units not specially designed for the camera are used and do not automatically adjust the white balance on the camere the Flash setting should be used see p 154 Attaching the flash unit Before attaching a flash unit to the accessory shoe 20 on the camera the cover ...

Страница 187: ... In addition the camera transfers the set sensitivity to the flash unit This allows the flash unit provided it has received such infor mation and the aperture manually set on the lens is also input to the flash unit automatically to adjust its range values accordingly With system compatible flash units the sensitivity setting cannot be influenced from the flash unit as it is transferred from the c...

Страница 188: ... flash 3 Set the desired aperture or the aperture required for the rele vant distance to the subject Note If the automatically controlled or manually set shutter speed is faster than 1 180s the flash is not fired unless the flash unit is HSS compatible Flash exposure displays in the viewfinder with system compat ible flash units A flash shaped LED appears in the viewfinder as confirmation and to d...

Страница 189: ... does not appear despite the flash unit being switched on and ready for use On the camera a shutter speed is set manually that is faster than 1 180s In such cases the camera will not fire the flash unit even though it is switched on and ready for use flashes slowly at 2Hz before the picture is taken The flash unit is not yet ready for use is lit up before the picture is taken The flash unit is rea...

Страница 190: ...rule of thumb for blur free pictures taken from the hand e g 1 60s with a 50mm lens The corresponding shutter speeds with 1 2f and 1 4f in this example would be 1 125s and 1 250s Important The setting range is limited to 1 125s even if the focal length used is longer Manual exposure control also allows any shutter speed up to the sync speed of 1 180s to be set Selecting the firing moment Flash pho...

Страница 191: ...he displays are identical in both cases Setting the function 1 Select the menu item Flash Settings 2 in the sub menu Flash Sync Mode and 3 set the desired version Flash exposure compensation This function can be used to selectively reduce or strengthen the flash exposure regardless of the exposure from available light e g in a picture taken in the evening to lighten the face of a person in the for...

Страница 192: ...ing the MENU button 22 the relevant setting is retained and the function can be restarted by pressing the shutter button again Important In self timer mode the exposure is not set by pressing the shutter button to the pressure point it is set immediately before the pic ture is taken INTERVAL PICTURE SERIES This camera makes it possible to automatically take pictures of motion sequences over a long...

Страница 193: ...re Regardless of how many pictures have been taken in a series both review modes initially show the last picture in the series or the last picture in the series saved on the card while saving is still ongoing MARKING THE PICTURE FILES FOR COPYRIGHT PROTECTION This camera enables you to mark your picture files by entering text or other characters You can enter up to 20 characters of information und...

Страница 194: ...aracter 6 enter each one with the Center button 30 and 7 finally confirm your entries with the button RECORDING THE LOCATION WITH GPS Note This option is only availalbe if the Leica Visoflex viewfinder is at tached available as an accessory The Global Positioning System enables the current position of a receiver to be determined worldwide The Leica Visoflex viewfinder is fitted with an appropriate...

Страница 195: ...n closed rooms underground under trees in a moving vehicle close to high buildings or in steep valleys close to high voltage cables in tunnels close to 1 5GHz mobile telephones Information for safe use The electromagnetic field generated by the GPS system can influ ence instruments and measuring equipment Therefore make sure the GPS function is deactivated on board an aircraft before takeoff or la...

Страница 196: ... the sub menu list either one of the saved profiles or Standard Profile corresponds to the camera factory setting The selected memory slot is indicated by User 1 for exam ple in the output menu list in the information screen see p 214 by the relevant symbol in this case Note If you change one of the settings for the profile currently in use appears instead of the name of the prodile you were previ...

Страница 197: ... not normally necessary to format memory cards that have already been used However if a card that has yet to be formatted is inserted for the first time it must be formatted Note You should get into the habit of copying all your pictures onto a secure bulk storage medium e g the hard drive on your computer as soon as possible This is particularly important if the camera is being sent for servicing...

Страница 198: ...umber 9999 a new folder is created automatically and the numbering begins again at 0001 If folder number 999 and picture number 9999 are reached a corresponding warning message appears in the monitor and the numbering must be reset see below This can be done by formatting the memory card or by using a different memory card On this camera you can also create new folders at any time give them names ...

Страница 199: ...operation is exactly as described for steps 5 7 of the Copyright function In the entry line L100 0001 DNG always appears intially The first 4 characters can be changed After the last entry the Image Numbering sub menu appears again Reseting Image numbering 1 Select the menu item Image Numbering and 2 in the sub menu Reset IMage Numbering A query sub menu appears 3 Confirm or reject the process 1 E...

Страница 200: ...n register Setting the function 1 Select the menu item WLAN 2 in the sub menu switch Function to On 3 in the same sub menu select Connect and 4 there either Create WLAN or Join WLAN Connect to an available network Join WLAN Access to the available Wifi networks is possible with this function Setting the function 5 In the WLAN sub menu select Setup The camera automatically lists the available netwo...

Страница 201: ... used in other countries than the one where the camera is sold there is the risk that communica tions transmission conditions may be violated Leica Camera AG does not assume any responsibility for violations of this kind Please also notice that data transmitted and received wirelessly may be intercepted by third parties We highly recommend that you activate encryption in the wireless access point ...

Страница 202: ...RKING WITH DNG RAW DATA If you wish to use the standardized and future proof DNG Digital Negative format you will need specialized software to convert the saved raw data into optimum quality for example a professional raw data converter Adobe Photoshop Lightroom Such picture editing software provides quality optimized algorithms for digital color processing delivering exceptionally low noise photo...

Страница 203: ...are update is available Leica Camera AG will notify you of all new updates To identify which firmware version is installed Select the menu item Camera Information The version number is stated in the Camera Firmware line on the right hand side Further information on registration and on firmware updates for your camera and on any changes or additions to the details in these in structions can be foun...

Страница 204: ...battery replace it and turn the camera on again Protect the camera from contact with insect sprays and other aggressive chemicals Petroleum spirit thinner and alcohol may not be used for cleaning Certain chemicals and liquids can damage the camera body or the surface finish As rubber and plastics sometimes emit aggressive chemicals they should not remain in contact with the camera for a long time ...

Страница 205: ...emperature fluctuations condensation can form on the monitor Wipe it carefully with a soft dry cloth If the camera is very cold when it is turned on the displays may at first appear darker than usual As soon as it warms up it will reach its normal level of brightness SENSOR Cosmic radiation e g during flights can cause pixel defects CONDENSATION If condensation has formed on or in the camera you s...

Страница 206: ... also that no grains of sand or similar particles are lodged there where they could scratch the bayonet Only clean this component when dry FOR LENSES Normally a soft hair brush is sufficient to remove dust from the outer lens elements However in case of more stubborn dirt they can be carefully cleaned with a very clean soft cloth that is completely free of foreign matter using circular motions fro...

Страница 207: ...cts such as paper clips or jewelry A short circuited battery can get very hot and cause severe burns If a battery is dropped check the casing and the contacts imme diately for any damage Using a damaged battery can damage the camera In case of noise discoloration deformation overheating or leaking fluid the battery must be removed from the camera or charger immediately and replaced Continued use o...

Страница 208: ... while the charger is connected to the mains FOR MEMORY CARDS While a picture is being stored or the memory card is being read it may not be removed nor may the camera be turned off or exposed to vibrations Make sure to store memory cards in an anti static container when not in use Do not store memory cards where they will be exposed to high temperatures direct sunlight magnetic fields or static d...

Страница 209: ...n using appropriate software Only the data that is then overwritten by saving new data is actually perma nently deleted You should nevertheless get into the habit of transferring all your pictures onto a secure bulk storage medium e g the hard drive on your computer as soon as possible This is particularly important if the camera is being sent for servicing along with the memory card Depending on ...

Страница 210: ... aperture to the largest value 16 or 22 and take a picture of a ho mogeneous surface defocussed 3 Press the shutter button 18 After a short time a picture appears in the monitor in which black pixels represent grains of dust Note If dust detection is not possible a corresponding message appears instead After a few seconds the display reverts to that described under 2 The picture can then be taken ...

Страница 211: ...ys such as Tetenal Antidust Professional can also be used in line with their specified usage If the particles cannot be removed from the sensor in this way please refer the matter to the Leica Product Support depart ment If the battery capacity falls to lower than 40 while the shutter is open the warning message Attention Please stop sensor cleaning immediately appears in the monitor Turning the c...

Страница 212: ...during use should be emptied to prevent damage to your equipment caused by moisture and any leather tanning residue released To prevent fungal growth during use in hot humid tropical cli mates the camera equipment should be exposed to the sun and air as much as possible Storage in airtight containers or cases is recommended only if a desiccant such as silica gel is placed in the container To preve...

Страница 213: ...e capacity of the memory card is exhausted Delete pictures you no longer require before taking new ones The monitor image is too dark or too bright When viewing the monitor image from oblique angles it is always more difficult to see If it is too light or too dark although you are looking at the monitor perpendicularly Set a different brightness or use the external electronic viewfinder available ...

Страница 214: ...EN 210 Appendix APPENDIX VIEWFINDER DISPLAYS 1 2 3 ...

Страница 215: ... Indicates that the memory card is full Full b Dot above Indicates when lit that saved metering values are being used c Dot below Indicates flashing that exposure compensation is being used d Two triangular and one circular LED For manual exposure setting Together as a light bal ance The triangular LEDs indicate the direction of rota tion of the aperture setting ring and shutter speed dial to adju...

Страница 216: ...sure control mode 15 ISO sensitivity setting 16 Light balance 17 Exposure compensation scale 18 Shutter speed 19 Exposure simulation 20 Remaining number of pictures incl trend indication by means of bar graph 21 Display of trimming size and position only with enlarged section 1 White balance mode 2 File format compression resolution 3 Exposure metering method 4 Shutter button Drive Mode setting 5 ...

Страница 217: ... 2 1 3 4 5 6 24 20 18 17 16 22 23 7 14 15 22 Battery capacity in comparison to Live View mode with additional trend indication by means of bar graph 23 Memory card capacity incl trend indication by means of bar graph 24 Profile storage slot used only if switched on ...

Страница 218: ...raph indicating the relative position in relation to the total number of pictures 20 Selected picture selected group of pictures only with reduced viewing of 12 20 pictures only 1 White balance mode 2 File format compression resolution 3 Exposure metering method 4 Shutter button Drive Mode setting 5 Wifi only if switched on different displays depending on recep tion situation 6 GPS only if switche...

Страница 219: ...ONTROL 21 3 4 5 2 1 21 Deletion menu items 1 Indication of the FAVORITES menu area only if at least one menu item is assigned to this menu 2 Menu item 3 Menu item setting 4 Reference to sub menu 5 Scroll bar for page indication main menu only ...

Страница 220: ... 168 Exp Compensation 6 6 171 Flash settings 6 6 186 187 ISO Setup 6 6 156 White Balance 6 6 154 Photo File Format 6 6 152 JPG Settings 6 6 152 153 JPG Resolution Subsection of JPG Settings Auto Review 6 176 Capture Assistants 6 161 EVF Display Control 6 161 163 165 166 User Profiles 6 148 Customize Control 6 192 Display Brightness 6 160 EVF Brightness 6 160 ...

Страница 221: ...ower Saving 6 148 WLAN 6 196 GPS1 6 190 147 Date Time 6 146 147 Language 6 146 Reset Camera 6 193 Format SD 6 193 Image Numbering 194 195 Sensor Cleaning 206 Camera Information 117 189 199 1 This option is only availalbe if the Leica Visoflex viewfinder is attached available as an accessory ...

Страница 222: ... in the monitor 211 in the viewfinder 210 Distance setting 164 Focusing aids 165 166 Metering field 158 210 On the monitor 165 Rangefinder 162 Setting ring 124 Split image method 164 Superimposed image method 164 DNG 152 199 Enlarging pictures 165 178 Exposure exposure control exposure meter Aperture priority 169 Automatic bracketing 172 Exposure compensation 170 Manual setting 174 Metering field ...

Страница 223: ...e series 140 Power off automatic 148 Raw data 152 199 Repairs Leica Customer Care 224 Resetting all custom menu settings 193 Resolution 152 Review mode 176 Scope of Delivery 116 Self timer 188 Sensitivity 156 Sharpness see image properties Shutter button see also shutter and technical data 139 222 Shutter speed setting dial 141 Shutter see shutter button and technical data Spare parts 116 Storage ...

Страница 224: ...ards up to 32GB SDXC cards up to 2TB Menu languages German English French Spanish Italian Portuguese Japanese Traditional Chinese Simplified Chinese Russian Korean Exposure metering Exposure metering through the lens TTL with working aperture metering principle method For metering the light reflected by light blades of the 1st shutter curtain onto a measuring cell Strong center weighted for meteri...

Страница 225: ... photo diodes with collection lens on the camera base Flash exposure compensation 3EV in1 3EV increments Displays in flash mode in viewfinder only Using flash symbol LED Viewfinder Construction principle Large bright line frame viewfinder with automatic parallax compen sation Eyepiece Calibrated to 0 5 dpt corrective lenses from 3 to 3 diopter available Image field limiter By activating two bright...

Страница 226: ...Gorilla glass color space sRGB for Live View and review mode displays Shutter and shutter release Shutter Metal blade focal plane shutter with vertical movement Shutter speeds For aperture priority A continuous from 125s to 1 4000s for manual adjustment 8s to 1 4000s in half steps from 8s to 125s in whole steps B For long exposures up to maximum 125s in con junction with self timer T function i e ...

Страница 227: ...tomatic shutdown in those countries data are written to EXIF header in picture files Wifi Complies with IEEE 802 11b g n standard standard Wifi proto col channel 1 11 encryption method Wifi compatible WPA WPA2 encryption access method Infrastructure mode Camera body Material All metal die cast magnesium body synthetic leather covering Brass top panel and base black or silver chrome plated finish I...

Страница 228: ...ica Camera AG homepage Leica Camera AG Product Support Software Support Am Leitz Park 5 35578 Wetzlar Germany Phone 49 0 6441 2080 111 108 Fax 49 0 6441 2080 490 info leica camera com software support leica camera com Leica Customer Care The Leica Camera AG Customer Care department or the repair service provided by authorized Leica agents in your country are available for service maintenance and r...

Страница 229: ...DAS WESENTLICHE Leica Camera AG Am Leitz Park 5 35578 WETZLAR DEUTSCHLAND Telefon 49 0 6441 2080 0 Telefax 49 0 6441 2080 333 www leica camera com 93725 IX 16 AX D ...

Отзывы: