


108
n. b.:
Always disconnect external transformers
and the microscope from the mains when
carrying out assembly work!
●
Switch off the microscope and the power unit.
●
Disconnect the appliance cable of the micro-
scope and the power unit.
●
Slacken the clamp screw on the microscope
and remove the lamphousing.
●
Slacken the screw (85.1) on the lid and re-
move the lid.
●
Move the collector (84.3) to the front if neces-
sary.
n. b.:
This step is not necessary with lamphousing
107/2.
n. b.:
Never use fuses with a different rating from the
ones specified.
●
Connect the microscope and the power unit to
the mains.
Replacing the 12 V / 100 W halogen lamp
in lamphousing 106, 107, 107/2
Ask a member of Leica field staff to show you
how to change the halogen lamp properly.
Here again are all the necessary steps:
1
2
3
4
5
6
7
8
9
10
10
11
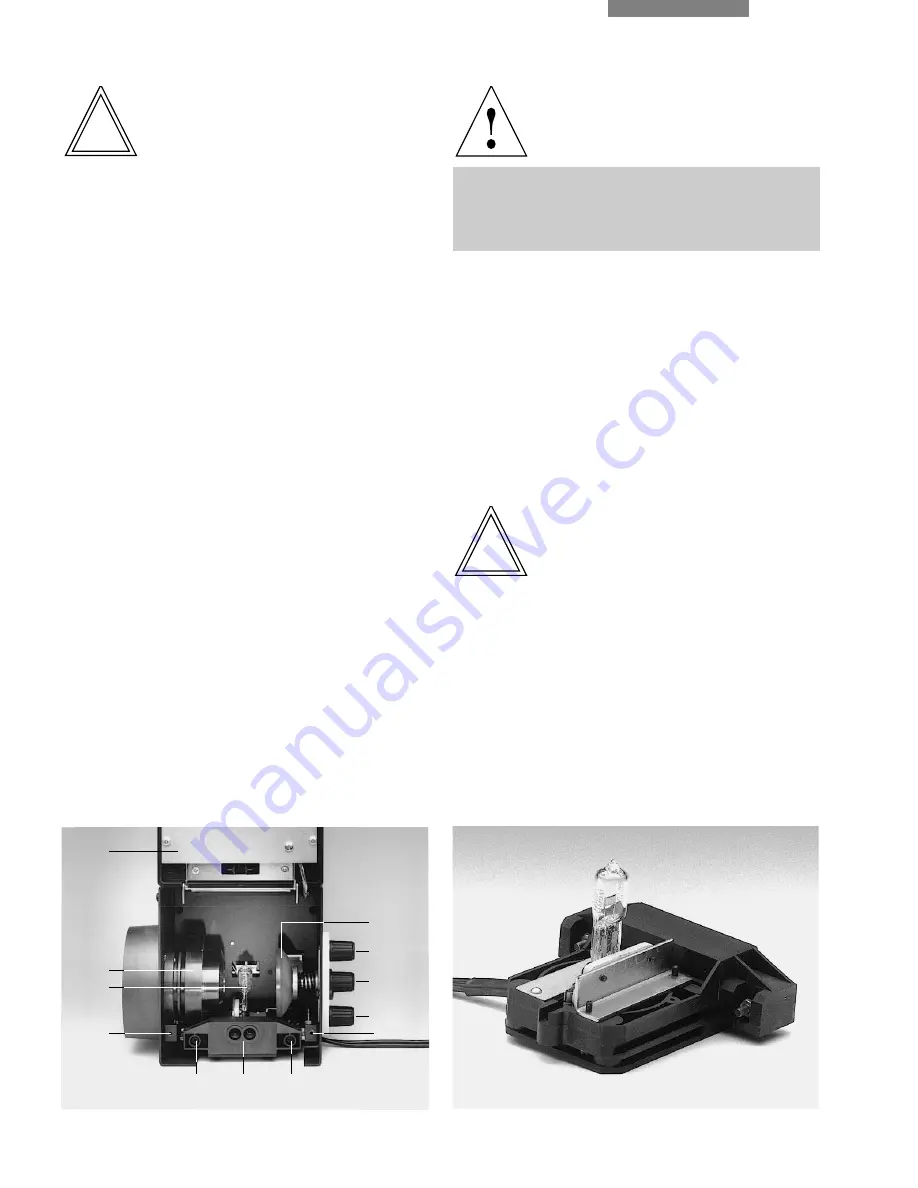
Fig. 88
␣ ␣ Lamphousing 106 z, opened
1
Lid, flipped up,
2
Collector,
3
12 V 100 W halogen or gas
discharge lamp,
4, 9
Screw holes for lid,
5
Reflector,
6, 8
x-y
adjustment screws for centration of reflector,
7
Reflector
focusing,
10
Fixing screws for lamp holder,
11
Socket for cut-
out plug
Fig. 89␣ ␣
12 V 100 W lamp holder
Содержание DM IRB
Страница 1: ...Leica DM IRB Instructions...
Страница 3: ...3 Leica DMIRB Instructions...
Страница 129: ...3...


