


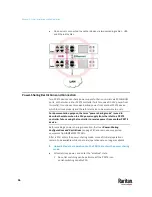


Chapter 3: Initial Installation and Configuration
39
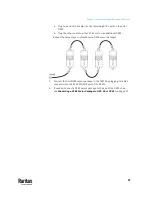
Supported Sensor Configurations for Power Sharing
All information and restrictions described in this section apply to BOTH PDUs
involved in the power-sharing configuration, unless otherwise specified.
•
There are
no
limitations for connecting Raritan's DPX or DPX2
environmental sensor packages to an iX7
™
PDU in the power-sharing mode.
See
DPX Sensor Packages
(on page 51) or
DPX2 Sensor Packages
(on page
48).
•
The maximum number of supported DPX3 environmental sensor packages
remains unchanged -- that is, 12 DPX3 packages. See
DPX3 Sensor
Packages
(on page 46).
•
The maximum number of supported DX environmental sensor packages
also remains unchanged as long as the DPX3-ENVHUB4 sensor hub is
not
used -- that is, 12 DX sensor packages. See
DX Sensor Packages
(on page
45).
•
The maximum number of supported DX2 environmental sensor packages
remains unchanged -- that is, 12 DX2 packages. See
DX2 Sensor Packages
(on page 43).
However, there are DX restrictions when DPX3-ENVHUB4 is used, and there are
also door handles-related restrictions.
DX sensor restrictions while DPX3-ENVHUB4 is involved:
•
A maximum of one DPX3-ENVHUB4 and a maximum of 10 DX sensor
packages are supported.
Door handle connection restrictions (via DX2-DH2C2 or DX-PD2C5):
•
(Restriction only for DX2-DH2C2 manufactured before 2019) DO NOT
connect any "SouthCo H3-EM series" door handle(s) because of insufficient
power supply in the power-sharing mode.
Note: The latest generation of DX2-DH2C2 does NOT have this restriction
and can have SouthCo H3-EM series connected in the power-sharing mode.
•
A maximum of 2 door handles connected to a maximum of one
DX2-DH2C2 or one DX-PD2C5 package are supported.
•
All of the 2 door handles must be controlled by the same PDU so that you
can have "only one" handle opened at a time to avoid critical power
consumption. That is, ALL door handles must be connected to only one
PDU in the power-sharing connection, NOT both PDUs.
Note: It is strongly suggested to check and make sure the upper limit of
"powered cry contact actuators" is set to 1 when making a power-sharing
connection. See
Peripherals
(on page 258).
Содержание Raritan PX3TS
Страница 4: ......
Страница 6: ......
Страница 20: ......
Страница 52: ...Chapter 3 Initial Installation and Configuration 32 Number Device role Master device Slave 1 Slave 2 Slave 3...
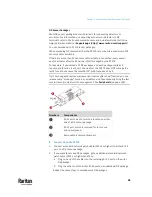
Страница 80: ...Chapter 4 Connecting External Equipment Optional 60...
Страница 109: ...Chapter 5 PDU Linking 89...
Страница 117: ...Chapter 5 PDU Linking 97...
Страница 440: ...Chapter 7 Using the Web Interface 420 If wanted you can customize the subject and content of this email in this action...
Страница 441: ...Chapter 7 Using the Web Interface 421...
Страница 464: ...Chapter 7 Using the Web Interface 444...
Страница 465: ...Chapter 7 Using the Web Interface 445 Continued...
Страница 746: ...Appendix A Specifications 726...
Страница 823: ...Appendix I RADIUS Configuration Illustration 803 Note If your PX3TS uses PAP then select PAP...
Страница 824: ...Appendix I RADIUS Configuration Illustration 804 10 Select Standard to the left of the dialog and then click Add...
Страница 825: ...Appendix I RADIUS Configuration Illustration 805 11 Select Filter Id from the list of attributes and click Add...
Страница 828: ...Appendix I RADIUS Configuration Illustration 808 14 The new attribute is added Click OK...
Страница 829: ...Appendix I RADIUS Configuration Illustration 809 15 Click Next to continue...
Страница 860: ...Appendix J Additional PX3TS Information 840...
Страница 890: ...Appendix K Integration 870 3 Click OK...
Страница 900: ......


