background image

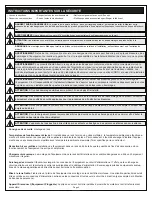
DANGER TENSION DANGEREUSE

: Le symbole de la pointe de flèche, dans un triangle équilatéral, est destiné à alerter l'utilisateur sur la 

présence de tension dangereuse non isolée dans l'enceinte du produit qui peut être d'une ampleur suffisante pour constituer un risque d'électrocu-

tion.

AVERTISSEMENT

Un avertissement vous avertit d'une situation pouvant entraîner des blessures graves ou la mort.

ATTENTION

: Une attention vous avertit d'une situation pouvant entraîner des blessures mineures ou des dommages au produit et/ou à la 

propriété.

REMARQUE

: Une remarque est utilisée pour mettre en évidence les procédures relatives à l'installation, au fonctionnement ou à l'entretien du 

produit.

INSTRUCTIONS IMPORTANTES SUR LA SÉCURITÉ 

• Lire ces instructions.
• Conservez ces instructions.

• Respectez tous les avertissements.
• Suivez toutes les instructions.

• Nettoyer uniquement avec un chiffon sec.
• N'utilisez que des accessoires spécifiés par le fabricant. 

AVERTISSEMENT

: Le dépassement des poids nominaux indiqués peut entraîner des blessures graves ou des dommages à 

l'équipement. C'est l'responsabilité de l'installateur/utilisateur de s'assurer que les composants installé ne dépassent pas les notes 

de poids comme un instable condition peut se produire qui peut causer des blessures ou dommages.

ATTENTION

: S'il ya des dommages visibles sur le produit, il ne doit pas être installé.

ATTENTION

: Des mesures de sécurité doivent être mises en œuvre en tout temps lors de l'assemblage de ce produit. Utiliser un 

équipement et des outils de sécurité appropriés pour la procédures de afin d'éviter les blessures.

ATTENTION

: Notez que pendant la construction, il ne doit pas y avoir de risque de blessure, comme par exemple le écraser des 

doigts ou des bras.

ATTENTION

: Pour le chargement, placez toujours des articles plus lourds au bas des baies, pas près du sommet, afin d'éviter la 

possibilité de basculement de l'ameublement.

ATTENTION

: L'appareil n'est pas destiné à être utilisé par des enfants en bas âge ou des personnes infirmes sans surveillance.

AVERTISSEMENT

: Refus de lire, comprendre et suivre la renseignements suivants peut traduire par de graves blessures, des 

dommages à l'équipement ou invalider la garantie. Il est la responsabilité de l'installateur/utilisateur de s'assurer que ce produit 

est chargé conformément aux spécifications.

Consignes de sécurité

: montage en rack

Température de fonctionnement élevée

: Si installé dans un rack fermé ou à unités multiples , la température ambiante de fonctionne-

ment de l'environnement du rack peut être supérieure à ambiante de la pièce. Par conséquent, il faudrait envisager d'installer l'équipe-

ment dans un environnement compatible avec la température ambiante maximale (Tma) spécifiée par le constructeur.

Réduction Air accréditives

: Installation de l'équipement dans un rack doit être telle que la quantité de flux d'air nécessaire au bon 

fonctionnement de l'équipement ne soit pas compromise.

Chargement mécanique

: Le montage de l'équipement dans le rack doit être telle qu'une condition dangereuse ne lié à un chargement 

mécanique irrégulier.

Surcharge des circuits

: Il faudrait envisager à la connexion de l'équipement au circuit d'alimentation et l' effet que la surcharge du 

circuit pourrait avoir sur la protection contre les surintensités et le câblage d'alimentation. Examen approprié des équipements évalua-

tions de la plaque signalétique doit être utilisée pour traiter de cette préoccupation.

Mise à la terre fiable

: Fiable mise à la terre de l'équipement de montage en rack doit être maintenue. Une attention particulière devrait 

être accordée aux connexions d'alimentation autres que les connexions directes vers le circuit de dérivation (par exemple de l'utilisation 

de bandes de puissance).

Appareil Disconnect (Équipement Pluggable)

: La prise de courant doit être installée à proximité du matériel et doit être facilement 

accessible.

AVERTISSEMENT

: Les produits Middle Atlantic, les systèmes électriques sont conformes et doivent être correctement mis à la 

terre conformément aux exigences du Code national de l'électricité en vigueur ou aux codes administrés par les autorités locales. 

Tous les produits électriques peuvent présenter un risque d'électrocution ou d'incendie s'ils sont mal installés ou utilisés. Les 

produits électriques peuvent porter la marque d'un laboratoire d'essais reconnu au niveau national (NRTL) et doivent être installés 

conformément au code électrique local et/ou national en vigueur.

Page 4

Содержание Middle Atlantic Forum

Страница 1: ...truction Sheet Thank you for purchasing a Forum collaboration suite Please read these instructions thoroughly before installing or assembling this product THANK YOU 100 00066 Rev B NOTE Free standing and floor to wall models shown ...

Страница 2: ...Using Top Small Device Storage and Bottom Rackmount Bays 13 14 Re Attaching the Front Panel to Your Display Stand 14 Selecting the Correct Interface Bracket Hardware for Your Display 14 15 Attaching Interface Brackets to the Back of Your Display 15 Attaching the Shroud and Mount to Your Display Stand 16 Hanging Your Display onto the Mount 17 Assembling Your Table if Purchased 17 19 Understanding C...

Страница 3: ... the bottom of the bays not near the top in order to help prevent the possibility of the furnishing tipping over CAUTION The appliance is not intended for use by young children or infirm persons without supervision Safety Instructions Rack Mount Elevated Operating Ambient If installed in a closed or multi unit rack assembly the operating ambient temperature of the rack environment may be greater t...

Страница 4: ...graves blessures des dommages à l équipement ou invalider la garantie Il est la responsabilité de l installateur utilisateur de s assurer que ce produit est chargé conformément aux spécifications Consignes de sécurité montage en rack Température de fonctionnement élevée Si installé dans un rack fermé ou à unités multiples la température ambiante de fonctionne ment de l environnement du rack peut ê...

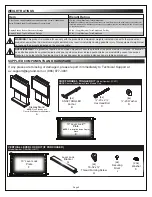
Страница 5: ...7 3901 10 Lever Lock Plate NOTE Pre Installed Inside Display Stand E Display Stand NOTE Free Standing and Floor to Wall models respectively A CHIEF GRADE 5 TOGGLER KIT Model Number FCAT1 NOTE Floor to Wall Display Stand Models Only 4x 20 x 2 Hex Head Bolt C 4x 20 Washer D 4x SNAPTOGGLE Anchor B Item Weight Rating Display Stand s Bottom Rackmount Storage Display Stand s Top Small Device Storage 50 ...

Страница 6: ... Screw R 3 Person Angle 5 Person Angle 3 Person Arc CHIEF FUSION FIXED DISPLAY MOUNT 4x M4 x 12mm Pan Head Screw I A 4x M4 x 20mm Pan Head Screw I A 4x M4 x 25mm Pan Head Screw I A 4x M5 x 12mm Pan Head Screw I A 4x M5 x 20mm Pan Head Screw I A 4x M5 x 25mm Pan Head Screw I A 4x M6 x 12mm Pan Head Screw I A 4x M6 x 20mm Pan Head Screw I A 4x M6 x 25mm Pan Head Screw I A 4x M8 x 20mm Pan Head Screw...

Страница 7: ...Number MDEA3 WH REQUIRED TOOLS WARNING Use tools with caution and follow all necessary safety protocols AVERTISSEMENT Utiliser des outils avec prudence et suivre tous les protocoles de sécurité nécessaires 2 Phillips Bit 2 Phillips Screwdriver Toothpick or Small Straw Adjustable Wrench Socket Awl Socket Protective Eyewear Socket Wrench 5 16 Socket Power Driver Drill Bit 7 16 Socket 3 32 Drill Bit ...

Страница 8: ... and additional reference covering the included Chief Fusion Fixed Display Mount and any optional Wiremold On Surface Primary MDSA10 WH Middle MDCA3 WH and End MDEA3 WH ModPower Units you may have purchased for your optional table s For more information refer to the following Forum product page at www legradav com https www legrandav com Products Technical_Furniture Collaboration Forum_Collaborati...

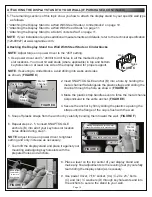
Страница 9: ...along top and bottom keyhole slot lines drawn during previous step as shown 4 Carefully team lift your display stand away from the wall WARNING This procedure requires at least one additional person AVERTISSEMENT Cette procédure nécessite au moins une personne supplémentaire WARNING The display stand must always bear its weight on its feet when wall mounted AVERTISSEMENT Le présentoir doit toujour...

Страница 10: ...essary 7 Team lift the display stand and place it against your mounting wall aligning keyhole slots with the prepared holes and anchors Plastic Cap Handles Metal Channel Making handles even forces metal channel perpendicular to entire anchor Slide plastic cap along straps FIGURE E 8 Place a level on the top center of your display stand and make any final adjustments to the leveling feet by careful...

Страница 11: ...TE When securing your display stand A to a solid concrete wall you must provide your own concrete anchors that support the weight ratings specified in Weight Ratings on page 5 Secure your display stand A to a solid concrete wall by using a procedure similar to Securing the Display Stand to a Wall With Steel Studs or Cinderblocks on page 10 INSTALLING AND CONFIGURING THE 10 LEVER LOCK PLATE NOTE On...

Страница 12: ...kets each kit sold separately installed in the lower sides of the display stand for clarity 3 Insert securing rivets J on the tab beneath the clip of the 10 plate to lock it in place NOTE Use 20x washers K for equipment mounting convenience 2 Attach the 10 Lever Lock plate F by inserting the side with the 2 tabs and no securing clip first Insert the tabs into the corresponding openings on the brac...

Страница 13: ...Bare frame of display stand shown for clarity 1 Load equipment into the top small device storage columns using Installing and Configuring the 10 Lever Lock Plate on page 11 and Installing the Lever Lock Kit If Purchased on page 12 as needed FIGURE K 2 Run cabling using knockouts between the top small device storage columns and the bottom rackmount bays as necessary FLOOR TO WALL DISPLAY STANDS ONL...

Страница 14: ...t any point during the overall installation and configuration process In addition to front door access to the bottom rackmount bays you can also access both the top small device storage and bottom rackmount bays from the back by carefully tugging at the magnetic sides of the back panel and opening back bay latch panels respectively FIGURE M The useable equipment depth of the bottom rackmount bays ...

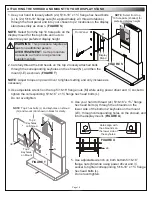
Страница 15: ...and other audio products available from Legrand or other providers before your display mount and display Before proceeding refer to the instructions provided with your accessory for the proper installation order 1 Carefully place your display facedown onto an appropriate work surface NOTE Center the interface brackets I B on your display so they do not extend past the top or bottom 2 Determine the...

Страница 16: ...nding holes on the shroud and into the display mount FIGURE U 1 Use your hand to loosely attach 2x 5 16 18 x 1 flange hex head bolts L to 2x 5 16 18 flange nuts M approximately 2 3 thread rotations through the front panel and into your chosen top 2 locations on the display stand assembly as shown FIGURE S NOTE Select from the top 10 hole pairs on the display mount for the top bolts and nuts to det...

Страница 17: ...u moins une personne supplémentaire WARNING Do not release your display until certain the top hook of each interface bracket is securely seated on the upper pole of the mount AVERTISSEMENT Ne relâchez pas votre écran tant que le crochet supérieur de chaque support d interface n est pas solidement fixé sur le pôle supérieur du support NOTE Tables models include 3 and 5 person angle tables and a cur...

Страница 18: ...RE X NOTE Adjust torque on power driver to lightest setting and only increase as necessary 3 Use power driver and Phillips bit to partially attach 2x 10 32 x thread forming screws R to the top inside of both table leg assemblies N approximately from the surface 4 With someone else holding one of the leg assemblies N carefully pick up the trough S and hook the keyholes over the 10 32 x thread formi...

Страница 19: ...of trough On 5 person angle tables there are 4x screw locations on front and back of trough FIGURE AB Screw Locations on 3 and 5 Person Angle Tables 18x and 20x Total Respectively V V 11 Use power driver Phillips bit and 12x 6x per panel 8 x 5 16 pan head sheet metal screws W through holes from the inside of the trough to attach your modesty panel pair X to corresponding sides of your table FIGURE...

Страница 20: ...nécessite au moins une personne supplémentaire NOTE Underside of arc table tops V shown without leg assemblies and troughs for clarity Table Locks FIGURE AE Front of Table Back of Table Back View of Table To appropriately rated receptacles To devices on your table To devices on your table To devices on your table FIGURE AD To appropriately rated receptacles V V 1 Carefully team lift each of your a...

Страница 21: ...ation may differ You may have purchased any number of optional Wiremold On Surface ModPower System Primary Middle or End units to provide power to your optional table s NOTE If purchased a primary ModPower unit is required to run any additional middle and end units A single primary unit may run power to an additional 7 units for a maximum of 8 total 3 Connect your unit s as specified in the On Sur...

Страница 22: ...9 5009 ca middleatlantic com av canada customerservice legrand com Middle Atlantic EMEA Technical Support P 31 495 726 003 av emea middleatlantic support legrand com Factory Distribution United States New Jersey California and Illinois Canada Ontario The Netherlands Weert At Legrand AV Inc we are always listening Your comments are welcome Legrand AV is an ISO 9001 and ISO 14001 Registered Company ...

Отзывы: