

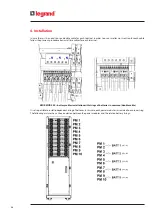


68
DANGER
All the configurations and start-up operations must be carried out exclusively by a SKILLED TECHNICIAN (para-
graph 2.2.1).
5.1
Pre-start-up checks
Before powering the equipment, carry out the following checks:
1. Close all the distribution panels on the UPS cabinet.
2. Check that the external mains input disconnector is open (OFF position).
3. Check that the external bypass input disconnector (if present) is open (OFF position).
4. Check that the external output disconnector is open (OFF position).
5. Check that the battery disconnectors of the external battery cabinets (if present) are open.
6. Check that the maintenance bypass disconnector and the output disconnectors of the UPS are open (OFF position).
7. Check that the input and output wiring has been done and that all the connections have been tightened up properly.
8. Check the correct phase sequence of the input and bypass line (if separate).
9. Check that the parameters (voltage and frequency) of the mains input are compatible with those shown on the UPS
rating plate.
10. Check that all the power modules are inserted properly and that the fixing screws are screwed up to abut the relative
slots (use hex socket M6x16 screws along with M6 toothed washers).
11. Check that all the battery drawers (if present) are inserted properly and that the fixing screws are screwed up to abut
the relative slots (use hex socket M6x16 screws along with M6 toothed washers).
12. Check the presence of the EPO terminal according to the setting (see paragraph 4.5.1)
5.2
Start-up procedure
1. Insert the battery fuses into the appropriate fuse breakers of the external battery cabinets (if present).
2. Press for at least 5 seconds the COLD START button of the SSS interface. The display turns on and the UPS boot starts.
3. The UPS boot ends when the LEDs on the power modules turn to steady blue. Tap on the Setting icon of the menu bar
at the bottom of the display
4. Choose the desired language in the tab “General” by tapping on the pencil icon on the item “Language”.
5. Set the correct day/time in the tab “General” by tapping on the pencil icon on the item “Date and Time”.
5. Configuration and start-up
Содержание Keor MOD 100
Страница 1: ...Part LE11406AB 04 19 01 GF Keor MOD Installation and maintenance manual ...
Страница 2: ...2 EN ENGLISH 3 Keor MOD ...
Страница 20: ...20 4 Installation 3 4 5 ...
Страница 22: ...22 4 Installation 9 10 ...
Страница 24: ...24 4 Installation KEOR MOD 250 earthing bars ...
Страница 79: ...Keor MOD Installation and maintenance manual 79 6 3 3 Removal of the SSS drawer 1 2 3 4 ...
Страница 87: ...Keor MOD Installation and maintenance manual 87 ...
Страница 88: ...88 9 Mechanical characteristics ...
Страница 89: ...Keor MOD Installation and maintenance manual 89 ...
Страница 90: ...90 9 Mechanical characteristics ...
Страница 91: ...Keor MOD Installation and maintenance manual 91 9 2 Power module PM25 all the dimensions are in mm ...
Страница 92: ...92 9 Mechanical characteristics 9 3 Battery drawer all the dimensions are in mm ...
Страница 93: ...Keor MOD Installation and maintenance manual 93 9 4 Battery block all the dimensions are in mm ...