


33
2.5 mm
2.5 mm
2.5 mm
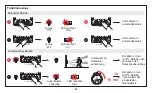
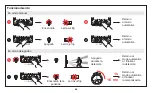
ON
OFF
AUTO
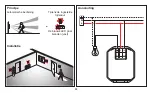
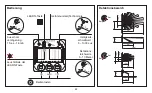
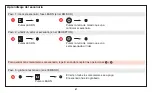
Bedienung
Detektionsbereich
Ausschalt-
verzögerung :
1
S
ek.- 16 min
Helligkeits-
schwellwert :
3 - 1000 Lux
Detektions-
reichweite :
3- 10 Meter
Leuchtdiode der
LEARN-Taste
Bedientasten
Gerätenummer(Technologie
LEARN-Taste
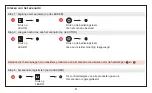
10 m
4 m
1.5 m
5 m
5 m
10 m
3 m
1.5 m
1.3 m
0.5 m
3 m
1.5 m
1.2 m
1.2 m
3 m
10 m
3 m
10 m


