background image

9

R

Function Instruction - 3

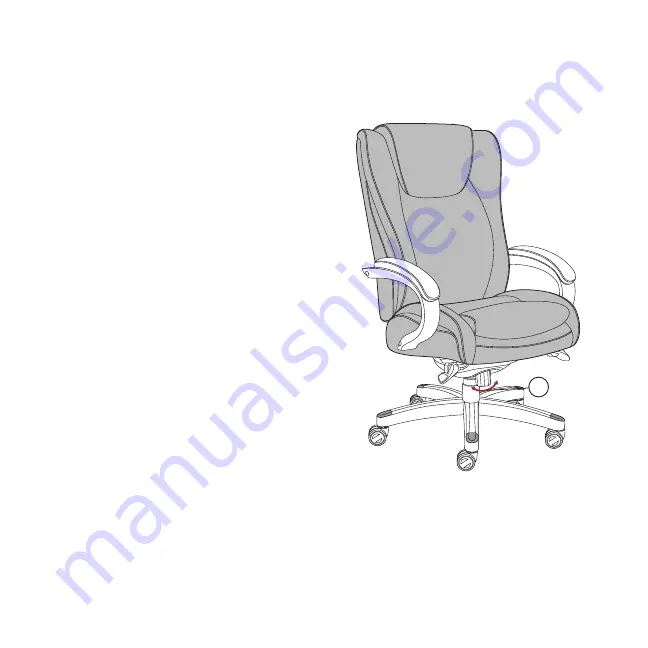
To Adjust Tension On The Tilt : 

Reach under the front center of the chair, grasp the round knob 
(R) and turn it counter- clockwise to stiffen the tilt mechanism 
for a heavier user. Turn the knob (R) clockwise to loosen the tilt 
mechanism for a lighter user. Rotate the knob (R) until the 
desired resistance is reached.    

Instrucciones de Funcionamiento - 3

Para ajustar la tensión del mecanismo de inclinación : 

Busque bajo el centro frontal de la silla, tome la perilla redonda 

(R) y gírela en sentido contrario a las manillas del reloj para 

apretar el mecanismo de inclinación para usuarios pesados. 

Gire la perilla (R) en el sentido de las manecillas del reloj para 

aflojar el mecanismo de inclinación para usuarios más livianos. 

Gire la perilla (R) hacia la derecha hasta que sienta la 

resistencia deseada.
    

Содержание 44946

Страница 1: ...t way Dise ado para que sea c modo y fabricado para que siga si ndolo Big and Tall Executive Chair Silla ejecutiva de durabilidad 400 lbs Soporte m ximo de la silla 181 kg 400 lbs Assembly Instruction...

Страница 2: ...identif quelas usando la lista de partes antes de empezar el ensamblaje Ponga la sill n sobre una superficie protegida para evitar rayar los componentes al ensamblarlo Nota Las ruedas que vienen con e...

Страница 3: ...rn the Star Base B over and insert the Gas Lift with Telescoping Cover C through the center hole on top of Star Base B Paso 2 Voltee la base en forma de estrella B e inserte el elevador neum tico con...

Страница 4: ...y los tornillos de 25mm I en los hoyos posteriores del mecanismo del asiento D y ajuste los tornillos Nota Ajuste los tornillos completamente Step 4 Insert Levers D1 D2 of Seat Plate D to the pre att...

Страница 5: ...pletamente Step 6 Insert 2 1 2 Screws L into arm holes attaching Arms E1 E2 with the front of arms facing the front of seat cushion to sides of Seat Cushion F and Back Cushion G Note Tighten all the s...

Страница 6: ...al de la mecanismo del asiento D Step 7 Put the Plastic Shroud H over the Seat Plate D with the front of plastic shroud facing the front of seat cushion Align shroud posts to holes on bottom of Seat C...

Страница 7: ...7 M M Step 9 Press the Plastic Caps M into armrest holes once all screws have been tightened Paso 9 Ponga las tapas pl sticas M en los hoyos de los brazos una vez que haya ajustado los tornillos...

Страница 8: ...l n suba a la altura deseada Cuando haya alcanzado la altura deseada suelte el mango para bloquear la silla en la altura deseada Para bajar el asiento levante la manija mientras ejerce peso sobre el a...

Страница 9: ...ired resistance is reached Instrucciones de Funcionamiento 3 Para ajustar la tensi n del mecanismo de inclinaci n Busque bajo el centro frontal de la silla tome la perilla redonda R y g rela en sentid...

Страница 10: ...r shipping storage accident fire flood or acts of God In the event of a defect in material or workmanship covered by this warranty True Innovations will repair or replace at their discretion without c...

Страница 11: ...aje accidente fuego inundaci n o actos de Dios En el caso de un defecto de material o mano de obra cubierto por esta garant a True Innovations le reparar o reemplaaz el mueble garantizado a su discrec...

Страница 12: ...LA Z BOY is a trademark of La Z Boy Incorporated and is used under license to LF Products Pte Ltd LA Z BOY es una marca de La Z Boy Incorporated y es usada con licencia de LF Products Pte Ltd...

Отзывы: