Walker Edison AF18NAOST, Руководство по сборке
Walker Edison AF18NAOST - прочная и стильная стойка для ТВ, идеальное решение для вашего дома. Сборку легко выполнить, следуя руководству по сборке, которое можно загрузить бесплатно с нашего сайта. Наслаждайтесь своим новым телевизором без лишних хлопот. manualshive.com.
Поделиться
Скачать


Отзывы:
Нет отзывов
Похожие инструкции для AF18NAOST

SIESTA
Бренд: OAK Страницы: 2

Clinician Premiere Series
Бренд: OAKWORKS Страницы: 28

Clinician Premiere
Бренд: OAKWORKS Страницы: 24

OPTIMA Outdoor Utility Cabinet
Бренд: Keter Страницы: 11

Cora Rose SFV5705A-K
Бренд: SAFAVIEH COUTURE Страницы: 4

Lacy Mid Sleeper
Бренд: Happy Beds Страницы: 54
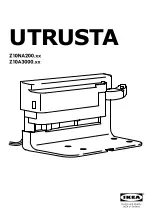
UTRUSTA Z10NA200 Series
Бренд: IKEA Страницы: 8

Vermont 03VER0808-V1
Бренд: Mercia Garden Products Страницы: 8

Edward Bed Frame Base
Бренд: BROSA Страницы: 8

CF 920027
Бренд: TAD Страницы: 8

North Avenue 420035
Бренд: Sauder Страницы: 28

Panchito RecBK-2F-OTMBK
Бренд: Möbelix Страницы: 4

QCT1675
Бренд: RSA Lighting Страницы: 1

CM7059
Бренд: Furniture of America Страницы: 7

20 05530 0553
Бренд: Kitchensource Страницы: 9

GT-11372-SSS
Бренд: HAMPTON BAY Страницы: 6

WP2484
Бренд: J&K Страницы: 9

Valencia CM-AC209
Бренд: Furniture of America Страницы: 7


