background image

31

Water drainage

The maximum permitted difference between the height of the surface 
on which the appliance is installed and the water outlet is 1 metre.
Only original hoses may be used to extend hoses. (A maximum of 3 m 
laid on the floor and then 80 cm vertically). The Customer Care Depart-
ment stocks outlet hoses of different lengths.

Draining water into a sink outlet

Secure the outlet/sink outlet joint 
with a hose band clip (available from 
your dealer). 

Draining water into a wash basin/bath

1

Important!


Small basins are not suitable. Wa-
ter may overflow. 

The end of the drain hose must 
not be in the water that has been 
pumped out. Otherwise water 
could be sucked back into the ap-
pliance.

When draining into a wash basin 
or a bath, secure the drain hose 
with the supplied elbow to stop it 
slipping. Otherwise the water run-
ning out can force the hose out of 
the basin. 

When pumping the water out, 
check that the water is running 
away fast enough.

Pumping heights over 1 m

The washing machine’s drain pump is able to pump water to a height of 
1meter, calculated from the surface on which the appliance is installed. 

Warning! 

If pumping height is over 1 metre, malfunctions and damage 

to the appliance may arise.
For pumping heights over 1metre a conversion kit can be obtained. 
Please contact the Customer Care Department.

Содержание 52810

Страница 1: ...LAVAMAT 52810 Washing machine User information ...

Страница 2: ... Pass this User Information on to any subsequent owner of the appli ance The following symbols are used in the text 1 Safety instructions Warning Notes that concern your personal safety Attention Notes that show how to avoid damage to the appliance 3 Useful tips and hints 2 Environmental information ...

Страница 3: ...d selecting rinse hold 12 Selecting the programme options 13 PRE WASH 13 TIME SAVER 13 Switching RINSE on and off 13 Setting the delay timer 14 Starting a programme 14 Interrupting a programme adding washing 15 Washing cycle complete removing the washing 15 Child safety device 16 Cleaning and maintenance 17 What to do if 18 Remedying small malfunctions 18 If the wash results are not satisfactory 2...

Страница 4: ...tion 25 Installing the appliance 26 Transporting the appliance 26 Removing the transit packaging 26 Where to install 28 Making the appliance level 29 Electrical connection 29 Connecting to the water supply 29 Water inflow 30 Water drainage 31 Guarantee Customer Service 32 Service 35 ...

Страница 5: ... and additives that are suitable for use in domes tic washing machines The washing must not contain any inflammable solutions Danger of explosion Do not use the washing machine for dry cleaning Dyes colour removers may only be used in the washing machine if the manufacturer of these products expressly permits this We cannot be held responsible for any damage arising Child safety Keep packaging awa...

Страница 6: ...s stopped disconnect the appliance from the mains sup ply and shut off the water tap Never unplug the appliance by pulling on the cable Always pull the plug Multi way plugs connectors and extension cables must not be used This could constitute a fire hazard through overheating Never wash the washing machine down with a water jet Danger of electric shock In washing programmes with high temperatures...

Страница 7: ...nt dispenser drawer Screw feet height adjustable Plinth flap Drain pump Rating plate behind door Control panel DELAY TIMER button SPIN RINSE HOLD button Programme Progress display Programme knob START PAUSE button DOOR indicator Programme option buttons ...

Страница 8: ...2 Programme settings for tests in accordance with or in support of EN 60 456 and IEC 60 456 are de scribed in the section Consumption values 6kg COTTONS LINEN 95 60 40 30 6kg 3 3 Recommended load for short progammes is 3kg full loading is possible however with somewhat reduced cleaning results EASY CARES 60 40 3kg EASY IRON 40 1kg DELICATES 40 30 3kg WOOL SILK H Hand washing 30 COLD 2kg RINSE 3kg ...

Страница 9: ...le programme for delicate fabrics such as bonded fibres micro fibres synthetics net curtains load max 20 to 25 m2 net curtains With RINSE HOLD also suitable for materials that have climatic membranes e g outdoor clothing I K Specially gentle programme for machine and hand washable wool silk Q L H Separate gentle rinse 3 rinse cycles liquid conditioner is washed in from the compartment spin Not sui...

Страница 10: ...60 press TIME SAVER add 1 4 of a measuring cup of washing powder Running a washing cycle Opening the door loading washing 1 To open the door pull the door by the handle When the machine is switched on the DOOR light and the START PAUSE light indicate whether the door can be opened 2 Unfold washing and load it loosely into the machine Mix large and small items Important Do not get any washing caugh...

Страница 11: ...turers Follow the advice on the packag ing Dosing depends upon the washing s degree of soiling the size of the load the degree of hardness of the water supply If the manufacturer does not give instructions for small loads for a half load use a third less for a very small load use only half of the detergent that is recommended for a full load From water hardness 2 medium upwards water softener shou...

Страница 12: ... containers provided by the de tergent manufacturer Switching on the appliance selecting a programme Set the programme and tempera ture using the programme knob 3 By selecting a programme you switch the appliance on at the same time The programme progress display indicates the programme steps that the selected programme will perform Changing spin speed selecting rinse hold The washing machine sugg...

Страница 13: ...CATES programme TIME SAVER Short wash cycle for lightly soiled washing Switching RINSE on and off When RINSE is switched on there are two additional rinses in the COTTONS LINEN EASY CARES EASY IRON DELICATES and GENTLE RINSE programmes RINSE remains permanently saved even after the appliance is switched off To switch on RINSE 1 Turn the programme knob to COTTONS LINEN EASY CARES EASY IRON or DELIC...

Страница 14: ...he display 3h lights up 3 If you press the DELAY TIMER button again the time delay is cancelled The display goes out 3 To activate the time delay press the START PAUSE button Note If a time delay of 6 hours is selected the display 6h is lit After 3 hours the display changes and 3h is lit After a total of 6 hours the wash programme then starts Starting a programme 1 Check that the water tap is open...

Страница 15: ...mme END lights up on the programme progress display The door can be opened as soon as the DOOR light goes off and the END light has come on 1 Open the door and remove the washing 2 Turn the programme knob to OFF 3 Close the water tap 4 After the wash pull out the detergent dispenser drawer slightly to al low it to dry Leave the door slightly open to air the inside of the wash ing machine If RINSE ...

Страница 16: ...in to turn the knob on the inside of the door in a clockwise di rection as far as it will go 1 Warning The knob must not be sunk in after being set otherwise the child safety device is not active The knob must stand proud as shown in the illustration Releasing the child safety device Turn the knob anti clockwise as far as it will go ...

Страница 17: ... 4 Put the conditioner insert in as far as it will go so that it is firmly in place 5 Clean all parts of the washing ma chine especially the nozzles in the top of the washing in chamber with a brush 6 Insert the detergent dispenser draw er in the guide rails and push it in Washing drum Rust deposits in the drum may occur due to rusting foreign bodies in the washing or tap water containing iron Imp...

Страница 18: ...TART PAUSE button If there are other fault codes one or more flashing lights on the pro gramme progress display Switch the appliance off and on again Re set the programme Press the START PAUSE button If the fault is displayed again please contact the Customer Care De partment Problem Possible cause Remedy Washing machine does not work Mains plug not plugged in or fuse not working Plug in mains plu...

Страница 19: ...let hose Drain hose is leaking Replace drain hose Drain pump cover is not closed properly Close cover properly Washing was caught in the door Load washing carefully for the next wash Emergency drain hose is leaking Close off emergency drain hose properly Washing water is foam ing excessively Probably too much deter gent has been used Dose detergent exactly as in structed by manufacturer END displa...

Страница 20: ...in the last rinse cycle The washing is however sufficiently rinsed There are white residues on the washing This is due to the insoluble ingredients in modern detergents They are not caused by insufficient rinsing Shake or brush the washing If possible turn the washing inside out before washing Check your choice of detergent Especially with dark colours it is advisable to use liquid detergents Door...

Страница 21: ... out the emergency drain hose 3 Place a shallow container under neath it Then loosen the drain plug by turning it in an anti clockwise direction and pull it out 4 The water runs out If it is necessary to empty the container more than once seal up the emergency drain hose with the drain plug while you are doing so When the water has all drained away 5 Push the drain plug firmly into the emergency d...

Страница 22: ...ve the mains plug from the socket 1 First carry out an emergency drain 2 Place a cloth on the floor in front of the drain pump cover Residual water runs out 3 Unscrew the pump cover in an anti clockwise direction and remove it 4 Remove foreign bodies and fluff from the pump housing and from the pump wheel 5 Check whether the pump wheel right at the back of the pump hous ing can turn It is normal f...

Страница 23: ...e recycling of elec trical and electronic equipment By ensuring this product is disposed of correctly you will help prevent potential negative consequences for the environment and human health which could otherwise be caused by inappropriate waste handling of this product For more detailed infor mation about recycling of this product please contact your local city office your household waste dispo...

Страница 24: ...in speed see Rating Plate Water pressure 1 10bar 10 100N cm2 0 1 1 0MPa Programme knob Temperature Load in kg1 1 The load is determined in accordance with EN 60456 Standard Loads Water in litres Energy in kWh Time in minutes COTTONS LINEN 95 6 62 2 20 146 ENERGY SAVING 2 2 Note Programme setting for tests in accordance with or supporting EN 60 456 and IEC 60 456 Actual consumption will vary from t...

Страница 25: ...ing Always plug the mains plug into a correctly installed shockproof socket Permanent connection a permanent connection must only be in stalled by a trained electrician Prior to using the appliance for the first time ensure that the rated voltage and type of supply on the rating plate match that of the sup ply where the appliance is to be installed The fuse rating is also to be found on the rating...

Страница 26: ...s transit packaging can lead to damage to the appliance Never lift the appliance by the door when it is open nor by the plinth When moving using a sack trolley Only use the sack trolley on the side of the appliance Removing the transit packaging Important Before using the appli ance for the first time all parts of the transit packaging must be re moved Keep the transit packaging in a safe place in...

Страница 27: ... cap C upside down as shown in the illustration 6 Seal hole using sealing cap C 7 Unscrew and remove two screws E using special spanner A 8 Unscrew and remove four screws F using special spanner A 9 Remove transit bar G 10 Screw in the four screws F again 11 Seal the two big holes using sealing caps B Important Press all sealing caps B 2 off and C 1 off in firmly so that they snap into place Splas...

Страница 28: ...hich the appliance is to be installed is fitted with small format tiles put a rubber mat available in the shops under the appliance If the appliance is to stand on a plinth In order for the appliance to be se cure on the plinth fixing plates must be mounted into which the appliance is inserted If the appliance is to stand on floors that vibrate e g floors of wooden joists with deal boards If possi...

Страница 29: ... water supply Important This appliance must not be connected to the hot water system When connecting it use only new hose kits Only connect the appliance to the drinking water supply Rain water or water for industrial use may only be used if it fulfils the require ments of DIN1986 and DIN1988 Do not kink or crush the water inlet hose or drain hose Permitted water pressure The water pressure must b...

Страница 30: ... gle connector to the machine Important Do not position the inlet hose vertically downwards Position it to the right or the left as shown in the illustration 2 Connect the hose with the straight connector to a water tap with an R inch screw thread 3 To tighten or loosen the threaded hose fitting only the metal nuts must be turned When doing this keep a firm hold on the housing of the safety valve ...

Страница 31: ...The end of the drain hose must not be in the water that has been pumped out Otherwise water could be sucked back into the ap pliance When draining into a wash basin or a bath secure the drain hose with the supplied elbow to stop it slipping Otherwise the water run ning out can force the hose out of the basin When pumping the water out check that the water is running away fast enough Pumping height...

Страница 32: ...ni possono essere esaminante sul luogo Serviços de assistência técnica no estrangeiro Nestes países são válidas as condições de garantia dos concessionários locais podendo aí ser consultadas További vevöszolgálati irodák külföldön Ezekben az országokban a mi AEG Electrolux vevöszolgálatainknál saját jótállási feltételek alkalmazhatók A további adatokat kérjük közvetlenül szerezzék be Servisne služ...

Страница 33: ...226 Limassol 05 562182 Larnaca 04 633929 Paphos 06 932 699 Lebanon Adib Assaferi P O Box 539 Tripoli Iran ARIAN International Develop ment Co AEG Showroom Shariati Balatar as Safar Teheran Iran Phone No Showroom 021 285 513 4 Phone No Service 021 312 27 67 8 Estonia Electrolux Estonia Ltd Mustamäe tee 24 EE0006 Tallinn Tel 372 6 650 090 Fax 372 6 650 092 Latvia Electrolux Latvija Ltd Kr Barona iel...

Страница 34: ...x 61 1234 238 Thailand Olympia Thai Tower 444 Rachadapiser Road Samsennok Huaykwang 10320 Bangkok Thailand Tel 006625136111 Fax 006625136334 Slovakia Rep Electrolux Slovakia S R O Seberiniho 1 821 03 Bratislava Tel 02 4333 4322 4355 Fax 02 4333 6976 South Africa AEG Pty Ltd 55 12th Road P O Box 1 02 64 Kew Johannesburg 2000 Tel 8069111 Hungary Electrolux Lehel KFT Erzsébet Királyné útja 87 1142 Bu...

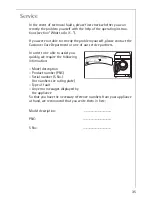
Страница 35: ...ontact the Customer Care Department or one of our service partners In order to be able to assist you quickly we require the following information Model description Product number PNC Serial number S No for numbers see rating plate Type of fault Any error messages displayed by the appliance So that you have the necessary reference numbers from your appliance at hand we recommend that you write them...

Страница 36: ... million Electrolux Group products such as refrigerators cookers washing machines vacuum cleaners chain saws and lawn mowers are sold each year to a value of approx USD 14 billion in more than 150 countries around the world AEG Hausgeräte GmbH Postfach 1036 D 90327 Nürnberg http www aeg electrolux de Copyright by AEG 105 177 034 01 241105 01 Subject to change without notice ...

Отзывы: