background image

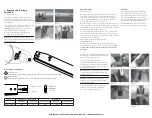
5. Jib

1.

 Ensure furling drum line is completely 

wound onto the furling drum before you attach 

the jib.

2.

 Th

  e furling line/cleat can be found on the 

starboard side of the foredeck. (fi gure 25)

3.

 Unroll the jib and attach the jib tack to the 

furling drum using the large shackle provided. 

(Tape up the shackle and pin to prevent snag-

ging or damage to the sails and line during 

sailing). (fi gure 26)

4.

 Clip the jib halyard swivel assembly on to 

the forestay and fasten the head of the jib to 

the swivel using the clevis pin and split ring.

(Tape up the shackle and pin to prevent snag-

ging or damage to the sails and line during 

sailing). (fi gure 27)

5.

 Hoist jib by pulling the white halyard out 

of the aft face of the mast, then hook the jib 

halyard purchase system onto jib halyard wire. 

(Ensure hook is facing aft to prevent 

engaging in the mast track groove). (fi gure 28) 

6.

 Tension the jib halyard purchase system 

until the jib luff  wire is taught. (fi gure 29)

7.

 Cleat and tidy away both rope ends in the 

halyard pocket positioned on the aft face of the 

general storage bag (underside of the mast but-

tress - port side) .

Note:

 If a loose gauge is used to measure the rig tension 

do NOT exceed 24 units or 150 kg - measured on the shroud 

0.75 meters above the vernier adjuster.

8.

 Find the centre of the jib sheet and pass it 

through the clew of the jib, then pull the two 

trailing ends of the sheet through the loop you 

have created to lock them in place as shown.

(fi gure 30)

9.

 Pass one jib sheet through either side of the 

mast before threading them through their 

respective port and starboard jib fairlead/

cleats. (fi gure 31)

Tip:

 Best practice is to tie the sheet ends together in the  

middle of the boat to prevent tangling and prevent sheets 

from falling overboard. 

(fi gure 32a & 32b)

10.

 Furl the jib by pulling the furling line. 

Th

  e furling line/cleat can be found on the 

starboard side of the foredeck just in front 

of the jib sheet track/cleat.

fi gure 25

fi gure 30

fi gure 32a

fi gure 32b

fi gure 31

fi gure 26

fi gure 28

fi gure 29

fi gure 27

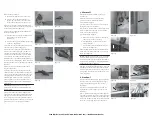
6. Gennaker

1.

 Clip the gennacker pole “fl yaway” system on 

to the front of the mast as shown. (Over time 

the elastic may stretch and require tighten-

ing). (fi gure 33)

2.

 Ensure the end of the gennaker halyard 

taken from the base of the mast is free of 

knots and tangles.

3.

 Take the gennaker halyard from the base of 

the mast and pass forward, under the genna-

ker sock and round the gennaker pole outhaul 

block. (Th

  e gennaker pole outhaul block is 

attached to the rope led from the pole as 

shown). (fi gure 34)

4.

 Th

  read the halyard aft, under the mast 

buttress and through the gennaker halyard 

cleat at the front of the centerboard case on 

the starboard side. (fi gure 35)

5.

 Th

  read the halyard through both the block 

and the eyelet at the aft end of the gennaker 

sock. (fi gure 36)

6.

 Tie the end of the halyard to something such 

as a batten or tiller extension and carefully 

pass the end of the halyard up the sock until 

you can grasp it from the front end of the gen-

naker sock opening. (fi gure 37)

7.

 Th

  is is known as the downhaul end of the 

gennaker halyard and should be temporarily 

tied around the jib tack bar while the batten/

extension is removed from the gennaker sock. 

(fi gure 38)

Note:

 Th

  e uphaul end of the gennaker halyard is 

already tied around the jib tack bar from a previous 

rigging exercise.

fi gure 33

fi gure 35

fi gure 37

fi gure 38

fi gure 36

fi gure 34

Fogh Marine | 416 251-0384 | www.foghmarine.com | [email protected]

Содержание Stratos Keel

Страница 1: ...the Mast 4 Boom and Gnav 5 Jib 6 Gennaker 7 Mainsail 8 Outhaul 9 Cunningham 10 Single Line Reefing 11 Rudder 12 Launching 13 Using Your Stratos Keel 14 Fitting the Stratos Engine Braket 15 Maintenance and Service STRATOS KEEL Fogh Marine 416 251 0384 www foghmarine com info foghmarine com ...

Страница 2: ...numbers in a dry clean and wind free environment 1 Lay the sail on a flat surface starboard side up 2 Numbers on the starboard side of a sail are always higher than those on the port 3 Mark a parallel line 76 mm above the third batten down from the head of the sail 4 Mark a point on the line 100mm in from the leach 5 The first number in the sequence should be positioned on the parallel line you have...

Страница 3: ...bar figure 7a figure 8 figure 7b figure 9 figure 10 figure 11 figure 5 figure6b figure 4 figure 6a 2 5 3 0 forward position rotate as necessary see table aft position Spreader End Cap The spreader end cap incorporates two shroud wire slots to give a tight grip on either 2 5 or 3 mm wire The sizes are identified on the front face of the end cap See diagram on page 4 To find which wire slot you require for your...

Страница 4: ...the 4th hole down on the vernier adjuster figure 12 12 Attach the forestay and elastic on to the deck fairlead on the port bow deck as shown figure 13 13 Temporarily fasten the jib halyard to the forestay genaker halyard to the jib tack bar and main halyard to the port shroud anchor point This simply ensures these elements do not inpinge upon other activities and are in the best positions for ease o...

Страница 5: ...1 Tip Best practice is to tie the sheet ends together in the middle of the boat to prevent tangling and prevent sheets from falling overboard figure 32a 32b 10 Furl the jib by pulling the furling line The furling line cleat can be found on the starboard side of the foredeck just in front of the jib sheet track cleat figure 25 figure 30 figure 32a figure 32b figure 31 figure 26 figure 28 figure 29 figure 27 ...

Страница 6: ...s and be positioned at the front of the boat to ensure the gennaker does not get snagged anywhere figure 44 7 Mainsail 1 Remove the mainsail from its the bag and unroll 2 Ensure all battens are tight in their pockets and the locking mechanisms are positively engaged 3 Position the boat so it is head to wind bow facing directly in to the wind 4 Place the mainsail in the cockpit of the hull with the ...

Страница 7: ... and rudder fully 7 Cleat the rudder downhaul in the cleat on the tiller and ensure that the wing nut on the side of the rudderstock is tight figure 58 THE RUDDER AND CENTERBOARD SHOULD BE IN THE FULLY DOWN POSITION AT ALL TIMES WHEN SAILING AN ASYMMETRIC BOAT LIKE THE STRATOS KEEL figure 53 figure 52 figure 55 figure 56 figure 57 figure 58 figure 54 10 Single Line Reefing 1 Rig the single line reefing see ...

Страница 8: ...f the keel and cleat in position In the unlikely event of capsize this will prevent the keel from falling back into the boat figure 62 5 The hoisting frame can now be lowered forward onto the cockpit floor figure 62 Note The sails are rigged and hoisted as per the standard Stratos Keel rigging instructions figure 60 figure 62 figure 59 figure 61 D Hoisting the Stratos keel 1 Anticipate arriving in shallo...

Страница 9: ...d be pushed fully towards the mainsail to stop the boat sailing until all crew have reboarded 9 Reboarding can be undertaken over the windward side of the boat using the righting line as a step or over the transom A grab rail is positioned on the inner face of the sub deck to assist with pulling yourself back in to the boat 10 If the person in charge of the boat or the crew are inexperienced in ca...

Страница 10: ...ide strap must have the ability to drain water away from the hull Trolley bunks padded with carpet or foam can cause blistering in the gel coat and changes to the hull color Please do not transport your LaserPerformance product on a trailer or trolley that has not been specifically designed for the product Hulls damaged through using an incorrectly designed or wrongly set up trailer or trolley are ...

Страница 11: ... 2818 f 852 2587 7868 LaserPerformance AUSTRALIA t 61 0 3 9016 4151 LaserPerformance MIDDLE EAST T5 Middle East LLC Dubai Investment Park PO Box 38442 Dubai UAE t 971 4 885 7601 LASERPERFORMANCE COM All rights reserved 2010 LaserPerformance LaserPerformance and associated logos are trademarks Laser SB3 Sunfish and Dart are trademarks used under license LaserPerformance reserves the right to make de...

Отзывы: