background image

4.

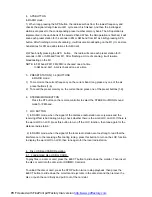
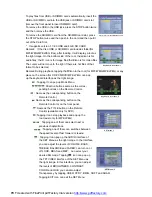
Press the > button to enter the setup item. Then press the v or ^ button to select a

desired mode of the setup item, finally press the OK button to confirm it.

*

Press the < button to return to the previous level.

*

Press the SETUP button again or use the direction buttons to highlight EXIT SETUP

and then press the OK button to exit the Setup Menu.

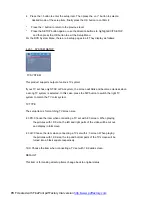
For the DVD System Menu, there are 6 setup pages in all. They display as follows:

4.23.1

SYSTEM SETUP

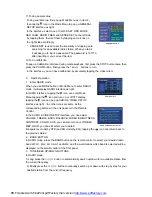
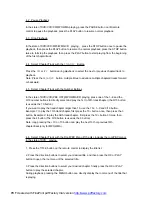
TV SYSTEM

This product supports output of various TV system.

If your TV set has only NTSC or PAL system, the screen will blink and become colorless when

a wrong TV system is selected. In this case, press the N/P button to switch the right TV

system to match the TV color system.

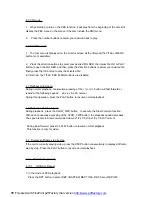
TV TYPE

The setup item is for matching TV screen size.

4:3 PS: Choose the item when connecting a TV set with 4:3 screen. When playing

the pictures with 16:9 size, the left and right parts of the video will be cut out,

and display in full screen.

4:3 LB: Choose the item when connecting a TV set with 4:3 screen. When playing

the pictures with 16:9 size, the top and bottom parts of the TV screen will be

turned into a black square respectively.

16:9: Choose the item when connecting a TV set with 16:9 wide screen.

DEFAULT

This item is for making all setup items change back to original status.

PDF created with FinePrint pdfFactory trial version 

http://www.pdffactory.com

Содержание SDN71BT

Страница 1: ...instructions in the literature accompanying the appliance CLASS 1 LASER PRODUCT Laser product symbol located on the rear panel of the unit indicate this player is a class laser product only use weak...

Страница 2: ...13 4 7 Playback with Speed 14 4 8 Playback with Slow Speed 14 4 9 Display Still Frame Step by Step 15 4 10 Playback Repeatedly 15 4 10 1 One All Repeat 15 4 10 2 A B Repeat 15 4 11 Playback in Scan M...

Страница 3: ...ck It is the biggest component of VCD Generally every song of karaoke disc is a track 1 2 Precautions Safety 1 Power Source The unit should be connected to power supply only of the type described in t...

Страница 4: ...Remote Control 1 Before using the remote control for the first time pull the insulating sheet out of the remote control as the direction indicated by the arrow see fig 1 2 Press the movable block hold...

Страница 5: ...7 CLEAR BUTTON 8 v BUTTON 9 SEL BUTTON 10 PLAY PAUSE BUTTON 11 NUMBER 0 10 10 10 BUTTONS 12 10 BUTTON 13 SETUP BUTTON 14 MODE BUTTON 15 APS HANG UP BUTTON 28 LOC SLOW FWD BUTTON 29 MUTE BUTTON 30 STOP...

Страница 6: ...nit After Sliding down the Front Panel SD MMC MUTE MIC AN G MODE _ EJECT RESET AU X IN 9 10 12 1 POWER MUTE button 2 ANG button 3 MODE button 4 and buttons 5 IR remote sensor 6 RESET button 7 USB jack...

Страница 7: ...Car Parking brake Parking brake switch inside the car Parking brake line coffee To metallic body or chassis of the car NOTE after connecting the Parking Line the video on the small monitor of the fro...

Страница 8: ...F THE LEFT AND RIGHT INSTALLATION BRACKETS SUPPLIED BY FACTORY ARE FIT FOR YOUR CAR PLEASE FIX THEM ON THE CHASSIS AND THEN FIX THE UNIT IN THE CAR WITH SCREWSACCORDING TO THE FOLLOWING DIAGRAM OTHERW...

Страница 9: ...e MUTE button on the remote control to turn on off MUTE mode pressing the POWER button on the front panel shortly also can turn on off MUTE mode 6 To display and adjust the clock time Press the CLK bu...

Страница 10: ...the icon can enter Mode Menu tapping the icon can turn on or off TFT display tapping the icon can pop up AUDIO VIDEO SETUP interface as right the other icons are same as the corresponding buttons in...

Страница 11: ...memory on the current band press one of the preset buttons 1 6 6 STEREO MONO BUTTON Press the ST button on the remote controller to select the STEREO or MONO sound mode for FM band 7 LOC BUTTON 1 In R...

Страница 12: ...Mode Menu Direction buttons same as the corres ponding buttons on the Remote Control Same as the corresponding button on the Remote Control Same as the corresponding button on the Remote Control or on...

Страница 13: ...ack chapter the 0 10 button is used as the 10 button If you want to play the track chapter larger than 10 use the 10 1 9 and 0 10 button Example 1 to play the 13th track chapter first press the 10 but...

Страница 14: ...will fast forward or rewind at the following speeds x2 x4 x8 x20 normal During this operation press the PLAY button to resume normal playback 4 8 Playback with Slow Speed During playback press the SLO...

Страница 15: ...s 15 seconds part of each track on the disc Press the INT button again to resume normal playback 2 In the state of DVD MP3 WMA playing the INT button is not available 4 12 Playback from a specified ch...

Страница 16: ...of VCD playing press the AUDIO button repeatedly to select the sound mode of the MONO L MONO R MIX MONO and Stereo no language function 3 In the state of CD WMA MP3 playing the AUDIO button is disabl...

Страница 17: ...nce playback or press the PROG button twice again To remove all the programmed sequence numbers move the cursor onto empty item then press the OK button To change the programmed sequence move the curs...

Страница 18: ...r icon then press the OK or PLAY button to open or play the selected file When displaying the root menu you can also use the number buttons to select the serial number of the file to play the file The...

Страница 19: ...hen a wrong TV system is selected In this case press the N P button to switch the right TV system to match the TV color system TV TYPE The setup item is for matching TV screen size 4 3 PS Choose the i...

Страница 20: ...subtitle language MENU LANG This item is for selecting a disc menu language 4 23 3 AUDIO SETUP AUDIO OUT There is only ANALOG mode i e SPDIF OFF not optional KEY It is for selecting your desired basi...

Страница 21: ...els of stereo signal VSS If you choose this item when playing a disc recorded with 5 1 channels the main channel speakers can output audio signal with VSS effect 4 23 6 DIGITAL SETUP OP MODE It is for...

Страница 22: ...movie disc for the version of region 6 was decided not to issue we need to purchase another DVD player that can play the DVD movie disc for the version of non region 6 In order to view this disc view...

Страница 23: ...en it will show a interface that ask you to input a password input the password 0000 and then enter it Then it will tell you pair OK 3 For some mobile phones they can automatically connect with the BT...

Страница 24: ...he call 6 3 During talking short press HANG UP button to end the call Note During ringing the phone number appears 7 To transfer the audio of a file played by Mobile Phone to the Car Audio Player In t...

Страница 25: ...yer Ensure that the audio is not under mute NO PICTURE BUT HAVE SOUND Ensure that the player s video output has a good connection with monitor s video input Ensure that you have turned your monitor to...

Страница 26: ...ctivity Direct the remote control to the IR sensor of the player Check whether there are some obstacles between the remote control and IR sensor SOME FUNCTION BUTTONS DO NOT WORK Turn off the power th...

Страница 27: ...o Specification Video Type 16 9 and 4 3 Video Output level Composite 1 0 0 2Vp p Load impedance 75 ohms Horizontal Resolution 500 Audio Specification Audio Output Analog audio 2 0 0 1 0Vrms Frequency...

Отзывы: