background image


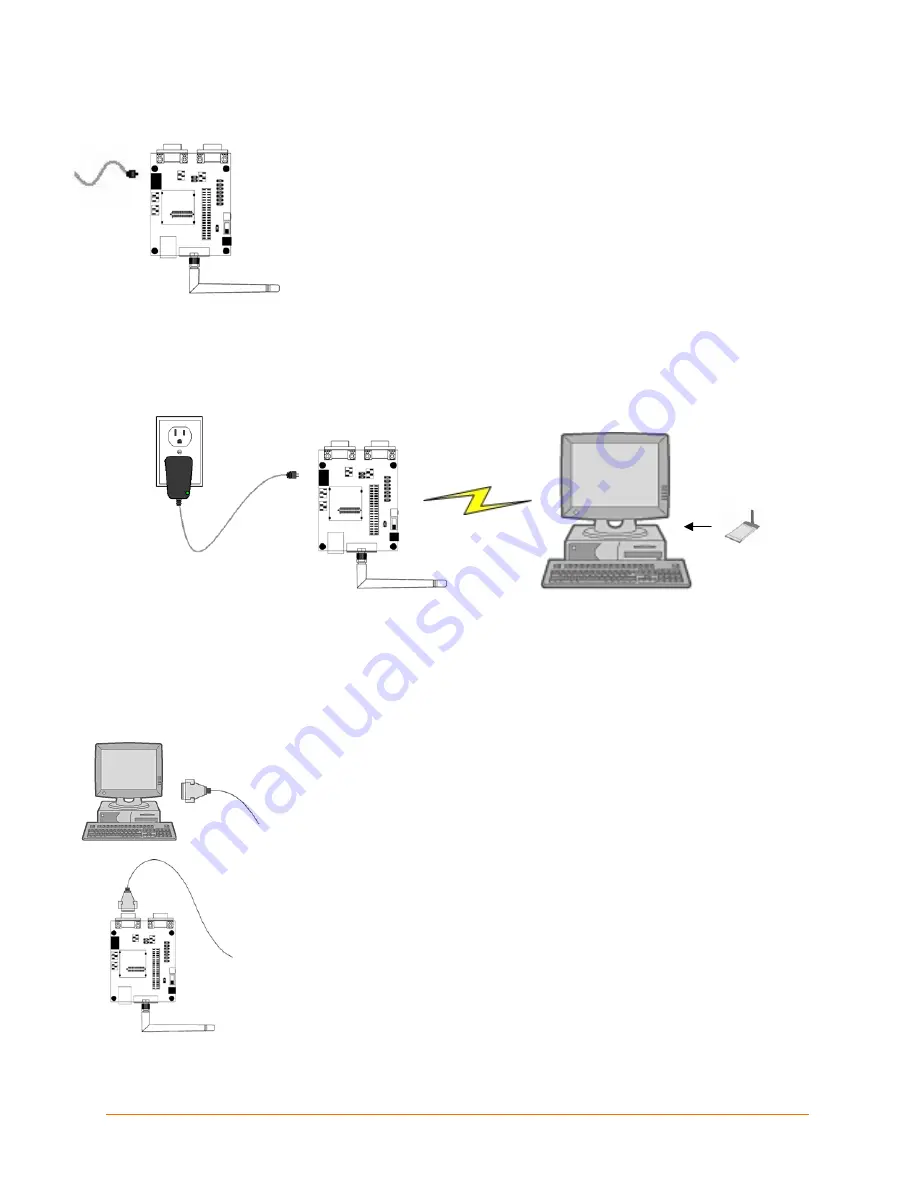
3.  Connect the Universal Power Supply to the WiPort Evaluation Board. 


4.  The WiPort is ready for configuration using DeviceInstaller. The final 

setup should look like this: 


Connecting the WiPort – Serial Method 

In the event that your laptop or desktop is not equipped with a wireless card, begin the 
initial configuration of the WiPort using the serial method.  After configuring the WiPort for 
wireless network access, disconnect the desktop’s serial connection to the device.  

1.  Connect one end of the supplied DB9F/F serial cable to the serial port on 

the laptop or desktop. 


2.  Connect the other end of the supplied DB9F/F serial cable to Port 0 on 

the WiPort. 


WiPort Evaluation Kit Quick Start Guide 

Содержание WiPort

Страница 1: ...WiPort Evaluation Kit Quick Start Guide Part Number 900 340 Revision D March 2013...

Страница 2: ...ower supply AC DC 1A 500 xxx RS 232 DB9F F 10ft null modem cable 500 107 CAT5e UTP RJ45M M Ethernet cable What You Need to Know Hardware Address You need to know the unit s hardware address also known...

Страница 3: ...sktop or laptop with a wireless card to the WiPort Evaluation Board This permits the configuration of the WiPort to work on your network Note To connect using the WiPort NR refer to Connecting the WiP...

Страница 4: ...is not equipped with a wireless card begin the initial configuration of the WiPort using the serial method After configuring the WiPort for wireless network access disconnect the desktop s serial conn...

Страница 5: ...figuring the WiPort using this method The final setup should look like this Install DeviceInstaller Use DeviceInstaller to configure the IP address and other network parameters when a wireless connect...

Страница 6: ...an one network adapter a message displays Select an adapter and click OK Note If the unit already has an IP address e g DHCP has assigned an IP address click the Search icon and select the unit from t...

Страница 7: ...the Status area Click the Clear Status button to clear the window to ping the device again Note If you do not receive Reply messages ensure the WiPort is visible on the network created by the laptop o...

Страница 8: ...Guide 1 Select the unit and click the Web icon The Lantronix Web Manager window displays in your browser Note You can also open your JAVA enabled web browser and enter the IP address of the WiPort to...

Отзывы: