


HTCA-6400 User Manual
26
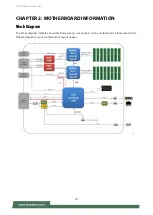
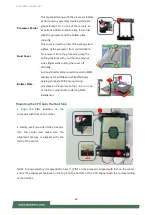
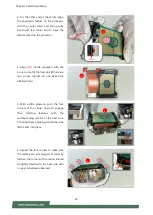
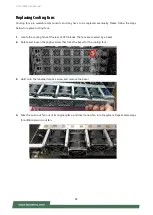
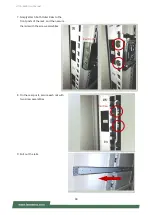
Installing the PHM onto the Motherboard
1. Remove the dust cover from the socket
contacts of the motherboard.
Note: Inspect the surface of the socket
under sufficient light to ensure there is no
contamination or damage prior to the
PHM installation.
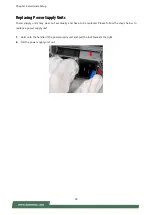
2. Flip the PHM over to align
PIN1
of the
carrier with the
Cutout
of the bolster
plate.
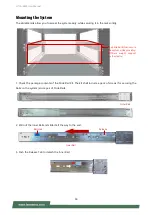
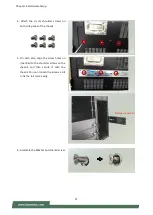
3. Flip the PHM back over, so the package
land of the processor will face the socket.
Lower the PHM vertically to engage it to
the alignment pins of the bolster plate.
1
2
Cutout
PHM
Alignment Pin
Alignment Pin
3
PHM
Содержание HTCA-6400
Страница 45: ...Chapter 4 BIOS Setup 45 Trusted Computing TPM 2 0...
Страница 47: ...Chapter 4 BIOS Setup 47 Trusted Computing PTT Enable...
Страница 49: ...Chapter 4 BIOS Setup 49 AST2500 Super IO Configuration...
Страница 63: ...Chapter 4 BIOS Setup 63 Tru0pt FORM Feature Options Description TruOpt Enabled Manual Lanner Optimization...
Страница 68: ...HTCA 6400 User Manual 68 Server ME Configuration...
Страница 71: ...Chapter 4 BIOS Setup 71 Processor Configuration...