


Chapter 3: Hardware Setup
25
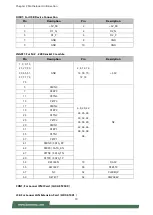
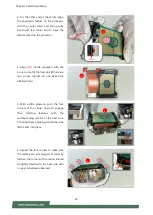
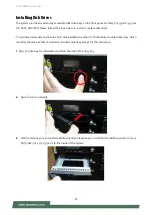
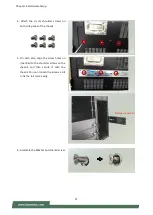
3. For the other end of the carrier, align
the alignment feature of the processor
with the carrier latch, and then gently
bend over the carrier end to have the
latch secured on the processor.
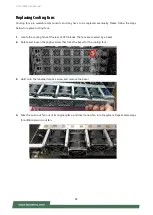
4. Align
PIN1
of the processor with the
corner cutout of the heat sink (if there are
two corner cutouts on one heat sink,
either will do).
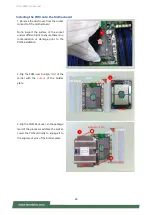
5. With a little pressure, push the four
corners of the carrier down to engage
their latching features with the
corresponding corners of the heat sink.
You might hear a clicking sound when the
latch clicks into place.
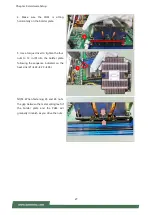
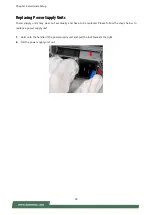
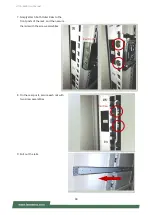
6. Inspect the four corners to make sure
the latches are all engaged. If correctly
latched, the corners of the carrier should
be tightly attached to the heat sink, with
no gap in-between observed.
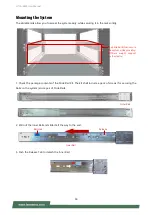
Cutout
5
6
Unlatched
4
3
Latch
Содержание HTCA-6400
Страница 45: ...Chapter 4 BIOS Setup 45 Trusted Computing TPM 2 0...
Страница 47: ...Chapter 4 BIOS Setup 47 Trusted Computing PTT Enable...
Страница 49: ...Chapter 4 BIOS Setup 49 AST2500 Super IO Configuration...
Страница 63: ...Chapter 4 BIOS Setup 63 Tru0pt FORM Feature Options Description TruOpt Enabled Manual Lanner Optimization...
Страница 68: ...HTCA 6400 User Manual 68 Server ME Configuration...
Страница 71: ...Chapter 4 BIOS Setup 71 Processor Configuration...