background image

4-24

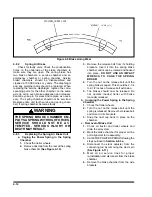
Figure 4-18 Mounting Tires and Wheels

Figure 4-19 Stud Tightening Sequence

Содержание 345B

Страница 1: ...MODEL 345B TRAILER OPERATOR S MANUAL 1900 North Street Marysville KS 66508 785 562 5381 F 272 398 3 98 ...

Страница 2: ... a defective part This warranty is void if any part not supplied by LANDOLL is used in assembly or repair or if the machine has been altered abused or neglected LANDOLL repair parts are warranted for ninety 90 days from date of replacement or for the unexpired warranty period of the applicable LANDOLL machine whichever period is longer LANDOLL makes no warranty whatsoever as to purchased component...

Страница 3: ...MODEL 345B TRAILER OPERATOR S MANUAL PURCHASED FROM DATE ADDRESS PHONE NO SERIAL NO ...

Страница 4: ...owever NHTSA cannot become involved in individual prob lems between you your dealer or Landoll Manufacturing To contact NHTSA you may either call the Auto Safety Hotline toll free at 1 800 424 9393 or 366 0123 in Washington D C area or write to NHTSA U S Depart ment of Transportation Washington D C 20590 You can also obtain other infor mation about motor vehicle safety from the Hotline In the even...

Страница 5: ...ER 3 7 3 12 LOADING THE TRAILER 3 8 3 13 UNLOADING THE TRAILER 3 9 3 14 AUXILIARY HYDRAULIC POWER ENGINE OPERATION 3 12 3 15 DOCK LEVELER CONTROL 3 13 3 16 REAR IMPACT GUARD SYSTEM 3 15 3 17 ANTI LOCK BRAKE SYSTEM ABS 3 15 3 18 REMOTE OPERATION 3 16 3 19 COLD WEATHER OPERATION 3 16 3 20 HOT WEATHER OPERATION 3 17 4 MAINTENANCE AND LUBRICATION 4 1 4 1 MAINTENANCE SCHEDULE 4 1 4 2 MAINTENANCE PROCED...

Страница 6: ...H IF NOT AVOIDED WILL RESULT IN DEATH OR SERIOUS INJURY WARNING WARNING INDICATES A POTENTIALLY HAZARDOUS SITUA TION WHICH IF NOT AVOIDED COULD RESULT IN DEATH OR SERIOUS INJURY CAUTION CAUTION INDICATES A POTENTIALLY HAZARDOUS SITUA TION WHICH IF NOT AVOIDED MAY RESULT IN MINOR OR MODERATE INJURY CAUTION CAUTION USED WITHOUT THE SAFETY ALERT SYMBOL INDI CATES A POTENTIALLY HAZARDOUS SITUATION WHI...

Страница 7: ...AVE ANY QUESTIONS CONTACT LANDOLL CORPORATION 1900 NORTH STREET MARYSVILLE KANSAS 66508 or phone 785 562 5381 or 800 428 5655 or FAX 785 562 4893 SECTION 5 is a troubleshooting guide to aid in diagnosing and solving problems with the trailer PARTS LIST is a separate manual showing the various assemblies subassemblies and sys tems Refer to that manual when ordering Landoll replacement parts Order p...

Страница 8: ......

Страница 9: ... SPECIFIC BOLT TORQUES AIR RIDE SUSPENSION EQUALIZER BEAM PIVOT AND ADAPTER BOLTS 800 FT LBS SHOCK ABSORBER MOUNTING 150 FT LBS AIR SPRING MOUNTING 1 2 35 FT LBS 3 4 35 FT LBS FOUR SPRING SUSPENSION AXLE CLAMP U BOLTS 300 FT LBS EQUALIZER BEAM PIVOT BOLT 480 500 FT LBS TORQUE ARM BOLT 250 FT LBS TORQUE ARM CLAMP NUTS 60 FT LBS WHEEL FASTENERS ALL MODELS OUTER SPINDLE NUTS 250 400 FT LBS PILOT WHEE...

Страница 10: ... 65 81 90 112 9 16 12 55 62 80 100 110 137 9 16 18 60 75 90 112 130 162 5 8 11 75 94 110 137 170 212 5 8 18 85 106 130 162 180 225 3 4 10 130 162 200 250 280 350 3 4 16 150 188 220 275 320 400 7 8 9 125 156 320 400 460 575 7 8 14 140 175 360 450 500 625 1 8 190 237 408 506 680 850 1 14 210 263 540 675 760 950 1 1 8 7 270 337 600 750 960 1200 1 1 8 12 300 375 660 825 1080 1350 1 1 4 7 380 475 840 1...

Страница 11: ... 146 75 85 16 115 125 202 218 109 121 20 160 180 248 272 213 237 24 185 215 303 327 238 262 32 250 290 310 340 LANDOLL CORPORATION HYDRAULIC FITTING TORQUE SPECIFICATIONS 37o JIC ORS ORB REV 10 97 THIS CHART PROVIDES TIGHTENING TORQUES FOR HYDRAULIC FITTING APPLICATIONS WHEN SPECIAL TORQUES ARE NOT SPECIFIED ON PROCESS OR DRAWING ASSEMBLY TORQUES APPLY TO PLATED CARBON STEEL AND STAINLESS STEEL FI...

Страница 12: ......

Страница 13: ...f the trailer is operated from the towing vehicle after coupling The towing vehicle s air system must be coupled to the trailer and charged to 90 psi minimum before the brakes can adequately function 3 1 2 Anti Lock Brake System ABS The Anti Lock Brake System of the trailer is constant powered by the auxiliary blue circuit of the seven way electrical connector with backup power from the stop lamp ...

Страница 14: ...the hitch of the towing vehicle If the trailer hitch is bolted to the trailer at the cor rect height according to Steps 3 2 2 and 3 2 3 raise or lower the hitch by operating the bed tilt hydraulics until the proper height has been obtained WARNING FAILURE TO CHOCK TRAILER WHEELS COULD ALLOW MOVEMENT OF THE TRAILER RESULTING IN SERI OUS PERSONAL INJURY DEATH OR DAMAGE TO PROPERTY IN ITS PATH 3 2 6 ...

Страница 15: ...pintle eye onto truck hitch by tilt ing bed up and lock the hitch in place 3 3 6 Raise the landing gear parking stands by first tilting the bed up activating the front hydraulic lever until the landing gear is off the ground Remove pins from landing gear and slide landing gear fully up to stowed po sition Insert and lock pin holding landing gear in stowed position Fully lower bed tilt IMPORTANT KE...

Страница 16: ...ation of the trailer When executing steep grades or turn ing tight curves the trailer must not be al lowed to push the towing vehicle or jackknif ing the trailer with the towing vehicle may re sult Application of the trailer brakes to keep the trailer in tow will help prevent this push ing Braking should begin before descending a hill or attempting a curve to assure control 3 6 2 Make a moving tes...

Страница 17: ...for proper brake holding 3 7 3 Chock wheels of trailer 3 7 4 Check for any air leaks in lines relay valve brake air chamber or any other air system component 3 8 UNCOUPLING TOWING VEHICLE FROM TRAILER 3 8 1 Park the trailer according to instructions in Section 3 7 3 8 2 Disconnect emergency and service air lines 3 8 3 Disconnect the electrical cable and store so end is not on the ground 3 8 4 Disc...

Страница 18: ...und winch clutch handle has two positions that engage or disengage the winch spool DISENGAGE In this position the winch is disen gaged This allows the spool to free wheel This is only used when there is no load on the winch cable This feature allows the cable to be pulled out fairly fast and does not require operating the hydraulic system ENGAGE In this position the winch is en gaged Cable may be ...

Страница 19: ...osition the undercarriage slides to the rear The undercarriage must be in the rear most position for transport 3 11 TRAILER TILT LEVER The TRAILER TILT LEVER See Figure 3 3 is located on the front lower deck of the driver s side frame member It is the front lever with three positions UP In this position the front of the trailer raises CENTER This is neutral position DOWN In this position the front...

Страница 20: ...on the ground whenever the center of gravity of the trailer and load is behind the rear axle of trailer In loading po sition the approach plate should be resting on the ground and the undercarriage fully forward CAUTION DO NOT ALLOW THE BACK TRAILER AXLE TO LEAVE THE GROUND THIS CAN RESULT IN DAMAGE TO THE TRAILER WARNING IN LOADING OR UNLOADING POSI TION THE APPROACH PLATE SHOULD BE RESTING ON TH...

Страница 21: ...will lower as the undercarriage rollers go into pockets Hold TRAILER TILT lever in the down position until hydraulic system works against the bottomed out Hydraulic Tilt Cylin ders Hold AXLE CONTROL lever in the transport position until hydraulic system works against the fully extended hydraulic axle cylinder 3 12 11 Check the position of the payload If between 8 and 30 of the total weight of trai...

Страница 22: ...3 10 Figure 3 4 Steps for Loading and Unloading ...

Страница 23: ...to the end of the approach plate With end of load resting on the ground block load from rolling or sliding if necessary Discon nect the winch and move the trailer from un der the load allowing the load to move off trailer to the ground WARNING WHEN REMOVING LOAD INSURE THAT THE LOAD IS STEERING STRAIGHT SO IT DOES NOT MANEU VER OFF THE SIDE OF THE TRAILER FAILURE TO DO SO COULD RESULT IN DAMAGE TO...

Страница 24: ...engine throttle is fully open letting it run at full speed LOW In this position the engine throttle is closed letting the engine run at a slow idle 3 14 4 To start pull the choke completely out and set the throttle to the LOW position 3 14 5 Turn the ignition key to the START po sition The engine should crank and then start CAUTION DO NOT CRANK ENGINE FOR MORE THAN 30 SECONDS IF ENGINE DOES NOT ST...

Страница 25: ...ts the cylinder on the curb side of the trailer Both controls have three position IN When the control for either cylinder is pushed in toward the center of the trailer the corresponding side of trailer is lowered CENTER This position is neutral for either con trol When either control is in this po sition there is no effect on either cyl inder OUT When the control for either cylinder is pulled out ...

Страница 26: ...3 14 Figure 3 7 Rear Impact Guard and Antilock Brake System ...

Страница 27: ...Y OR DEATH TO OTHERS 3 17 ANTI LOCK BRAKE SYSTEM ABS Vehicle standards FMVSS No 121 anti lock brake system requires all trailers with air brake systems to have ABS after March 1 1998 Each trailer including a trailer converter dolly shall be equipped with an anti lock brake system that con trols the wheels of at least one axle of the trailer Wheels on other axles of the trailer may be indi rectly c...

Страница 28: ...ctrical receptacle usually located by the Hydraulic Control Panel Optional receptacle locations are on the rear street side or both rear street and rear curb sides The wired re mote is available as a single dual or triple function See Figure 3 8 3 18 2 A wireless radio remote control is also available as a dual or triple function 3 18 3 The remotes operate any of the hydrau lic functions that are ...

Страница 29: ...tires light and hose grommets hoses etc and paint life 3 20 3 Check tire pressure early in the day be fore beginning operations while the tire is cool Put all valve stem caps back on after checking 3 20 4 If the area is extremely humid protect electrical terminals with ignition insulation spray Coat paint and bare metal surfaces with an appropriate protective sealer 3 20 5 For trailers with air br...

Страница 30: ......

Страница 31: ...ts must be repaired or replaced at once Deter mine the cause of any binding or hydraulic leakage at once Correct the problem before using the tractor or trailer b Use the Troubleshooting Guide to check for SYMPTOMS and PROBLEMS of any trailer system not functioning correctly or where wear distortion or breakage are found Administer REMEDY according to the right hand column of the Troubleshooting G...

Страница 32: ...lti purpose Grease Ronex Multi purpose Grease Phil Lube M W Grease MarFax All Purpose 4 ALL YEAR Industrial Oil 32 Estic 32 Condor 32 or Magnus 32 Regal Oil R O 32 5 ALL YEAR Gear Lube SAE 80W 90 Gear Oil GX SAE 80W 90 Superior MP Gear Oil SAE 80W 90 Multi gear EP SAE 80W 90 6 ABOVE 0 o F Ultimate Gold 10W 30 10W 40 SuperFlow 10W 30 10W 40 Tropartic 10W 30 10W 40 Havoline 10W 30 10W 40 BELOW 32 o ...

Страница 33: ... T I I T f HYDRAULIC OIL I I R 1 c HYDRAULIC FILTER R R HOSES I I I WINCH GEAR CASE I I 2 c I Inspect R Replace T Tighten Adjust Torque L Lubricate C Clean NOTES a Perform at the time shown Shorten service intervals when operating in severe or dirty conditions b See Tables 2 1 and 2 2 Torque Specifications for correct torque c See Table 4 1 Lube Specification Chart for recommended lubricant d Call...

Страница 34: ... reported troubles d Scrape sand prime and repaint areas where finish is missing or where there is evi dence of corrosion e Replace any missing or illegible decals Re place any missing or damaged reflective tape f After disassembling any components thor oughly clean dirt and old lubricant from all parts Do not use a wire brush on any bearing parts or surfaces use a stiff bristle brush Do not use c...

Страница 35: ...4 5 Figure 4 2 345B Wiring Diagram ...

Страница 36: ...4 6 Figure 4 3 Remote Wiring Diagram ...

Страница 37: ...H DS19 FIRST WINCH LIGHT DS20 FIRST WINCH LIGHT DS21 ABS MALFUNCTION INDICATOR YELLOW J1 FRONT MAIN CONNECTOR J2 FRONT DECK CONNECTOR J3 U C CONNECTOR J4 U C MID CONNECTOR 345B WIRING PARTS LIST REF DES FUNCTION J5 AUX LIGHTS PWR GRND CONN J6 REMOTE CONTR PWR GRND CONN J7 BUMPER CONNECTOR J8 REMOTE CURB REAR J9 ABS LAMP CONNECTOR J10 ABS ECU VALVE CONNECTOR J11 GRND CONN TO SOLENOID VLVS J12 PWR F...

Страница 38: ...age or unraveling must be repaired or replaced 4 5 2 Frayed or unraveling wire must have the defective section removed and replaced with wire of the same color and gauge Seal all connections and insulate 4 5 3 Corroded terminals must have the corro sion removed source of corrosion neutral ized and the terminals resealed protected and insulated 4 5 4 Fuse or circuit breaker burn out or blow out usu...

Страница 39: ...nnections Only b Check all other suspension components for any sign of damage looseness wear or cracks c With trailer on level surface and air pressure in excess of 65 psi all air springs should be of equal firmness The height control valve on right side of front axle controls all air springs on tandem axle suspensions 4 6 3 Air Ride Height Adjustment See Fig ure 4 4 for parts identification a Bef...

Страница 40: ...ENING ACCIDENT 1 SUPPORT TRAILER AND UNDER CARRIAGE SO TIRES ARE OFF THE GROUND 2 SUPPORT THE TRAILER AND UN DERCARRIAGE ON JACK STANDS WITH SUFFICIENT CAPACITY TO SUP PORT THE TOTAL WEIGHT OF THE TRAILER AND ANY LOAD WHICH IT MAY BE CARRYING When trailer tires show signs of scuffing feather edging or uneven wear examine the trailer for damaged suspension frame shocks linkage etc axle wheel bearin...

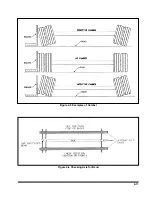
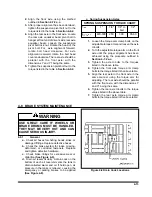
Страница 41: ...4 11 Figure 4 5 Examples of Camber Figure 4 6 Checking Axle for Bend ...

Страница 42: ...measuring from the underside of the trailer 3 Suspend a plumb bob at axle height from the center of the pintle eye 4 Measure D from the plumb bob to the center point on one end of the axle Record this measurement See Figure 4 7 5 Measure D1 to the other end of the axle in the same manner as in Step 4 Record this measurement See Figure 4 7 6 Set D about 1 8 shorter than D1 to insure proper trailer ...

Страница 43: ... procedure outlined in Section 4 7 2 a c 3 Tighten the axle U bolts to the torques listed in the above table 4 Tighten the front axle torque arm clamp bolts to the torque listed in the above table 5 Align the rear axle to the front axle in the same manner using the torque arm for adjusting The rear axle should be parallel with the front axle with the dimensions Y and Y1 being the same 6 Tighten th...

Страница 44: ... spring brake chamber See Figure 4 10 3 Remove the release bolt from it s holding brackets Insert it into the spring brake chamber until it can be rotated and hooked into place DO NOT USE AN IMPACT WRENCH TO CAGE THE SPRING BRAKE 4 Turn the nut on the release bolt until the spring brake is caged This should be 2 1 4 to 2 1 2 inches of release bolt extension 5 The brakes should now be released Do n...

Страница 45: ...m should be removed and the linings replaced if the thinnest portion of the lining is 3 8 in 9 5 mm or less Do not allow the linings to wear thin enough that the lining rivet contacts the drum See Figure 4 9 WARNING DO NOT ALLOW GREASE TO CON TACT BRAKE LININGS AS THIS COULD RESULT IN REDUCED BRAK ING PERFORMANCE a Brake Adjustment This trailer is equipped with automatic slack adjusters which comp...

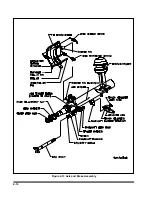
Страница 46: ...4 16 Figure 4 10 Axle and Brake Assembly ...

Страница 47: ...ounterclockwise to create an excessive clearance condition A ratcheting sound will occur 4 Make a full service brake application On release allow sufficient time for brake to fully retract During the brake release observe rotation of the adjustment hex attach a wrench on the hex to make this movement easier to see This rotation indicates that an excessive clearance condition has been determined by...

Страница 48: ...the air chamber 6 Swing the guide into the clevis until the appropriate slot totally engages 1 2 pin 7 Observe the guide pointer arrow If the guide pointer is above the clevis pointer adjust clevis CCW for alignment If the guide pointer is below the clevis pointer adjust clevis CW for alignment 8 Reposition clevis until the guide pointer aligns with the clevis pointer 9 Verify by engaging 1 4 pin ...

Страница 49: ...braking surface to remove small heat checks or other surface defects resulting from normal use a The maximum diameter cast into the back plate portion of the brake drum is the maxi mum diameter or discard diameter to which the brake drum may be turned or worn and still be usable If any portion of the brake sur face exceeds the maximum diameter it must be discarded The maximum is 120 over the nomin...

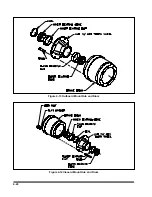
Страница 50: ...4 20 Figure 4 13 Outboard Mount Hub and Drum Figure 4 14 Inboard Mount Hub and Drum ...

Страница 51: ...hub flange and mates properly with the hub pilot There should be no interference between the brake drum pilot chamfer and the corner radius on the hub k For spoke wheels there should be clear ance between the spoke and the brake drum or the brake drum will not function properly l Install inner bearing cone and seal IMPORTANT DO NOT MIX NEW CUPS WITH OLD CONES OR NEW CONES WITH OLD CUPS m If studs ...

Страница 52: ... to in sure proper seating of the bearings and cups in the wheel hub f Loosen the inner adjustment nut so that the wheel will turn freely g Retighten the inner adjustment nut to 50 ft lbs while rotating the wheel to properly position the bearings for the final adjustment h Loosen the inner adjustment nut 1 3 turn i Install the spindle nut lock washer so that the dowel on the inner nut will align w...

Страница 53: ...ure will result in damaged tire bodies rims and wheels Replace all valve stem caps when pressure checking adjusting has been com pleted Remove any foreign objects from be tween duals 4 11 2 Tire Matching Both tires on the same spindle must be the same size in order to properly distribute the load and braking forces between them The tire must be mounted on a rim and properly inflated before measuri...

Страница 54: ...4 24 Figure 4 18 Mounting Tires and Wheels Figure 4 19 Stud Tightening Sequence ...

Страница 55: ...pounds for ball seat and 500 to 550 foot pounds for pilot mount using the same se quence h Torque will drop after the first 50 to 100 miles of operation Check the capnuts for proper torque after this interval and retighten them Loosen the outer capnuts and retighten the inner and outer capnuts per steps d to g WARNING USE A TORQUE WRENCH TO ASSURE PROPER TORQUE INSUFFICIENT TORQUE CAN CAUSE STUD B...

Страница 56: ...in the weather for any length of time it is advisable to oil the winch cable to prevent untimely rusting and deterioration of the cable See Table 4 1 for lubrication specifications Inspect the winch mechanism thoroughly each week to insure safe efficient operation WARNING DO NOT HANDLE THE WINCH CABLE WHEN THE WINCH IS IN THE ENGAGE POSITION HANDS OR CLOTHING COULD GET CAUGHT IN THE CABLE AND BE P...

Страница 57: ...replace or tighten Grounding through fifth wheel locate broken ground wire tractor or trailer LIGHTS DIM Voltage difference between trailer tractor match bulbs with tractor voltage Grounding through fifth wheel locate broken ground wire tractor or trailer LIGHTS BRIGHT BURN OUT Voltage difference between trailer tractor match bulbs with tractor voltage FUSE BLOW OUT OR CIRCUIT BREAKER TRIPPING Vib...

Страница 58: ... ONE SHOULDER Axle damage straighten or replace axle OVERALL TREAD WEAR Overloading check tire load rating High speeds adjust speed according to road and load condi tions Incorrect dual matching properly match dual tires TIRE FLAT SPOTS Quick stops adjust braking practices Grabbing brakes adjust brakes properly Worn or loose wheel bearings adjust or replace as needed Out of balance wheels and tire...

Страница 59: ...eplace valve Supply line to one height control valve pinched restricted or plugged repair or replace line 5 3 BRAKES For maintenance procedures see Sections 4 8 SYMPTOM PROBLEM REMEDY NO BRAKES OR BRAKES ARE INTERMITTENT Brake air system improperly connected reconnect hand valves properly Relay Emergency valve plugged clean valve Defective tractor protection valve repair or replace Restricted tubi...

Страница 60: ...e brake Relay emergency valve in emergency position check line pressure and check valve Restricted tubing or line locate restriction and remove Defective tractor protection valve troubleshoot tractor air system Parking brakes locked troubleshoot air system Tractor pressure too low Adjust to provide 105 psi min INSUFFICIENT BRAKES Brakes need adjusting adjust brakes Brakes need lubricating lubricat...

Страница 61: ...enance manual sup plied with trailer for system function and use of blink code diagnostics 5 4 BRAKE DRUMS For maintenance procedures see See Sections 4 6 4 7 4 8 4 9 4 10 SYMPTOM PROBLEM REMEDY EXCESSIVE LOSS OF BRAKES OR FADING Overheated brake drums check for defective or misadjusted brake linings distorted or over machined drums Also check for operating conditions or loads that create severe o...

Страница 62: ...pump drive repair or replace couplings Check for alignment SYSTEM OPERATES ERRATIC ALLY Air in the system check suction side of system for leaks Re pair leaks Cold oil allow ample warm up time Use proper weight oil for operating temperature Dirty or damaged components clean or repair as needed Restriction in filters or lines clean and or replace filter or lines Not enough oil in system fill and ch...

Страница 63: ...ISY PUMP Low incorrect foamy oil replace clean or add oil as needed Suction line plugged clean out obstruction or replace line Flush system replace filter LEAKY PUMP Damaged or worn shaft seal Replace seal and check for misalignment Loose or broken parts Tighten or replace CYLINDERS MOVE WITH CONTROL VALVE IN NEUTRAL POSITION Leaking cylinder seals or fittings Replace worn seals or fit tings Contr...

Страница 64: ...500 psi Worn hydraulic pump service or replace Insufficient volume to dock level circuit adjust flow divider to provide 2 5 to 3 1 GPM Too heavy a load reduce load on cylinders LOWERS UNEVENLY OR ERRATICALLY Insufficient volume to dock level circuit clean system and new oil and filter Dirty oil in check valves use same procedure as above 8 ...

Страница 65: ...5 9 NOTES ...
Страница 66: ...ing facilities Model 345B Trailer Operator s Manual Re Order Part Number F 272 298 LANDOLL CORPORATION 1900 North Street Marysville Kansas 66508 785 562 5381 800 428 5655 WWW LANDOLL COM F 273 398 Copyright 2010 Landoll Corporation All rights reserved including the right to reproduce this material or portions thereof in any form ...

Отзывы: