14
15
Instructions for use
Connecting to your tablet
Important:
Before connecting the tablet
with the Keyboard Dock for the first time, please
turn on your tablet and wait for the boot process
to be completed and the Windows desktop to
finish loading.
1. Place the Keyboard Dock onto a firm surface for
support when docking your tablet.
2. Connect the tablet to the Keyboard Dock by
locating the Pogo Pin connection and pushing your
tablet into the docking slot.
Windows will now automatically detect the
connection and begin to set up your accessory.
Please
DO NOT
undock the tablet during this
process.
Note:
The time taken to automatically detect and
setup the Keyboard Dock can vary depending on
the hardware configuration, number of applications
running and number of external devices connected
to the tablet. Please be patient during this process.
3. After the auto-detection and setup of the
Keyboard Dock is complete, a confirmation prompt
will display on your tablet.
Your Linx Keyboard Dock is now successfully set up
with your tablet and is ready-to-use.
Note:
When you have successfully set up the
keyboard for the first time, the setup process will not
have to be run again when docking your tablet into
the keyboard, making it faster and easier to use.
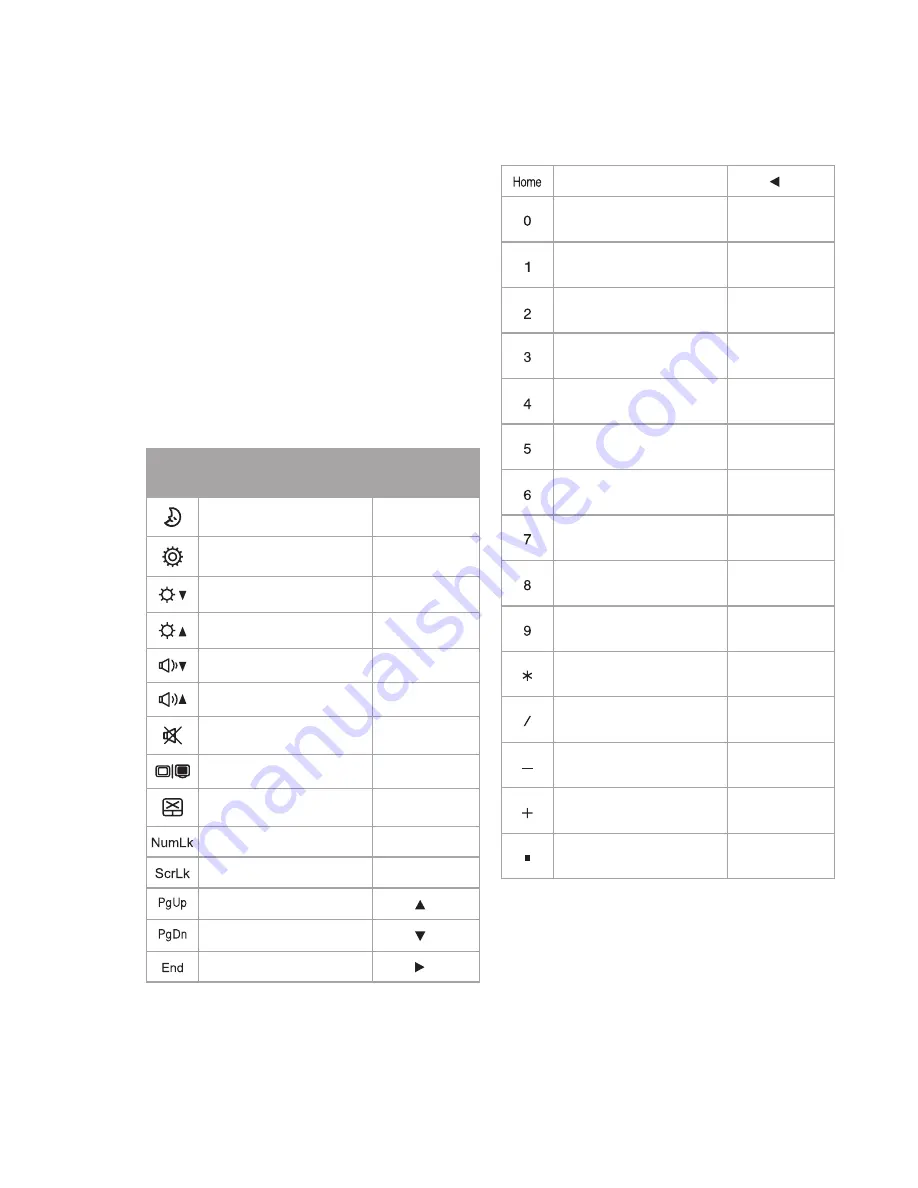
Using the function keys
Additional enhanced function keys provide shortcuts
to useful functions, such as volume levels
and screen brightness. To use the enhanced
functions, first
press and hold
the ‘Fn’ key;
then press the function key that you wish to use.
Note:
The additional functions have been printed
on the keyboard in blue to provide a clear visual
difference when using the keyboard.
Note:
The numerical functions require the ‘number
lock’ function to be enabled before use.
Icon
Function description
Key
combination
Sleep
Fn + F1
Settings
Fn + F2
Brightness down
Fn + F3
Brightness up
Fn + F4
Volume down
Fn + F5
Volume up
Fn + F6
Mute volume
Fn + F7
External video mode
Fn + F8
Disable trackpad
Fn + F9
Enable number lock
Fn + Ins
Enable scroll lock
Fn + Del
Page Up
Fn +
Page Down
Fn +
End key
Fn +
Home key
Fn +
Numeral 0
(after enabling
number lock)
M
Numeral 1
(after enabling
number lock)
J
Numeral 2
(after enabling
number lock)
K
Numeral 3
(after enabling
number lock)
L
Numeral 4
(after enabling
number lock)
U
Numeral 5
(after enabling
number lock)
I
Numeral 6
(after enabling
number lock)
O
Numeral 7
(after enabling
number lock)
7
Numeral 8
(after enabling
number lock)
8
Numeral 9
(after enabling
number lock)
9
Multiply
(after enabling
number lock)
0
Divide
(after enabling
number lock)
P
Minus
(after enabling
number lock)
:
Add
(after enabling number
lock)
?
Decimal
(after enabling
number lock)
>
Содержание T-1010B.NORD
Страница 1: ...T 1010B NORD MANUAL English ...
Страница 6: ...Product Overview CMOS Camera ...
Страница 7: ...6 Product Overview ...
Страница 24: ......


