LaCie 4big Quadra
• D
esign
by
N
eil
P
oulton
RAID
User Manual
page 19
3.2. Changing the RAID Mode
The 4big comes preconfigured in RAID 0 mode. Before you
change the RAID mode of the LaCie 4big, familiarize your-
self with the 4big’s RAID modes. See section
3.1. About RAID
Modes
.
IMPORTANT INFO:
Changing the RAID mode destroys data
stored on the LaCie 4big. If you have saved data on the drives,
back up data before following these steps.
To change the RAID mode:
1. Unmount or safely remove the 4big Quadra volumes from
your computer, disconnect the interface cable and switch
off the 4big.
2. To enter RAID modification mode, turn ON the 4big (do
not select “AUTO”) and simultaneously press the front LED
button for 15 seconds. The front LED will blink blue and red.
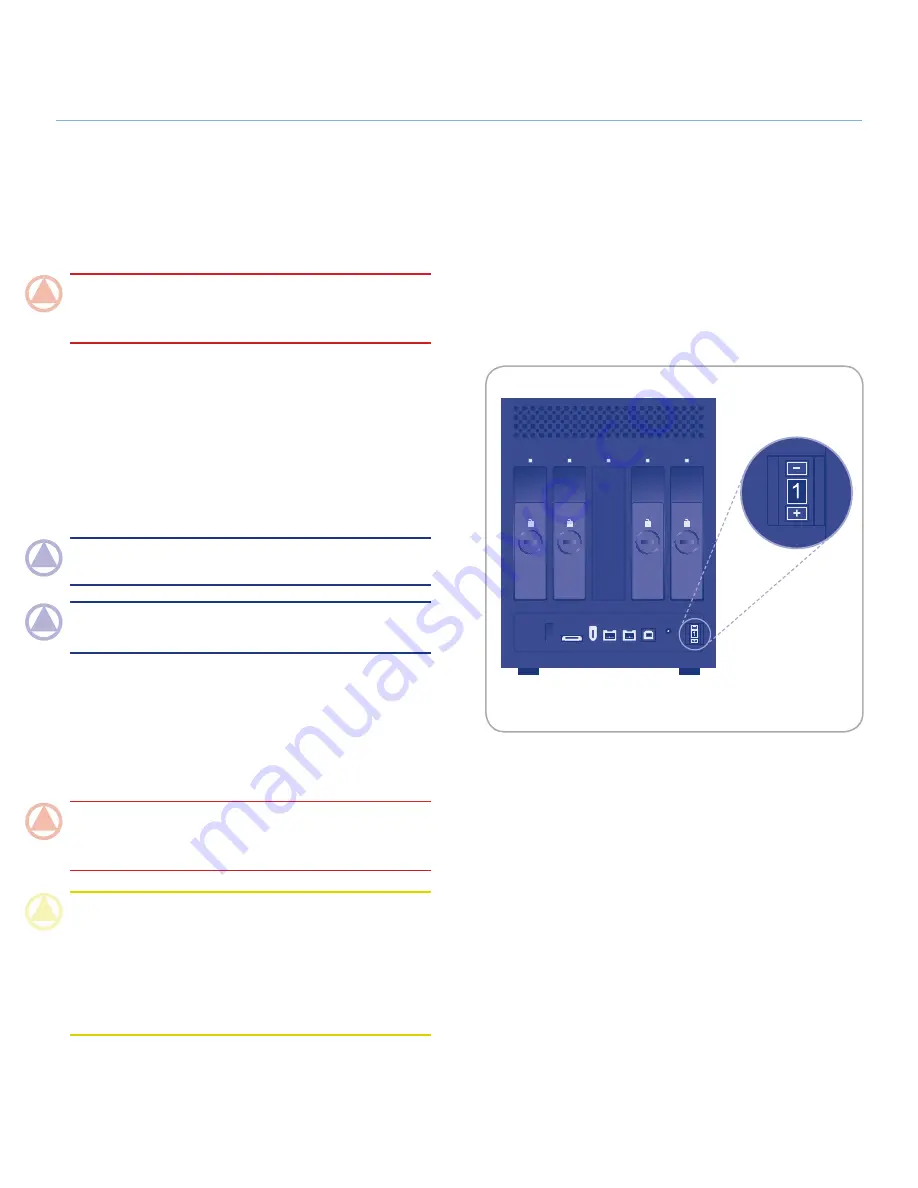
3. Push the + or - buttons on the RAID mode selector until the
desired RAID number appears. See Fig. 3.2.
NOTE:
0=RAID 0, 1=RAID 10, 2=Concatenation, 3=RAID
3, 4=RAID 3+Spare, 5=RAID 5, 6=RAID 5+Spare, 7=N/A.
NOTE:
Although the number 7 appears in the RAID selector,
no RAID changes will take effect if 7 is selected.
4. Validate the mode by pushing the front LED button. The
4big will start.
5. Connect the 4big’s interface cable. The device is ready to
be reformatted.
6. Partition the disks. See section
3.4. Formatting
.
IMPORTANT INFO:
You must partition the disk drives after
changing the storage policy configuration. See section
3.5. Par-
titioning the Disks
.
CAUTION:
Your LaCie 4big comes preconfigured in RAID 0
(Fast) mode. RAID 0 allows access to the whole storage capac-
ity but does not provide any security. If a drive fails, all data
will be lost. If you are concerned about data security, LaCie
highly recommends a RAID 10, 3, 3+SPARE, 5, or 5+SPARE
configuration. See section
3.1. About RAID Modes
, for more
information.
Fig. 3.2
off
on
auto
off
on
auto


