background image

11

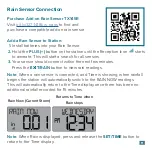
Rain Sensor Connection

Visit 

bit.ly/327-1418bw_parts


to find and

purchase a compatible add-on rain sensor.

Purchase Add-on Rain Sensor TX145R

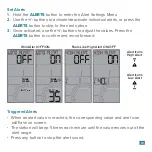
Add a Rain Sensor to Station:

 1.

 Install batteries into your Rain Sensor. 

2.

 Hold the 

PLUS (+)

 button on the station until the Reception Icon       starts  

    to animate. This will start a search for all sensors. 

3.

 Your sensor should connect within the next few minutes. 

    Press the 

EXIT/

RAIN

 button to view rain readings. 

Note:

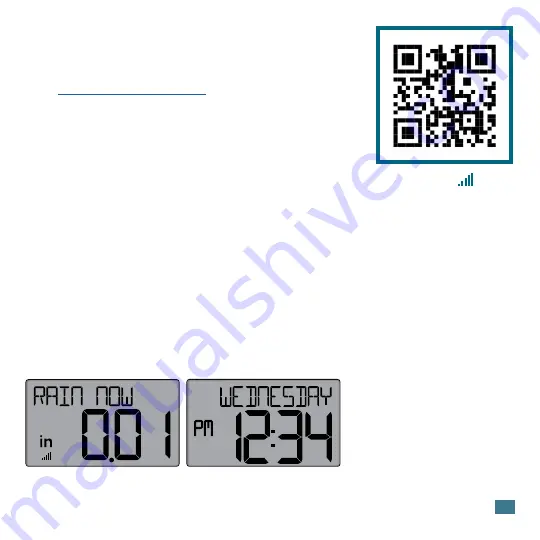
 When a rain sensor is connected, and Time is showing, when rainfall 

begins the station will automatically switch to the RAIN NOW readings. 
This will automatically return to the Time display once there has been no 
additional rainfall recorded for 15 minutes. 

Rain Now (Current Storm)

Returns to Time when 

Rain stops

Note:

 When Rain is displayed, press and release the 

SET/TIME

 button to 

return to the Time display.

Содержание 327-1418BW

Страница 1: ...SET UP GUIDE MODEL 327 1418BW Wind Speed Station...

Страница 2: ...y Patents California Statement Care Maintenance FCC Statement Double Warranty Offer WIND SPEED Wind Speed Readings Top Speed History Reset Wind Records 08 08 09 ALERTS Custom Alerts Set Alerts Trigger...

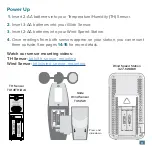
Страница 3: ...Speed Station 4 Once readings from both sensors appear on your station you can mount them outside See pages 14 15 for more details Watch our sensor mounting videos TH Sensor bit ly th_sensor_mounting...

Страница 4: ...ME button to confirm values and move to the next setting 4 Press and release the EXIT RAIN button at any time to save and exit Settings Menu Order Greeting Beep ON OFF 12HR 24HR Time Hour Minute Year...

Страница 5: ...in sensor will read in place of the time See page 12 for details on the add on rain sensor and viewing rain history If RAIN NO shows on the station a rain sensor is not connected to a rain sensor Pres...

Страница 6: ...DITY 8 INDOOR TEMPERATURE 9 INDOOR HUMIDITY Readings will automatically change from Outdoor to Indoor 2 AUTO SCROLL ICON Shows an Alert is armed 7 FEELS LIKE ALERT ICONS Indoor and Outdoor Readings sh...

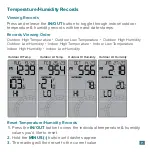
Страница 7: ...al temperature humidity values you d like to reset 2 Hold the MINUS button until dashes appear 3 The reading will then reset to the current value Outdoor High Temperature Outdoor Low Temperature Outdo...

Страница 8: ...nd Speed for timeframe selected 2 TOP SPEED HISTORY Current Wind Speed 8 WIND SPEED Viewing History Press and release the WIND button to toggle through wind speed records with time and date stamps The...

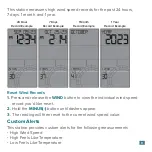
Страница 9: ...his station measures high wind speed records for the past 24 hours 7 days 1 month and 1 year Custom Alerts This station provides custom alerts for the following measurements High Wind Speed High Feels...

Страница 10: ...Press the ALERTS button to confirm and move forward CURRENT SPEED WIND SPEED MPH CURRENT SPEED WIND SPEED MPH Wind Alert OFF ON Feels Like High Alert ON OFF When an alert value is reached the corresp...

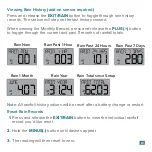
Страница 11: ...ll sensors 3 Your sensor should connect within the next few minutes Press the EXIT RAIN button to view rain readings Note When a rain sensor is connected and Time is showing when rainfall begins the s...

Страница 12: ...through the current and past 11 months of rainfall totals Rain Past 7 Days Rain Now Rain Past 24 Hours Rain Past 1 Hour Rain 1 Month Rain Total since Setup Rain Year 1 Press and release the EXIT RAIN...

Страница 13: ...the sensor and station 3 Press any button on the station 20 times and leave the parts sit for a few moments with the power off 4 Install a new set of alkaline batteries into the sensor then power up...

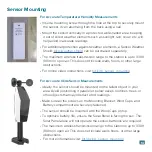
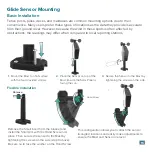
Страница 14: ...lls floors or other large obstructions For more information visit bit ly wind_sensor_mounting For Accurate Temperature Humidity Measurements For Accurate Glide Sensor Measurements Insert a mounting sc...

Страница 15: ...st to a flat surface with the four provided screws Place the Sensor on top of the Mast Ensure the Solar Panel is facing the sun Secure the Sensor to the Mast by tightening the screws on the side 1 2 3...

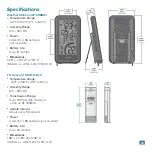
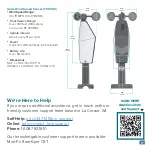
Страница 16: ...W x 7 02 H 9 60cm L x 2 90cm W x 17 83cm H Specifications TH Sensor TX141TH Bv4 Temperature Range 40 F to 140 F 40 C to 60 C Humidity Range 10 99 RH Transmission Range Over 330 feet 100 meters in ope...

Страница 17: ...L x 5 14 W x 13 37 H 13 06cm L x 13 06cm W x 33 96cm H 13 37 33 96cm 8 91 22 64cm 2 95 7 50cm 5 14 13 06cm 3 74 9 50cm 2 76 7 00cm 18 If you require additional assistance get in touch with our friend...

Страница 18: ...erials workmanship La Crosse Technology Ltd 2830 S 26th St La Crosse WI 54601 For Full Warranty Details Visit www lacrossetechnology com pages warranty Patents www lacrossetechnology com pages patents...

Страница 19: ...any form even in part or duplicated or processed using electronic mechanical or chemical process without the written permission of the publisher This booklet may contain errors or misprints The inform...

Страница 20: ...UBLE YOUR WARRANTY Scan Here Scan the QR Code or visit bit ly 327 1418bw_register to register your product and double the standard 1 year warranty for free by opting to recieve occasional product emai...

Отзывы: