


Appendix-2
Character Entry Method
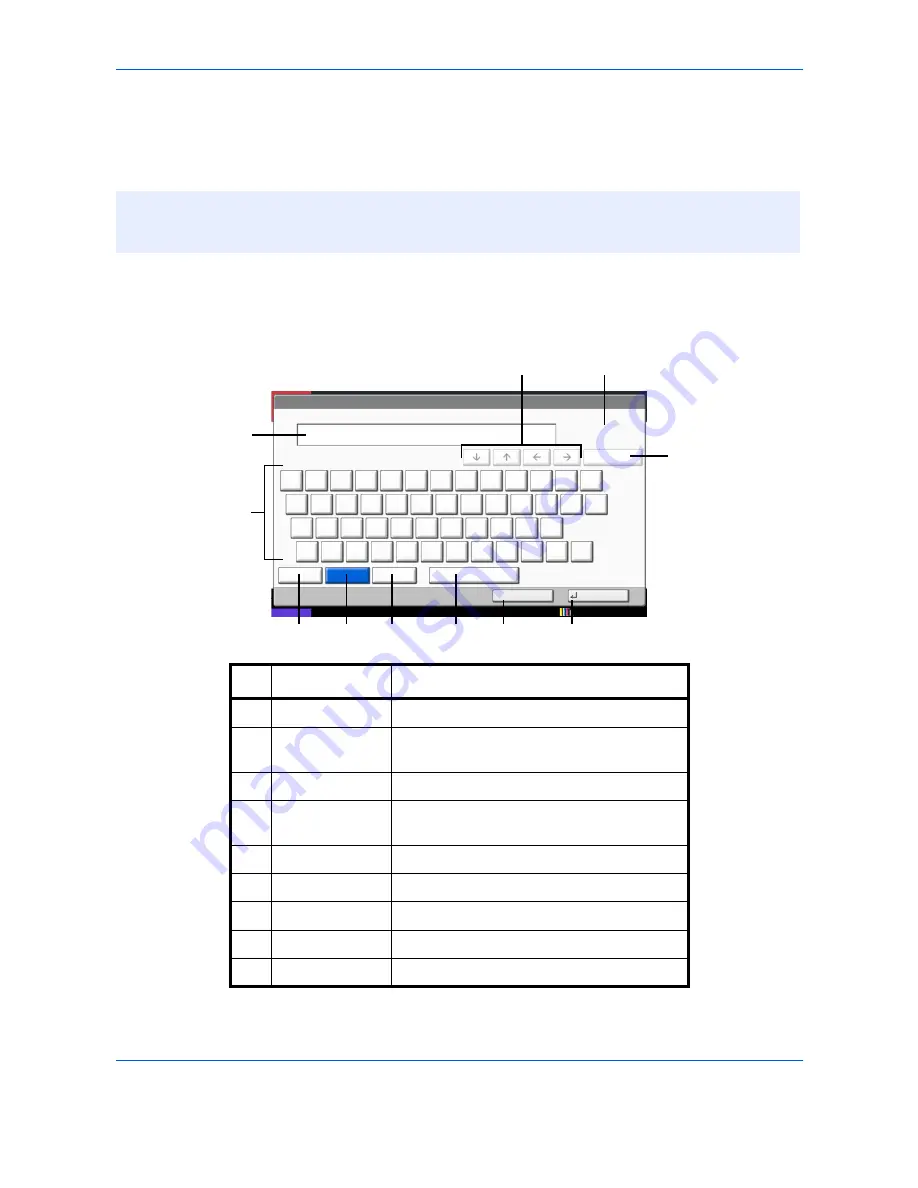
To enter characters for a name, use the on-display keyboard in the touch panel following the steps as explained
below.
Entry Screens
Lower-case Letter Entry Screen
NOTE:
QWERTY, QWERTZ and AZERTY are keyboard layouts the same as a PC keyboard are available.
If necessary, change the layout. For information on how to change layouts, refer to the machine’s
Operation
Guide
. QWERTY layout is used here as an example. You may use another layout following the same steps.
Status
Use the keyboard to enter.
Backspace
Upper-case
No./Symbol
Space
Cancel
OK
Lower-case
1
2
3
4
5
6
7
8
9
0
!
=
`
q
w
e
r
t
y
u
i
o
p
[
]
a
s
d
f
g
h
j
k
l
;
’
z
x
c
v
b
n
m
,
.
/
\
@
_
Input: characters
Limit: characters
0
32
12/12/2011 10:10
1
5
2
4
6
7
8
9
10
11
3
No.
Display/Key
Description
1
Display
Displays entered characters.
2
Limit / Entry
Display
Displays maximum number of characters
and the number of characters entered.
3
Cursor Key
Press to move the cursor on the display.
4
[Backspace]
Press to delete a character to the left of the
cursor.
5
Keyboard
Press the character to enter.
6
[Upper-case]
Press to use upper-case letters.
7
[Lower-case]
Press to use lower-case letters.
8
[No./Symbol]
Press to enter numbers and symbols.
9
[Space]
Press to insert a space.
Содержание TASKALFA
Страница 1: ...FAX System W OPERATION GUIDE...
Страница 2: ......
Страница 18: ...xvi...
Страница 24: ...Part Names and Functions 1 6...
Страница 188: ...Setup and Registration 6 40...
Страница 206: ...Internet Faxing i FAX Option 8 14...
Страница 214: ...About Network FAX 9 8...
Страница 242: ...Appendix 20...
Страница 247: ...MEMO...
Страница 248: ...A1...
Страница 249: ......
Страница 252: ...Rev 1 2012 3 3N6KMEN001...


