background image


Calendar & Tools 

70 


Send Items via Bluetooth 

Turn Bluetooth On and Off 

By default, your phone‘s Bluetooth feature is turned off. Turning Bluetooth on enables your 
phone‘s Bluetooth functions. 

1.  Press 

 > 

Tools

 > 

Bluetooth

 > 

On/Off

2.  Press 

ON

 (left softkey) to enable Bluetooth. Press 

OFF

 (left softkey) to disable Bluetooth. 

Note: 

Turn off Bluetooth when not in use to conserve battery power, or in places where using a 
wireless device is prohibited, such as aboard an aircraft and in hospitals. 

Make Your Phone Discoverable 

To make your phone discoverable (allowing other Bluetooth devices to detect it), you must set 
your phone‘s visibility to other than 

Hidden

1.  Press 

 > 

Tools

 > 

Bluetooth

 > 

Visibility

2.  Select 

Visible for 3 min

 or 

Always visible

. If you select 

Always visible

, your phone 

will be discoverable by all in-range Bluetooth devices until you change the setting. If you 
select 

Visible for 3 min

, your phone will return to hidden mode after three minutes. 

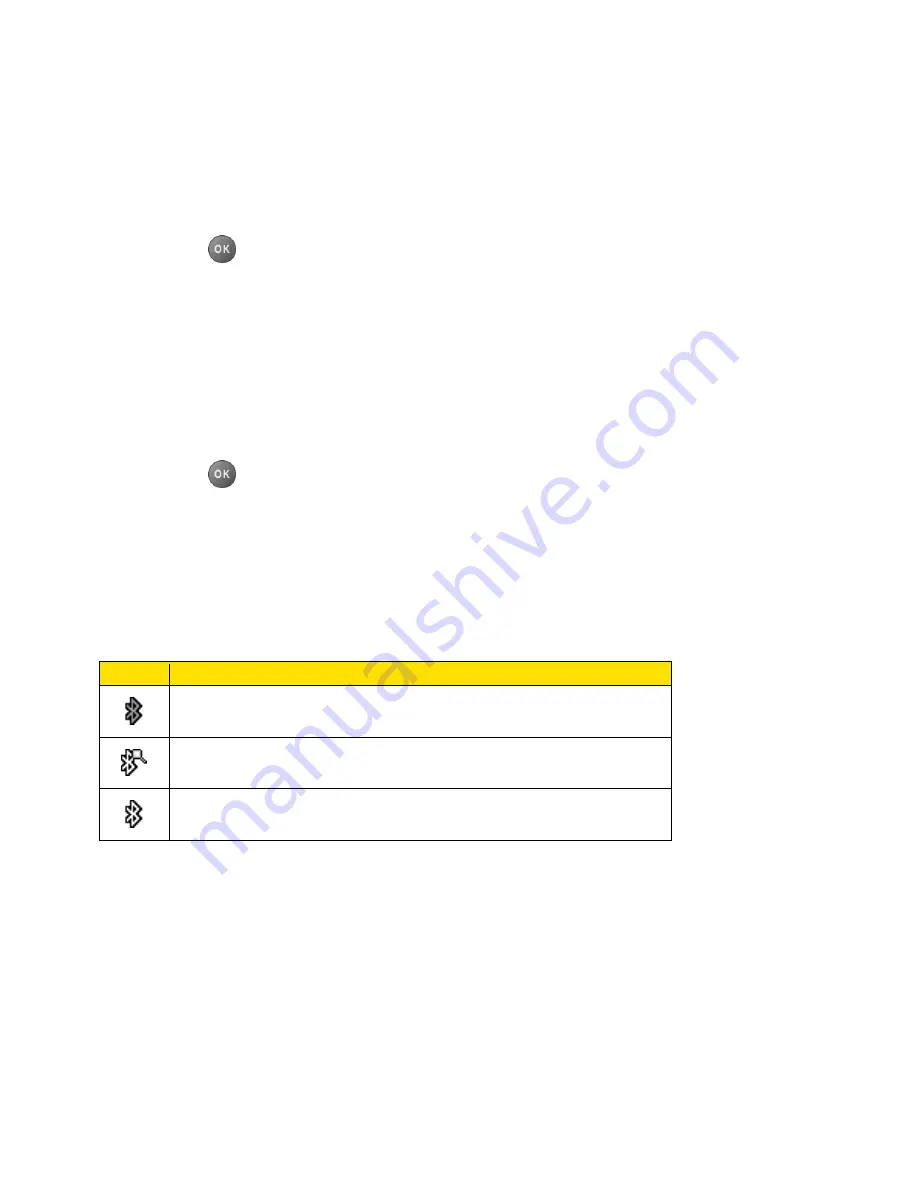
Bluetooth Status Indicators 

The following icons show your Bluetooth connection status at a glance: 

Icon 

Description 


Your phone

‘s Bluetooth feature is turned on. 


Your phone is visible to other Bluetooth devices. 


Your phone is connected to a Bluetooth device. 

The above icons will blink while your phone is communicating with a Bluetooth device. 

Bluetooth Menu 

The 

Bluetooth


menu allows you to set up many of the characteristics of your phone‘s Bluetooth 

feature, including: 

●  Setting your phone‘s visibility (or ―discoverability‖) for other Bluetooth devices. 

●  Adding a new Bluetooth device to your phone. 

●  Displaying your Bluetooth trusted devices list. 

Содержание Kona

Страница 1: ...go are trademarks of Virgin Mobile USA L P The Virgin name and the Virgin signature logo are registered trademarks of Virgin Enterprises Limited and are used under license All other trademarks are the property of their respective owners KYOCERA is a registered trademark of Kyocera Corporation ...

Страница 2: ...mer Support 6 Directory Assistance 411 7 Phone Basics 8 Your Phone s Layout 9 Turn Your Phone On and Off 11 Battery and Charger 11 View the Display Screen 12 Navigate Through the Menus 15 Display Your Phone Number 15 Enter Text 15 Select a Text Input Mode 16 T9 Text Input 16 Abc Mode 17 Set Text Entry Options 17 Simple Data Exchange 18 Phone Calls Settings 20 Make Phone Calls 20 Call Using the Pho...

Страница 3: ...oicemail Notification 27 New Voicemail Message Alerts 27 Retrieve Your Voicemail Messages 28 Check Voicemail Details 28 Phone Call Options 29 Caller ID 29 Call Waiting 29 Call Forwarding 29 Phone Call Settings 30 Call Answer Mode 30 Auto Answer Mode 30 Alert Notification 31 Persistent Alerts 31 Airplane Mode 31 TTY Use With Service 32 Hearing Aid Device Compatibility 33 Settings 34 Display Setting...

Страница 4: ...tings 38 Ringtones 38 Set Up Voice Guide 39 Select a Vibration Pattern 40 Messaging Settings 40 Set Clear Alerts Icon 40 Message Alerts 40 Add a Customized Signature 41 Manage Preset Messages 41 Emergency Alerts 41 Long Message Reassembly 42 Phone Setup Options 42 Navigation Key Shortcuts 42 Headset Mode 43 Security Settings 43 Lock Your Phone 43 Delete Phone Content 44 Reset Your Phone and Phone ...

Страница 5: ...Call History From Contacts 52 Create a New Contacts Entry 52 Create a Contacts Entry 52 Create a Group Entry 52 Save a Number Using the Phone Keypad 53 Edit a Contacts Entry 53 Edit a Contacts Entry 54 Delete a Contacts Entry 54 Add a Number to a Contacts Entry 54 Assign a Ringtone to a Contacts Entry 54 Assign a Picture to a Contacts Entry 55 Add Members to a Group Entry 55 Remove Members From a ...

Страница 6: ...eaded Messaging 62 Calendar Tools 65 Calendar 65 Add an Event to the Calendar 65 Add a To Do List Item to the Calendar 66 Calendar Alerts 67 View Events 67 Delete Events 68 Device Self Service 68 Alarm 68 Bluetooth 69 Turn Bluetooth On and Off 70 Make Your Phone Discoverable 70 Bluetooth Menu 70 Pair Bluetooth Devices 71 View the Trusted Devices List 71 Send Items via Bluetooth 72 Voice Services 7...

Страница 7: ...tos Folder 84 My Photos Folder Options 84 Review Pictures in the Assigned Media Folder 85 Send Pictures 85 Send Pictures Using the Messaging Feature 85 Web and Data 87 Data Services 87 Launch a Web Connection 87 Data Connection Status and Indicators 87 Browser 88 Learn to Navigate the Web 88 Browser Menu 89 Download Games Ringtones and More 91 Downloads 92 Social Networking 92 GPS Services 93 Loca...

Страница 8: ...on gives you all the information you need to set up your phone and use your service the first time Your Phone at a Glance Set Up Your Phone Activate Your Phone Account Management Set Up Voicemail Customer Support Directory Assistance 411 ...

Страница 9: ...Get Started 2 Your Phone at a Glance The following illustration outlines your phone s primary external features ...

Страница 10: ... phone 1 Install the battery Hook your fingernail into the slot at the bottom of the battery cover and lift the cover off gently Figure Insert the battery contacts end first and gently press into place Figure Replace the cover making sure all the locking tabs of the cover are seated with no gaps Figure ...

Страница 11: ...and Pick Your Plan 1 From your computer visit virginmobileusa com and click on Activate 2 Choose an activation option and click Next Then enter your zip and click Next 3 When prompted enter the serial number MEID DEC printed on the sticker located on the back of your phone in the battery compartment and click Next 4 Follow the remaining instructions to choose your plan and select a payment method ...

Страница 12: ... a network coverage area Power your phone off and then power it back on The phone should program itself automatically If you are still experiencing issues call Customer Care at 1 888 322 1122 Account Management Find out information about managing your account Managing Your Account Top Up Your Account Managing Your Account Manage your account from your phone or your computer From Your Phone Dial 86...

Страница 13: ...should set up your voicemail and personal greeting as soon as your phone is activated Always use a password to protect against unauthorized access 1 From standby mode press and hold in standby mode to dial your voicemail number or From standby mode press MESSAGING left softkey Voicemail Call Voicemail 2 Follow the system prompts to Create your password Record your name announcement Record your gre...

Страница 14: ...stance 411 Directory Assistance 411 gives you access to a variety of services and information including residential business and government listings movie listings or show times driving directions restaurant reservations and major local event information There is a per call charge to use Directory Assistance 411 and you will be billed for airtime Dial 411 from your payLo phone For more information...

Страница 15: ...Phone Software Upgrades Updates to your phone s software may become available from time to time payLo will automatically upload critical updates to your phone You can also use the menu to check for and download updates Press Tools Update Phone Update Firmware to search for and download available updates Your Phone s Layout Turn Your Phone On and Off Battery and Charger View the Display Screen Navi...

Страница 16: ...Phone Basics 9 Your Phone s Layout The illustrations and descriptions below outline your phone s basic layout ...

Страница 17: ...contacts See ICE Contacts Microphone allows other callers to hear you clearly when you are speaking to them Softkeys let you select softkey actions or menu items corresponding to the bottom left and right lines on the screen Navigation Key scrolls through the phone s menu options and acts as a shortcut key in standby mode These keys can be reassigned to create customized shortcuts See Navigation K...

Страница 18: ...he phone Turn Your Phone On and Off The instructions below explain how to turn your phone on and off Turn Your Phone On Open the phone and press Turn Your Phone Off Open the phone and press and hold for two seconds until you see the powering down animation on the main screen Battery and Charger Warning Use only Kyocera approved batteries and chargers with your phone The failure to use a Kyocera ap...

Страница 19: ... battery from the phone and replace the cover Warning Do not handle a damaged or leaking Li Ion battery as you can be burned View the Display Screen The status bar at the top of your phone s display screen provides information about your phone s status and options The following tables identify the symbols you ll see on your phone s display screen Tip To view a list of your phone s icons and descri...

Страница 20: ... Beep A beep sounds when you receive an incoming call a message etc 1 Beep Vibrate 1 Beep and vibrate are set Ringtone Vibrate The volume level is set to between 1 and 8 and vibrate is turned on Messaging and Alert Icon Description New Messages You have one or more new messages waiting New Voicemail You have one or more new voicemail messages waiting Urgent Messages You have one or more new urgent...

Страница 21: ...ltiple Shots The multiple shots function is enabled Camera Resolution 2 0M The camera is set to 2 megapixel resolution 1200x1600 Camera Resolution 1 3M The camera is set to 1 3 megapixel resolution 960x1280 Camera Resolution 0 3M The camera is set to 0 3 megapixel resolution 480x640 Camera Resolution 0 1M The camera is set to 0 1 megapixel resolution 240x320 Other Icon Description TTY Your phone i...

Страница 22: ...esponding number on the phone s keypad For example to view the Icon Glossary screen 1 Press to access the main menu 2 Select Settings by highlighting it and pressing 3 Select Phone Info by highlighting it and pressing 4 Select Icon Glossary by highlighting it and pressing For the purposes of this guide the above steps condense into Press Settings Phone Info Icon Glossary Back Up Within a Menu To g...

Страница 23: ... numeric characters Symbols to enter symbols Smileys to enter smile icons Emoticons to enter emoticons This is available for example when composing a message or when editing a Schedule or To Do description in Calendar Paste List to paste copied or cut text if applicable Web Shortcuts to enter Web shortcuts for example www http or com Text Options to display the text entry options menu if applicabl...

Страница 24: ...ey The word will appear as an option the next time you scroll through options during T9 Text Input For more information about T9 Text Input visit the Nuance website at nuance com t9 xt9 Abc Mode In Abc mode also known as multi tap entry you press keys one two three or four times to enter the letters you see on the keypad By default the first letter of a sentence is capitalized and the following le...

Страница 25: ...nput Language to select the language to enter English or Spanish My Words to edit or delete custom words you have added to the predictive text database Add Word to store words that you frequently use Select Text to select text for copying cutting or adding if applicable Delete All to delete all text if applicable Help to view the T9 instructions Simple Data Exchange This feature makes it easy to s...

Страница 26: ...ne Number Options Highlight a phone number press and then select an option Call to call the phone number Prepend to prepend a number to the phone number Send Message to send a message to the phone number The messaging application will open and the phone number will appear as the message s recipient Share to select Message The messaging application will open and the phone number will appear in the ...

Страница 27: ...Calls There are several convenient ways to place calls from your phone Call Using the Phone Keypad Call From Call History Call From Contacts Call Using the Plus Code Call Using a Speed Dial Number Call Using Abbreviated Dialing Features Call a Phone Number With Pauses Call a Phone Number in a Message Call Emergency Numbers Call Using the Phone Keypad The most traditional way to place a call is by ...

Страница 28: ...ll 3 Press to dial the entry s default phone number or To dial another number from the same entry press to select the entry highlight a number and then press Call Using the Plus Code When placing international calls use Plus Code Dialing to automatically enter the international access code for your location for example 011 for international calls made from the U S 1 Press and hold to display on yo...

Страница 29: ...ur or more digits of any part of the number Prepend Prepend the first five or six digits for example the area code and prefix to any four or five digits you enter To activate the Prepend feature 1 Press Settings Others Call Setup Abbrev Dial 2 Select Prepend On 3 Enter a five or six digit number and press To place a call using Abbreviated Dialing 1 Enter the four or more digits of any part of a Co...

Страница 30: ...ber 2 Press OPTIONS right softkey Hard Pause or 2 Sec Pause 3 Enter additional numbers 4 Press to dial the number or Press OPTIONS right softkey Save You can save to a new or existing Contacts entry Note When dialing a number with a hard pause press SEND TONES left softkey to send the next set of numbers Call a Phone Number in a Message You can place a call to a number that appears in a message 1 ...

Страница 31: ...System GPS chip necessary for utilizing E911 emergency location services where available When you place an emergency 911 call the GPS feature of your phone seeks information to calculate your approximate location Depending on several variables including availability and access to satellite signals it may take up to 30 seconds or more to determine and report your approximate location Important Alwa...

Страница 32: ...ding on your settings you may also answer incoming calls by pressing other keys See Call Answer Mode Answer an Incoming Call in Speakerphone Mode Press Mute the Ringtone and Stop the Vibration Select Silence on the screen or Press or the volume button up or down Send an Incoming Call to Voicemail Select Send to Voicemail on the screen Reject an Incoming Call Press or Press and hold Reject an Incom...

Страница 33: ...els do not place the phone near your ear during speakerphone use End Phone Calls Press After you have finished your call the phone will display the caller s name if already in your Contacts phone number if available and the duration of the call Pressing OPTIONS right softkey will display the Recent Call History options See Call History Options for details Missed Call Notification When an incoming ...

Страница 34: ... It is strongly recommended that you create a password when setting up your voicemail to protect against unauthorized access Without a password anyone who has access to your phone is able to access your voicemail messages Voicemail Notification There are several ways your phone alerts you to a new message You will be notified of a new voicemail By displaying a message on the screen By sounding the...

Страница 35: ...ssages 1 Press and hold or From standby mode press MESSAGING left softkey Voicemail Call Voicemail 2 Enter your voicemail password if prompted 3 Follow the voice prompts to listen to and manage your voicemail messages Note You are charged for airtime minutes when you are accessing your voicemail from your wireless phone Use Another Phone to Access Messages 1 Dial your wireless phone number 2 When ...

Страница 36: ...s you that another call is coming in and displays the caller s phone number if available To respond to an incoming call while you are on a call Press This puts the first caller on hold and answers the second call To switch back to the first caller Press again Tip For those calls where you don t want to be interrupted you can temporarily disable Call Waiting by pressing before placing your call Cal...

Страница 37: ...tion Persistent Alerts Airplane Mode TTY Use With Service Hearing Aid Device Compatibility Call Answer Mode Select how to answer incoming calls on your phone 1 Press Settings Others Call Setup Call Answer 2 Select Talk Key Any Key or Flip Open Auto Answer Mode Set your phone to automatically pick up incoming calls Remember your phone will answer calls in auto answer mode even if you are not presen...

Страница 38: ...s Persistent Alerts 2 Select Audible Tone Vibrate or Blink LED 3 Select On or Off Airplane Mode Airplane Mode allows you to use many of your phone s features such as games and voice memos when you are on an airplane or in any other area where making or receiving calls or data is prohibited When you set your phone to Airplane Mode it cannot send or receive any calls or access online information 1 P...

Страница 39: ...which allows you to send voice and receive text during a call TTY HCO to enable TTY mode in Hearing Carry Over mode which allows you to send text and receive voice during a call TTY Full to enable all TTY settings You can send and receive text during a call To access the state Telecommunications Relay Service TRS for assistance with TTY calls Dial and press to reach an operator Note In TTY Mode yo...

Страница 40: ...ility Your phone has been tested and rated for hearing aid device compatibility To use this function effectively set the Hearing Aid option to On 1 Press Settings Others Accessibility Hearing Aid 2 Read the disclaimer and press 3 Select On or Off On to use a hearing aid device with your phone Off to use your phone without a hearing aid device ...

Страница 41: ... display settings not only helps you see what you want they can also help increase battery life Change the Graphic Change the Brightness Change the Backlight Settings Set the Notification Pop up Select a Picture ID Power Save Mode Change the Clock Calendar Display Set a Custom Greeting Change the Phone s Menu Style Change the Font Size Change the Keypad Light Settings Display Language Change the G...

Страница 42: ...me to elapse before the screen backlight dims If you select Backlight Off select a preset length of time to elapse before the screen and keypad backlights turn off When you select Always Bright for the Backlight Dim setting in step 2 the keypad backlight will turn off after about one minute Note Long backlight settings reduce the battery s talk and standby times To change the Java application back...

Страница 43: ... On Select Off to deactivate this feature 3 Read the message and press CONTINUE left softkey Change the Clock Calendar Display Select a clock calendar display on the main screen in standby mode 1 Press Settings Display Clock Calendar 2 Highlight an option and press twice Set a Custom Greeting You can display your own custom greeting in standby mode 1 Press Settings Display Greeting Custom 2 Enter ...

Страница 44: ...ove the menu 4 If you are satisfied with the font size press SAVE left softkey Change the Keypad Light Settings You can choose whether to turn the keypad light on or off 1 Press Settings Display Keypad Light 2 Select On or Off Display Language You can choose to display your phone s onscreen menus in English or in Spanish 1 Press Settings Others Language 2 Select English or Español Volume Settings ...

Страница 45: ...utton down in standby mode The screen will display Silence All To deactivate Silence All Press the volume button up repeatedly to select a volume level Ringtone Settings You can assign a ringtone or vibration pattern to incoming calls messages etc and also enable audio guidance Ringtones Set Up Voice Guide Select a Vibration Pattern Ringtones Ringtones help you identify incoming calls and messages...

Страница 46: ...gtone type category Incoming Calls Voicemail Messages etc and any applicable subcategories 3 Select Downloaded Get New 4 Use the navigation key and keypad to search through available ringtones When you find the one you want highlight it and press 5 To purchase the ringtone select Buy and follow the onscreen instructions to complete the download 6 When the download is finished select an option to c...

Страница 47: ...ve different kinds of messages without placing a voice call Messaging settings allow you to create a signature with each sent message and your own preset messages Set Clear Alerts Icon Message Alerts Add a Customized Signature Manage Preset Messages Emergency Alerts Long Message Reassembly Set Clear Alerts Icon Clear Alerts Icon will clear the envelope icon on the display 1 From standby mode press...

Страница 48: ...ssage 1 From standby mode press MESSAGING left softkey OPTIONS right softkey Preset Messages The list of preset messages will be displayed 2 To edit or delete a message highlight it and press OPTIONS right softkey 3 Select Edit edit the message and press or Select Delete YES left softkey to delete the message You can also reset all messages by selecting Reset all messages YES left softkey To chang...

Страница 49: ... it is divided into up to 15 messages and delivered to your phone You can choose to combine them to display as one message rather than segmented ones 1 From standby mode press MESSAGING left softkey OPTIONS right softkey Long Message Re assembly 2 Select On or Off Phone Setup Options Configure your phone to your convenience Navigation Key Shortcuts Headset Mode Navigation Key Shortcuts You can use...

Страница 50: ...es for Data Services Lock Your Phone When your phone is locked you can only make calls to 911 or ICE Contact 1 Press Settings Lock Phone 2 Enter your lock code 3 Select Lock Now Tip The first time you access the Lock Phone menu you will be advised to change the default lock code by pressing CHANGE left softkey Enter and re enter your new lock code to proceed For details see Change the Lock Code Un...

Страница 51: ...int and press or Delete the hint by pressing and press Tip If you can t recall your lock code try using the last four digits of your wireless phone number or check your lock code hint Delete Phone Content You can quickly and easily delete all the content that you have created or stored in your phone 1 Press Settings Reset Delete and enter your lock code 2 Select Delete Stuff 3 Highlight an option ...

Страница 52: ...tory Calendar and Messaging are not affected Reset Phone to reset all settings and erase all data on your phone 4 Read the message and press the left softkey RESET SETTINGS or RESET PHONE Security Features for Data Services You can turn on or off your phone s data services Enable Data Services Although your phone s data services are turned off by default you may enable them at any time To enable d...

Страница 53: ... to sign out Net Guard The Net Guard helps you avoid accidental connections when you connect to the Web To enable or disable Net Guard Press Settings Others Data Settings Net Guard On to activate the Net Guard Off to deactivate the Net Guard Note When enabled Net Guard appears only once as long as you have not turned the phone off and on ...

Страница 54: ...the bottom of the list Each entry contains the phone number if available and Contacts entry name if the number is in your Contacts Duplicate calls calls from the same number may appear only once on the list The Call History List Call History Icons Call History Thread Call History Details The Call History List The call history list displays your recent call history at a glance From standby mode pre...

Страница 55: ...om standby mode press 2 Highlight an entry from the list and press The Call History thread is displayed 3 Highlight an entry and press An onscreen menu may also be available according to the type of call See Call History Options Call History Options You may see several menu items on the onscreen menu Press OPTIONS right softkey for additional options Call to call the selected entry Send Message to...

Страница 56: ...all History Make a New Group Entry From Call History Save a Number From Call History You can easily save a number from your Call History to your Contacts 1 From standby mode press 2 Highlight an entry and press OPTIONS right softkey Save Contact 3 Select New Entry or Existing Entry 4 If New Entry was selected select a number type and then enter the new entry name or If Existing Entry was selected ...

Страница 57: ...Contacts 4 When you have selected all the entries you want to add press CONTINUE left softkey 5 Enter a group name and press SAVE left softkey Delete Call History You can delete individual or all entries in your Call History 1 From standby mode press 2 Highlight an entry you wish to delete and press OPTIONS right softkey Delete Select Delete All to delete all entries 3 If you are certain you want ...

Страница 58: ...umber While Using Contacts Dial Services View Contacts Entry Access your Contacts entries currently stored in your phone The Contacts List Contacts Details View Call History From Contacts The Contacts List The Contacts list shows the Contacts entries stored in your phone 1 From standby mode press CONTACTS right softkey You will see the Contacts list 2 Highlight a contacts entry to show the entry s...

Страница 59: ...y Your phone can store up to 600 Contacts entries Each entry can contain up to seven phone numbers and three email addresses IM addresses and Web addresses 1 From standby mode press CONTACTS right softkey Add New New Contact 2 Enter a name for the new entry and press the navigation key down 3 Enter the phone number and press 4 Highlight a number type for the entry Mobile Home Work Pager Fax or Oth...

Страница 60: ...e Keypad You can save a phone number to Contacts directly from the phone keypad 1 From standby mode enter a phone number 2 Press OPTIONS right softkey Save If this is the first time you are saving an entry to Contacts skip to step 4 3 Select New Entry or Existing Entry 4 If you chose New Entry select a number type and then enter the new entry name or If you chose Existing Entry select an entry to ...

Страница 61: ... right softkey 2 Highlight an entry or a group you want to delete 3 Press OPTIONS right softkey Delete Contact or Delete Group 4 Press DELETE left softkey Add a Number to a Contacts Entry You can add numbers to existing entries in your Contacts 1 From standby mode press CONTACTS right softkey 2 Highlight the entry you want to add a number to and press OPTIONS right softkey Edit Contact Add Number ...

Страница 62: ...certain contact calls you 1 From standby mode press CONTACTS right softkey 2 Highlight an entry and press 3 Highlight and press 4 Select Choose Photo 5 Select a photo category and press 6 Select an image and press to assign it Add Members to a Group Entry You can add a group member to an existing group 1 From standby mode press CONTACTS right softkey 2 Highlight the group you want to add members t...

Страница 63: ...key that displays the ICE In Case of Emergency contacts which could be very helpful in case of emergency Add an ICE Contact Call an ICE Contact Edit an ICE Contact Emergency Message ICE Information Add an ICE Contact You can register one Call contact and up to four Text contacts 1 From standby mode press CONTACTS right softkey and highlight an entry 2 Press OPTIONS right softkey Settings ICE ICE C...

Страница 64: ...dby mode press CONTACTS right softkey and highlight an entry 2 Press OPTIONS right softkey Settings ICE SEND TEXT right softkey 3 Read the message and press OK left softkey Note When Location settings is turned off it will be automatically turned on To enter or edit the emergency message 1 From standby mode press CONTACTS right softkey and highlight an entry 2 Press OPTIONS right softkey Settings ...

Страница 65: ...Press the navigation key left or right to display other listed numbers or Highlight an entry and press to display the details Find an Entry Using the Phone Keypad You can search Contacts entries for the numbers that contain a specific string of numbers 1 Enter four or more digits of the number in standby mode The more numbers you enter the more specific the search becomes 2 All Contacts entries ma...

Страница 66: ...in your Contacts or From standby mode press CONTACTS right softkey highlight an entry and press 2 Highlight the number and press OPTIONS right softkey Set Speed Dial 3 Highlight an available speed dial location and press 4 Press to return to the contact details screen Tip To replace a current assignment select a location and press REPLACE left softkey To check speed dial assignments 1 From standby...

Страница 67: ...ess OPTIONS right softkey My Number Dial Services Your Contacts list is preprogrammed with contact numbers for various services To dial a service from your Contacts 1 From standby mode press CONTACTS right softkey 2 Press OPTIONS right softkey Settings Services 3 Select Directory Assistance Voicemail Community Information Non Emergency Services Traffic Information Call Care TRS Relay for TTY Call ...

Страница 68: ... a recipient from the list or from the following options Go to Contacts to select a recipient from your Contacts Qualifying Contacts entries must contain a phone number or an email address MULTIPLE left softkey to select multiple recipients Press CONTINUE left softkey when you have finished selecting and entering recipients You may include up to 40 recipients per message NEW ADDRESS right softkey ...

Страница 69: ...de press MESSAGING left softkey Messages You will see a thread list Each thread has an entry s name if saved in Contacts a phone number or an email address You will also see the number of unread messages if any for each thread View Messages Highlight a thread and press to display the messages sent to and received from a particular contact in reverse chronological order Failed pending and draft mes...

Страница 70: ...RESEND left softkey to resend a failed message Select a message press OPTIONS right softkey and select an option Forward to forward the selected message Lock to lock the selected message Unlock to unlock the selected message Unlock All to unlock all messages Note Messages are automatically deleted starting with the oldest To save messages lock them Delete to delete the selected message Delete All ...

Страница 71: ...Messaging 64 Combine Uncombine to display segmented messages as one message or vice versa More Information to display more information when receiving an Emergency Alert message See Emergency Alerts ...

Страница 72: ...nage events meeting and appointments Your Calendar helps organize your time and reminds you of important events Add an Event to the Calendar Add a To Do List Item to the Calendar Calendar Alerts View Events Delete Events Add an Event to the Calendar Your Calendar helps organize your time and reminds you of up to 100 important events 1 Press Tools Calendar 2 Highlight a day to which you would like ...

Страница 73: ... 10 Select a repeat status for the alarm by highlighting the repeat field and pressing If you chose Specific Period set a start and end date for the repeat status and press OK left softkey If you chose Weekly select the check box for each day of week you wish to set and press DONE left softkey 11 Press SAVE left softkey Tip To change the calendar display views press the left softkey MONTH or WEEK ...

Страница 74: ...of the event To respond to the alarm select an available onscreen menu or press the appropriate softkey Press SNOOZE left softkey or Snooze to stop the alarm and start snooze mode if applicable Press DISMISS right softkey to clear the alarm if applicable Select View to display the event detail screen Tip To change the alarm settings from the main menu select Tools Calendar OPTIONS right softkey Se...

Страница 75: ...hted event Select to delete multiple events All on This List to delete all events on the list All Completed Events to delete completed To Do List items 5 Press YES left softkey To delete old events or all events Press Tools Calendar OPTIONS right softkey Delete Memory Delete Old or Delete All YES left softkey Device Self Service Your phone comes with a built in servicing application that can assis...

Страница 76: ...gth for the alarm by highlighting the ringtone length field and pressing 10 Select a snooze interval for the alarm by highlighting the snooze interval field and pressing 11 Select the number of times the snooze should repeat by highlighting the snooze time field and pressing 12 Press SAVE left softkey Tip Press ON or OFF left softkey to toggle the alarm on and off Bluetooth Bluetooth is a short ra...

Страница 77: ...isible for 3 min or Always visible If you select Always visible your phone will be discoverable by all in range Bluetooth devices until you change the setting If you select Visible for 3 min your phone will return to hidden mode after three minutes Bluetooth Status Indicators The following icons show your Bluetooth connection status at a glance Icon Description Your phone s Bluetooth feature is tu...

Страница 78: ... fast secure connections while bypassing the discovery and authentication process 1 Press Tools Bluetooth Add New 2 Select the device you wish to pair with and press 3 If prompted accept the connection on the receiving device and enter the same passcode on both your phone and the other device or confirm the auto generated passcode and then press 4 Optional Edit the device name and press SAVE left ...

Страница 79: ...w Bluetooth device Delete to delete the selected device from the list Delete All to delete all devices from the list Auto Accept to configure your phone s accessibility to other Bluetooth devices View Edit Info to view or edit the information of the selected device Help to display the Trusted Devices list help Send Items via Bluetooth Depending on your paired devices settings and capabilities you ...

Страница 80: ...ply follow the voice prompts Available ASR commands include Call Name or to call an entry in your Contacts list or a spoken phone number See Make a Voice Call Using ASR for details Send Message Name or to send a message to an entry in your Contacts list or to a spoken phone number See Send a Message Using ASR for details Lookup Name to display the detail screen of an entry in your Contacts list Se...

Страница 81: ...e or number say a name or a phone number 4 When you hear Which location say a number type for example Mobile The phone displays the text entry screen See Messaging for how to compose a message Display a Contacts Entry s Information Using ASR 1 Press and hold or 2 When you hear Say a command say Lookup 3 When you hear Say the name say a Contacts entry s name The phone displays the detail screen for...

Страница 82: ...n 3 Highlight an option and press Automatic to ask for confirmation only when the system is not sure what you said Always Confirm to always ask for confirmation Never Confirm to never ask for confirmation To adapt the system to your voice 1 Press and hold or 2 Press SETTINGS right softkey Adaptation Adapt Voice 3 Press START left softkey and repeat each word phrase or telephone number you hear To ...

Страница 83: ...in North America Other to recognize any number regardless of location To display the ASR software version 1 Press and hold or 2 Press SETTINGS right softkey About Manage Voice Memos Use your phone s Voice Memo to record brief memos to remind you of important events phone numbers or grocery list items and to record call memos of the other party s voice during a phone call Note You can store up to 2...

Страница 84: ...vices Voice Memo List 2 Press OPTIONS right softkey Play Multiple and select memos you want to play 3 Press PLAY left softkey Voice Memo Options Your phone offers several options for managing voice memos you have recorded 1 Press Tools Voice Services Voice Memo List 2 Highlight a memo and press OPTIONS right softkey to display available voice memo options Play to play selected memos or all memos S...

Страница 85: ...lear all numbers 3 Press for the total World Clock You can view the local time in various cities around the world To view the time in different locations 1 Press Tools World Clock 2 Press the navigation key left or right to scroll through different time zones Note Press OPTIONS right softkey Standard or Summer to change between daylight saving time and standard time Countdown Timer This feature al...

Страница 86: ...key to start the stopwatch 4 Press SPLIT or LAP left softkey to record the time 5 Press STOP right softkey to stop timing 6 Press RESET left softkey to reset the stopwatch to zero Notepad Your phone offers a simple notepad to allow you store your notes Write a Note View a Note Edit a Note Delete Notes Write a Note 1 Press Tools Notepad Add New 2 Enter a note and press OK left softkey to save it To...

Страница 87: ... OK left softkey To access various text entry options press OPTIONS right softkey See Select a Text Input Mode Delete Notes 1 Press Tools Notepad 2 Highlight the note you want to delete and press DELETE right softkey 3 Highlight an option and press This to delete the highlighted note All to delete all notes on the list 4 Press YES left softkey ...

Страница 88: ...Additional camera options are available See Camera Mode Options for more information Shortcut To activate camera mode you can also press and hold the camera key 2 Using the phone s main screen as a viewfinder aim the camera lens at your subject 3 Press or CAPTURE left softkey until the shutter sounds The picture will automatically be saved in the selected storage area See Store Pictures To return ...

Страница 89: ...de Options Various options are available from camera mode Press OPTIONS right softkey in camera mode to display additional camera options Picture Mode to select a picture mode from Normal Beach Snow Scenery Mirror Image or Night Dark Zoom to zoom in on a subject See Zoom Self Timer to activate the camera s timer See Self timer Fun Tools to select an option from the following Multiple Shots to take...

Страница 90: ...s feature allows you to take three six or nine shots in a continuous sequence When you take multiple shots the icon will be displayed on the upper left corner of the screen 1 From camera mode press OPTIONS right softkey Fun Tools Multiple Shots Note When taking multiple shots the resolution is temporarily set to 0 1M 240x320 2 Highlight an option 3 Shots 6 Shots or 9 Shots and press Select Off to ...

Страница 91: ...own Auto Review to select whether or not the picture is displayed for review after you take a picture Store Pictures Your phone s picture storage area is called My Photos From the My Photos folder you can view all the pictures you have stored there delete files and access additional options Review Pictures in the My Photos Folder My Photos Folder Options Review Pictures in the Assigned Media Folde...

Страница 92: ...ption time date and size Full Screen to display the selected picture in full screen view Review Pictures in the Assigned Media Folder The Assigned Media folder automatically stores copies of pictures assigned as picture IDs or graphics on your phone See Assign Pictures 1 Press Tools Assigned Media 2 Use your navigation key to view and scroll through the pictures To switch a picture from thumbnail ...

Страница 93: ...electing and entering recipients You may include up to 40 recipients per message NEW ADDRESS right softkey to enter a recipient s wireless phone number or email address directly Press CONTINUE left softkey to proceed 4 Compose a message 5 Confirm the recipients message and pictures You may also select additional options by pressing the right softkey Follow the onscreen instructions to add availabl...

Страница 94: ...unch a Web Connection Data Connection Status and Indicators Launch a Web Connection Launching a Web connection is as simple as opening the browser on your phone Press Web Your data connection starts and you see the home page Tip To change the default launch page to the last page you viewed press Options right softkey and select Browser settings Startup page Use the last page I visited Confirm left...

Страница 95: ...s display screen contains one or more softkeys These keys are shortcut controls for navigating around the Web and they correspond to the softkeys directly below the phone s display screen Tip Depending on which websites you visit the labels on the softkeys may change to indicate their function To use softkeys Press a softkey If an additional pop up menu is displayed when you press the softkey sele...

Страница 96: ...ay of sites and services for you to browse not all sites are represented and certain functions such as going directly to specific websites are not available For these and other functions you will need to use the browser menu The browser menu offers additional options to expand your use of the Web on your phone Open the Browser Menu You may open the browser menu anytime you have an active data sess...

Страница 97: ...this page to bookmarks to store the address of the currently viewed Web page View all bookmarks to display a bookmark list View browsing history to display a list of the Web pages visited Send this page to a friend to send a URL of the currently viewed Web page Overview Mode to display the entire Web page Browser settings Startup page to change the default launch page Automatic Overview Mode to ch...

Страница 98: ... redirected Root certificate to display the certifications Disable Virtual Mouse Enable Virtual Mouse to activate or deactivate the virtual mouse Virtual Mouse to set the speed of the virtual mouse Reset browser to reset all browser settings Download Games Ringtones and More The My Stuff menu allows you to access games ringtones and other applications Additional charges may apply Follow the basic ...

Страница 99: ... to download Press to quit the browser and return to standby mode Note Services may be available for an additional subscription fee Visit virginmobileusa com or call Virgin Mobile Care Downloads You have access to a dynamic variety of downloadable content such as games ringtones and other applications Additional charges may apply Access the Downloads Menu 1 Press Downloads 2 Scroll through the ava...

Страница 100: ... phone s standby screen will display the icon When Location is turned off your phone will display the icon To send the GPS log to other devices 1 Press Settings Others Location NMEA Output 2 Select USB Note Turning Location on will allow the network to detect your position using GPS technology making some payLo applications and services easier to use Turning Location off will disable the GPS locat...

Страница 101: ...and or payLo s network settings may limit the feature s functionality Always contact payLo about feature availability and functionality All features functionality and other specifications as well as the information contained in this user guide are based upon the latest available information and are believed to be accurate at the time of issuing Kyocera Communications Inc reserves the right to chan...

Страница 102: ...rademarks or registered trademarks of ACCESS CO LTD in Japan and other countries This software is based in part on the work of the Independent JPEG Group The Bluetooth word mark and logos are owned by the Bluetooth SIG Inc and any use of such marks by Kyocera Corporation is under license Other trademarks and trade names are those of their respective owners T9 is a registered trademark of Nuance Co...

Страница 103: ...e 4 Install 3 Remove 12 Bluetooth 69 Icons 13 70 Make Your Phone Discoverable 70 Menu 70 Pair Devices 71 Send Items 72 Trusted Devices 71 Turn On and Off 70 Brightness 35 Browser 88 Menu 89 Web Navigation 88 Calculator 78 Calendar 65 Add a To Do 66 Add an Event 65 Alerts 67 Delete Events 68 View Events 67 Call Answer 25 End 26 Forward 29 In call Options 25 Make 20 Missed 26 Phone Call Options 29 ...

Страница 104: ...Icons 14 Settings 84 Store Pictures 84 Take a Picture 81 Clock Display 36 World Clock 78 Contacts Assign a Picture to a Contacts Entry 55 Assign a Ringtone to a Contacts Entry 54 Assign a Speed Dial Number 59 Create a New Contacts Entry 52 Delete a Contacts Entry 54 Edit a Contacts Entry 54 Find 58 ICE Contacts 56 List 51 Make a Call From 21 Secret Entries 59 Countdown Timer 78 Customer Support 6 ...

Страница 105: ...de 16 Font Size 37 Forward a Call 29 GPS Services 93 Graphic 34 Greeting 36 Headset 43 Hearing Aid Device Compatibility HAC Mode 33 Icon Indication 12 47 70 87 Key Functions 10 Keypad Light 37 Language Display 37 Preset Messages 41 Lock Code 43 Lock Your Phone 43 Make a Call 20 From Call History 21 49 From Contacts 21 To a Number in a Message 19 23 To Emergency Numbers 23 Using Abbreviated Dialing...

Страница 106: ...2 Microphone 10 Missed Calls 26 Navigation Key Shortcuts 42 Net Guard 46 Notepad 79 Notification Pop up 35 Phone Illustration 2 9 Key Functions 10 Lock 43 Reset 45 Set Up 3 Turn On and Off 11 Unlock 43 Phone Number Display 15 With Pauses 23 Picture ID 36 Pictures Assign 36 55 82 Send 85 Store 84 Take a Picture 81 Plus Code Dial 21 Power Save Mode 36 Preset Messages 41 Receive a Call 24 Answer 25 I...

Страница 107: ...5 Delete Phone Content 44 Lock Code 43 Lock Phone 43 Net Guard 46 Reset Phone 45 Unlock Phone 43 Self timer 83 Services Dial 60 Set Up Phone 3 Voicemail 6 27 Settings Camera 84 Display 34 Phone Call 30 Phone Setup Options 42 Ringtones 38 Security 43 Volume 37 Signature 41 Silence All 38 Simple Data Exchange 18 Social Networking 92 Speed Dial 21 Assign Numbers 59 Stopwatch 79 TTY Use 32 Turn Your P...

Страница 108: ...ces 73 Automatic Speech Recognition ASR 73 Voice Memos 76 Voicemail 26 New Message Alerts 27 Notification 27 Retrieve Messages 28 Set Up 6 27 Volume 37 Adjust 37 Silence All 38 Web 87 Browser 88 Launch 87 Navigation 88 Status and Indicators 87 World Clock 78 Zoom 83 ...

Отзывы: