background image

 
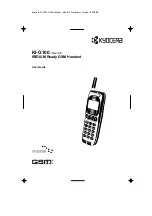
Kyocera KI-G100 GSM Handset - 

Ver.


0.3


Preliminary Version - 

01.1999


1. Getting Started 


INSERT YOUR SIM CARD 

 
The GSM SIM (Subscriber Identification Module) Card contains all the relevant 
information concerning your subscription (card number, phone number...). This 
card must be inserted in the phone prior to use. 
 
Place the SIM Card (Plug-In size) in the phone as 
shown beside. Ensure that the gold chip is facing 
upwards and towards the bottom of the phone. 


To remove the SIM Card: 

• 

Press the release catch 

• 

When the SIM Card pops up, pull it out 


ATTACH THE BATTERY 

 
a.  Hook the battery onto the hinge at the bottom of the phone 
b.  Swing the battery down and click it into place 
 

     a:


b: 


To remove the battery, 

a.  Press the release catch 
b.  Swing the battery up and then lift it off the phone 
 

     a:


b: 


Getting Started 

2

Содержание IRIDIUM KI-G100

Страница 1: ...Kyocera KI G100 GSM Handset Ver 0 3 Preliminary Version 01 1999 KI G100 Main Kit IRIDIUM Ready GSM Handset User Guide...

Страница 2: ...not use the phone in hospitals as the antenna s electromagnetic radiation may cause disturbances to medical equipment s normal operation If you wear devices such as a pacemaker or hearing aids we rec...

Страница 3: ...ll up the antenna 6 To make a call 6 To receive a call 6 To adjust the volume 7 To mute the microphone 7 To end or refuse a call 7 To redial 7 To switch off 7 3 Extra Dialling Services 8 Abbreviated D...

Страница 4: ...4 Services 19 5 Network 20 6 Security 21 7 Accessory 22 8 IRIDIUM 23 Memory Menu 24 1 Phonebook 24 2 Dialled 26 3 Received 26 4 Erase 26 5 Own Number 26 5 IRIDIUM 27 6 Problem Solving Helpful Hints 2...

Страница 5: ...dly way Your KI G100 phone has been designed to be easy to use simply follow the self explanatory instructions on the display Once you have mastered the basic concept of using the phone you should onl...

Страница 6: ...to use Place the SIM Card Plug In size in the phone as shown beside Ensure that the gold chip is facing upwards and towards the bottom of the phone To remove the SIM Card Press the release catch When...

Страница 7: ...minutes after you connect the charger We recommend to always discharge completely the battery before recharging CARRY STRAP The Carry Strap included in the box can be fixed and removed as shown besid...

Страница 8: ...onds to conserve battery life Keypad and phone descriptions 1 Antenna 9 Scroll right 14 Earpiece 2 Alert speaker slots 10 Power End 15 Status LEDs 3 LCD panel Hang up 16 Data and charger 4 Soft key 1...

Страница 9: ...e status On new message waiting Blinking Short Message memory full 5 IRIDIUM system operation 6 GSM cellular operation 7 Incoming signal strength level 8 Number text display area Numbers text 4 lines...

Страница 10: ...d there are at least 2 bars on the signal strength indicator In case of poor coverage conditions the reception quality may be improved by changing location e g in a building move near to a window Dial...

Страница 11: ...he option Mute in the In Call Menu Press OK to confirm To reconnect the microphone press Unmute or hold down the key In Call Menu Tones Off Mute Quit OK Quit Calls muted Unmute TO END OR REFUSE A CALL...

Страница 12: ...ake use the Clear key short press clear the last digit long press clear the complete number Press or scroll 5 6 from the desired location number in the Phonebook Press Call or hold down the key to cal...

Страница 13: ...see next section Press Menu to access the In Call Menu Select with 5 6 Hold or Retrieve or Exclude or Swap End or Drop Join All Hold all Private Tones Off or Tones On Cost or Total Cost Mute Quit to p...

Страница 14: ...s are active and a new one is waiting indicated by a signal tone through the earpiece and red light on top of the phone blinking Press to end all active and held calls and then to accept the new call...

Страница 15: ...d with the Exclude Drop Join All Hold All and Private options of the In Call Menu see previous section MANNER TALK MODE The Manner Talk Mode allows you to make a call in noisy environment with a highe...

Страница 16: ...enu or option is selected when it is highlighted The 4 symbol beside a menu option indicates the presence of a submenu The isymbol indicates the option which is currently set A selected option can be...

Страница 17: ...with 5 6 to option 2 Duration Press OK to confirm and read the last call duration Menu 0 Quit 1 Settings 4 2 Messages OK Quit Menu 2 Messages 3 Costs 4 4 Services OK Quit Costs 0 Quit 1 Last Call 4 2...

Страница 18: ...Kyocera KI G100 GSM Handset Ver 0 3 Preliminary Version 01 1999 MAIN MENU STRUCTURE continued on next page Menus 14...

Страница 19: ...on 01 1999 from previous page Note Menu 8 IRIDIUM is only available when the KI G100 is docked on the Iridium Adapter SD 66K optional MEMORY MENU STRUCTURE 1 Phone Book 1 Find 2 New 3 Edit 4 Delete 2...

Страница 20: ...ume set the default earpiece volume 15 Key Volume set the keypad tone volume 16 DTMF Tones switch on or off the generator of Dual Tone Multi Frequency tones generator for the control of answering mach...

Страница 21: ...letter appears see keypad allocation page 29 Use A a to toggle between upper and lowercase If you make a mistake use the Clear key short press clear the last character long press clear the complete en...

Страница 22: ...d and you must enter the PUK2 code to release it contact your Service Provider A charge or duration limit can be set so that when elapsed calling becomes automatically impossible The PIN2 code of your...

Страница 23: ...Eventually select All Calls or If Abroad for the option 3 Incoming and confirm again Enter your Barring Password and confirm 42 Divert You can choose to divert your incoming calls to another telephone...

Страница 24: ...n on page 10 44 Caller id With this menu you can choose whether the telephone number of someone or a party calling you will be displayed provided the function is activated on their side and whether yo...

Страница 25: ...ress OK and then to answer the call Keylock Off OK 62 PIN If this function is activated your SIM Card is protected against unauthorised use with a Personal Identification Number PIN of your choice tha...

Страница 26: ...ialled The access to the SIM memory is also restricted This can be used for example when you lend your phone to someone else and wish them to be only able to call certain numbers e g in your office Th...

Страница 27: ...r the GSM cellular operation Please notice however that Call Barring can only be set for all incoming and or all outgoing calls and that Call Divert on No Answer is not available 84 Modes Should both...

Страница 28: ...umber 1 Name Enter the beginning of a name To enter a letter press a key several times until the desired letter appears see keypad allocation page 29 Use A a to toggle between uppercase and lowercase...

Страница 29: ...s the FDN Memory Eventually edit the suggested location number and confirm 13 Edit change an entry in the phonebook SIM Phone or FDN Memory according to the location number Find the entry to edit same...

Страница 30: ...ilable that have been received If you have been called by the same number more than one time this number will appear only once in the list You can recall the received number list to call back or store...

Страница 31: ...s to the equator Each orbital plane contains eleven operational satellites and a spare one placed in a storage orbit below the eleven operational satellites The satellites orbit at a speed of approx 2...

Страница 32: ...to cell causing handoffs to occur In the IRIDIUM system the cell pattern moves across the user s location which causes handoffs to occur Although it uses a satellite network instead of a terrestrial o...

Страница 33: ...e Provider for a replacement SIM Card Contact your Service Provider who will give you the PUK and help you to unblock your SIM Card If none of the and symbols are showing The network connection is los...

Страница 34: ...e phone If it is not working properly call the Kyocera Helpline Use only the recommended battery chargers Treat the phone gently and avoid dropping knocking or shaking it Keep the equipment out of rea...

Страница 35: ...x 41 x 22 mm L x W x H Weight 99 g Operating temperature 10 C 55 C Data speed 9600 bps depending on network coverage and system parameters offered by the network operator AC G100 AC Charger Dimension...

Страница 36: ...your KI G100 phone Additional accessories may be available and are sold separately Please contact your local Service Provider or retail outlet for more information GSM ACCESSORIES DC Charger GC Ref D...

Страница 37: ...Kyocera KI G100 GSM Handset Ver 0 3 Preliminary Version 01 1999 Soft Case GC Ref SG G100 External Antenna GC Ref OA G100 Personal Hands Free GC Ref EM G100 Accessories 33...

Страница 38: ...ry Version 01 1999 IRIDIUM ACCESSORIES IRIDIUM Adapter Ref SD 66K IRIDIUM Hands Free Kit Ref HF S100 IRIDIUM AC Charger Ref AC S100 IRIDIUM Car Holder Ref CH S100 IRIDIUM DC Charger Ref DC S100 IRIDIU...

Страница 39: ...et Ver 0 3 Preliminary Version 01 1999 IRIDIUM Solar Power Supply Ref SP S100 Personal Hands Free GC Ref EM G100 Data Cable GC Ref DA G100 IRIDIUM Separate Vibrator Ref SV S100 IRIDIUM Two Way Cable R...

Страница 40: ...Kyocera KI G100 GSM Handset Ver 0 3 Preliminary Version 01 1999 Index to be inserted in the final version Index 36...

Страница 41: ...Kyocera KI G100 GSM Handset Ver 0 3 Preliminary Version 01 1999 Notes...

Страница 42: ...de and confirm with OK Enter 112 is the international GSM emergency call number Press to make the call Give the following information to the emergency service Your name The location of the accident Wh...

Страница 43: ...irm with OK Your phone is ready to be used when a network name is displayed To make a call Telephone no To end or refuse a call To redial To receive a call telephone ringing light blinking To switch o...

Отзывы: