Setup and Connections
1- 28
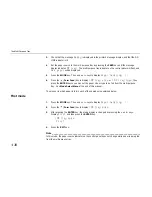
11. Test the printer.
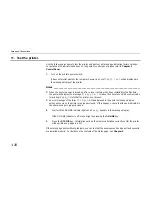
Use the following procedure to test the printer and print out a status page indicating factory settings.
For details on the indicators and keys on the printer’s control panel, please refer to Chapter 2
Control Panel.
1.
Turn on the printer's power switch.
It does not matter whether the computer's power is on or off.
Self test
will be displayed in
the message display of the printer.
Notes ____________________________________________________________________
•
When the printer’s power is turned on after a toner container has been installed for the first time,
the printer will display the message
Please wait
for about five minutes until it becomes ready
for printing (
Ready
). Note that the printer is not broken.
•
An error message of the form
XXX Open
will be displayed in the printer’s message display
unless all covers on the printer are properly closed. If this happens, check that the part indicated in
the error message is properly closed.
2.
Wait until the ON LINE indicator lights and
Ready
appears in the message display.
If the ON LINE indicator is off, make it light by pressing the ON LINE key.
3.
Press the STATUS key. Information such as the memory allocation currently set for the printer
will be printed on a page in a list.
If the status page prints without problems, you can tell that the developer unit and paper feed cassette
are installed properly. For details on the contents of the status page, see Chapter 2.
Содержание FS-9000
Страница 91: ...Operating Procedures 2 20 Sample Status Page 4 5 6 2 3 7 8 9 1 ...
Страница 140: ...List of Fonts 3 4 Resident Scalable Fonts 1 ...
Страница 141: ...Chapter 3 Fonts 3 5 Resident Scalable Fonts 2 ...
Страница 142: ...List of Fonts 3 6 KPDL Fonts 1 ...
Страница 143: ...Chapter 3 Fonts 3 7 KPDL Fonts 2 ...
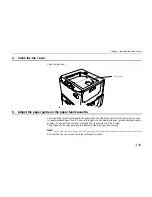
Страница 156: ...Chapter 4 Maintenance 4 9 11 Close the top cover ...
Страница 167: ...Cleaning 4 20 8 Close the printer s front cover ...
Страница 194: ...HP LaserJet 5M Symbol Sets 6 2 HP LaserJet 5M Symbol Sets LaserJet 5M HP Roman 8 8U LaserJet 5M ECMA 94 Latin 1 0N ...
Страница 197: ...Chapter 6 Symbol Set tables 6 5 LaserJet 5M ISO Latin 6 6N LaserJet 5M PS Math 5M ...
Страница 198: ...HP LaserJet 5M Symbol Sets 6 6 LaserJet 5M PS Text 10J LaserJet 5M Math8 8M ...
Страница 199: ...Chapter 6 Symbol Set tables 6 7 LaserJet 5M Pi font 15U LaserJet 5M MS publishing 6J ...
Страница 200: ...HP LaserJet 5M Symbol Sets 6 8 LaserJet 5M Windows 9U LaserJet 5M Desktop 7J ...
Страница 201: ...Chapter 6 Symbol Set tables 6 9 LaserJet 5M ISO Latin 2 2N LaserJet 5M ISO Latin 5 5N ...
Страница 202: ...HP LaserJet 5M Symbol Sets 6 10 LaserJet 5M WinBalt 19L LaserJet 5M PC775 26U ...
Страница 203: ...Chapter 6 Symbol Set tables 6 11 LaserJet 5M PC 1004 9J LaserJet 5M Windows Latin 1 19U ...
Страница 204: ...HP LaserJet 5M Symbol Sets 6 12 LaserJet 5M Windows Latin 2 9E LaserJet 5M Windows Latin 5 5T ...
Страница 205: ...Chapter 6 Symbol Set tables 6 13 LaserJet 5M PC 852 Latin 2 17U LaserJet 5M PC Turkish 9T ...
Страница 206: ...HP LaserJet 5M Symbol Sets 6 14 Macintosh 12J ...
Страница 207: ...Chapter 6 Symbol Set tables 6 15 LaserJet 5M International Characters ...
Страница 208: ...Appendix A Printer Specifications A 1 Appendix A Printer Specifications ...
Страница 211: ...Appendix B Paper Selection B 1 Appendix B Paper Selection ...

