First
Aid
kvm-tec
media
4K
connect
12G SDI - 4K
First
Aid
kvm-tec
media
4K
connect
12G SDI - 4K
1.
1.
First check your delivery content 12G SDI ...
2.
2.
Check your Installation 12G SDI ....
LOCAL/CPU Unit
o 1 x Media4Kconnect - 12G SDI local (CPU)
o 1 x 12VDC 2 A power supply
o 1 x SFP+ Multimode Modul up to 500m/1640ft
alt. Single Mode Modul up to 10km/6.2mi
o 1 x BNC-BNC cable 2m/6.56ft
o 1 x USB A-cable 1.8m/5.9ft
o 4 x rubber feet
1.
1.
First check your delivery content 12G SDI redundant ...
2.
2.
Check your Installation 12G SDI redundant....
LOCAL/CPU Unit
o 1 x Media4Kconnect - 12G SDI redundant local (CPU)
o 1 x 12VDC 2 A power supply
o 2 x SFP+ Multimode Modul up to 500m/1640ft
alt. Single Mode Modul up to 10km/6.2mi
o 1 x BNC-BNC cable 2m/6.56ft
o 1 x USB A-cable 1.8m/5.9ft
o 4 x rubber feet
DP out
to Monitor
USB fr
om
k
eyboar
d and mouse
power supply
for 12V 2A
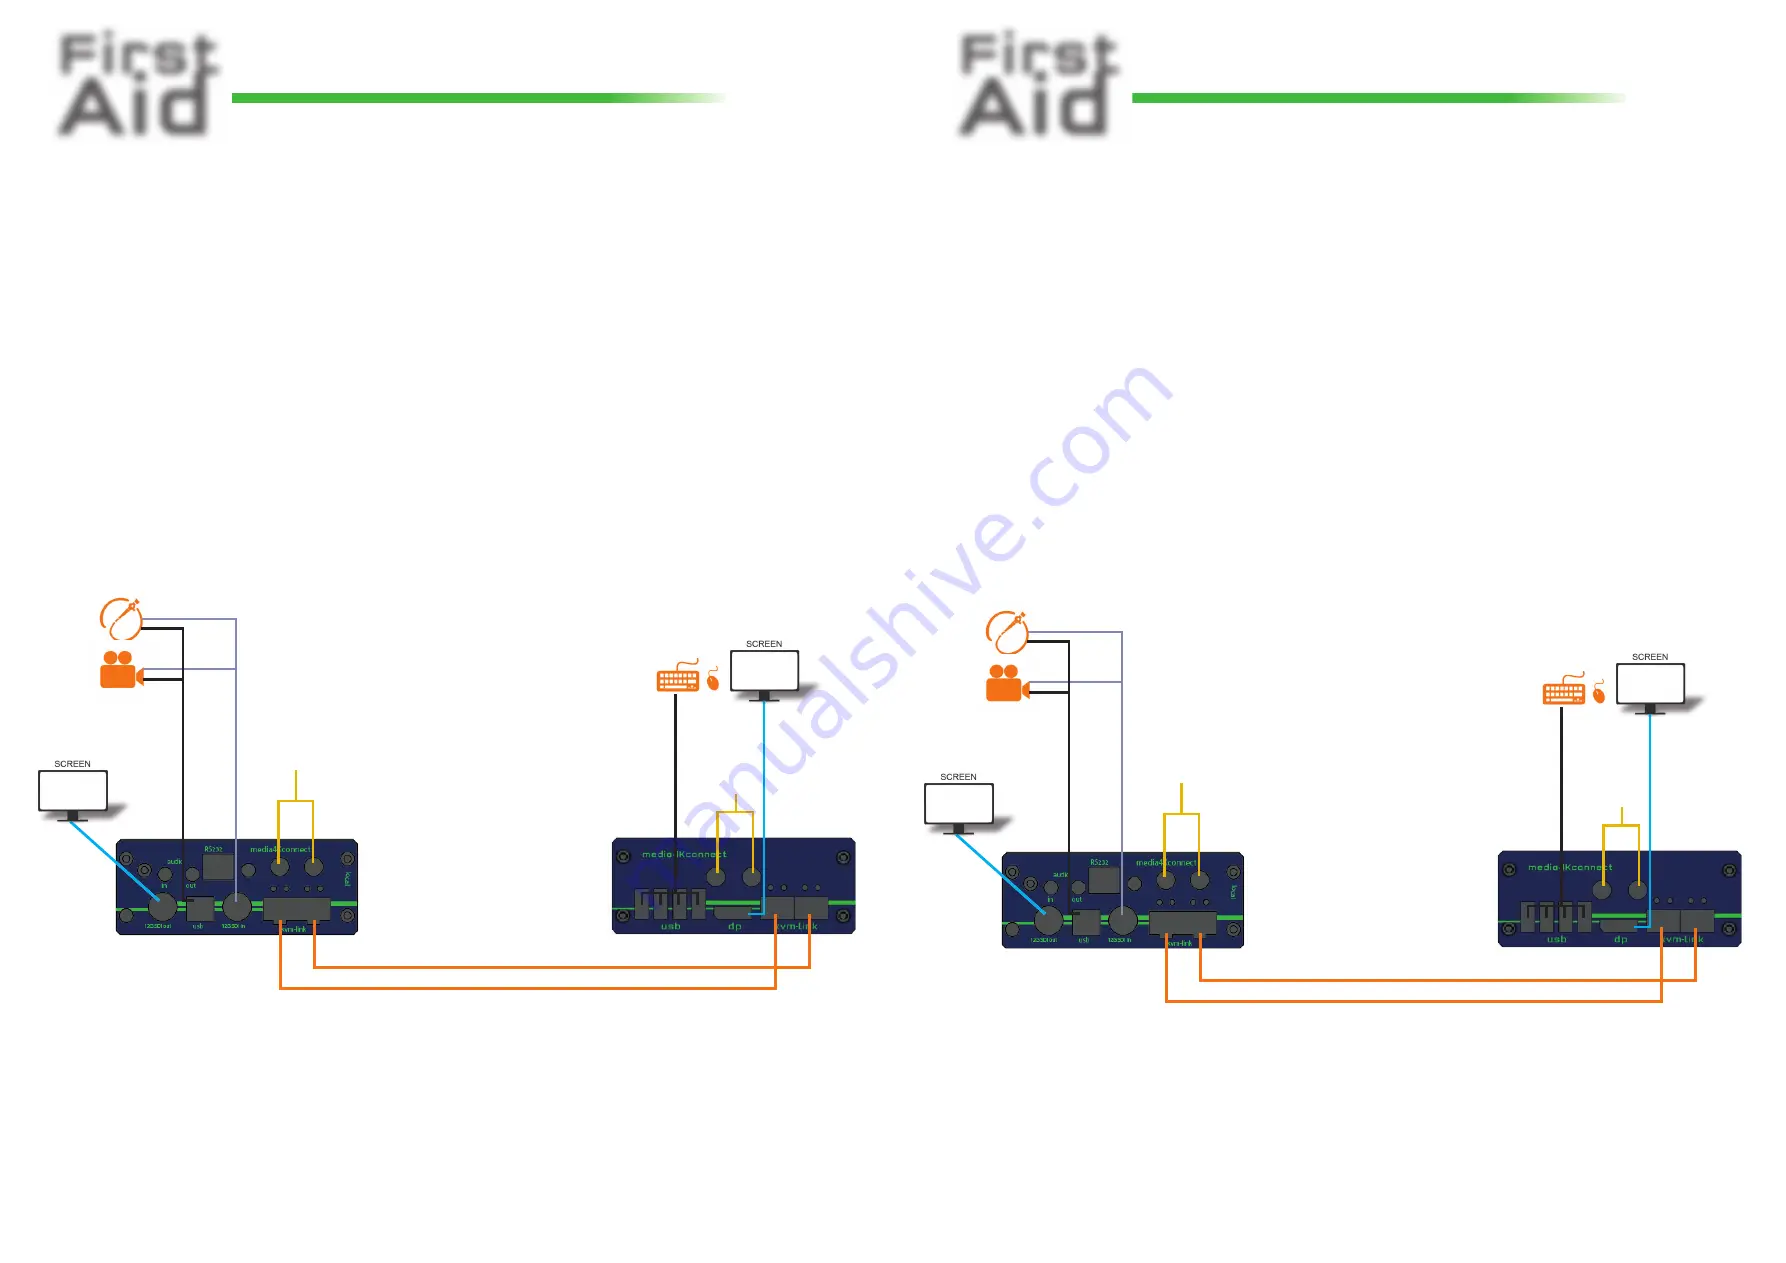
1. Connect the CON/Remote and the CPU/Local Unit with the supplied 12V 2A power supply.
2. Now connect the USB cable to a USB socket of your PC and connect the other end of the USB cable to
the Local Unit. Connect the keyboard and mouse to the Remote Unit.
3. Connect the Local and the Remote Unit with a network fi ber cable.
4. Connect the DP cable to the DP socket of the PC to the DP socket SDI/in of the Local device and connect
the screen on the remote side with the DP cable.
HAVE FUN - Your kvm-tec Extender is now in use for many years (MTBF approx. 10 years)!
Duplex multimode OM4-fi ber cable (LC) up to 300m/984 ft main link 1
Duplex multimode OM4-fi ber cable (LC) up to 300m/984 ft main link 2
FIBERCABLE
Please also use an OM4 cable to have enough bandwidth
SDI out
to Monitor
power supply
for 12V 2A
SDI in
fr
om camer
a / Endoscope
USB to Camer
a / Endoscope
DP out
to Monitor
USB fr
om
k
eyboar
d and mouse
power supply
for 12V 2A
1. Connect the CON/Remote and the CPU/Local Unit with the supplied 12V 2A power supply.
2. Now connect the USB cable to a USB socket of your PC and connect the other end of the USB cable to the
Local Unit. Connect the keyboard and mouse to the Remote Unit.
3. Connect the Local and the Remote Unit with a network fi ber cable.
4. Connect the DP cable to the DP socket of the PC to the DP socket SDI/in of the Local device and connect
the screen on the remote side with the DP cable.
HAVE FUN - Your kvm-tec Extender is now in use for many years (MTBF approx. 10 years)!
Duplex multimode OM4-fi ber cable (LC) up to 300m/984 ft main link 1
Duplex multimode OM4-fi ber cable (LC) up to 300m/984 ft link 2 redundant
FIBERCABLE
Please also use an OM4 cable to have enough bandwidth
SDI out
to Monitor
power supply
for 12V 2A
SDI in
fr
om camer
a / Endoscope
USB to Camer
a / Endoscope


