30
i
41
EN
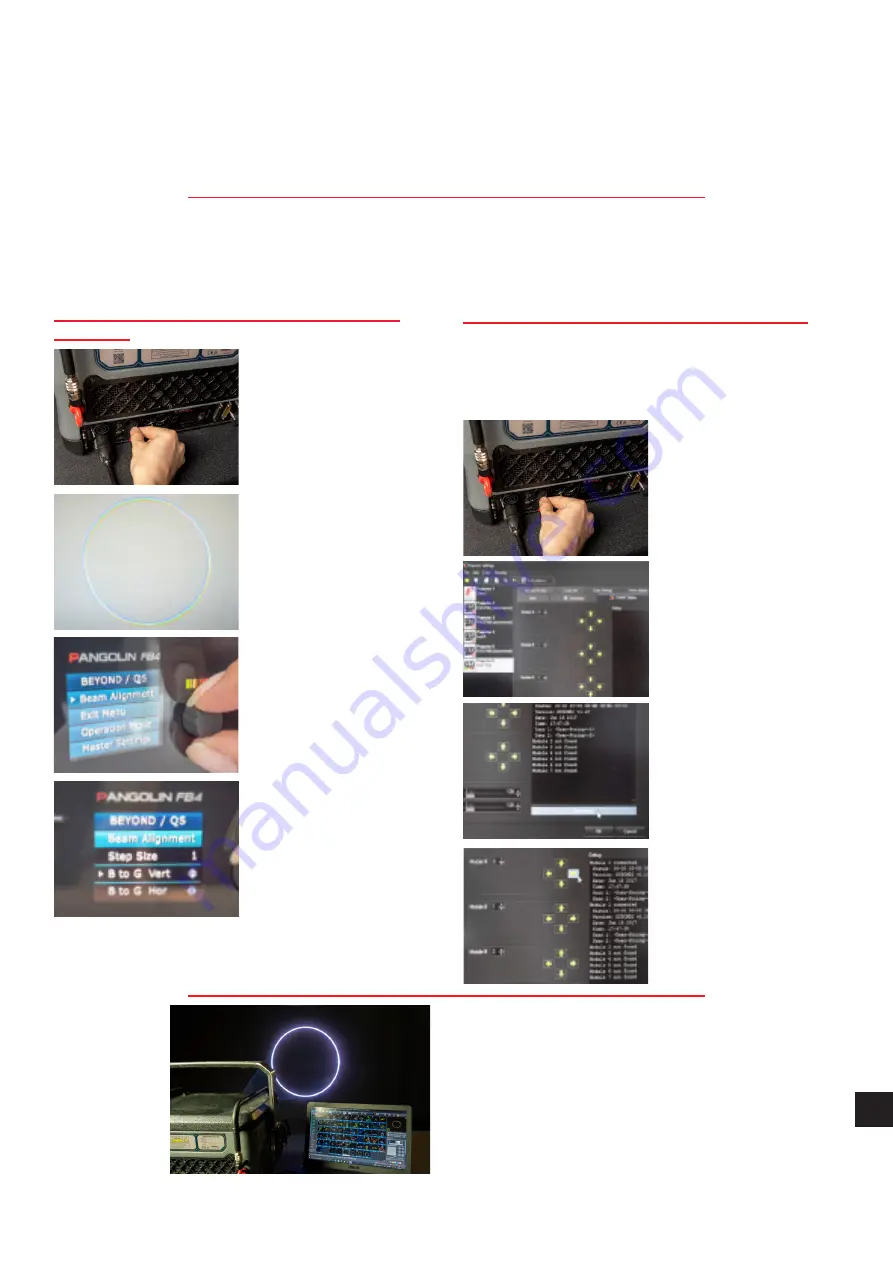
1. Adjusting colours directly from Spectrum
interface
A:
Power up the system
as standard.
B:
Create a full-size white
circle (static tunnel effect).
C:
Find Beam Alignment
option in the menu and enter
it by pressing the rotary
knob.
D:
Here you can set the STEP
SIZE
(amount of movement
in a single step),
and
VERTICAL / HORIZONTAL
movement for every colour
in your projector
(R=RED,
G = G R E E N , B = B L U E ,
Y=YELLOW).
2. Adjusting colours from Beyond software
Beyond automatically identifies Motorised
Dichroic Filters when the laser projector
is connected (and powered up ) to the PC via
Ethernet.
A:
Power up the system
as standard and create
a full-size white circle (static
tunnel effect).
B:
Go to :
PROJECTOR SETTINGS
-> KVANT DICHRO tab.
There you will find all the
information and control
options for the dichroic
filters.
C:
To start the beam
alignment, press the READ
STATUS button.
D:
Start with the first dichroic
filter (laser module1) and/
or any other as necessary.
Use the arrows associated
with each module to move
the beam to the desired
position.
When the alignment procedure is successful,
you will see all the colours nicely overlaying
each other, resulting in an even, bright and
sharp white circle.
6.4
motorised dichroid filters
beam alignment with


