16
GB
16
12c
12d
8
Mounting the hood body
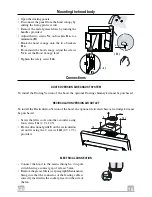
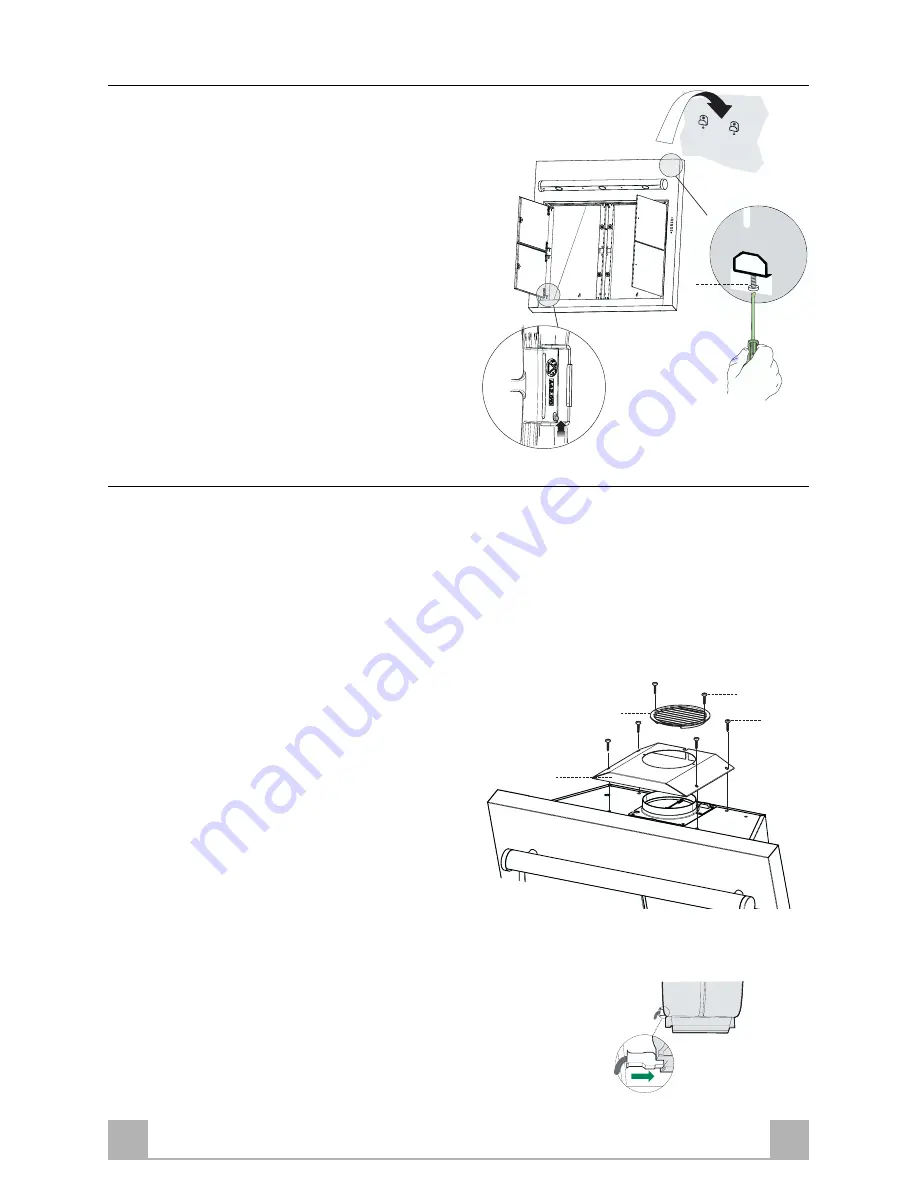
• Open the ducting panels.
• Disconnect the panel from the hood canopy by
sliding the fixing pin lever.
(A)
• Remove the metal grease filters by turning the
handles provided.
• Adjust the two screws
Vr
, on brackets
11a
, to a
minimum.
(B)
• Hook the hood canopy onto the two brackets
11a.
• From inside the hood canopy, adjust the screws
Vr
to set the Hood Canopy level.
• Tighten the safety screw
12a
.
Connections
DUCTED VERSION AIR EXHAUST SYSTEM
To install the Ducting Version of the hood, the optional Ducting chimney kit must be purchased.
RECIRCULATION VERSION AIR OUTLET
To install the Recirculation Version of the hood, the optional Activated charcoal cartridge kit must
be purchased.
• Screw the filter cover onto the air outlet, using
four screws
12c
(2.9 x 12.5).
• Fix the directional grille
8
on the recirculation
air outlet using the 2 screws
12d
(2,9 x 9,5)
provided.
ELECTRICAL CONNECTION
• Connect the hood to the mains through a two-pole
switch having a contact gap of at least 3 mm.
• Remove the grease filters (see paragraph Maintenance)
being sure that the connector of the feeding cable is
correctly inserted in the socket placed on the side of
the fan
( A )
( B )
Vr

