background image

20

паспорт технического изделия

русский

Электрическая варочная поверхность

только внутренней части нагреватель-

ного  элемента  нажмите  соответству-

ющую  сенсорную  кнопку.  Для  вклю-

чения  обеих  частей  нагревательного 

элемента  сначала  соответствующей 

сенсорной кнопкой включите внутрен-

нюю часть, а затем – внешнюю часть.

таБлиЦа 1

Мощность и размеры конфорок

Диаметр 

(мм)

Нагревательный 

элемент

Мощность 

Вт

1

140

Светится 

«Hi-light»

1200

2

180

Светится 

«Hi-light»

1800

3

210

Светится 

«Hi-light»

2100

4

270/210

Светится 

«Hi-light» 

с расширением

2400

5

210/175

Светится 

«Hi-light» 

с расширением

2000

таБлиЦа 2

Режим 

сен-

сорной 

панели

Варианты блюд

1

Растапливание сливочного масла, 

растапливание шоколада.

1-3

Нагрев небольших количеств жид-

кости, поддержание температуры 

горячих блюд.

3-4

Нагрев пищи. Приготовление 

фруктов и бобовых. Разморозка 

продуктов глубокой заморозки.

4-5

Варка овощей, бобов. Разморозка 

продуктов глубокой заморозки.

5-6

Приготовление мяса, рыбы, бобов 

в соусе..

6-7

Приготовление жаркого, рыбы, 

стейков, блюд из яиц.

7-9

Жарка во фритюре, доведение до 

кипения большого количества воды.

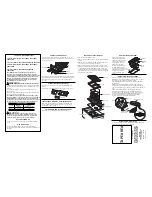
типы и функции регуляторов

Панель управления

FA6VS02

1.  Сенсорная  кнопка  включения/от-

ключения

2. Сенсорная кнопка увеличения уров-

ня мощности (+)

3.  Сенсорная  кнопка  уменьшения 

уровня мощности (-)

4. Сенсорная кнопка выбора передней 

левой конфорки

5.  Сенсорная  кнопка  выбора  задней 

левой конфорки

6.  Сенсорная  кнопка  выбора  задней 

правой конфорки

7. Сенсорная кнопка выбора передней 

правой конфорки

8. Индикатор второй зоны задней ле-

вой конфорки

9. Индикатор уровня нагрева

10. Таймер 

РИС. 1

Содержание FA6VS02

Страница 1: ...Technical passporT FA6VS02 ELECTRIC HOB...

Страница 2: ...ic hob DEAR USER 3 DESCRIPTION OF THE HOB 4 USE 5 BASIC FUNCTIONS 7 CLEANING 9 INSTALLATION 9 TECHNICAL CHARACTERISTICS OF THE ELECTRICAL COMPONENTS 13 TECHNICAL ASSISTANCE AND SPARE PARTS 14 TROUBLES...

Страница 3: ...ions of this manual The appliance must be installed only by a quali ed electrician in compliance with the instructions provided The manufacturer declines all responsability for improper installation T...

Страница 4: ...ding the change of the flexible supply cable of the appliance Safety warnings If the ceramic glass breaksor cracks immediately unplug the appliance to avoid electric shocks This appliance is not desig...

Страница 5: ...ereafter in stand by mode All the heat zones are switched off and t he display are not illum inated The desired heating element can now be selected by using the 4 5 6 or 7 sensors for related heating...

Страница 6: ...rm 3 4 To heat foods Thaw deep frozen foods to cook fruits and pulses 4 5 Deep frozen foods to cook fruits and pulses 5 6 To cook meat sh pulses with sauce 6 7 To cook roast of meat sh to cook steaks...

Страница 7: ...utton A and 9 flash on display alternately Now use the MINUS button to select constant cooking level you want Example You want to cookat heating Level 6 and begin with rapid heating Select Level 9 pre...

Страница 8: ...on timer displays Adjust the timer in minutes by pressing or buttons When the countdown reaches 00 you will the hear the alarm None of the heating elements are switched off Fast Switch off Function Wh...

Страница 9: ...s case switch off the hob and clean the surfacewith hot water and razor scraper iNSTALLATiON TeCHNiCAL iNSTrUCTiONS FOr THe iNSTALLer Installation transformations and maintenances listed below may onl...

Страница 10: ...verla pping 2 Stick the sealing washer to the hob uniformly Presing it by ngers Figure 9 3 Place the hotplate in the openning on the table top 4 Fix the hooks in the relative accomodations of the body...

Страница 11: ...liance appliance eLeCTriCAL CONNeCTiON The electrical connection has to be done in accordance with electrical and installation requirements of the Regulation Before proceeding with the connection plea...

Страница 12: ...adequate to the load of the appliance with a minimum gap of 3mm between the contacts Keep in mind that the earth cable does not have to be interrupted by the switch In an alternative solution the ele...

Страница 13: ...ower COMPONeNTS SUbSTiTUTiON To replace the components lodged in the internal part is necessary to take the appliance up from the fauwrnaiytu trhee obvoettrotumrn it loosen the screws and take After t...

Страница 14: ...e parts and a intervention We suggest to ll the table below TrOUbLeSHOOTiNG PrObLeM SOLViNG Before you contact the Technical Service please perform the following checks The appliance does not work Ens...

Страница 15: ...numbers continues with letters See the table below After the numbers continues with letters October A November B December C Made in EU Moscow Avtomotornaya 7 LLC Kuppersberg Import 125438 Moscow regio...

Страница 16: ...16 17 18 19 21 23 23 27 28 28...

Страница 17: ...17...

Страница 18: ...18 FA6VS02 8 8...

Страница 19: ...19 1 1 9 4 5 6 7 1 3 1 2 1 9 1 9 1 9 2 H 30...

Страница 20: ...20 1 1 140 Hi light 1200 2 180 Hi light 1800 3 210 Hi light 2100 4 270 210 Hi light 2400 5 210 175 Hi light 2000 2 1 1 3 3 4 4 5 5 6 6 7 7 9 FA6VS02 1 2 3 4 5 6 7 8 9 10 1...

Страница 21: ...21 3 2 L L H A 3 9 9 6 9 9 9 9 2 5 150 3 6 2 5 6 3 3 0 0 0 U 2 0 1 6 60 2 6 180 3 5 288 4 5 390 5 4 510 6 1 5 150 7 1 5 210 8 1 5 270 9 1 5 150...

Страница 22: ...22 U 0 1 U 1 00 00 00 00 0 L...

Страница 23: ...23 4 5 6 4 0 0 1 6 2 6 3 5 4 5 5 4 6 1 5 7 1 5 8 1 5 9 1 5 5 6...

Страница 24: ...24 A 2 D 2 F6VS01 517 587 480 560 1 e 10 2 10 3 4 F 9 70 12 150 C 5 7 7 8 5 7...

Страница 25: ...25 12 Y 75 9 10 11 6 13...

Страница 26: ...26 13 L N 75 3 EN 60 335 1 EN 60 335 2 6 2004 108 EC 2006 95 EC 13...

Страница 27: ...27 14 a 14 b 16 c 6 d e f 6 FA6VS02 3X2 5 H05SS F...

Страница 28: ...28 U400 E2...

Страница 29: ...T 27 J 18 9 9 S 26 H 17 8 8 R 25 G 16 7 7 Q 24 F 15 6 6 P 23 E 14 5 5 X 31 N 22 D 13 4 4 W 30 M 21 C 12 3 3 V 29 L 20 B 11 2 2 U 28 K 19 A 10 1 1 A B 2 7 125438 4 141400 144 1 35410 C 316 5 1 1 29...

Страница 30: ...30 7 495 236 90 67 Kuppersberg 8 800 250 17 18 9 00 18 00 Kuppersberg http kuppersberg ru 1 2 Kuppersberg 10 2 3 4 5 6 7 19 2...

Страница 31: ...31 8 15 1 2 3 4 5 6 7 8 9 10 11 12 13 1 2 3 4 1 Kuppersberg 2 3 4 RU C DE 30 B 01388 04 03 2020...

Страница 32: ...Kuppersberg www kuppersberg ru info kuppersberg ru...

Отзывы: