44
EN
EN
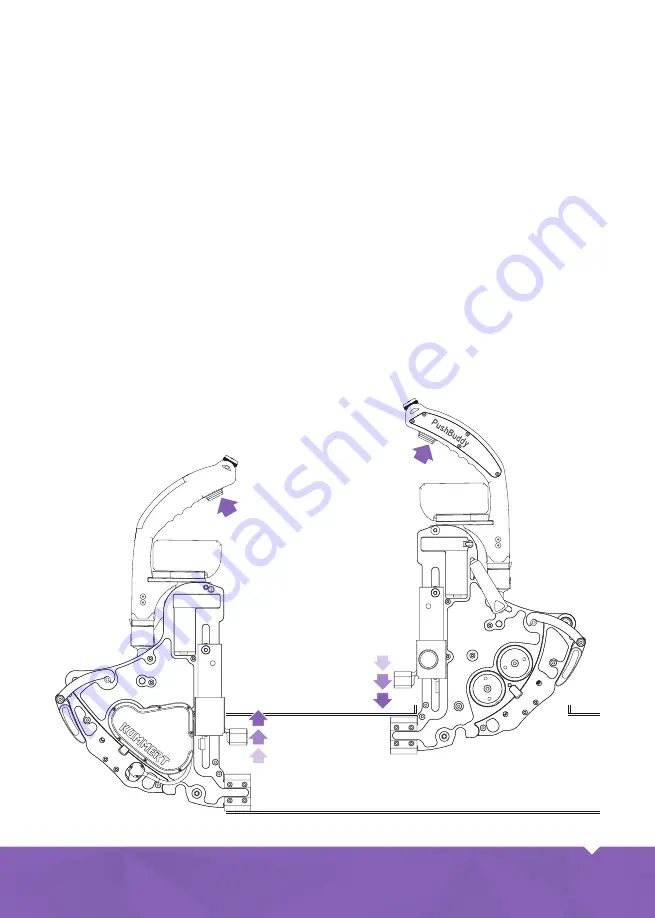
Clamping to a pipe wall
Hold the PushBuddy
®
by the handle and
position it in such a way that the pipe
wall is between the two granule coated
parts of the clamping machanism.
Push the rocker switch backwards and
keep it pressed. The clamping mecha-
nism closes and switches off automati-
cally when the PushBuddy
®
is fi rmly
engaged. The LED fl ashes. Release the
rocker switch.
Clamping into a pipe
Hold the PushBuddy
®
by the handle
and position it in such a way that both
granule coated parts of the clamping
machanism are inside the pipe.
Push the rocker switch forward and
keep it pressed. The clamping mecha-
nism expands and switches off auto-
matically when the PushBuddy
®
is fi rmly
engaged. The LED fl ashes. Release the
rocker switch.
Make sure that the PushBuddy
®
is connected to the base unit and that the emergency stop
switch is activated. If you need light to insert the PushBuddy
®
, press the rocker switch briefl y.
The LEDs will stay on for ten seconds.
Clamping PushBuddy
®
at the beginning of a pipe
Содержание PushBuddy
Страница 1: ...INSTRUCTION MANUAL PushBuddy EN P Push ush B Buddy uddy ...
Страница 8: ...33 EN 33 Components 1 PushBuddy 2 Battery 3 Extension 1 0 m 4 Extension 0 5 m 5 Carrier 3 4 5 1 2 ...
Страница 26: ...DE 51 NOTES ...
Страница 27: ...EN Distributor Albert Einstein Str 8 D 97447 Gerolzhofen Tel 49 0 9382 9727 0 info kummert de www kummert de ...


