background image

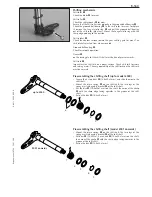
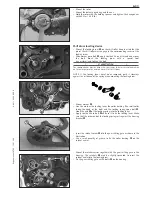
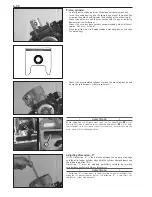
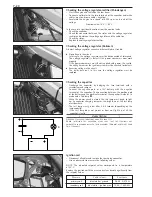
– Grease the shaft seal ring of the shift shaft. 
– Oil the shift shaft and insert it into the housing. Do not forget the

stop disc! When mounting the shift shaft make sure that both legs of
the return spring rest against the prolongation of the shift rail 

1

.   

Kickstarter

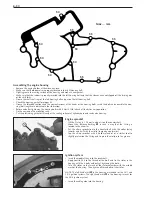
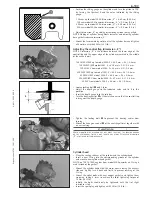
– Grease the bearing bore of the kickstarter shaft in the housing. 
– Insert the preassembled kickstarter shaft into the housing so that the

locking pawl is located on the kickstarter shaft behind the release
plate in the housing. 

– Pretension the kickstarter spring clockwise and hook it into the 

corresponding bore in the housing 

A

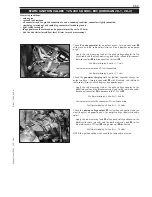
Primary drive, clutch 

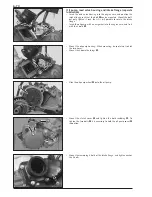
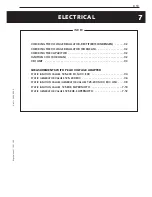
– Grease the shaft seal ring of the crankshaft. 
– Put the oiled O-ring (25x2 mm) onto the crankshaft and mount the

distance bushing with the chamfer facing the crank web so that the
O-ring is located in the chamfer. 

– Insert the woodruff key into the crankshaft.  
– Put the primary gear onto the crankshaft with the collar facing the

housing.  

– Mount a new detent edged ring and a hexagon nut (LH thread).  
– Mount the holding spanner for the primary gear and tighten the

hexagon nut with 180 Nm (133 ft.lb.).  

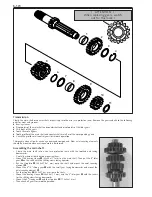
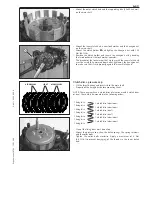
– Put the stop disc (17.2x26x1 mm) and the intermediate starter gear

2

onto the countershaft. 

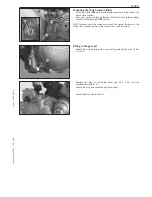
– Oil the bearing of the outer clutch hub 

3

and put it onto the main

shaft.  

6-5C

A

2

1

3

Содержание 125

Страница 1: ...Repair manual KTM 125 200 Art No 320588 E 125 200 REPAIR MANUAL ENGINE KTM SPORTMOTORCYCLE AG 5230 Mattighofen Austria www ktm at ...

Страница 2: ......

Страница 3: ...REPAIR MANUAL ENGINE 125 200 ...

Страница 4: ......

Страница 5: ...N 3 REMOVING AND REFITTING ENGINE 4 DISASSEMBLING THE ENGINE 5 SERVICING INDIVIDUAL COMPONENTS 6 ASSEMBLING THE ENGINE 7 ELECTRICAL 8 TROUBLE SHOOTING 9 TECHNICAL SPECIFICATIONS 10 PERIODIC MAINTENANCE SCHEDULE 11 WIRING DIAGRAMS 12 13 14 15 16 ...

Страница 6: ......

Страница 7: ...t the front page of the repair manual 210x297 mm into the transparent pocket provided for this purpose on the outside of the binder Put the spine label 170x45 mm into the transparent pocket provided for this purpose on the spine of the binder Put the summary list of contents 150x297 mm into the transparent pocket provided for this purpose on the inside of the binder or insert this page on the begi...

Страница 8: ......

Страница 9: ...2000 2001 2000 Engine number with first digit 0 2001 Engine number with first digit 1 8 2000 3 210 27 E Updating of Rep Manual 3 205 74 E Modelyear 2002 Engine number with first digit 2 7 2001 3 206 005 E Updating of Rep Manual 3 205 74 E Modelyear 2003 Engine number with first digit 3 11 2002 Modification Updating Technical Details Technical Specifications Periodic Maintenance Schedule Wiring Dia...

Страница 10: ......

Страница 11: ...e repair work WARNING STRICT COMPLIANCE WITH THESE INSTRUCTIONS IS ESSENTIAL TO AVOID DANGER TO LIFE AND LIMB CAUTION NON COMPLIANCE WITH THESE INSTRUCTIONS CAN LEAD TO DAMAGE OF MOTORCYCLE COMPONENTS OR RENDER MOTORCYCLES UNFIT FOR TRAFFIC NOTE POINTS OUT USEFUL TIPS Use only ORIGINAL KTM SPARE PARTS when replacing parts The KTM high performance engine is only able to meet user expectations if th...

Страница 12: ......

Страница 13: ...NOTE to table Enter the complete item no for the repair manual in column 1 e g 3 206 005 E You will find the number on the cover page or in the left margin on each right page of the manual Enter the corresponding page number in the repair manual e g 5 7c in column 2 Enter the current text inaccurate or incomplete in column 3 by quoting or describing the respective passage of the text If your text ...

Страница 14: ......

Страница 15: ...nual 125 200 Art No 3 206 005 E OPERATING RANGES OF THE CARBURETOR 2 2 CARBURETOR ADJUSTMENT 2 3 BLEEDING OF THE HYDRAULIC CLUTCH 2 4 OIL PUMP ADJUSTING MODELS WITH SEPARATE LUBRICATION 2 5 CHECK OF EXHAUST CONTROL 2 6 INDEX 2 1C 2 ...

Страница 16: ......

Страница 17: ...he carburetor will be too rich the fuel level too high or the float needle is leaking Part throttle range C Operation with partly open throttle valve This range is only influenced by the jet needle shape and position The optimum part throttle setting is controlled by the idling setting in the lower range and by the main jet in the upper range If the engine runs on a four stroke cycle or with reduc...

Страница 18: ...NOT ENOUGH OIL OR LOW GRADE OIL CAN CAUSE EROSION OF THE PISTON USING TOO MUCH OIL THE ENGINE CAN START SMOKING AND FOUL THE SPARK PLUG IN THE CASE OF A LEANER ADJUSTMENT OF THE CARBURETOR PROCEED CAUTIOUSLY ALWAYS REDUCE THE JET SIZE IN STEPS OF ONE NUMBER TO AVOID OVERHEATING AND PISTON SEIZURE NOTE If despite a changed adjustment the engine does not run properly look for mechanical faults and c...

Страница 19: ...le hydraulic oil ex Shell Naturelle HF E15 Refill oil until oil is discharged from the bore 3 of the master cylinder in a bubble free state Make sure that the oil does not overflow CAUTION HAVING COMPLETED THE BLEEDING PROCEDURE YOU HAVE TO VERIFY THAT THE OIL LEVEL IN THE MASTER CYLINDER IS CORRECT FOR FILLING OF THE MASTER CYLINDER USE SAE 10 BIODEGRADABLE HYDRAULIC OIL ONLY EX SHELL NATURELLE H...

Страница 20: ...adjusted correctly the mark A must coincide with the notch B on the cable pulley except 125 EXE and 125 Supermoto On 125 EXE and 125 Supermoto models the notch B must coincide with the edge C CAUTION IF THE ADJUSTMENT OF THE OIL PUMP IS NOT CORRECT THE ENGINE IS NOT SUPLIED WITH THE CORRECT AMOUNT OF OIL AND THIS CAN RESULT IN ENGINE DAMAGE If necessary loosen the lock nut 4 and correct the adjust...

Страница 21: ...y mark 2 of the guide plate CAUTION BASE POSITION MUST BE ADJUSTED WITH A DEPTH GAUGE SHOWN IN CHAPTER 6 10 DIMENSION Z Open throttle flap with increasing the revolutions mark 1 moves downwards to the bore in the housing 3 CAUTION MARK 4 IS NOT USED IF MARK 1 DOES NOT REACH BORE 3 OR DOES NOT MOVE THE EXHAUST CONTROL MECHANISM IS TO BE OVERHAULED Mount cover and tighten the bolts 1 3 1 2 4 ...

Страница 22: ......

Страница 23: ...Repair manual 125 200 Art No 3 206 005 E REMOVING THE ENGINE 3 2 REFITTING THE ENGINE 3 3 INDEX 3 1C REMOVING AND REFITTING ENGINE 3 ...

Страница 24: ......

Страница 25: ...the motorcycle Remove the seat and the tank with the spoilers Drain the cooling liquid Remove the exhaust system and the engine brace Disconnect the radiator hoses at the engine Remove the carburetor Dismount the brake cylinder cover Remove the engine sprocket cover and the chain Disconnect the electrical wires Unscrew the clutch master cylinder and reposition the clutch line such that it will not...

Страница 26: ...m pivot Tighten collar nut with 100 Nm 74 ft lb Twist in the engine mounting bolts Mount the engine brace Connect the electrical wires Position clutch line correctly and mount clutch master cylinder at handlebar Mount the chain and the engine sprocket cover Mount brake cylinder cover Mount the carburetor 3 3C ...

Страница 27: ...s free of air bubbles Mount the exhaust system Mount the tank with the spoilers and the seat Fix the breather tube to the frame Check the electrical system for faultless operation Adjust the carburetor Test ride After the test ride check the engine the cooling system and the exhaust system for leaks Fixing the cables to the frame Models with separate lubrication CAUTION TO PREVENT DISENGAGEMENT OF...

Страница 28: ......

Страница 29: ... CYLINDER PISTON 4 3 IGNITION 4 4 ENGINE SPROCKET 4 4 REED VALVE HOUSING INTAKE FLANGE AND CLUTCH COVER 4 5 REED VALVE HOUSING INTAKE FLANGE AND OIL PUMP MODELS WITH SEPARATE LUBRICATION 4 6 REMOVING CLUTCH AND PRIMARY DRIVE 4 6 SHIFT DRUM LOCATING KICKSTARTER 4 7 DIVIDING THE ENGINE HOUSING 4 8 REMOVING SHIFT MECHANISM AND TRANSMISSION 4 9 REMOVING CRANKSHAFT 4 9 INDEX 4 1C 4 ...

Страница 30: ......

Страница 31: ... 510 12 011 000 Circlip plier 8 546 29 012 100 Holding spanner for flywheel Kokusan 2K 1 2 3 4 13 501 12 013 000 Dial gauge 1 10 mm 14 501 12 030 000 Dial gauge support 16 6 899 785 Loctite 243 blue 6 ccm 20 584 29 037 037 Mounting tool inner ring NJ206 22 503 29 022 000 Adjusting plate for control flap 38 503 29 038 000 Holding plate for locating drum SPECIAL TOOLS ENGINE 125 200 7 5 8 HOLZGABEL ...

Страница 32: ...inder Remove the 2 bolts 4 and withdraw the clutch slave cylinder together with the gasket Pull push rod out of drive shaft Cylinder head cylinder piston Undo the 6 bolts 5 and remove the cylinder head together with the gasket NOTE on 125 SX EXC engines from model 2002 onwards an O ring is used instead of the gasket Take the O ring s out of the groove in the cylinder Remove the 4 collar nuts 6 at ...

Страница 33: ...nition Remove 4 bolts and take off the ignition cover together with the gasket Hold the rotor with the special tool and undo the hexagon nut Take the hexagon nut and the detent edged ring off the crankshaft Twist the rotor extractor into the thread of the rotor LH thread and remove the rotor Remove the 3 collar bolts 1 and take the stator out of the housing Take the woodruff key out of the cranksh...

Страница 34: ...undo screw 2 Remove all bolts of clutch cover and the 2 front end bolts 4 of the water pump cover and dismount clutch cover Remove the clutch cover gasket and pull the dowels out of the housing Take O ring 8 out of water bore NOTE The water pump cover 5 the exterior cap 6 and the hexagon cap nut 3 need not be removed The water pump and the centrifugal timer are left in the clutch cover CAUTION WHE...

Страница 35: ...pletely only as soon as the oil pump housing E has been dismantled Pull the oil pump housing off the engine case and swing it sideways see picture Remove the 2 bolts C and withdraw oil pump together with gasket from the engine case Remove the bolt 3 at the intake flange and dismount intake flange together with reed valve housing Removing clutch and primary drive Undo the 5 bolts 4 in diagonal orde...

Страница 36: ...ub together with the bearing off the main shaft Remove the intermediate starter gear and the stop disc 2 below Mount the primary gear holder and undo the hexagon nut LH thread Remove the primary gear holder Take the hexagon nut the detent edged ring and the primary gear off the crankshaft Take the woodruff key out of the crankshaft Shift drum locating kickstarter Simply pull the shift shaft out of...

Страница 37: ...with the special tool undo bolt 8 and remove the bolt together with the washer Pull the locking drum off the shift roller CAUTION THE LOCKING DRUM MUST BE HELD WITH THE SPECIAL TOOL TO PREVENT DAMAGING OF THE BUSHINGS ON THE DRIVING PINS OF THE SHIFT FORKS Dividing the engine housing Swing the ignition side upwards and remove all 12 housing bolts Undo the engine mounting device at the mounting rac...

Страница 38: ... on the shift forks Pull the complete main shaft and the countershaft together out of the bearing seats Removing crankshaft Pull the crankshaft out of the bearing seat if necessary lightly tap it with a plastic hammer Take the distance bushing 5 and the O ring 6 out of the right crankshaft seal ring Clean all parts Check for wear and exchange worn components NOTE All gaskets shaft seal rings O rin...

Страница 39: ...LSE GENERATOR 5 19 5 1C SERVICING INDIVIDUAL COMPONENTS 5 INDEX Engine housing NOTE Read through the following section before commencing work Then determine the assembly sequence so that the engine housing halves only need to be heated up once before replacing the bearings Having first removed the dowels in order to expel the bearings or remove them with light mallet blows the housing halves must ...

Страница 40: ......

Страница 41: ...y into the seat Grooved ball bearing of the shift roller 4 Apply a suitable mandrel on the outside to press the old grooved ball bearing inwards Insert a new grooved ball bearing from the inside and press it all the way into the seat CAUTION MODEL 2000 UPWARDS THE GROOVED BALL BEARING IS SECURED WITH A SCREW bl THIS IS TO BE REMOVED BEFORE PRESSING OUTWARDS THE BEARING AND TO BE MOUNTED AFTER PRES...

Страница 42: ...ING IN GROOVED BALL BEARINGS Grooved ball bearing of the countershaft 3 Apply a suitable mandrel on the outside to press the grooved ball bearing inwards Insert a new grooved ball bearing from the inside and press it all the way into the seat Shaft seal ring of the countershaft 4 Insert a new shaft seal ring from the outside and press it in flush Do not forget the stop disc position it on the groo...

Страница 43: ... outer dimension with a sliding gauge as illustrated Crankshaft webs outer dimension 55 mm 0 05 mm Piston If a used piston is to remain in service then the following should be checked 1 Piston running surface Check for pressure marks seizing marks minor friction marks can be removed with a fine abrasive stick 2 Piston ring grooves The piston rings must not get jammed in the grooves For cleaning th...

Страница 44: ...t be reconditioned or replaced NOTE For reconditioning of the old cylinder all exhaust control components must be removed Reconditioned cylinders are available on order from your KTM dealer The piston size is stamped into the bottom of the piston Nikasil coating of cylinder Nikasil is the brand name for a cylinder coating process developed by the piston manufacturer Mahle The name is derived from ...

Страница 45: ...d to twist a M5x40 bolt into the thread of the lifting bolt and pull it upwards out of the cylinder Now the control flap can be taken out of the cylinder Clean all parts of the exhaust control and check for wear and damage Roller guides 4 Check the contact surface between the roller guides and the control roller segment for grooves and exchange them if necessary Control rollers 5 Check bearing for...

Страница 46: ... of a full turn out again Apply Loctite 243 to two bolts 7 and use them to fix the two locking plates 8 thereby taking care to turn the control flap axles 9 as little as possible Remove the two feeler gauges and check control flap for easy operation When installed the control flap must not touch the exhaust duct Thoroughly oil the lifting bolt bl and insert it from above into the bore in the cylin...

Страница 47: ...ion NOTE When all marks are aligned the control flap must be in the bottom position and the bores of the control rollers must be completely closed Mount three roller guides 4 with the small collar facing the cylinder Mount the guide plate 3 apply Loctite 243 to two bolts 2 and use them to fix the guide plate in the cylinder Turn the control segment clockwise The control flap must open and the bore...

Страница 48: ...5 9C 1 1 10 2 3 4 5 6 7 11 8 9 ...

Страница 49: ...ever normally shows no signs of wear If this is nevertheless the case it is recommended to replace the entire clutch cover Shaft seal ring of the kickstarter shaft 8 Lever the used shaft seal ring out of the clutch cover with a screwdriver Grease the new shaft seal ring and insert it with the open side facing inwards Press it in flush Centrifugal timer bk The centrifugal advance device is factory ...

Страница 50: ...pump shaft 6 The shaft seal ring 5 must be removed to exchange the grooved ball bearing Use an appropriate mandrel to press the grooved ball bearing out of the water pump housing 4 Press a new grooved ball bearing all the way into the seat Apply Loctite 648 to the outside of a new water pump shaft seal ring and insert it with the label facing inwards Water pump driving wheel 7 The water pump drivi...

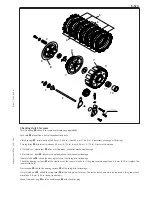
Страница 51: ...chanical damage 2 Clutch discs steel 6 discs must be plane check for mechanical damage Inner clutch hub 7 check the bearing surface of the lining disc for damage Check the bearing surfaces A of the steel discs at the inner clutch hub If the grooves are deeper than 0 5 mm 0 02 in replace the inner clutch hub Pressure cap 8 check the bearing surface B of the lining disc for damage Outer clutch hub 9...

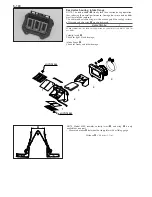
Страница 52: ...sealing surfaces of the reed valve housing 2 are also damaged CAUTION WHEN MOUNTING THE REED VALVE HOUSING BE SURE TO APPLY LOCTITE 243 TO ALL BOLTS Velocity insert 3 Check for tight fit and damage Intake flange 4 Check for cracks and other damage NOTE Model 2000 onwards velocity insert 3 and wing 5 is only available as one part Measure distance M between the stop plates with a sliding gauge Dista...

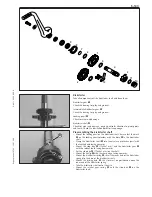
Страница 53: ...rk A on the locking pawl coincides with the bore B in the kickstarter shaft Clamp the kickstarter shaft 4 into the vise use protective jaws with the teethed end facing upwards Mount the stop disc 5 17x24x1 mm and the kickstarter gear 1 with the ratchet teeth facing downwards Put the stop disc 6 17x24x1 mm on the shaft Mount the circlip 7 with the sharp edge facing upwards Mount the kickstarter spr...

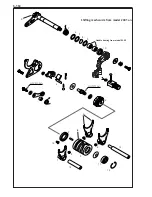
Страница 54: ...5 15C Shifting mechanism from model 2001 on B A C 7 6 8 9 9 10 4 1 1 3 2 5 5 5 1 14 13 15 11 12 13 Needle bearing from model 2002 ...

Страница 55: ...e shift rails on a planar surface Check shift rails for score and seizing marks The easy operability of the shift forks on the shift rails must be ensured Preassembling the shifting shaft up to model 2000 Grease the 2 stop discs 6 14 3x20x1 mm and slide them onto the shift shaft Mount the return spring 7 on the shift shaft the two legs of the spring must rest against bracket C of the shift shaft P...

Страница 56: ...e main shaft into a vise use protective jaws with the toothed end facing downwards Carefully grease all parts before mounting them Mount the bearing sleeve 1 22x25x11 1 mm on the main shaft Then put the 5th idler gear 2 on the shaft with the shifting claws facing upwards Put the stop disc 3 22 2x27 8x1 mm onto the shaft and mount the axial securing element 4 Mount the 3rd 4th sliding gear 5 with t...

Страница 57: ...facing downwards All parts must be carefully greased before mounting Mount the bearing sleeve 1 25x28x9 7 mm and the 2nd idler gear 2 with the recess for the shifting claws facing upwards Mount the stop disc 3 25 2x32x1 mm and the axial securing element 4 on the countershaft Mount the 6th idler gear 5 with the shift groove facing upwards then mount the stop disc 6 22 2x28x1 mm Mount the bearing sl...

Страница 58: ...STOR OTHERWISE PROBLEMS CAN OCCUR IN THE CDI UNIT Check stator and pulse generator Use an ohmmeter to perform the following measurements NOTE The measuring must be performed at a temperature of 20 C Otherwise significant deviations must be expected Replace the stator and or the pulse generator if the measured values deviate significantly from the setpoint values Ignition Measure cable colours Resi...

Страница 59: ...6 4 KICKSTARTER 6 5 PRIMARY DRIVE CLUTCH 6 5 CLUTCH DISCS PRESSURE CAP 6 6 OIL PUMP REED VALVE HOUSING INTAKE FLANGE SEPARATE LUBRICATION 6 7 REED VALVE HOUSING INTAKE FLANGE 6 8 CLUTCH COVER 6 8 PISTON CYLINDER 6 9 ADJUSTING DIMENSION X 6 9 ADJUSTING THE CONTROL FLAP DIMENSION Z 6 10 CYLINDER HEAD 6 10 IGNITION COVER 6 11 MEASURING DIMENSION Y 6 11 MOUNTING THE CLUTCH SLAVE CYLINDER 6 12 FILLING ...

Страница 60: ......

Страница 61: ...shift mechanism Mount the stop disc at the bottom of the countershaft and fix it with grease to prevent it from slipping off the shaft Align the teeth of the main shaft and the countershaft and insert both shafts together into the bearing seats Grease the driving pins 2 of the shift forks and mount the rollers 1 Oil the blades of the shift forks and hook them into the sliding gears Insert the shif...

Страница 62: ...t the sealing surfaces at cylinder base and reed valve housing 6 3C M6x mm 50 50 50 50 50 55 55 50 55 55 55 Engine sprocket Oil the O ring 1 78 mm and put it on the countershaft Mount the distance bushing 1 in such a way that the O ring is located in the chamfer Put the chain sprocket onto the countershaft with the collar facing inwards and fix it with the circlip sharp edge outwards Tap the chain...

Страница 63: ...sn t been removed push it sideways against the resistance of the spring when mounting the locking drum Mount washer 3 Line the washer the locking lever the collar bushing the small collar facing the head of the bolt and the locking spring upon bolt 4 Hook the end A of the locking spring into the locking lever Apply Loctite 243 to bolt 4 and use it to fix the locking lever Make sure that the other ...

Страница 64: ...nd hook it into the corresponding bore in the housing A Primary drive clutch Grease the shaft seal ring of the crankshaft Put the oiled O ring 25x2 mm onto the crankshaft and mount the distance bushing with the chamfer facing the crank web so that the O ring is located in the chamfer Insert the woodruff key into the crankshaft Put the primary gear onto the crankshaft with the collar facing the hou...

Страница 65: ...h hub Clutch discs pressure cap Oil the thrust bearing and insert it into the main shaft Properly oil the lining discs before mounting them NOTE These engines have 4 clutch discs of aluminum and 2 clutch discs of steel These must be mounted in the following order One of the lining discs must be on top Mount the pressure cap then the clutch springs the spring retainers and the collar bolts Tighten ...

Страница 66: ...sert the oil pump with a new gasket into the engine case and fix it with the 2 bolts 2 Mount the oil pump housing When mounting be careful not to kink the two hoses Mount the 2 dowel bushings 3 Slide the oil pump wheel 4 onto the oil pump Mount the clutch cover 5 and tighten the bolts including 6 To tighten the two bolts 7 it is necessary to hold the oil pump cover 8 in position Mount the remainin...

Страница 67: ...it on Slightly rotate the crankshaft so that the centrifugal timer and the water pump can mesh with the primary gear Mount the collar bolts bolt lengths indicated in the illustration on next page and tighten with 8 Nm 6 ft lb Check all shafts for smooth operation Tighten the collar bolt 2 of the centrifugal timer Reed valve housing intake flange Mount the reed valve housing and the intake flange a...

Страница 68: ...p the cylinder down with two collar nuts CAUTION WHEN MOUNTING THE CYLINDER MAKE SURE THAT THE ROCKER ARM 1 OF THE CENTRIFUGAL TIMER IS LOCATED IN THE CORRESPONDING RECESS 2 OF THE CON TROL SEGMENT IN THE CYLINDER IF NECESSARY REMOVE THE SMALL CAP ON THE RIGHT SIDE OF THE CYLINDER AND CHECK Adjusting dimension X NOTE Dimension X is the distance between the upper piston edge and the offset upper cy...

Страница 69: ... 6 mm 200 SX from model 2003 Z 46 mm 0 2 0 6 mm Loosen locking bolt 1 only 2 turns Adjust the depth gauge to the indicated value and fix it in this position Insert the depth gauge into the cylinder Turn the bearing carrier 2 at the clutch cover so that the control flap rests against the depth gauge Tighten the locking bolt 1 to prevent the bearing carrier from turning Mount the hexagon cap nut 3 o...

Страница 70: ...der to the push rod Swing the ignition side up Oil the push rod and push it into the main shaft as far as it will go Then use a sliding gauge to measure the distance between the bearing surface of the driving cylinder of the clutch and the push rod Write down dimension Y and use an appropriate gasket see table when mounting the driving cylinder of the clutch CAUTION ALWAYS USE A NEW GASKET DAMAGED...

Страница 71: ...ly Loctite 243 onto the bolt s 1 thread NOTE to make shure the clutch works well the correct thickness of the clutch slave cylinder gasket is to be measured see dimension Y Filling in the gear oil Mount the oil drain plug with a new seal ring and tighten with 15 Nm 11 ft lb Remove the plug at the clutch cover and fill in 0 70 l oil see spezifications chapter 9 Mount the plug and check the engine f...

Страница 72: ......

Страница 73: ...KING THE CAPACITOR 7 2 IGNITION COIL KOKUSAN 7 2 CDI UNIT 7 3 MEASUREMENTS WITH PEAK VOLTAGE ADAPTER STATIC IGNITION VALUES 125 200 SX MXC EXC 7 4 STATIC GENERATOR VALUES 125 200 EXC 7 6 STATIC IGNITION VALUES GENERATOR VALUES 125 200 MXC EXC USA 7 8 STATIC IGNITION VALUES 125 EXE SUPERMOTO 7 10 STATIC GENERATOR VALUES 125 EXE SUPERMOTO 7 12 INDEX 7 1C 7 ...

Страница 74: ... be replaced Checking the capacitor Discharge the capacitor by bridging the two terminals with a screwdriver and remove Connect the negative pole of a 12V battery with the negative terminal of the capacitor The connection between the positive pole of the battery and the positive terminal of the capacitor marked is made with a test lamp 3 When the power circuit is closed the test lamp must begin to...

Страница 75: ...bles and plug and socket connections of the CDI unit The CDI unit function can only be checked on an ignition test bench CAUTION NEVER USE A COMMERCIAL MEASURING DEVICE TO CHECK THE CDI UNIT COMMER CIAL MEASURING DEVICES CAN DESTROY HIGHLY SENSITIVE ELECTRONIC COMPO NENTS ...

Страница 76: ...7 4C S P O R T M O T O R C Y C L E S 1 2 3 4 5 ...

Страница 77: ...ct the CDI unit 2 Multimeter display 35 volts 5 volts Same measurement with connectors CDI unit connected Multimeter display 200 volts 10 volts Check the primary voltage output 4 for ignition coil control also see circuit diagram on opposite page for output voltage blue white cable color Apply the red measuring lead R of the peak voltage adapter to the black white cable ground and the black measur...

Страница 78: ...7 6C S P O R T M O T O R C Y C L E S 6 9 10 11 ...

Страница 79: ... be the same NOTE the black measuring lead of the peak voltage adapter must be applied to the ground Check regulator rectifier output voltage 9 also see circuit diagram on opposite page cable colors yellow red regulator rectifier bk connected capacitor bl disconnected between yellow red and brown ground Multimeter display 14 volts 1 volt NOTE the black measuring lead S of the peak voltage adapter ...

Страница 80: ...7 8C 1 2 3 4 5 6 ...

Страница 81: ...nected Multimeter display 220 volts 10 volts Check the primary voltage output 4 for ignition coil control also see circuit diagram on opposite page for output voltage blue white cable color apply the red measuring lead R of the peak voltage adapter to the black white cable ground and the black measuring lead S to the blue white cable CDI unit 2 and ignition coil 5 connected Multimeter display 210 ...

Страница 82: ...l g bl ge r g bl ge br r br g w ge bl s ge bl br v br s br v br s br ge w r w s r g r KOKUSAN 2 K 3 s w bl w bl w s w s ge w ge r br 31 58 54 g w w br g w br ge bl ge bl br v s o o ge bl br ge r s v ge bl s v w s ge r w g o bl ge s ge bl s ge br ge s o ge ge r br v s Europa 22 11 99 Hasl vorne 512 11 075 000 SERVICE S P O R T M O T O R C Y C L E S 1 3 4 5 2 Modell 125 EXE 2000 2001 125 Super Moto ...

Страница 83: ...it 2 Multimeter display 6 volts 1 volt Same measurement with CDI unit connected Multimeter display 3 volts 1 volt Check the generator charging coil for the ignition capacitor charge for output voltage two pin connector 3 with black red and red white cable colors also see circuit diagram on opposite page Apply the red measuring lead of the peak voltage adapter to the black red cable and the black m...

Страница 84: ...l g bl ge r g bl ge br r br g w ge bl s ge bl br v br s br v br s br ge w r w s r g r KOKUSAN 2 K 3 s w bl w bl w s w s ge w ge r br 31 58 54 g w w br g w br ge bl ge bl br v s o o ge bl br ge r s v ge bl s v w s ge r w g o bl ge s ge bl s ge br ge s o ge ge r br v s Europa 22 11 99 Hasl vorne 512 11 075 000 SERVICE S P O R T M O T O R C Y C L E S 6 9 10 11 Modell 125 EXE 2000 2001 125 Super Moto ...

Страница 85: ...llow and brown ground connector 7 disconnected Multimeter display 19 volts 2 volts between white and brown ground connector 8 disconnected Multimeter display 24 volts 2 volts Repeat both measurements with connector 7 and 8 connected The measured values should be the same NOTE the black measuring lead of the peak voltage adapter must be applied to the ground Check regulator rectifier output voltage...

Страница 86: ......

Страница 87: ...Repair manual 125 200 Art No 3 206 005 E TROUBLE SHOOTING TROUBLE SHOOTING 125 200 8 2 INDEX 8 1C 8 ...

Страница 88: ......

Страница 89: ...rburettor lead into a basin and open fuel tap if fuel leaks out clean carburettor if no fuel leaks out check tank ventilation i e clean fuel tap Reduce electrode distance 0 60 mm Clean spark plug or renew Dismount spark plug connect ignition cable hold to ground blank place on engine and actuate kickstarter a strong spark must be produced at the spark plug If no spark is produced loosen spark plug...

Страница 90: ...olts Incorrect dimension X Cylinder head or cylinder head gasket leaks Excessive oil quantity in transmission Water pump shaft seal ring or right hand crankshaft seal ring defect Voltage regulator faulty REMEDY Replace reed paddles or reed valve housing Overhaul engine Have ignition system checked Clean carburetor if necessary replace float needle and adjust level Tighten jets Refer to technical d...

Страница 91: ...GINE 125 200 SX MXC EXC 9 8 TECHNICAL SPECIFICATIONS CHASSIS 125 200 SX MXC EXC 9 10 MODEL 2001 TECHNICAL SPECIFICATIONS ENGINE 125 EXE SUPERMOTO 9 6 TECHNICAL SPECIFICATIONS CHASSIS 125 EXE SUPERMOTO 9 7 TECHNICAL SPECIFICATIONS ENGINE 125 200 9 11 TECHNICAL SPECIFICATIONS CHASSIS 125 200 9 13 MODEL 2002 TECHNICAL SPECIFICATIONS ENGINE 125 200 9 14 TECHNICAL SPECIFICATIONS CHASSIS 125 200 9 16 MO...

Страница 92: ......

Страница 93: ...C 1 6 mm 0 063 in 17 BTDC Spark plug NGK R 6918 B8 NGK BR 8 EG Electrode gap 0 60 mm 0 024 in Dimension Z 42 mm 1 65 in 46 mm 1 81 in Primary drive straight cut spur gears primary ratio 23 73 Clutch multiple disc clutch in oil bath hydraulic operated Shell HF E15 Transmission 6 speed claw actuated Gear ratio 1st gear 13 32 12 33 13 32 12 33 2nd gear 15 30 15 31 15 30 15 31 3rd gear 17 28 17 28 17 ...

Страница 94: ...e bottom gasket 0 07 0 15 0 20 0 25 0 40 0 50 0 75 mm Cylinder head gasket 1 10 mm O ring 125 SX EXC USA 125 EGS AUSTRALIA 125 SX EXC EUROPE 200 MXC EXC USA 200 EXC EUROPE 125 EGS 200 EGS Carburetor Carburetor setting number Main jet Idling jet Starting jet Jetneedle Needle position from top Throttle valve Air adjustment screw top Performance restrictor Keihin PWK 39 120598 190 188 192 195 48 45 5...

Страница 95: ...inal sprockets 38 40 42 45 48 50 52 Steering head angle 63 Wheel base 1461 10 mm 57 3 0 4 in Seat height unloaded 925 mm 36 4 in Ground clearance unloaded 385 mm 15 2 in Dead weight without fuel 92 kg 96 kg 100 kg 96 kg 97 kg 101 kg 203 lbs 212 lbs 221 lbs 212 lbs 214 Ibs 223 Ibs TECHNICAL SPECIFICATIONS CHASSIS 125 SX EXC EGS 200 MXC EXC EGS 99 WP 1218T711 WP 1218T713 Compression adjuster 5 6 Reb...

Страница 96: ...o 23 73 Clutch multiple disc clutch in oil bath hydraulic operated Shell HF E15 Transmission 6 speed claw actuated 1st gear 12 33 2nd gear 15 31 3rd gear 17 28 4th gear 19 26 5th gear 22 25 17 19 6th gear 22 20 Gear lubrication 0 70 l engine oil 20W 40 Shell Advance VSX4 Available chain sprockets 13t 14t 15t for chain 5 8 x 1 4 Coolant 1 2 litres 40 anti freeze 60 water at least 25 C 13 F Ignition...

Страница 97: ...gear 12 33 2nd gear 15 31 3rd gear 17 28 4th gear 19 26 5th gear 21 25 6th gear 22 24 Gear lubrication 0 7 l gear oil SAE 80W Shell Advance Gear EP Available chain sprockets 14t for chain 5 8 x 1 4 Coolant 0 8 litres 40 anti freeze 60 water at least 25 C 13 F Ignition system Kokusan digital 2K 3 Generator output 12V 110 W Carburetor flat slide carburetor carburetor setting see table Air filter wet...

Страница 98: ...ar 220 260 mm 8 7 10 2 in Rear suspension WP Progressive Damping System shock absorber aluminium swingarm Front brake Disc brake with carbon steel brake disc brake caliper floated Front brake disc Ø 260 mm 10 2 in Ø 320 mm 12 6 in Rear brake Disc brake with carbon steel brake disc Ø 220 mm 8 7 in brake caliper floated Brake discs Wear limit max 0 4 mm 0 016 in Front tires 3 00 21 110 70 17 Air pre...

Страница 99: ...k plug NGK BR9 EVX NGK BR 8 EG Electrode gap 0 60 mm 0 024 in Dimension Z 42 mm 1 65 in 46 mm 1 81 in Primary drive straight cut spur gears primary ratio 23 73 Clutch multiple disc clutch in oil bath hydraulic operated Shell HF E15 Transmission 6 speed claw actuated Gear ratio 1st gear 13 32 12 33 13 32 12 33 2nd gear 15 30 15 31 15 30 15 31 3rd gear 17 28 17 28 17 28 17 28 4th gear 19 26 19 26 19...

Страница 100: ...rings length new 39 mm minimum length 38 mm TOLERANCES AND FITTING CLEARANCES GASKET THICKNESSES Crankcase 0 5 mm Clutch cover 0 5 mm Clutch driving cylinder 0 30 0 50 0 75 mm Cylinder bottom gasket as required Available bottom gasket 0 07 0 15 0 20 0 25 0 40 0 50 0 75 mm Cylinder head gasket 1 10 mm O ring 125 SX 125 200 MXC EXC Carburetor Carburetor setting number Main jet Idling jet Starting je...

Страница 101: ...e Power Up Side Down 43 MA Wheel travel front rear 295 320 mm 11 3 12 6 in Rear suspension WP Progressive Damping System shock absorber aluminium swingarm Front brake Disc brake with carbon steel brake disc Ø 260 mm 10 2 in brake caliper floated Rear brake Disc brake with carbon steel brake disc Ø 220 mm 8 7 in brake caliper floated Brake discs Wear limit max 0 4 mm 0 016 in Front tires 80 100 21 ...

Страница 102: ... 33 1G33 13 32 1S32 12 33 1G33 2nd gear 2S15 15 30 2S30 2S15 15 31 2G31 2S15 15 30 2S30 2S15 15 31 2G31 3rd gear 3S17 17 28 3S28 3S17 17 28 3S28 3S17 17 28 3S28 3S17 17 28 3S28 4th gear 4S19 19 26 4S26 4S19 19 26 4S26 4S19 19 26 4S26 4S19 19 26 4S26 5th gear 5S21 21 25 5S25 5S21 21 25 5S25 5S21 21 25 5S25 5G17 17 19 5G19 6th gear 6S22 22 24 6S24 6G20 20 20 6G20 6S22 22 23 6S23 6G22 22 20 6G20 Gear...

Страница 103: ... FITTING CLEARANCES GASKET THICKNESSES Crankcase 0 5 mm Clutch cover 0 5 mm Clutch driving cylinder 0 30 0 50 0 75 mm Cylinder bottom gasket as required Available bottom gasket 0 07 0 15 0 20 0 25 0 40 0 50 0 75 mm Cylinder head gasket 1 10 mm O ring BASIC CARBURETOR SETTING 125 SX 125 EXC EU 125 EXC USA 200 MXC EXC USA Carburetor Carburetor setting number Main jet Idling jet Starting jet Jetneedl...

Страница 104: ...wer Up Side Down 43 MA Wheel travel front rear 295 320 mm 11 3 12 6 in Rear suspension WP Progressive Damping System shock absorber aluminium swingarm Front brake Disc brake with carbon steel brake disc Ø 260 mm 10 2 in brake caliper floated Rear brake Disc brake with carbon steel brake disc Ø 220 mm 8 7 in brake caliper floated Brake discs Wear limit max 0 4 mm 0 016 in Front tires 80 100 21 51M ...

Страница 105: ...o 1st gear 13 32 1S32 12 33 1G33 13 32 1S32 12 33 1G33 2nd gear 2S15 15 30 2S30 2S15 15 31 2G31 2S15 15 30 2S30 2S15 15 31 2G31 3rd gear 3S17 17 28 3S28 3S17 17 28 3S28 3S17 17 28 3S28 3S17 17 28 3S28 4th gear 4S19 19 26 4S26 4S19 19 26 4S26 4S19 19 26 4S26 4S19 19 26 4S26 5th gear 5S21 21 25 5S25 5S21 21 25 5S25 5S21 21 25 5S25 5G17 21 25 5G19 6th gear 6S22 22 24 6S24 6G20 20 20 6G20 6S22 20 23 6...

Страница 106: ... FITTING CLEARANCES GASKET THICKNESSES Crankcase 0 5 mm Clutch cover 0 5 mm Clutch driving cylinder 0 30 0 50 0 75 mm Cylinder bottom gasket as required Available bottom gasket 0 07 0 15 0 20 0 25 0 40 0 50 0 75 mm Cylinder head gasket 125 shapedring O ring 200 1 10 mm O ring BASIC CARBURETOR SETTING 125 SX 125 EXC EU 125 EXC AUS 200 MXC EXC USA Carburetor Carburetor setting number Main jet Idling...

Страница 107: ... WP PDS 5018 Progressive Damping System shock absorber aluminium swingarm Front brake Disc brake with carbon steel brake disc Ø 260 mm 10 2 in brake caliper floated Rear brake Disc brake with carbon steel brake disc Ø 220 mm 8 7 in brake caliper floated Brake discs Wear limit max 0 4 mm 0 016 in Front tires 80 100 21 51M 90 90 21 54R 90 90 21 54R Front tires USA 80 100 21 51M 80 100 21 51M 80 100 ...

Страница 108: ...ted Shell HF E15 Transmission 5 speed claw actuated 6 speed claw actuated Gear ratio 1st gear 13 32 1S32 12 33 1G33 13 32 1S32 13 33 1G33 2nd gear 2S15 15 30 2S30 2S15 15 31 2G31 2S15 15 30 2S30 2S15 15 31 2G31 3rd gear 3S17 17 28 3S28 3S17 17 28 3S28 3S17 17 28 3S28 3S17 17 28 3S28 4th gear 4S19 19 26 4S26 4S19 19 26 4S26 4S19 19 26 4S26 4S19 19 26 4S26 5th gear 5S21 21 25 5S25 5S21 21 25 5S25 5S...

Страница 109: ...III 5 5 1 5 BASIC CARBURETOR SETTING 125 EXC EU 125 EXC AUS 125 EXC SIX DAYS Carburetor Carburetor setting number Main jet Idling jet Starting jet Jet needle Needle position from top Throttle valve Air adjustment screw open Performance restrictor Keihin PWK 38 AG 070202 148 180 185 35 45 48 85 R 1472 N NOZ E NOZ F V 6 5 1 5 Keihin PWK 38 AG 160202 180 185 45 48 85 NOZ E NOZ F IIII 6 5 1 5 125 SX K...

Страница 110: ... 100 90 19 57M 120 90 18 65R Rear tires USA 100 90 19 57M 100 100 18 59M 100 90 19 57M 100 100 18 59M 100 100 18 59M Air pressure offroad 1 0 bar 14psi 1 0 bar 14psi 1 0 bar 14psi 1 0 bar 14psi 1 0 bar 14psi Air pressure road driver only 2 0 bar 28psi 2 0 bar 28psi Fuel tank capacity 7 5 liters 2 US Gallons 9 liters 2 3 US Gallons 7 5 liters 2 US Gallons 11 liters 2 9 US Gallons 9 11 liter 2 3 2 9...

Страница 111: ... Brake disk front M 6 10 9 Loctite 243 15 Nm Brake disk rear M 6 Loctite 243 15 Nm Clamping bolts upper fork bridge M 8 20 Nm Clamping bolts lower fork bridge M 8 15 Nm Clamping bolts fork stubs M 8 10 Nm Collar nut rear wheel spindle M 20x1 5 80 Nm Hexagon nut swing arm bolt M 14x1 5 100 Nm Hexagon collar bolt handlebar clamp M 8 20 Nm Allan head bolt handlebar support M 10 Loctite 243 40 Nm Shoc...

Страница 112: ...E NOZG NOZG NOZH NOZH NOZH NOZI POS POS 4 4 3 3 2 1 HD MJ 180 178 175 172 170 168 LSCHR AS 3 4 1 1 1 4 1 1 2 1 3 4 2 LD IJ 55 52 50 48 45 42 NADEL NEEDLE NOZG NOZG NOZH NOZH NOZI NOZI POS POS 4 4 3 3 3 2 HD MJ 182 180 178 175 172 170 LSCHR AS 1 2 3 4 1 1 1 4 1 1 2 1 3 4 LD IJ 55 52 50 50 48 45 NADEL NEEDLE NOZF NOZG NOZG NOZH NOZH NOZI POS POS 5 4 4 3 3 2 HD MJ 185 182 180 178 175 172 3000 m 10000...

Страница 113: ...48 45 45 45 NADEL NEEDLE NOZF NOZF NOZH NOZH NOZH NOZH POS POS 4 3 3 2 2 2 HD MJ 192 190 188 185 185 182 LSCHR AS 1 1 1 4 1 3 4 1 3 4 1 3 4 1 3 4 LD IJ 50 50 48 48 48 45 NADEL NEEDLE NOZF NOZF NOZG NOZG NOZH NOZH POS POS 4 4 3 3 3 2 HD MJ 195 192 190 190 188 185 LSCHR AS 3 4 1 1 1 2 1 1 2 1 1 2 1 3 4 LD IJ 50 50 48 48 48 48 NADEL NEEDLE NOZD NOZD NOZF NOZF NOZG NOZH POS POS 4 4 3 3 3 2 HD MJ 200 1...

Страница 114: ... 3 2 2 2 1 1 HD MJ 182 180 178 175 172 170 LSCHR AS 1 1 2 1 1 4 1 1 2 1 3 4 1 3 4 2 LD IJ 48 45 45 45 42 42 NADEL NEEDLE NOZG NOZG NOZH NOZH NOZI NOZI POS POS 3 3 2 2 2 1 HD MJ 182 182 180 178 175 172 LSCHR AS 1 1 4 1 1 1 4 1 1 2 1 3 4 1 3 4 LD IJ 48 48 45 45 45 42 NADEL NEEDLE NOZG NOZG NOZG NOZH NOZH NOZI POS POS 4 3 3 2 2 2 HD MJ 185 182 182 180 178 175 LSCHR AS 1 1 1 4 1 1 2 1 1 4 1 1 2 1 3 4 ...

Страница 115: ...48 45 42 40 38 NADEL NEEDLE R1467D R1468D R1468D R1469D R1469D R1469D POS POS 3 3 2 3 2 2 HD MJ 190 188 185 182 180 178 LSCHR AS 3 4 1 1 1 4 1 1 2 1 3 4 2 LD IJ 52 50 48 45 42 40 NADEL NEEDLE R1467D R1467D R1468D R1468D R1469D R1469D POS POS 4 3 3 2 3 2 HD MJ 192 190 188 185 182 180 LSCHR AS 1 2 3 4 1 1 1 4 1 1 2 1 3 4 LD IJ 55 52 50 48 45 42 NADEL NEEDLE R1467D R1467D R1467D R1468D R1468D R1469D ...

Страница 116: ... NADEL NEEDLE NOZG NOZG NOZH NOZH NOZH NOZI POS POS 4 4 3 3 2 1 HD MJ 180 178 175 172 170 168 LSCHR AS 3 4 1 1 1 4 1 1 2 1 3 4 2 LD IJ 55 52 50 48 45 42 NADEL NEEDLE NOZG NOZG NOZH NOZH NOZI NOZI POS POS 4 4 3 3 3 2 HD MJ 182 180 178 175 172 170 LSCHR AS 1 2 3 4 1 1 1 4 1 1 2 1 3 4 LD IJ 55 52 50 50 48 45 NADEL NEEDLE NOZF NOZG NOZG NOZH NOZH NOZI POS POS 5 4 4 3 3 2 HD MJ 185 182 180 178 175 172 ...

Страница 117: ... 45 45 45 42 42 NADEL NEEDLE NOZG NOZG NOZH NOZH NOZI NOZI POS POS 3 3 2 2 2 1 HD MJ 182 182 180 178 175 172 LSCHR AS 1 1 4 1 1 1 4 1 1 2 1 3 4 1 3 4 LD IJ 48 48 45 45 45 42 NADEL NEEDLE NOZG NOZG NOZG NOZH NOZH NOZI POS POS 4 3 3 2 2 2 HD MJ 185 182 182 180 178 175 LSCHR AS 1 1 1 4 1 1 2 1 1 4 1 1 2 1 3 4 LD IJ 48 48 48 45 45 45 NADEL NEEDLE NOZF NOZG NOZG NOZG NOZH NOZH POS POS 4 4 3 3 2 2 HD MJ...

Страница 118: ... R1468D R1468D R1469D R1469D R1469D POS POS 3 3 2 2 2 2 HD MJ 190 188 185 182 180 178 LSCHR AS 3 4 1 1 1 4 1 1 2 1 3 4 2 LD IJ 52 50 48 45 42 40 NADEL NEEDLE R1467D R1467D R1468D R1468D R1469D R1469D POS POS 4 3 3 3 2 2 HD MJ 192 190 188 185 182 180 LSCHR AS 1 2 3 4 1 1 1 4 1 1 2 1 3 4 LD IJ 55 52 50 48 45 42 NADEL NEEDLE R1467D R1467D R1468D R1468D R1468D R1470D POS POS 5 4 3 3 2 2 HD MJ 195 192 ...

Страница 119: ...48 45 42 40 NADEL NEEDLE NOZG NOZG NOZH NOZH NOZH NOZI POS POS 4 4 3 2 2 1 HD MJ 180 178 175 172 170 168 LSCHR AS 3 4 1 1 1 4 1 1 2 1 3 4 2 LD IJ 55 52 50 48 45 42 NADEL NEEDLE NOZG NOZG NOZH NOZH NOZI NOZI POS POS 4 4 3 3 2 2 HD MJ 182 180 178 175 172 170 LSCHR AS 1 2 3 4 1 1 1 4 1 1 2 1 3 4 LD IJ 55 52 50 50 48 45 NADEL NEEDLE NOZF NOZG NOZG NOZH NOZH NOZI POS POS 5 4 4 3 3 2 HD MJ 185 182 180 1...

Страница 120: ...NOZG NOZH NOZH NOZI NOZI POS POS 3 3 2 2 2 1 HD MJ 182 182 180 178 175 172 LSCHR AS 1 1 4 1 1 1 4 1 1 2 1 3 4 1 3 4 LD IJ 48 48 45 45 45 42 NADEL NEEDLE NOZF NOZF NOZG NOZG NOZH NOZI POS POS 4 4 3 3 2 2 HD MJ 185 182 182 180 178 175 LSCHR AS 1 1 1 4 1 1 2 1 1 4 1 1 2 1 3 4 LD IJ 48 48 48 45 45 45 NADEL NEEDLE NOZF NOZF NOZG NOZG NOZH NOZH POS POS 5 4 3 3 2 2 HD MJ 188 185 182 182 180 178 3000 m 10...

Страница 121: ... R1468D R1469D R1469D R1470D R1470D R1470D POS POS 3 3 2 2 2 2 HD MJ 190 188 185 182 180 178 LSCHR AS 3 4 1 1 1 4 1 1 2 1 3 4 2 LD IJ 52 50 48 45 42 40 NADEL NEEDLE R1468D R1468D R1469D R1469D R1470D R1470D POS POS 4 3 3 3 2 2 HD MJ 192 190 188 185 182 180 LSCHR AS 1 2 3 4 1 1 1 4 1 1 2 1 3 4 LD IJ 55 52 50 48 45 42 NADEL NEEDLE R1468D R1468D R1469D R1469D R1469D R1470D POS POS 5 4 3 3 2 2 HD MJ 1...

Страница 122: ...ulierschraube offen LD Leerlaufdüse POS Clip Position von oben HD Hauptdüse Schieber 6 5 Zerstäuber 5 mm LSCHR AS 1 1 2 1 3 4 2 2 1 4 2 1 2 2 3 4 LD IJ 45 42 40 38 35 32 NADEL NEEDLE NOZG NOZG NOZG NOZH NOZH NOZI POS POS 3 3 2 1 1 1 HD MJ 180 178 175 172 170 168 LSCHR AS 1 1 4 1 1 2 1 3 4 2 2 1 4 2 1 2 LD IJ 48 45 42 40 38 35 NADEL NEEDLE NOZF NOZG NOZG NOZH NOZH NOZH POS POS 4 3 3 2 1 1 HD MJ 182...

Страница 123: ...LE NOZE NOZF NOZF NOZG NOZH NOZH POS POS 3 3 2 2 2 1 HD MJ 182 180 178 175 172 170 LSCHR AS 1 1 4 1 1 1 4 1 1 2 1 3 4 1 3 4 LD IJ 48 48 45 45 45 42 NADEL NEEDLE NOZD NOZE NOZF NOZF NOZG NOZH POS POS 4 4 3 3 2 2 HD MJ 185 182 180 178 175 172 LSCHR AS 1 1 1 4 1 1 2 1 1 4 1 1 2 1 3 4 LD IJ 50 48 48 45 45 45 NADEL NEEDLE NOZD NOZD NOZE NOZF NOZF NOZG POS POS 5 4 3 3 2 2 HD MJ 188 185 182 180 178 175 3...

Страница 124: ...1470D R1470D R1470D POS POS 3 3 2 2 2 2 HD MJ 190 188 185 182 180 178 LSCHR AS 3 4 1 1 1 4 1 1 2 1 3 4 2 LD IJ 52 50 48 45 42 40 NADEL NEEDLE R1468D R1468D R1469D R1469D R1470D R1470D POS POS 4 3 3 3 2 2 HD MJ 192 190 188 185 182 180 LSCHR AS 1 2 3 4 1 1 1 4 1 1 2 1 3 4 LD IJ 55 52 50 48 45 42 NADEL NEEDLE R1468D R1468D R1469D R1469D R141469D R1470D POS POS 5 4 3 3 2 2 HD MJ 195 192 190 188 185 18...

Страница 125: ...1 3 5 2 4 LSCHR Luftregulierschraube offen LD Leerlaufdüse POS Clip Position von oben HD Hauptdüse Schieber 6 5 Zerstäuber 5 mm LSCHR AS 1 1 2 1 3 4 2 2 1 4 2 1 2 2 3 4 LD IJ 45 42 40 38 35 32 NADEL NEEDLE NOZE NOZE NOZE NOZF NOZF NOZG POS POS 3 3 2 1 1 1 HD MJ 180 178 175 172 170 168 LSCHR AS 1 1 4 1 1 2 1 3 4 2 2 1 4 2 1 2 LD IJ 48 45 42 40 38 35 NADEL NEEDLE NOZD NOZE NOZE NOZF NOZF NOZF POS PO...

Страница 126: ... R1469G R1469G 1469G POS POS 3 3 2 2 2 2 HD MJ 195 192 190 188 185 182 LSCHR AS 3 4 1 1 1 4 1 1 2 1 3 4 2 LD IJ 55 52 50 48 45 42 NADEL NEEDLE R1467G R1467G R1468G R1468G R1469G R1469G POS POS 4 3 3 3 2 2 HD MJ 198 195 192 190 188 185 LSCHR AS 1 2 3 4 1 1 1 4 1 1 2 1 3 4 LD IJ 58 55 52 50 48 45 NADEL NEEDLE R1466G R1467G R1468G R1468G R1468G R1469G POS POS 5 4 3 3 2 2 HD MJ 200 198 195 192 190 188...

Страница 127: ...LE NOZD NOZE NOZE NOZF NOZG NOZG POS POS 3 3 2 2 2 1 HD MJ 182 180 178 175 172 170 LSCHR AS 1 1 4 1 1 1 4 1 1 2 1 3 4 1 3 4 LD IJ 48 48 45 45 45 42 NADEL NEEDLE NOZD NOZD NOZE NOZE NOZF NOZG POS POS 4 4 3 3 2 2 HD MJ 185 182 180 178 175 172 LSCHR AS 1 1 1 4 1 1 2 1 1 4 1 1 2 1 3 4 LD IJ 50 48 48 45 45 45 NADEL NEEDLE NOZC NOZD NOZD NOZE NOZE NOZG POS POS 5 4 3 3 2 2 HD MJ 188 185 182 180 178 175 3...

Страница 128: ......

Страница 129: ...NTENANCE SCHEDULE 125 200 UP TO 2000 10 2 125 200 SX MXC EXC 2001 2002 10 3 125 EXE SUPERMOTO 10 5 125 200 SX MXC EXC 2003 10 7 Repair manual 125 200 Art No 3 206 005 E LUBRICATION AND MAINTENANCE SCHEDULE INDEX 10 1C 10 ...

Страница 130: ......

Страница 131: ...lutch Check telescopic fork action Check telescopic fork for leaks Push up the protective bellows and remove the dirt the drain holes must be free of obstructions Marzocchi fork Clean the dust scrabbers of the telescopic force WP Extreme fork Undo the bleeder screws at the fork legs Change oil of telescopic fork Service telescopic fork completely Check steering head bearing free play Clean and reg...

Страница 132: ...ght indicator indicator lamps speedometer illumination horn emergency OFF switch or button Check brake fluid level lining thickness brake lining Check brake lines for damage and leaks Check adjust smooth operation and free travel of handbrake foot brake lever Check tightness of brake system bolts Check shock absorber and fork for leaks and function Clean dust bellows Bleed fork legs Check swing ar...

Страница 133: ...in check tension and adjust if necessary Clean air filter and filter box Check tires for pressure and wear Check cooling liquid level Check fuel lines for leaks Empty and clean float chamber Check all control elements for smooth operation Check brake performance Treat blank metal parts with the exception of brake and exhaust systems with wax based anti corrosion agent Treat ignition and steering l...

Страница 134: ...mination horn battery holder and connections Check brake fluid level lining thickness and brake discs Check brake lines for damage and leaks Check adjust smooth operation free travel of handbrake footbrake levers Check bolts of brake system for tight fit Check suspension strut and fork for leaks and proper function Clean dust sleeves Bleed fork legs Check swinging fork pivot Check adjust steering ...

Страница 135: ... clean dust sleeves in regular intervals Clean and lubricate chain check tension and readjust it if necessary Clean air filter and filter box Check tire inflation pressure and wear Check coolant level Check fuel lines for leaks Drain and clean float chamber Verify smooth operation of all controls Check brake performance Treat exposed metal components except for brake and exhaust systems with wax b...

Страница 136: ...light indicator indicator lamps speedometer illumination horn emergency OFF switch or button Check brake fluid level lining thickness brake lining Check brake lines for damage and leaks Check adjust smooth operation and free travel of handbrake foot brake lever Check tightness of brake system bolts Check shock absorber and fork for leaks and function Clean dust bellows Bleed fork legs Check swing ...

Страница 137: ...n check tension and adjust if necessary Clean air filter and filter box Check tires for pressure and wear Check cooling liquid level Check fuel lines for leaks Empty and clean float chamber Check all control elements for smooth operation Check brake performance Treat blank metal parts with the exception of brake and exhaust systems with wax based anti corrosion agent Treat ignition and steering lo...

Страница 138: ...45 hours 60 hours 90 hours 120 hours 135 hours RECOMMENDED INSPECTION OF THE 125 200 SX MXC AND EXC ENGINE USED FOR HOBBY ENDURO BY THE KTM WORKSHOP ADDITIONAL ORDER FOR THE KTM WORKSHOP Check the reed type intake valve for wear Check the clutch shoes for wear Check the length of the clutch springs Check the cylinder and piston for wear Check the exhaust control for proper functioning and smooth r...

Страница 139: ...G DIAGRAMS 2000 125 200 EXC USA 11 8 125 200 EXC EUROPA 11 9 125 EXE SUPERMOTO 11 11 WIRING DIAGRAMS 2001 125 200 EXC EUROPA 11 13 125 200 EXC USA 11 15 125 EXE SUPERMOTO 11 11 WIRING DIAGRAMS 2002 125 200 EXC EUROPA 11 13 125 200 EXC USA 11 15 WIRING DIAGRAMS 2003 125 200 EXC EUROPA 11 16 125 200 EXC USA 11 18 WIRING DIAGRAMS INDEX 11 1C 11 ...

Страница 140: ......

Страница 141: ...Repair manual KTM 125 200 Art No 3 206 005 E 11 2C ...

Страница 142: ...11 3C ...

Страница 143: ...Repair manual KTM 125 200 Art No 3 206 005 E 11 4C ...

Страница 144: ...11 5C ...

Страница 145: ...Repair manual KTM 125 200 Art No 3 206 005 E 11 6C ...

Страница 146: ......

Страница 147: ...Repair manual KTM 125 200 Art No 3 206 005 E 11 8C S P O R T M O T O R C Y C L E S ...

Страница 148: ...11 9C S P O R T M O T O R C Y C L E S ...

Страница 149: ...Repair manual KTM 125 200 Art No 3 206 005 E 11 10C ...

Страница 150: ... ge bl g bl ge r g bl ge br r br g w ge bl s ge bl br v br s br v br s br ge w r w s r g r KOKUSAN 2 K 3 s w bl w bl w s w s ge w ge r br 31 58 54 g w w br g w br ge bl ge bl br v s o o ge bl br ge r s v ge bl s v w s ge r w g o bl ge s ge bl s ge br ge s o ge ge r br v s Europa 22 11 99 Hasl vorne 512 11 075 000 SERVICE S P O R T M O T O R C Y C L E S Modell 125 EXE 2000 2001 125 Super Moto 2000 ...

Страница 151: ...e 3 lampegg ant sn 4 lampegg ant dx 5 luce di tachimetro 6 spia abbagliante 7 spia lampeggiatori 8 connettore a 4 poli 9 accensione 10 multicomando 11 int luce arresto ant 12 int luce arresto post 13 clacson 14 trasmett di lampeg 15 CDI seatola 16 candela 17 bobina d accens 18 dinamo 19 contr d liv d olio 20 regol di tens 21 batteria 3Ah 22 fusibile 10A 23 connettore a 6 poli 24 lampegg post sn 25...

Страница 152: ...11 13C 125 200 EXC 2001 2002 ...

Страница 153: ...Repair manual KTM 125 200 Art No 3 206 005 E 11 14C KTM 125 200 EXC 2001 2002 KTM 125 200 EXC 2001 2002 ...

Страница 154: ......

Страница 155: ...11 15C Repair manual KTM 125 200 Art No 3 206 005 E KTM 125 200 EXC 2001 2002 ...

Страница 156: ...11 16C 125 200 EXC 2003 ...

Страница 157: ...11 17C Repair manual KTM 125 200 Art No 3 206 005 E KTM 125 200 EXC 2003 ...

Страница 158: ...11 18C 125 200 EXC 2003 ...

Страница 159: ...Click below to find more Mipaper at www lcis com tw Mipaper at www lcis com tw ...

Отзывы: