7.5.3 Installing the shaft seal
7.5.3.1 Installing the mechanical seal
Always observe the following rules when installing the mechanical seal:
▪
Work cleanly and accurately.
▪
Only remove the protective wrapping of the contact faces immediately before
assembly takes place.
▪
Prevent any damage to the sealing surfaces or O-rings.
✓
The notes and steps stated in (
46) have been observed/carried out.
✓
The assembled bearing as well as the individual parts are kept in a clean and
level assembly area.
✓
All disassembled parts have been cleaned and checked for wear.
✓
Any damaged or worn parts have been replaced by original spare parts.
✓
The sealing surfaces have been cleaned.
1. Clean shaft sleeve 523, and touch up any score marks or scratches with a
polishing cloth.
If the socre marks or scratches are still visible, replace shaft sleeve 523.
2. Push shaft sleeve 523 with new gasket 400.3 onto shaft 210.
3. Clean the seat ring in discharge cover 163.2 or seat ring holder 476.
CAUTION
Elastomers in contact with oil/grease
Shaft seal failure!
▷
Use water as assembly lubricant.
▷
Never use oil or grease as assembly lubricant.
4. Carefully fit seat ring/seat ring holder 476.
Press seat ring in evenly.
5. Place discharge cover 163.2 into the locating fit of bearing bracket 330.
6. Fit and tighten nuts 920.4, if any.
NOTE
To reduce friction forces when assembling the seal, wet the shaft sleeve and the seat
ring location with water.
7. Mount the rotating part of the mechanical seal (spring-loaded ring) on shaft
sleeve 523.
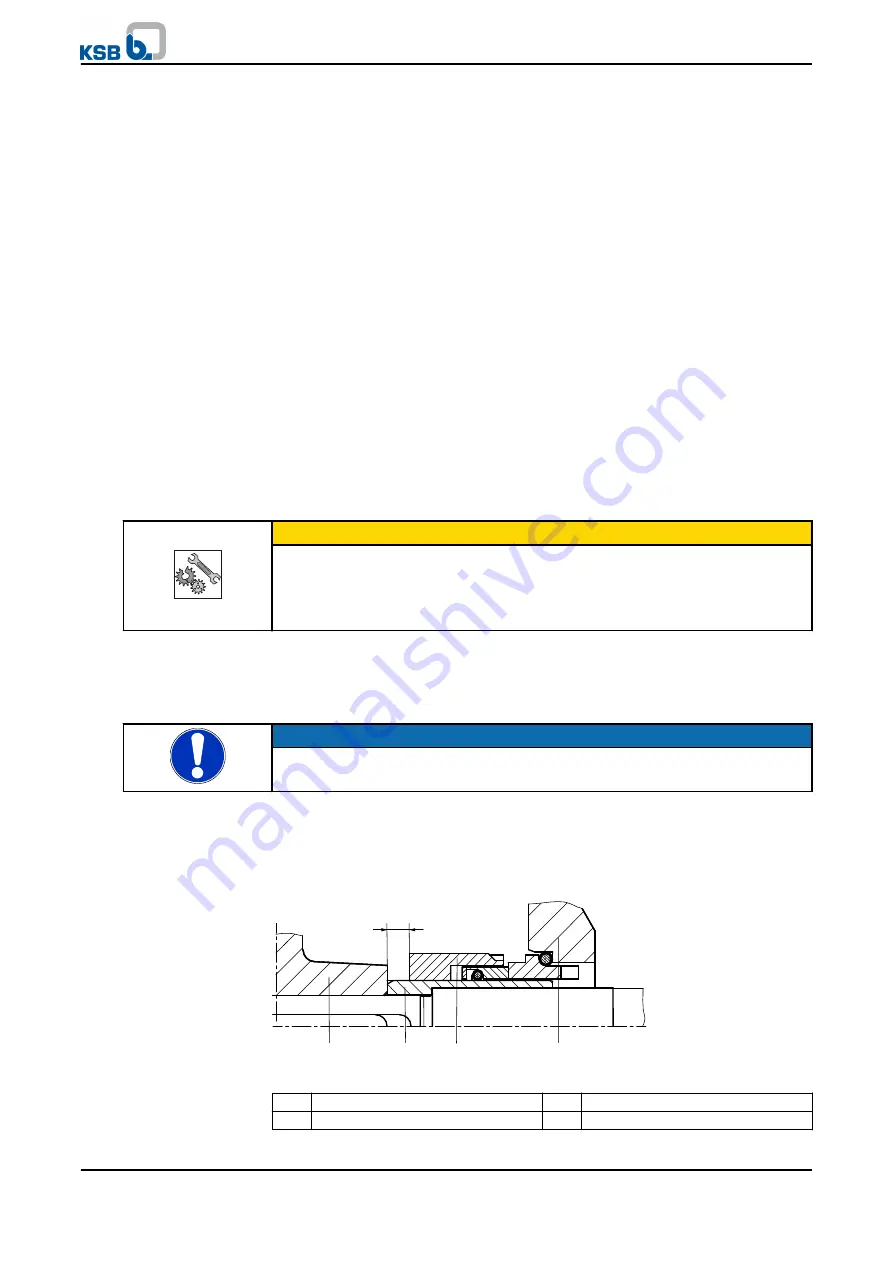
Observe the following installation dimension b for mechanical seals with installation
dimension L
1k
to EN 12756 (design KU):
b
1
2
4
3
Fig. 17: Installation dimension b of mechanical seal
1
Impeller
2
Shaft sleeve
3
Mechanical seal
4
Discharge cover
Installing the mechanical
seal
7 Servicing/Maintenance
Etanorm
47 of 66


