background image

O

p

e

r

a

ti

n

g

 I

n

s

tr

u

c

ti

o

n

s


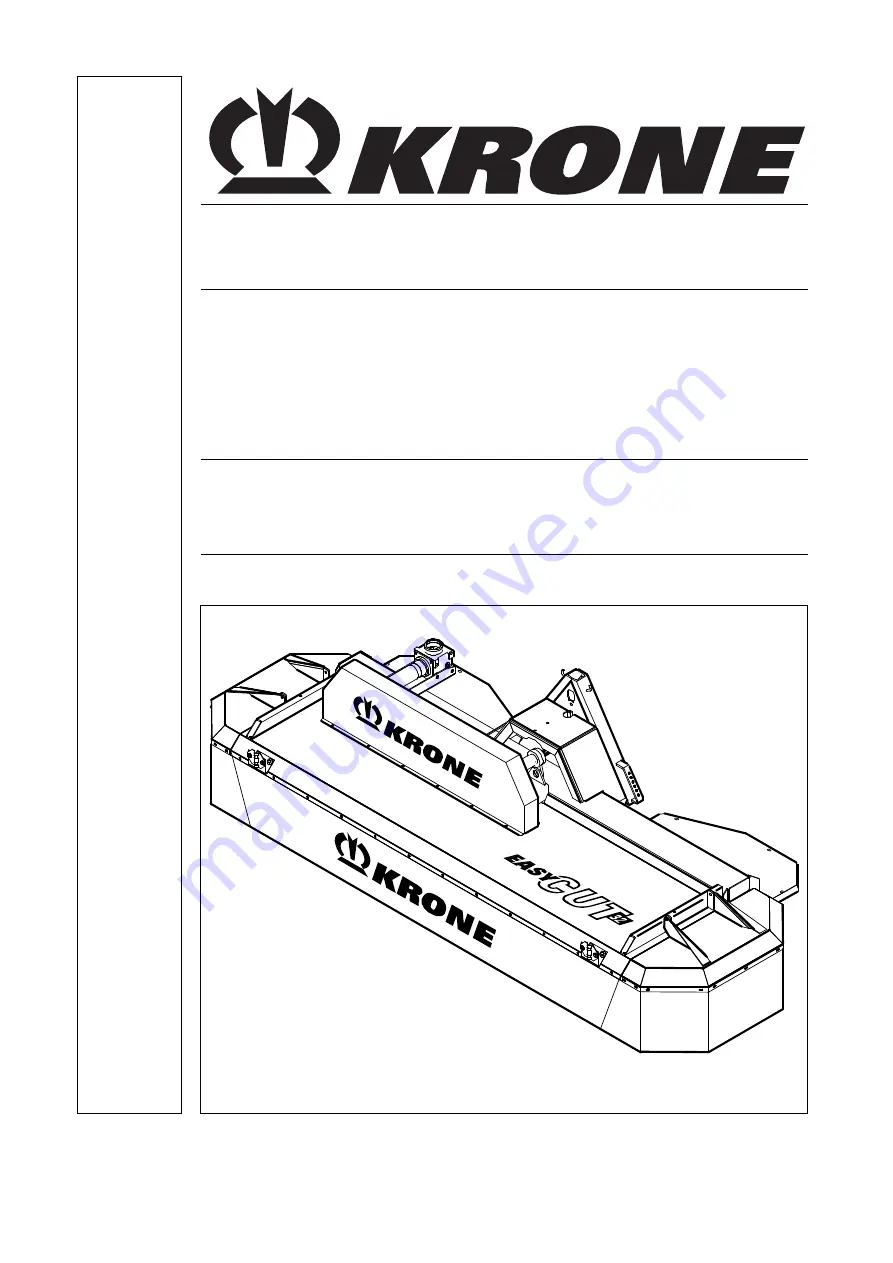
 Disc Mower 


<v>T - Typ1</v> 

EasyCut 28

</v>  

<v>T - Typ2</v> 

EasyCut 28 P

</v>  

<v>T - Typ3</v> 

EasyCut 28 M

</v>  

<v>T - Typ4</v> </v>  
<v>T - Typ5</v> </v>  

<v>T - Typ6</v> 

EasyCut 32

</v>  

<v>T - Typ7</v> 

EasyCut 32 P

</v>  

<v>T - Typ8</v> 

EasyCut 32 M

</v>  

<v>T - Typ9</v> </v>  
<v>T - Typ10</v> </v>  


(

<v>T - ab Masch.-Nr.</v> 

from serial no.

</v>

: 785 000) 


<v>T - Bestell-Nr.</v> 

Order no.

</v>

: 150 000 015 02 EN 


<v>B - Titelbild</v> 

</v> 

08.09.2009 

Содержание EasyCut 28

Страница 1: ...v EasyCut 28 P v v T Typ3 v EasyCut 28 M v v T Typ4 v v v T Typ5 v v v T Typ6 v EasyCut 32 v v T Typ7 v EasyCut 32 P v v T Typ8 v EasyCut 32 M v v T Typ9 v v v T Typ10 v v v T abMasch Nr v from serial no v 785 000 v T Bestell Nr v Order no v 150 000 015 02 EN v B Titelbild v v 08 09 2009 ...

Страница 2: ...requirements of the EC Directive 98 37 EC of 22 June 1998 Spelle 01 10 08 Dr Ing Josef Horstmann Managing Director ppa Dr Ing Klaus Martensen Director of Design and Development Pos 2 BA Vor wort Sehr geehrter Kunde 0 mod_1195626300326_78 doc 905 Dear customer Dear customer You have now received the operating instructions for the KRONE product which you have purchased These operating instructions c...

Страница 3: ...ns 12 4 2 3 Safety conscious work practices 12 4 3 Safety Instructions and Accident Prevention Regulations 13 4 4 Attached devices 14 4 5 PTO operation 15 4 6 Hydraulic system 16 4 7 Tyres 16 4 8 Maintenance 17 4 9 Unauthorised Conversion Modification and Spare Parts Production 18 4 10 Inadmissible Modes of Operation 18 4 11 Introduction 19 4 12 Position of the Adhesive Safety Stickers on the Mach...

Страница 4: ...e 46 10 1 Special Safety Instructions 46 10 1 1 Test run 46 10 2 Spare Parts 47 10 3 Torques 47 10 4 Torques Countersunk Screws 48 10 4 1 Deviating Torque 48 10 5 Filling Quantities and Lubrication Designations for Gearboxes 49 10 5 1 Oil Level Check and Oil Change Intervals Gearboxes 49 10 6 Angular gearbox 50 10 6 1 Front Mowing Unit CV CRI 50 10 7 Mower Drive Gearbox 51 10 8 Oil level check and...

Страница 5: ...on chart 68 11 1 Special Safety Instructions 68 11 2 PTO shaft 68 11 3 Lubrication Chart 69 12 Placing in Storage 70 13 Before the Start of the New Season 71 13 1 Special Safety Instructions 71 13 2 Test run 71 14 Special equipment 73 14 1 Special Safety Instructions 73 14 2 Conversion to narrower swathing EasyCut 28 M EasyCut 32 M 74 14 3 Conversion for mowing steep slopes EasyCut 28 M EasyCut 32...

Страница 6: ...Cut 3 mod_1204546850246_78 doc 70549 Note In the operating instructions which follow the disc mower will also be referred to as the machine Pos 7 4 BA Vor wort Beachten Sie für Maschi ne 0 mod_1195626904076_78 doc 944 Please note The operating instructions are part of your machine Only operate this machine after you have been trained to do so and according to these instructions It is essential to ...

Страница 7: ...1204547495418_78 doc 70590 The EasyCut disc mower is used for cutting crops growing on the ground except maize Pos 9 4 BA Ei nleitung Gültigkeit EasyC ut EasyC ut 28 32 28 32P 28M 10 mod_1221642027181_78 doc 135781 3 2 Validity These operating instructions apply to disc mowers of the series EasyCut 28 EasyCut 28 P EasyCut 28 M EasyCut 32 EasyCut 32 P EasyCut 32 M Pos 9 5 Ü berschriften Ü berschrif...

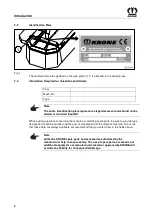
Страница 8: ...h No Type Note The entire identification plate represents a legal document and should not be altered or rendered illegible When asking questions concerning the machine or ordering spare parts be sure to provide type designation machine number and the year of manufacture of the relevant machine To ensure that these data are always available we recommend that you enter them in the fields above Note ...

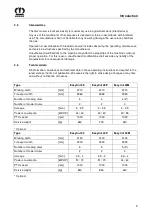
Страница 9: ...uential damage Pos 9 13 BA Einl eitung Technische D aten 0 mod_1195566374865_78 doc 594 3 6 Technical data All information illustrations and technical data in these operating instructions correspond to the latest state at the time of publication We reserve the right to make design changes at any time and without notification of reasons Pos 9 14 BA Einl eitung Technische D aten EasyC ut EasyC ut 28...

Страница 10: ...ntroduction 10 Pos 11 BA Di ese Seite ist bewusst freig elassen worden 1 mod_1201783680373_78 doc 54443 This page has been left blank deliberately Pos 12 BA Sei tenumbruch 0 mod_1196175311226_0 doc 4165 ...

Страница 11: ...of Hazard Warnings Danger Danger Type and source of the hazard Effect Danger to life or serious injuries Measures for hazard prevention Warning sign Warning Type and source of the hazard Effect Danger to life or serious injuries Measures for hazard prevention Caution Caution Type and source of the hazard Effect Danger to life or serious injuries Measures for hazard prevention Pos 13 4 BA Sicher he...

Страница 12: ... the safety instructions are not respected this could result in the forfeiture of any claims for damages Failure to follow the safety instructions could result for example in the following hazards Endangering of persons due to not protected working areas Breakdown of important machine functions Failure of prescribed methods for repair and maintenance Endangering of persons due to mechanical and ch...

Страница 13: ... Use extreme caution when attaching or detaching implements onto or from the tractor 12 Always attach ballast weights properly to the fixing points provided 13 Observe permitted axle loads gross weight and transport dimensions 14 Check and install transport equipment such as lighting warning devices and protective equipment 15 Actuating mechanisms cables chains linkages etc for remote controlled d...

Страница 14: ...yC ut 3 mod_1204552588996_78 doc 70752 4 4 Attached devices 1 Use extreme caution when attaching or detaching implements onto or from the tractor 2 Couple the respective application devices to the appropriate couplings e g three point suspension only and secure them in a way transport use that excludes inadvertent lifting or lowering of the device 3 When using three point linkage the attachment ca...

Страница 15: ... shaft make sure that no person is in the danger zone of the device 10 Never switch on the PTO if the engine is switched off 11 No one should be in the vicinity of the rotating PTO or PTO shaft when the PTO is in use 12 Always switch off the PTO shaft when the angle is too large or the PTO shaft is not required 13 Caution After disengaging the PTO danger due to the flywheel running on Keep away fr...

Страница 16: ...ic system depressurise the system and switch off the engine Pos 13 6 12 BA Sicherheit H ydrauli kanl age Zusatz Alterung der H ydr auli kschlauchlei tungen 3 mod_1204552944856_78 doc 70772 8 Check the hydraulic hose lines at regular intervals and replace them if damaged or worn The new hoses must fulfill the technical requirements set by the manufacturer of the implement Pos 13 6 13 Ü berschriften...

Страница 17: ... edges use suitable tools and gloves 5 Oils greases and filters must be disposed of correctly 6 Always disconnect the power supply before working on the electrical system 7 If protective devices and guards are subject to wear check them regularly and replace them in good time 8 When performing electrical welding work on the vehicle and mounted devices turn the power supply off at main battery swit...

Страница 18: ...e manufacturer help to ensure safety Use of other parts may void liability for resulting damage Pos 13 6 19 BA Sicherheit U nzulässig e Betri ebsweisen 11 mod_1223357699923_78 doc 145527 4 10 Inadmissible Modes of Operation The operating safety of the delivered machine is guaranteed only when it is used as intended in compliance with the introductory section Intended use of the operating instructi...

Страница 19: ...ion of these safety signs and what they mean is given below Pos 13 9 BA Sicher heit Beschädigte oder unl esbare Aufkl eber 0 mod_1195567214115_78 doc 674 Danger Danger zone of the machine Effect Danger to life or serious injuries Immediately replace damaged or illegible adhesive labels Following repair work always attach appropriate adhesive safety stickers to all the replaced modified or repaired...

Страница 20: ... eber an der M aschine 0 mod_1195634967326_78 doc 1020 4 12 Position of the Adhesive Safety Stickers on the Machine Pos 13 12 BA Sicherheit Aufkleber EasyC ut Sicher hei tsaufkl eber EasyC ut 28 32 28P 32P 28M 13 mod_1226930402162_78 doc 166659 GL Fig 2 Fig 3 EasyCut 28 M EasyCut 32 M ...

Страница 21: ...ot touch any moving parts of the machine Wait until they have come to a complete stop b Move the protective devices into protective position prior to start up c When the machine is running keep your distance 3a 3b 3c 4 While parts are moving never reach into areas where there is a risk of being crushed Order No 942 196 1 2x EC 28P 32P 5 Order No 939 106 3 1x 6 Danger in the swivel range for EC 28 ...

Страница 22: ... EasyC ut Hinweisaufkl eber EasyC ut 28 32 28P 32P 28M 29 mod_1251274295430_78 doc 282045 Fig 4 1 942 342 2 1x EasyCut 28 942 343 1 1x EasyCut 32 942 561 0 1x EasyCut 28P 942 562 0 1x EasyCut 32 P 2 942 301 0 1x 3 255 498 1 min 14 mm Ø 17 5 mm 80 255 498 1 1x with blade screw connection 3 255 499 2 255 499 2 1x with blade Quick Fit Device 4 139 888 0 139 889 0 80 139 888 139 889 939 567 1 1x 5 939...

Страница 23: ...rstinbetriebnahme und 1x j ährlich vor der Ernte muss die Reibkupplung gel üftet werden 939 278 2 80 125 939 278 2 1x EasyCut 28 M EasyCut 32 M 8 27 005 384 0 1x Pos 13 16 BA Sicherheit N achbestellung Anbring ung Aufkleber 0 mod_1195637337107_78 doc 1079 4 13 1 Re Ordering the Adhesive Safety and Information Labels Note Every adhesive safety and information label is assigned an order number and c...

Страница 24: ...rious damage to the machine Only authorised service centres may assemble the machine The machine must be assembled with special care Always heed the applicable accident prevention regulations Use only safe and sufficiently dimensioned lifting equipment and load securing equipment The machine may be taken into operation only after all the safety devices have been installed If unauthorised modificat...

Страница 25: ... Schutztücher montier en EC 28 32 P Bild 10 mod_1221658764493_78 doc 136118 5 3 Fitting the guard cloths 4 Fig 5 Pos 15 12 BA Erstinbetriebnahme EasyC ut Schutztücher montiert EC 28 32 P 10 mod_1221658896868_78 doc 136140 Item Part No Name EC 28 EC 32 1 904 731 Square coach bolt M 8 x 20 33 34 2 910 603 Washer 8 4 x 24 x 2 43 44 3 908 706 Hex nut NM 8 38 39 4 900 614 Hex screw M 8 x 20 5 5 Pos 15 ...

Страница 26: ...BA Erstinbetriebnahme EasyC ut Anbau Weiste Drei eck Text 3 mod_1204638631735_78 doc 71179 For the installation of the front mounted disc mower a Weiste triangle 1 is attached to the front hydraulics Adjust the top suspension arm in such a way that the triangle is inclined slightly forward Pos 15 17 BA Erstinbetriebnahme EasyC ut Vor ber eitung am Fr ontschei benmäher EC 28 32 28P 32P 28M 10 mod_1...

Страница 27: ... ut Bel euchtung monti eren EC 28 32 P 10 mod_1221661519150_78 doc 136233 EC 0 016 Fig 8 Install the light holder 1 From above push warning boards 2 with lighting 3 into the light holder 1 Secure with a spring cotter pin 4 Check functionality of the lighting Standardised section according to Din 11027 Pos 16 BA Sei tenumbruch 0 mod_1196175311226_0 doc 4165 ...

Страница 28: ...uries or serious damage to the machine Use extreme caution when attaching implements to or detaching them from the tractor The accident prevention regulations must be complied with absolutely When attaching or detaching the machine do not walk between the tractor and the machine The lower suspension arms of the front hydraulics on the tractor must be adjusted to swing freely see operating instruct...

Страница 29: ... tractor lower suspension arm adapters can be installed between the lower suspension arm and the Weiste triangle Pos 17 7 BA Inbetriebnahme EasyC ut Vor bereitung am Tr aktor EC 28 32CV 28 32 10 mod_1221728655208_78 doc 136257 Carefully position the tractor with Weiste triangle 2 in front of the holder 1 of the front mounted disc mower The tension spring 3 must not be inside the holder Connect the...

Страница 30: ...he guard tube does not rotate simultaneously with the PTO shaft Pos 17 11 BA Sicherheit Gel enkwell e Antri ebsdr ehzahl 1000 beachten 3 mod_1204700292070_78 doc 71424 Danger Observe drive speed Effect Danger to life or serious injuries This machine is driven at a maximum PTO speed of 1000 rpm Pos 17 12 Ü berschriften Ü berschriften 3 K O Längenanpassung 1 mod_1201687632810_78 doc 53589 6 2 1 Leng...

Страница 31: ...ebnahme EasyCut Anbau Gel enkwell e Anbau Gelenkwell e 3 mod_1204702102883_78 doc 71462 AFA 0 005 2 1 Fig 11 Swivel the PTO shaft bracket under the Weiste triangle Push the PTO shaft 1 onto the front PTO shaft of the tractor and secure Secure the PTO shaft guard against turning with the retaining chain 2 Pos 17 17 BA Seitenumbruch 0 mod_1196175311226_0 doc 4165 ...

Страница 32: ... To do this Raise the mowing unit Note Lift the mowing unit parallel to the ground Effect Conserve functionality and increased service life Lifting the mowing unit parallel to the ground will help prevent the machine from running unevenly due to the PTO shaft If this is not so Hook the upper suspension arm 1 into another hole on the tractor or on the Weiste triangle 2 so that the mowing unit is ra...

Страница 33: ...e absolutely sure that there are no persons animals or objects in the danger zone Start a trial run of the machine from the driver s seat of the tractor only Lower the machine into working position Carefully switch in the PTO of the tractor Slowly increase the PTO speed to 1000 rpm Check that the machine is running smoothly and without vibrations Reduce the PTO speed to idling and wait for the cut...

Страница 34: ...ort Absperrhahn Transport Straßenfahrt Absperr hahn in Fronthydr auli k Traktorseitig schließen 33 mod_1254118215456_78 doc 318342 DANGER Transport road travel Effect Danger to life serious injuries or serious damage to the machine A shut off valve must be existent in the hydraulic line for the front hydraulic of the tractor The shut off valve must always be locked during transport road travel Pos...

Страница 35: ...assistant giving instructions or mirror at road junctions to ensure road safety data sheet for attached implements supplied by the Federal Minister for Transport Pos 19 8 BA Fahren und Tr ansport EasyCut Schutze i n Tr ansportstellung bri ngen EC28 32 10 mod_1221735727426_78 doc 136637 EC 0 014 Fig 14 Always move the guard 1 from the right and left hand sides to the transport position before road ...

Страница 36: ...tted according to the instructions Before starting operation always check the mowing unit for damaged missing or worn blades retaining bolts leaf springs and cutting discs blade drum replace any parts that are damaged missing or worn Always replace missing and damaged blades in sets to prevent unbalanced rotation Never install unevenly worn blades on a drum disc Whenever a blade is changed also in...

Страница 37: ...ngen EC28 32 10 mod_1221736185786_78 doc 136703 8 2 Moving the guards into the working position EC 0 013 Fig 15 Move the guard covers 1 from the right and left hand sides to the working position each time before using the machine Pos 21 8 BA Seitenumbruch 0 mod_1196175311226_0 doc 4165 ...

Страница 38: ...ion regulations must be complied with absolutely When detaching the machine do not walk between the tractor and the machine Pos 21 11 Ü berschriften Ü berschriften 2 A E D emontage der Entlastungsfeder n 3 mod_1204792429324_78 doc 73264 8 4 Removing the compensation spring s Pos 21 12 BA Sicherheit Gefahrenhinweise Mähwer ke Ei nstellung an den Entlastungsfedern 0 mod_1196751594562_78 doc 12575 Da...

Страница 39: ... into the transport position Remove compensation spring 2 and hang it on hook 1 Lower front mounted disc mower Pull spring cotter pin 5 out of the Weiste triangle Release the interlock of the holding triangle Loosen the guard cloth Remove the retaining chain 4 of the PTO shaft 3 Remove the PTO shaft 3 from the tractor side and place on the PTO shaft bracket Carefully lower the front hydraulics Dri...

Страница 40: ...ay start moving Effect Danger to life injuries or damage to the machine Switch off the engine and remove the ignition key Secure the machine against accidental start up and against rolling The cutter blades can continue to rotate after the drive has been switched off Only approach the machine once the work tools have come to a complete standstill After completing maintenance work reattach all safe...

Страница 41: ...er n Entlastungsfedern am Traktor einstell en Bil d EC 28 32 10 mod_1221737502192_78 doc 136861 AFA 1 007 4 3 1 2 a 5 Fig 17 Pos 23 7 BA Einstell ung en Mähwer ke EasyC ut Entlastungsfeder n Entlastungsfedern am Traktor einstell en Text EC 28 32 28 32 CV 10 mod_1221737190442_78 doc 136798 Bring the front mowing unit into the transport position Hook compensation spring 3 onto perforated bar 4 Attac...

Страница 42: ...6927 EC 145 1 1 2 Fig 18 Pos 23 13 BA Ei nstellungen M ähwer ke EasyCut Bodendruck Bodendr uck einstellen Text EC 28 32 28 32C V 10 mod_1221737841223_78 doc 136908 Note Retaining chain shorter reduced ground pressure Retaining chain longer increased ground pressure If a telescope upper suspension arm is being used optional The higher the compensation springs 1 are hooked into the perforated bar 2 ...

Страница 43: ... longer smaller cutting height Top suspension arm shorter bigger cutting height Pos 23 18 BA Ei nstellungen M ähwer ke Teleskopoberlenker 3 mod_1204708776180_78 doc 71835 9 3 1 Telescopic upper suspension arm AFA 0 020 3 1 2 Fig 20 In order to allow the front mounted disc mower to adapt to the ground in the direction of travel a telescopic upper suspension arm can be purchased as optional addition...

Страница 44: ..._78 doc 137022 9 4 Setting of the V belt Tension except EC 28 M EC 0 008 Fig 21 The drive V belts maintain their tension by means of a compression spring 2 To adjust dimension a unscrew the nut 1 Turn the nuts until dimension a 205 mm is reached Lock nuts again Pos 24 BA Sei tenumbruch 0 mod_1196175311226_0 doc 4165 ...

Страница 45: ...Settings 45 Pos 25 BA Di ese Seite ist bewusst freig elassen worden 1 mod_1201783680373_78 doc 54443 This page has been left blank deliberately Pos 26 BA Sei tenumbruch 0 mod_1196175311226_0 doc 4165 ...

Страница 46: ...y sporadically Effect Danger to life injuries or damage to the machine Always check the mowing units for damaged missing or worn blades retaining bolts leaf springs and cutting discs blade drum before starting operation replace any parts that are damaged missing or worn Always replace missing and damaged blades in sets to prevent unbalanced rotation Never mount unevenly worn blades on a drum disc ...

Страница 47: ...damage Pos 27 10 BA Wartung Drehmomente Anzugsmomente Dr ehmomente 14 mod_1227524875870_78 doc 169435 10 3 Torques Tightening torque MA is stated in Nm unless otherwise indicated A Thread size The stability class can be seen on the head of the screw A Ø 5 6 6 8 8 8 10 9 12 9 MA Nm M 4 2 2 3 4 4 5 1 M 5 4 5 5 9 8 7 10 M 6 7 6 10 15 18 M 8 18 25 36 43 M 10 29 37 49 72 84 M12 42 64 85 125 145 M14 100...

Страница 48: ...al socket heads and metric threading that are tightened by the hexagonal socket head Pos 27 13 Ü berschriften Ü berschriften 3 A E Abweichendes Drehmoment 0 mod_1196950054171_78 doc 15312 10 4 1 Deviating Torque Pos 27 14 BA Wartung Selbstfahr er Gr undmaschine Abweichendes Drehmoment EasyCut 3 mod_1204885737515_78 doc 73465 Screws nuts MA Nm Nut for cutting disc flange 850 Nut for shear protectio...

Страница 49: ...5 l Mower drive gearbox EasyCut 28 M 0 4 l Cutter bar EasyCut 28 6 0 l Cutter bar EasyCut 32 7 0 l Pos 27 19 BA Wartung Zei tinter valle an den Getri eben 0 mod_1196951919921_78 doc 15373 10 5 1 Oil Level Check and Oil Change Intervals Gearboxes Note Oil level check and oil change gearboxes and lubricating the machine Effect Long expected service life of machine First oil change on all gearboxes a...

Страница 50: ...w 1 Oil level up to bore hole 1 If necessary top up the oil SAE 90 Screw the check screw 1 back in Pos 27 21 5 BA Wartung Öl kontrolle_Wechsel Öl wechsel Versi on absaug en 10 mod_1221740650161_78 doc 137085 Oil change For time intervals see Chapter Oil Level Check and Oil Change Intervals Gearboxes Unscrew the inspection screw 1 Extract oil Top up oil oil level up to hole 1 Screw the inspection s...

Страница 51: ...evel up to bore hole 1 If necessary top up the oil SAE 90 Screw the check screw 1 back in Pos 27 23 5 BA Wartung Öl kontrolle_Wechsel Öl wechsel Versi on5 9 mod_1221047052043_78 doc 131562 Oil change For time intervals see Chapter Oil Level Check and Oil Change Intervals Gearboxes Screw out the oil drain plug 1 Collect the used oil in a suitable drip pan Screw in the oil drain plug 1 Top up the oi...

Страница 52: ...ion key The cutting discs blade drums continue to run Do not leave the driver s cab until the cutting discs blade drums have come to a complete stop Pos 27 25 3 Ü berschriften Ü berschriften 3 K O M ähholm ausrichten 0 mod_1197017956815_78 doc 16042 10 8 1 Aligning the Cutter Bar Pos 27 25 4 BA Wartung Mähwerke M ähhol m ausrichten EasyC ut 3 mod_1204721803648_78 doc 72358 EC 0 001 Fig 24 Oil leve...

Страница 53: ...tting discs blade drums Effect Danger to life or serious injuries Switch off the engine and remove the ignition key The cutting discs blade drums continue to run Do not leave the driver s cab until the cutting discs blade drums have come to a complete stop Pos 27 25 9 BA Wartung Mähwerke Öl kontr olle Mähhol m Easycut 3 mod_1204723206930_78 doc 72428 Allow the machine to run briefly Do not leave t...

Страница 54: ...c 16361 10 9 1 Cutter Blades Pos 27 27 4 BA Wartung Mähwerke Di e Bohrung der M ähklingen kann sich durch Verschleiß aufweiten 10 mod_1221048982715_78 doc 131675 The borehole on the cutter blades may spread due to wear Pos 27 27 5 BA Sicherheit Gefahrenhinweise Mähwerke Zu g eringe Materialstär ke an den M ähkli ngen_neu 3 mod_1204727167898_78 doc 72588 Danger Insufficient thickness of material on...

Страница 55: ...olts Effect Danger to life or serious injuries At every blade changing check the thickness of the holding bolts material Damage or worn retaining bolts must always be replaced by sets on each cutting disc blade drum The material thickness of the retaining bolts must not be less than 14 mm at the weakest point EC 240 0 min 14 mm Fig 27 Pos 27 27 9 BA Seitenumbruch 0 mod_1196175311226_0 doc 4165 ...

Страница 56: ...es At every blade changing check the thickness of the holding bolts material Damage or worn retaining bolts must always be replaced by sets on each cutting disc blade drum The material thickness of the retaining bolts must not be less than 14 mm at the weakest point The material thickness of the leaf spring must not be less than 3 mm at the weakest point EC 239 0 min 14 mm Fig 28 Pos 27 27 11 BA S...

Страница 57: ...af springs Effect Danger to life or serious injuries Check the leaf springs for damages at least once a day or after contact with foreign objects The abrasion limit of the leaf springs will be achieved if the application seam 1 is worn on one point EC 225 0 1 1 Fig 29 Note Warranty claim Use only original Krone spare parts to replace the leaf springs Pos 27 27 13 BA Seitenumbr uch 0 mod_1196175311...

Страница 58: ...ade Drums Effect Danger to life or serious injuries Check the cutting discs or blade drums for damages at least once per day or after contact with foreign objects In case of deformed cuttings discs or drums the dimension of A 48 mm must never be exceeded EC 0 211 A 1 Fig 30 Note Warranty claim The cutting discs or drums must be replaced by Original Krone spare parts only Pos 27 27 15 BA Seitenumbr...

Страница 59: ...ect Danger to life or serious injuries The abrasion limit 2 will be achieved if the min material thickness of 3 mm is no longer given EC 226 0 2 2 Fig 31 Note Warranty claim If cutting discs or blade drums show deformations or wear in form of abrasions 2 or similar these components have to be replaced by Original Krone spare parts Pos 27 27 17 BA Seitenumbr uch 0 mod_1196175311226_0 doc 4165 ...

Страница 60: ...ade drums continue to run Do not leave the driver s cab until the cutting discs blade drums have come to a complete stop Pos 27 27 20 BA Sicher hei t Gefahrenhi nweise M ähwer ke Sich lösende M ähkli ngen 0 mod_1197269483265_78 doc 16540 Danger Cutter blades coming loose Effect Danger to life or serious injuries After changing the blades check that they fit perfectly and that they can move freely ...

Страница 61: ...olt from above and tighten it firmly for tightening torque see chapter entitled Torques Repeat this process for all blades even on the blade drums After fitting the blades fold the protective device down again Note The cutter blades of anticlockwise rotating cutting discs blade drums are different than those of clockwise rotating ones Make certain the direction of rotation is correct when installi...

Страница 62: ...nto the retaining bolt and allow the blade key to return upwards After fitting the blades fold the protective device down again Note The cutter blades of anticlockwise rotating cutting discs blade drums are different than those of clockwise rotating ones Make certain the direction of rotation is correct when installing The arrow on the cutter blades must match the direction of rotation of the corr...

Страница 63: ...erial to the cutter bar material and to the lining or carry out a trial welding if necessary EC 0 012 Fig 34 Open the welding seams of the old lining Remove the lining Deburr the contact surface EC 252 0 Fig 35 Adapt the new lining 3 Weld short I seams on the upper surface of the cutter bar in the areas marked 1 each should be approx 30 mm Do not weld the edges 2 On the lower surface of the cutter...

Страница 64: ...cher ung opti onal 4 mod_1213097920976_78 doc 86356 10 12 Rotary hub with shear fuse optional Pos 27 29 2 BA Wartung Mähwerke Schersicherung Bild Mähhol m Aufstellung EC 28 32 P EC 28 32M 15 mod_1232448431683_78 doc 174012 Fig 36 Pos 27 29 3 BA Seitenumbruch 0 mod_1196175311226_0 doc 4165 ...

Страница 65: ... Eccentric bearing housing anticlockwise threading with identifying groove Pos 27 29 6 BA Wartung Mähwerke Schersicherung Beschrei bung Schersicherung 3 mod_1204205493155_78 doc 69964 For protection against overload on the mowing units the rotary hubs 1 are secured with nuts 2 and shear pins 3 If the machine strikes obstacles for example stones the 2 shear pins in the rotary hub will be sheared of...

Страница 66: ...of the bearing housing not observed Effect Damage to the machine Right rotating RE RZ cutting discs and drums always have right handed pinion shafts and nuts no groove mark on the pinion shaft and nut Left rotating LE LZ cutting discs and drums always have left handed pinion shafts and nuts with groove mark on the pinion shaft and nut 1 3 2 8 7 3 4 c d a 9 b EC 255 0 10 3a 3a 3a Fig 37 ...

Страница 67: ...e the new shear pins 3 through the hub 1 and shaft 4 Note Note the position of the shear pins Drive the shear pins 3 into the hole from outside until the end of the pin reaches the surface of the hub d he slots of the shear pins 3 must be mounted facing each other horizontally see detail I Install the nut 2 using the special key 10 included with delivery tighten to a tightening torque of 300 Nm In...

Страница 68: ...or engine and remove the ignition key Secure the tractor against accidental start up and against rolling Switch off the PTO and disengage it After repair maintenance cleaning work or technical modifications are complete mount all protective coverings and safety devices again properly Avoid skin contact with oils greases cleaning agents and solvents In the event of injuries or burns due to oils cle...

Страница 69: ...7 31 8 Abkürzungen Abkürzung en spr achneutral EasyC ut EasyCut 28 P EasyC ut 28M EasyC ut 32 P 10 mod_1221742126208_0 doc 137262 EasyCut 28 P EasyCut 28 M EasyCut 32 P Pos 27 31 9 BA Wartung EasyC ut Schmier pläne Schmier plan Bild EC 28 32 10 mod_1221741987395_78 doc 137240 EC 228 0 20h 20h Fig 39 Pos 28 BA Sei tenumbruch 0 mod_1196175311226_0 doc 4165 ...

Страница 70: ...llers etc to make certain they move easily If necessary remove clean grease and remount If necessary replace with new parts Use only original KRONE replacement parts Disassemble the PTO shaft Lubricate the inner tubes and the guard tube with grease Grease the lubrication points on the cross joint and on the bearing rings of the guard tubes Touch up damaged paint and preserve all uncoated areas tho...

Страница 71: ...TO and disengage it After repair maintenance cleaning work or technical modifications are complete mount all protective coverings and safety devices again properly Avoid skin contact with oils greases cleaning agents and solvents In the event of injuries or burns due to oils cleaning agents or solvents contact a doctor immediately All other safety instructions must also be followed to avoid injuri...

Страница 72: ...bearings Check oil level in the gearbox es and top up if necessary Check all screws to make certain they are tight or retighten them if necessary Check all electrical connection cables and the lighting Repair or replace if necessary Check the entire setting of the machine and correct if necessary Re read the operating instructions thoroughly Note Use vegetable oils and greases Pos 30 BA Sei tenumb...

Страница 73: ...ng discs continue to run Effect Danger to life injuries or damage to the machine Move the machine to the working position and lower it to the ground Switch off the tractor engine and remove the ignition key Secure the tractor against accidental start up and against rolling Switch off the PTO and disengage it After repair maintenance cleaning work or technical modifications are complete mount all p...

Страница 74: ...covers 6 Remove cover 3 of mower drum 4 Mount the mower drum with fastening bolts and the detent edged washers of the disassembled cutting discs 6 Mount the cover 3 on the mower drum 4 Note Keep the cover 5 and cutting disc 6 in a suitable place for later reinstallation Warning Mower drum incorrectly installed Effect Damage to the machine Make certain the mower drums are installed correctly The in...

Страница 75: ...rse order Before starting up the machine again make certain to check the cutter blades retaining bolts cutting discs and drums as well as the linings See Maintenance section Checking the Cutter Blades and Retaining Bolts See Maintenance section Periodical Inspection of Cutting Discs and Drums See Maintenance section Replacing the Linings Pos 35 2 BA Seitenumbruch 0 mod_1196175311226_0 doc 4165 ...

Страница 76: ... EasyCut 28M EasyCut32M Fig 41 Remove plates 1 2 Remove cover 3 of mower drum 4 Remove mower drum 4 Note Keep the plates 1 2 cover 3 and mower drums 4 in a protected place for later reinstallation Warning Cutting disc installed incorrectly Effect Damage to the machine Make certain the cutter discs are installed correctly The installed cutting discs 5 must be installed at a 90 degree offset to the ...

Страница 77: ...nstallation see also Chapter Conversion to Narrower Swathing Before starting up the machine again make certain to check the cutter blades retaining bolts cutting discs and drums as well as the linings See Maintenance section Checking the Cutter Blades and Retaining Bolts See Maintenance section Periodical Inspection of Cutting Discs and Drums See Maintenance section Replacing the Linings Ende der ...

Страница 78: ...abrik Bernard Krone GmbH Heinrich Krone Straße 10 D 48480 Spelle Postfach 11 63 D 48478 Spelle Phone 49 0 59 77 935 0 Fax 49 0 59 77 935 339 Internet http www krone de eMail info ldm krone de konsequent kompetent ...

Отзывы: