13
KRAUSMANN POWER TOOLS
8970
English |
EN
ishing plate slip off the buffing disc.
Always follow the instructions provided by
the polishing paste manufacturer that you
are using.
M
ake sure the ventilation openings are kept
clean. Especially when working in environ
-
ments rich in dust.
Always remove the tool from the plug before
removing dust.
I
n order to prevent damage to the tool’s
internal parts, do not use cleaning brushes,
metallic or similar objects to remove dust.
Bear in mind that after you turn off the
machine, the axle or disc keeps rotating for a
short period of time.
SAVE THESE INSTRUCTIONS
4. Functional description
and specifications
WARNING:
M
isuse or failure to follow the safety rules stated in this
instruction manual may cause serious personal injury.
WARNING:
I
f the replacement of the supply cord is necessary, it has
to be done by a professional to avoid a safety hazard.
Intended use
The machine is intended for polishing and
brushing metal and coated surfaces as well as for
polishing stone without the use of water.
Power supply
Power input
No load speed
Disc diameter
Eccentric orbit
Axle threading
Weight
2
30V~50Hz
900W
1500-4500/min
-1
Ø150mm
16mm
5/16”
2.3kg
Tool
8970
WARNING:
B
efore plugging in the tool, always make sure the switch
trigger actuates properly and returns to the OFF position.
Installing and removing the velcro
buffing disc
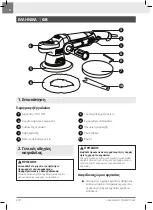
The machine features a buffing disc
5
. Place the
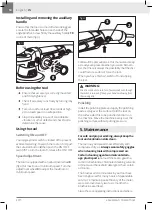
machine on a table, facing upwards. (fig 1). Place
the wrench
10
on the screw of the axle and hold it
steady, place the buffing disc on top and screw it
tightly. Remove the wrench.
Never
use the wrench
when the disc is rotating. To remove, follow the
procedure in reversed order.
WARNING:
Before installing or removing the buffing disc always
remove the tool from the plug.
Installing and removing the velcro
polishing plate
The machine features a polishing plate
6
. The pol
-
ishing plate is used to spread the polishing paste
and polish the surface. Place the machine on a
table, with the buffing disc
5
facing upwards (fig 2).
Place the wrench
10
on the screw of the axle and
hold it steady and install the polishing plate on the
buffing disc. The polishing plate must sit firmly and
evenly on the buffing disc. Remove the wrench. To
remove, follow the procedure in reversed order.
5
4
10
fig 1
5
4
6
fig 2


