8
Step 4. Secure mounting hardware / Fixez le matériel de montage / Fije los
accesorios de montaje
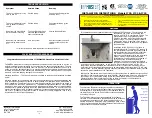
Adjust the direction of the faucet body
(2). Tighten the mounting nut (8) until snug.
Tighten the mounting screws (9) to the nut with
a Phillips head screw driver.
Ajustez la direction du corps du
robinet (2). Serrez l’écrou de fixation (8) jusqu’à
ce qu’il soit bien serré. Serrez les vis de
fixation (9) jusqu’à l’écrou avec un tournevis
cruciforme.
Ajuste la dirección del cuerpo del grifo (2).
Apriete la tuerca de fijación (8) hasta que quede
bien ajustada Apriete los tornillos de fijación (9)
a la tuerca con un destornillador Phillips.
Step 5. Attach spray hose and counterweight / Fixation du tuyau de
pulvérisation et du contrepoids / coloque la manguera de aspersión y el
contrapeso
Connect the spray hose (14) to the supply hose
(12). Tighten with wrench until snug. Install the
weight (13) on the indicated mark on the spray
hose (14).
Connectez le tuyau de pulvérisation (14) au
tuyau d’alimentation (12). Serrez à fond avec
une clé. Installez le poids (13) sur la marque
indiquée sur le tuyau de pulvérisation (14).
Conecte el tubo flexible del rociador (14) al
tubo flexible de alimentación (12). Ajuste
bien con una llave inglesa. Coloque el
contrapeso (13) donde indica la marca en el
tubo flexible del rociador (14).
4
10
8
9
12
14
13
10
14
26”


