background image

5

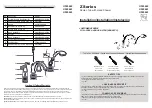
Step 1: Remove washer and lock nut 

Insert faucet through hole in sink or 

countertop.From underneath sink, 

attach the seat (B1), rubber washer (B2), 

metal washer (B3), and nut (B4). Lock 

nut (B4) into position by tightening 

screws (B5).

Shut off the water supply.

Remove the old faucet. Clean the 

mounting surface. Remove mounting 

hardware (B) from faucet body (A).

Step 2: Install faucet

B1

B2

B3

B4

B5

A

B

Содержание Artec Pro KPF-1603

Страница 1: ...Artec Pro Single Handle Commercial Kitchen Faucet KPF 1603 INSTALLATION GUIDE www kraususa com I Toll Free 1 800 775 0703 I 2018 Kraus USA Inc I REV Aug 21 2018 ...

Страница 2: ...lems with your product Please contact our Customer Service Team 1 800 775 0703 customerservice kraususa com Have the model number available and retain a copy of your receipt with purchase date for reference If for any reason this product does not meet your expectations please be sure to repack this product in the original box and packaging material to avoid damage during transit DO NOT RETURN TO S...

Страница 3: ...rt is missing or damaged please contact Kraus Customer Service at 800 775 0703 for a replacement to release any built up pressure Pre drilled countertop hole size requirement 1 3 8 min Max countertop thickness 2 Tools you will need 13 Wrench Phillips Screwdriver Safety Goggles Silicone Sealant optional Pipe Tape ...

Страница 4: ...3 Diagram and Parts List B4 B5 C A A Faucet Body B1 Seat B2 Rubber Washer B3 Metal Washer B4 Mounting Nut B5 Screw C 2 2 GPM Flow Restrictor D Hex Wrench B1 B2 B3 D ...

Страница 5: ...4 Faucet Dimension Installer Tip 4 1 8in 106 5mm 24 3 4in 628 7mm 2 3 8in 60 0mm 9 16 24UNEF 2B 7 1 8in 182 6mm 9 3 4in 248 2mm 6in 153 2mm 7 5 8in 198 2mm 6 5 8in 173 3mm MAX 2 3 8in 60 8mm ...

Страница 6: ... underneath sink attach the seat B1 rubber washer B2 metal washer B3 and nut B4 Lock nut B4 into position by tightening screws B5 Shut off the water supply Remove the old faucet Clean the mounting surface Remove mounting hardware B from faucet body A Step 2 Install faucet B1 B2 B3 B4 B5 A B ...

Страница 7: ...oderately to ensure the connection has been made If it is necessary to remove the quick connector 2 squeeze the tabs on the hose and then pull down to disconnect 6 Step 4 Making the water supply connections Thread the nut 1 on the supply line onto the outlet of the water supply valve and tighten with a wrench Do not overtighten 1 1 2 ...

Страница 8: ...on where it mixes hot and cold water Flush the water lines for one minute This flushes away any debris that could cause damage to internal parts Check for leaks Reinstall the spray head by hand tightening it back onto the spray hose 7 279 10 31 32 Minimum distance 90mm Cold Wat Max35 217 8 17 32 Max1 3 8 NOTE 1 Do not lose the rubber washer 1 when installing back the sprayer 2 The magnet end marki...

Страница 9: ...stance 90mm Cold Wat Max35 217 8 17 32 Max1 3 8 2 1 2 1 1 To activate the spray mode simply press the handle 1 located under the spray head 1 Step 6 Flush faucet NOTE In compliance with CEC standards this faucet is designed with a 1 8 gpm flow rate At your discretion you may modify the product with the included 2 2 gpm restrictor Please note that doing so will remove the capability of this product...

Страница 10: ...BG CH SFS BG MB CH SFS BG MB CH SFS BG MB CH SFS BG CH SFS BG CH SFS BG Less than 90mm 32 3 32 Ø35 Ø38 1 2 3 4 6 8 4 5 6 7 8 Ø1 3 8 Ø1 1 2 815 194 7 5 8 Ø1 3 8 Ø1 1 2 30 10 8 7 Ø35 Ø38 9 1 2 3 4 5 6 7 8 9 10 1112 13 14 2 14 3 14 1 17 21 20 23 22 18 16 15 19 KP27063 KP27080 KP27064 KP27065 KP27066 KP27067 KP27068 KP27069 KP27070 KP27071 KP27072 KP27028 KP27079 KP27073 KP27077 KP27078 KP27075 KP2707...

Страница 11: ...ater pressure is low The connector underneath the deck is clogged with debris The aerator is clogged Turn off the water supply and disconnect the connector aerator Unscrew the connector aerator and clean under running water Screw the connector aerator back Test water flow If water pressure is still low then replace the connnector aerator Care Maintenance To keep the product clean shining follow th...

Страница 12: ...s not cover Marine or Outdoor Installation Except as otherwise provided above Kraus makes no warranties expressed or implied including warranties of Faucet Warranty Kraus products are manufactured and tested to the highest quality standards by Kraus USA Inc Kraus Kraus extends this warranty to the original purchaser for personal household use of the Faucet in its original location The warranty is ...

Страница 13: ...ntative at Kraus USA Inc 12 Harbor Park Drive Port Washington NY 11050 516 801 8955 Proservice kraususa com If you are an Authorized Partner please contact a Partner Support Representative at Kraus USA Inc 12 Harbor Park Drive Port Washington NY 11050 516 801 8954 Partnersupport kraususa com In requesting warranty service please be ready to provide 1 Proof of purchase 2 A description of the proble...

Страница 14: ...IMPORTANT Register Your Kraus Product REGISTER TODAY http www kraususa com registration Activate Your Warranty Access Premium Customer Support Get Product Information www kraususa com ...

Отзывы: