1
Issue 01 MAR.19
Pozi-head Screwdriver
Flat-head Screwdriver
3 & 4mm Allen Key - supplied
Cutting Pliers
Junior Hacksaw
Clear Silicone Sealant
7mm Masonry Drill Bit
Drill (Battery or Mains)
Spirit Level
Marking Paste (Shoe Polish)
INSTALLATION INSTRUCTIONS - PIVOT WIDE DOOR
Please read these instructions throughout before installing as incorrect fitting will invalidate the guarantee.
If you are unsure about these instructions please contact Kudos Shower Products 01539 564040.
HEALTH & SAFETY WARNING
DUE TO THE WEIGHT & SIZE OF THE GLASS PANEL(s) A MINIMUM OF TWO PERSONS ARE REQUIRED
TO MOVE AND INSTALL THIS ENCLOSURE
For the wall post and fixings use only warm soapy water and damp cloth/ sponge
on a regular basis. After cleaning please rinse with clean water to remove any
residue.
Do not use abrasive scouring powders, chemicals or aerosol cleaners - these may
result in damage to the surfaces, in particular, the plated component parts.
The glass panels are pre-treated with Life Shield on the inside surfaces only.
Whilst this makes cleaning the glass easier and helps prevent the build up of
harmful lime-scale and soap deposits, the glass still needs to be maintained on a
regular basis. We recommend the use of a detergent and aroma free glass cleaner
(A 50/50 mix of white vinegar and water works well).
DO NOT use strong detergents, abrasive cleaners or abrasive scrubbing
equipment for cleaning, these can damage the coating.
DO use a squeegee to remove remaining droplets of water from glass after
showering, any build up of residue can be removed easily using an appropriate
cleaner and agitation from soft cleaning equipment.
Cleaning - General
Kudos LifeShield Glass Treatment
Important
Check appearance of all product - any defects must be reported to Kudos Shower
Products before assembly/installation. Claims for imperfections will only be
accepted prior to assembly/installation.
Any claims made under the terms of the Lifetime Guarantee must be reported to
Kudos within 21 days of the fault occurring.
Check the enclosure adjustment sizes are suitable for your installation.
Use care when drilling into the walls to avoid hidden pipes or electric cables.
Stage 2
silicone sealant
Stage 1
Shower Tray
Ensure the top of shower tray is
LEVEL in ALL directions.
Once the tray is installed but
before the wall tiles are fitted, any
gap between the tray and the walls
must be filled with silicone sealant
flush with the top of the tray.
Once the walls have been tiled but
before the enclosure is installed,
the tiles must be silicone sealed to
the tray all of the way around in
one continuous bead.
Failure to follow these
instructions will result in
leakage problems.
THESE INSTRUCTIONS ARE TO BE LEFT
WITH THE CONSUMER
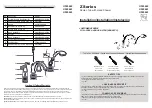
Tools Required
original
6
original
6


