


Your VP-725xl Presentation Switcher / Scaler
7
7
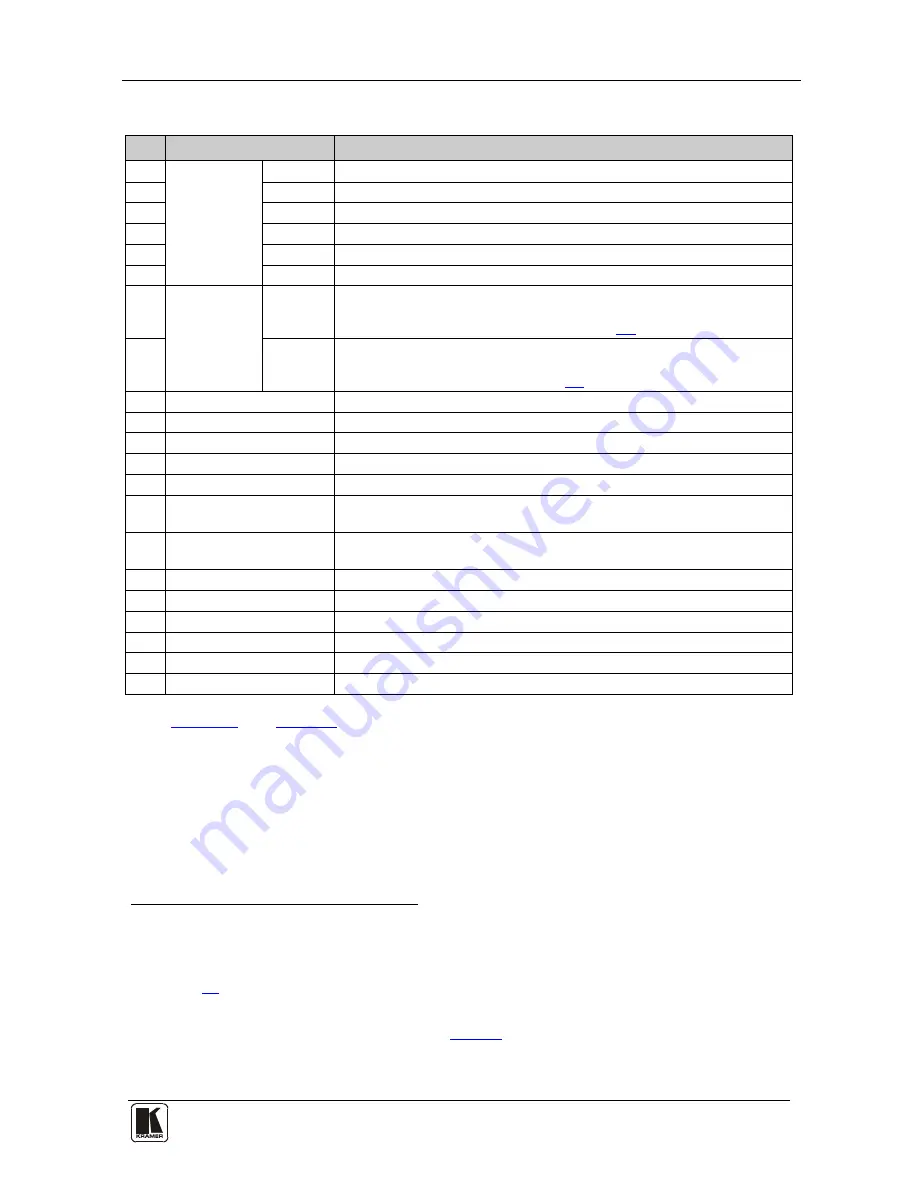
Table 1: Front Panel VP-725xl Presentation Switcher / Scaler Features
#
Feature
Function
1
INPUT
SELECTOR
Buttons
YC
Selects one of the s-Video (Y/C) sources (from 1 to 4)
2
CV
Selects one of the CV sources (from 1 to 4)
3
UXGA
Selects one of the UXGA sources (from 1 to 4)
4
HDMI
Selects one of the HDMI sources (from 1 to 4)
5
USB
Press to select the USB
1
source
6
COMP
Selects one of the component video sources (from 1 to 4)
7
MODE
SELECT
Buttons
VIDEO
GROUP
Select the Video group operation mode; within each group, select which
input (from 1 to 4) to switch to the output. The selected input button
within each group is illuminated (see section
7.1
)
8
SCALER
Select the Scaler operation mode; press an input button (1 of 20), to
select the input to be scaled at the SCALED OUTPUTS. The selected
input button illuminates (see section
7.1
)
9
LCD Status Display
Displays the status
10
POWER
Switch
Illuminated switch for turning the unit ON or OFF
11
IR Receiver / LED
Green when ON; red when OFF
2
12
FREEZE
Button
Freezes the output video image
3
13
PIP
Button
Selects the picture-in-picture function
3,4
14
MENU
Button
Displays the OSD Menu screen (or returns to the previous level in the
OSD screen)
15
ENTER
Button
Moves to the next level in the OSD screen
3
Press for about 3 seconds to lock/unlock the front panel buttons
16
UP
Button
Moves up one step (in the same level) in the OSD screen
3
17
- Button
Decreases the range by one step
3
18
DOWN
Button
Moves down one step (in the same level) in the OSD screen
3
19
+ Button
Increases the range by one step
3
20
OSD ON
Button
Activates/deactivates access to the OSD Menu
3, 5
21
USB
Connector
Connect to a USB drive to read JPEG files
Figure 2
and
Table 2
define the rear panel of the
VP-725xl
:
1 JPEG files on a USB memory stick, up to a maximum size of 2048x1536
2 OFF in this case means that the outputs and the front-panel are disabled
3 Applicable to the Scaler outputs only
4 See section
7.2
5 The OSD ON front panel button is activated (illuminated) by default, and pressing the MENU front panel button (or the
MENU key on the infrared remote control transmitter (see
Figure 21
)) displays the OSD Menu. To prevent OSD display,
press the OSD ON front panel button (or the OSD key). The front panel button will no longer be illuminated, and the front
panel LCD now operates independently of the OSD (when the OSD is OFF, the LCD is still operational)


