5
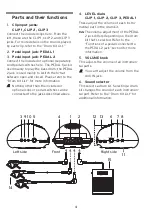
7.
Power button
This turns the power on. Long-press the
button to turn the power on/off. When the
power is on, the power indicator in the
speaker area will be lit up. Refer to
“Turning the power on/off” for more
information.
8.
DC 9V jack
If you're using an AC adapter, connect the
optional (separately sold) AC adapter to
this DC 9V jack and connect the other side
to an electrical outlet.
Be sure that the power is off before
you connect the AC adapter.
Use only the specified AC adapter.
9.
AUX IN jack
Connect a stereo mini-phone plug here.
This lets you add input sound from an
audio player or other source device. Use
this jack when you want to perform along
with the audio input. Adjust the volume on
the audio source device.
Be sure that the power is off before
any devices are connected.
10.
Headphone jack
This jack is where you would connect
headphones equipped with a stereo
mini-phone plug.
To protect your hearing, avoid
listening at high volume for extended
periods of time when using head-
phones.
11.
Battery compartment
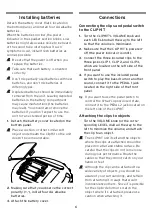
If you're using batteries, install AA
alkaline batteries here. Refer to the
“Installing batteries” section for addi-
tional information.
12.
Internal speaker
The sound of your performance is output
from the internal speaker.
If headphones are connected to the
headphone jack, sound is not output from
the internal speaker.
This speaker that's built into this instru-
ment contains a magnet. Do not place it
near memory cards, hard drives or
medical devices that might be affected by
magnetism.
Do not insert your finger or any foreign
object into the bass-reflex port located at
the bottom of the CLIPHIT. Doing so may
cause malfunction or injury.
13.
Power indicator
When the power is on, the indicator in the
speaker section will be lit up.
14.
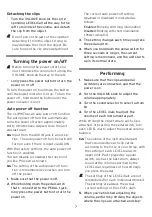
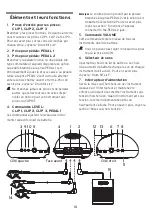
Clips (x3)
These are clips with built-in sensors. Connect
each clip to a clip input jack of the CLIPHIT
unit, and attach the clip to a magazine or
other object at hand. Refer to the “Attaching
the clips to objects” section for more infor-
mation. When you strike the object, the clip
sends the sound (vibration) to the CLIPHIT
unit. The CLIPHIT uses that sound to trigger
the sounds of the drum kit.
Do not strike the clip itself.
The electrical connection of the clip cable
may fail if you wrap the cable around the
object or pull it strongly.
If you leave the clip attached for an
extended period of time, it might leave a
surface mark when you detach it. De-
pending on the age of the object or the
state of its finish, it could be damaged
regardless of the length of time.
15.
Pedal switch
Connect this to a pedal input jack. By press-
ing the pedal switch, you can play a bass
drum (kick) or switch the hi-hat between open
and closed positions.
Take care that the pedal switch does not
mar the floor or other surface when you
step on it.
Note
The pedal switch only changes the on/off
state. Stepping on the pedal more or less
strongly does not change the volume, nor
can you produce a half-open hi-hat sound
by holding the pedal partially down.


