background image

15


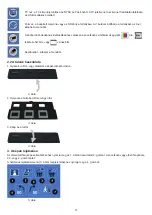
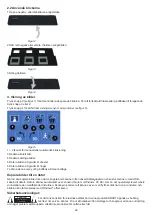
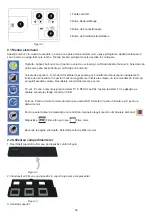
Figura 2

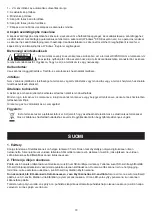
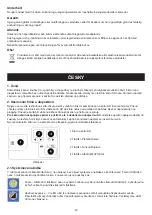
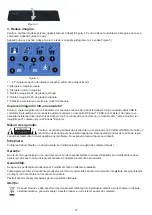
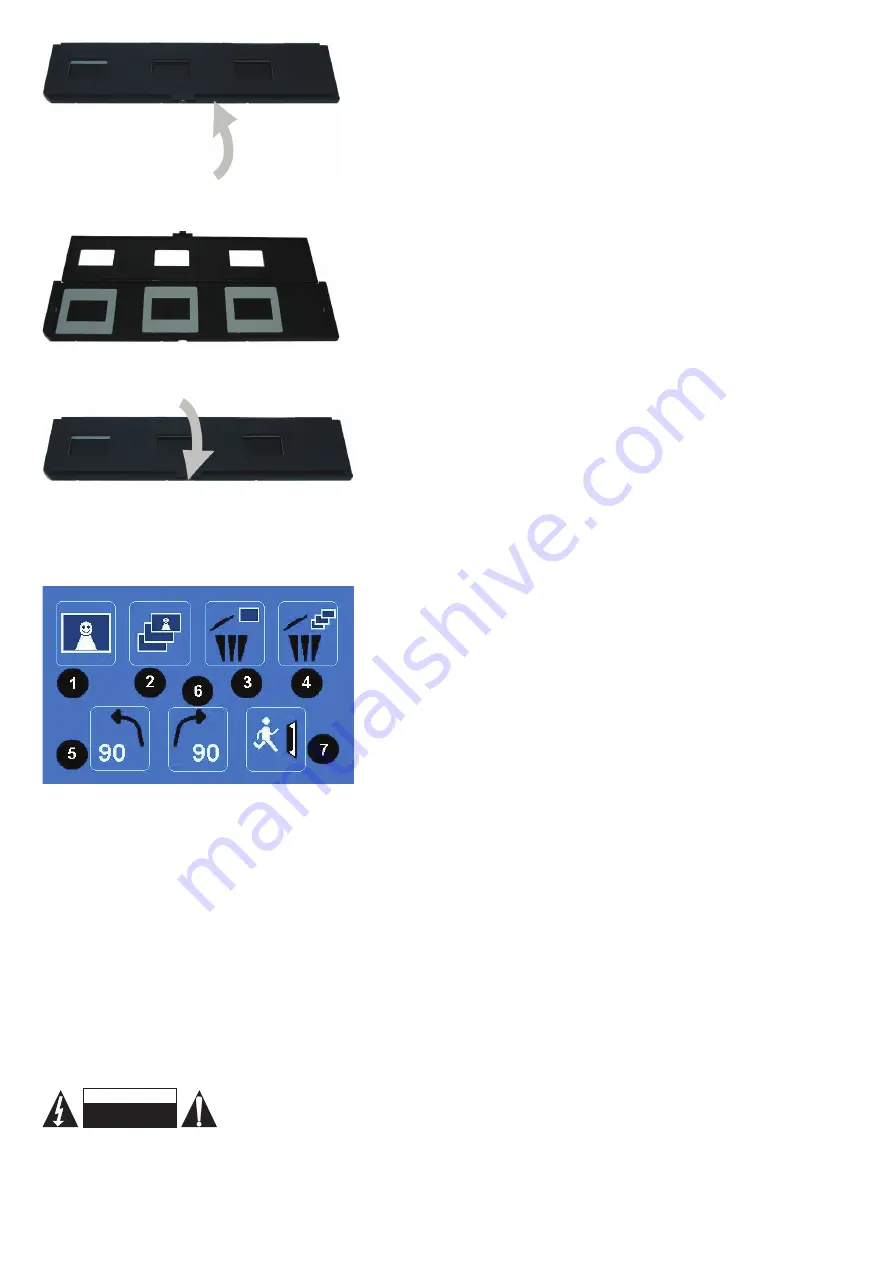
2. Coloque la película o la diapositiva en el soporte como se muestra en la imagen.


Figura 3

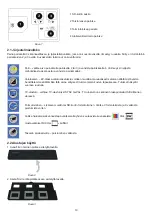
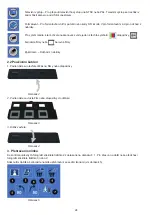
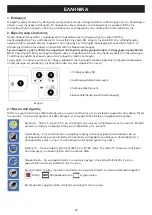
3. Cierre el soporte.


Figura 4

3. Reproducción de imágenes grabadas 

Para comprobar las fotos guardadas pulse el botón 2 de la Figura 1. Para ir a la foto anterior o siguiente pulse el botón 3 o 2. 
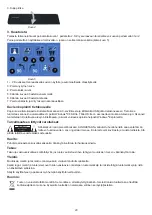
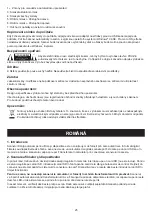
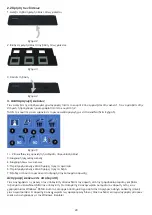
Pulse el botón 4 para ver el menú de reproducción de imágenes pregrabadas con 7 iconos (vea la Figura 5). 


Figura 5

1 + 2: Iconos para diapositivas en manual y presentación automática
3: Eliminar la imagen actual
4: Eliminar todas las imágenes
5: Girar la imagen 90 grados a la izquierda
6: Girar la imagen 90 grados a la derecha
7: Salir de este menú y volver al modo de escaneo

Copiar imágenes al PC

Para copiar imágenes al PC, desconecte el escáner del adaptador eléctrico y conecte el cable USB en el PC. El PC 

reconocerá el escáner automáticamente, excepto en Windows

®

 98 SE. Este Sistema Operativo necesita que instale el 

controlador suministrado. El escáner será reconocido como un disco extraíble cuando se conecte, y las imágenes pueden 

ser copiadas con facilidad con el Windows

®

 Explorer.

Medidas de seguridad: 

Para reducir el peligro de descarga eléctrica, este producto SÓLO lo debería abrir un técnico 

autorizado cuando necesite reparación. Desconecte el producto de la toma de corriente y de 

los otros equipos si ocurriera algún problema. No exponga el producto al agua ni a la humedad.

Mantenimiento:

Límpielo sólo con un paño seco. No utilice disolventes de limpieza ni productos abrasivos.

RIESGO DE ELECTROCUCIÓN

NO ABRIR

ATENCIÓN

Содержание CMP-FILMSCAN30

Страница 1: ...anner f r negativ och dia MANUAL DE UTILIZARE p 25 Scaner autonom pentru filme i diapozitive HASZN LATI TMUTAT o 16 n ll film s diaszkenner K YTT OHJE s 18 Standalone filmi diaskanneri ANLEITUNG s 4 U...

Страница 2: ...he screen for dust If so please clean the inner surface by putting the cleaning brush in the right opening and move the brush gently until the dust has disappeared 1 SD card slot 2 Playback Left butto...

Страница 3: ...t 7 Exit this menu and go back to scan modus Copy images to a computer To copy the images to a computer disconnect the scanner from the AC adapter and plug the USB cable into the computer The computer...

Страница 4: ...en Speicher oder auf einer SD Karte nicht mitgeliefert speichern m chten Zum Speichern auf SD Karte setzen Sie diese in den Slot links von den Bedientasten ein Der Scanner unterst tzt nicht den Anschl...

Страница 5: ...matieren und X um das Men zu verlassen Auswahl des zu scannenden Mediums mit folgenden Symbolen Dias Schwarz Wei Filme oder Farbfilme Home Men verlassen 2 2 Benutzung der Einsch be 1 ffnen Sie den Fil...

Страница 6: ...ine Reinigungs oder Scheuermittel verwenden Garantie Es kann keine Garantie oder Haftung f r irgendwelche nderungen oder Modifikationen des Produkts oder f r Sch den bernommen werden die aufgrund eine...

Страница 7: ...rrer S lectionner Lecture Figure 1 2 1 Menu syst me Appuyez sur le bouton 3 en mode scannage le menu syst me appara tra avec ses six ic nes Utilisez les boutons 2 et 3 pour parcourir les fonctions Voi...

Страница 8: ...ra reconnu comme disque amovible une fois connect les images pourront facilement tre copi es l aide de l explorateur Windows Consignes de s curit Pour r duire le risque de choc lectrique ce produit ne...

Страница 9: ...pter in de voedingsaansluiting steekt en de bovenafdekking opent De voedingsindicator LED zal rood oplichten wanneer de scanner wordt ingeschakeld Controleer of het scherm stoffig is Zo ja maak het op...

Страница 10: ...e houder Afbeelding 4 3 Afbeeldingen weergeven U kunt de opgeslagen foto s controleren door op toets 2 te drukken ge llustreerd in afbeelding 1 Druk op toets 3 of 2 om naar de volgende of vorige foto...

Страница 11: ...t product is voorzien van dit symbool Dit symbool geeft aan dat afgedankte elektrische en elektronische producten niet met het gewone huisafval verwijderd mogen worden Voor dit soort producten zijn er...

Страница 12: ...manualmente per regolare la luminosit Specialmente per le foto pi scure suggeriamo di provare a regolare questo valore I risultati sono direttamente visibili sullo schermo Uscita TV Configura l uscita...

Страница 13: ...e copiate con Windows Explorer Precauzioni di sicurezza Per ridurre il rischio di shock elettrico questo prodotto dovrebbe essere aperto SOLO da un tecnico autorizzato quando necessario ripararlo Scol...

Страница 14: ...illo de limpieza en la abertura correcta y mueva el cepillo hasta que desaparezca el polvo 1 Ranura para tarjeta SD 2 Bot n Reproducir Izquierda 3 Bot n Funci n Derecha 4 Bot n Iniciar Seleccionar Ima...

Страница 15: ...caneo Copiar im genes al PC Para copiar im genes al PC desconecte el esc ner del adaptador el ctrico y conecte el cable USB en el PC El PC reconocer el esc ner autom ticamente excepto en Windows 98 SE...

Страница 16: ...vagy a k l n v s rolhat SD k rty n k v nja e t rolni a k peket SD k rty n val t rol shoz helyezze az SD k rty t a kezel gombokt l balra tal lhat k rtyany l sba Felh vjuk figyelm t hogy a szkenner nem...

Страница 17: ...a k vetkez szimb lumok egyik t dia fekete feh r film vagy sz nes film Kezd oldal kil ptet a men b l 2 2 A t lc k haszn lata 1 Nyissa ki a film vagy diatart t a k pen l that m don 2 bra 2 Helyezze a t...

Страница 18: ...ak Minden log term kn v s m rkan v a tulajdonos nak m rkaneve vagy bejegyzett m rkaneve azokat ennek tiszteletben tart s val eml tj k rizze meg ezt az tmutat t s a csomagol st Figyelem Ezt a term ket...

Страница 19: ...sasetuksia voidaan muuttaa manuaalisesti salaman s t mist varten Suosittelemme s t m n t t arvoa erityisesti tummempien kuvien tapauksessa Tulokset n kyv t suoraan ruudulla TV ulostulo vaihtaa TV ulos...

Страница 20: ...kopioida helposti Windows Explorerilla Turvallisuuteen liittyv t varoitukset S hk iskun riskin pienent miseksi AINOASTAAN valtuutettu huoltohenkil saa avata t m n laitteen huoltoa varten Jos ongelmia...

Страница 21: ...inte r dammig Om den skulle vara det reng r den inre ytan genom att f ra reng ringsborsten fr n h ger ppning och borsta f rsiktigt tills allt damm r borta 1 SD minneskortplats 2 Uppspelning V nster k...

Страница 22: ...7 L mna denna meny och g tillbaka till scannerl ge Kopiera bilder till en dator N r du ska kopiera bilder till en dator koppla bort scannern fr n v xelstr msadaptern och anslut scannern med USB kabeln...

Страница 23: ...a e 2 Skenov n film a diapozitiv Nejprve se mus te rozhodnout zda chcete sn mky ulo it do intern pam ti nebo na kartu SD nen zahrnuta Pokud chcete sn mky ulo it na kartu SD vlo te kartu SD do slotu na...

Страница 24: ...bol diapozitivy ernob l filmy nebo barevn filmy Zp t dom Odchod z nab dky 2 2 Pou v n ablon 1 Podle n kresu otev ete dr k na filmy nebo diapozitivy Obr zek 2 2 Podle n kresu vlo te film nebo diapoziti...

Страница 25: ...ymbolem To znamen e se s v robkem mus zach zet jako s nebezpe n m elektrick m a elektronick m odpadem a nelze jej po skon en ivotnosti vyhazovat s b n m dom c m odpadem Pro likvidaci t chto v robk exi...

Страница 26: ...luminozitate n special n cazul imaginilor mai nchise la culoare v recomand m s ncerca i s regla i aceast valoare Rezultatele sunt vizibile direct pe ecran TV out Pentru a comuta ie irea la sistem TV n...

Страница 27: ...suri de siguran Pentru a se reduce pericolul de electrocutare acest produs va fi desf cut NUMAI de c tre un tehnician avizat c nd este necesar depanarea Deconecta i produsul de la priza de re ea sau...

Страница 28: ...28 A 1 K nig 35mm SD 2 SD SD SD hot plugging SD AC AC LED 1 SD 2 3 4 1 2 1 3 2 3 2 3 4 4 EV TV TV NTSC PAL TV USB SD V X...

Страница 29: ...29 2 2 1 2 2 3 3 4 3 2 1 3 2 4 5 5 1 2 3 4 5 90 6 90 7 USB Windows 98 SE driver Windows Explorer...

Страница 30: ...30...

Страница 31: ...ndente per pellicole e diapositive Descripci n Esc ner independiente para pel culas y diapositivas Megnevez se n ll film s diaszkenner Kuvaus Standalone filmi diaskanneri Beskrivning Frist ende scanne...

Отзывы: