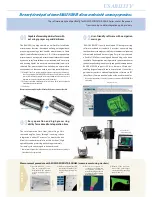
①
Contour evaluation
②
Cross-section inspection
③
Dimension inspection
(GD&T)
④
Report output
e
Upper limit Lower limit
Date/time
Inspection Report
Measurement
Name
Type
Measured
value
Distance
Distance
Distance
Distance
Distance
Distance
Distance
Measurement
Name
Type
Measured value
Name
Type Measured value
Distance
Distance
Distance
radius
radius
*
Screen shot examples from optional application software.
A
SOLUTION
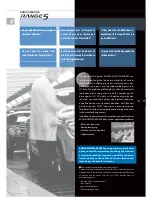
KONICA MINOLTA RANGE5 will change the process of manufacturing.
Problems can be solved by using KONICA MINOLTA RANGE5
and 3D CAD data, without the need for 2D drawings.
Solution 1
Cast parts can be visualized and quantified for the evaluation of wall
thickness distribution, enabling inspection for excessively thin walls
and lack of machining stock. Early feedback of the results to the de-
sign and production processes reduces losses in later processes.
Solution 2
By visualizing the spring-back which occurs during form-
ing trials in press die making, the location and amount
of distortion can be pinpointed precisely, leading to im-
proved accuracy of die correction and reduced correction
cycles.
Solution 3
By creating 3D CAD data of the dimensions and tolerances for inspec-
tion points such as the positions of bosses, ribs and holes of plastic
products in advance, you can automatically create dimension inspec-
tion reports on GD&T analysis, etc., resulting in the development of a
routine and speeding up the inspection process.
The direct comparison of 3D scan data against 3D CAD data provides visual and quantitative evaluation of surface
distortion and cross-sections of part exteriors, even those with multiple free-form surfaces. By doing this, you can
confirm and verify whether parts are manufactured to the design.
KONICA MINOLTA RANGE5 is designed to provide high oper-
ability and reliability. It is a user-friendly 3D digitizer that
provides easy operation with intuitive GUIs, minimization of
erroneous measurements, and always offers high-quality 3D
data regardless of the target shape or surface conditions.
P e r s o n a l c o m p u t e r
(commercial product)


