FS-601 Field Service Ver2.0 Sep. 2004
Other
2-19
II
M
a
in
te
na
n
c
e
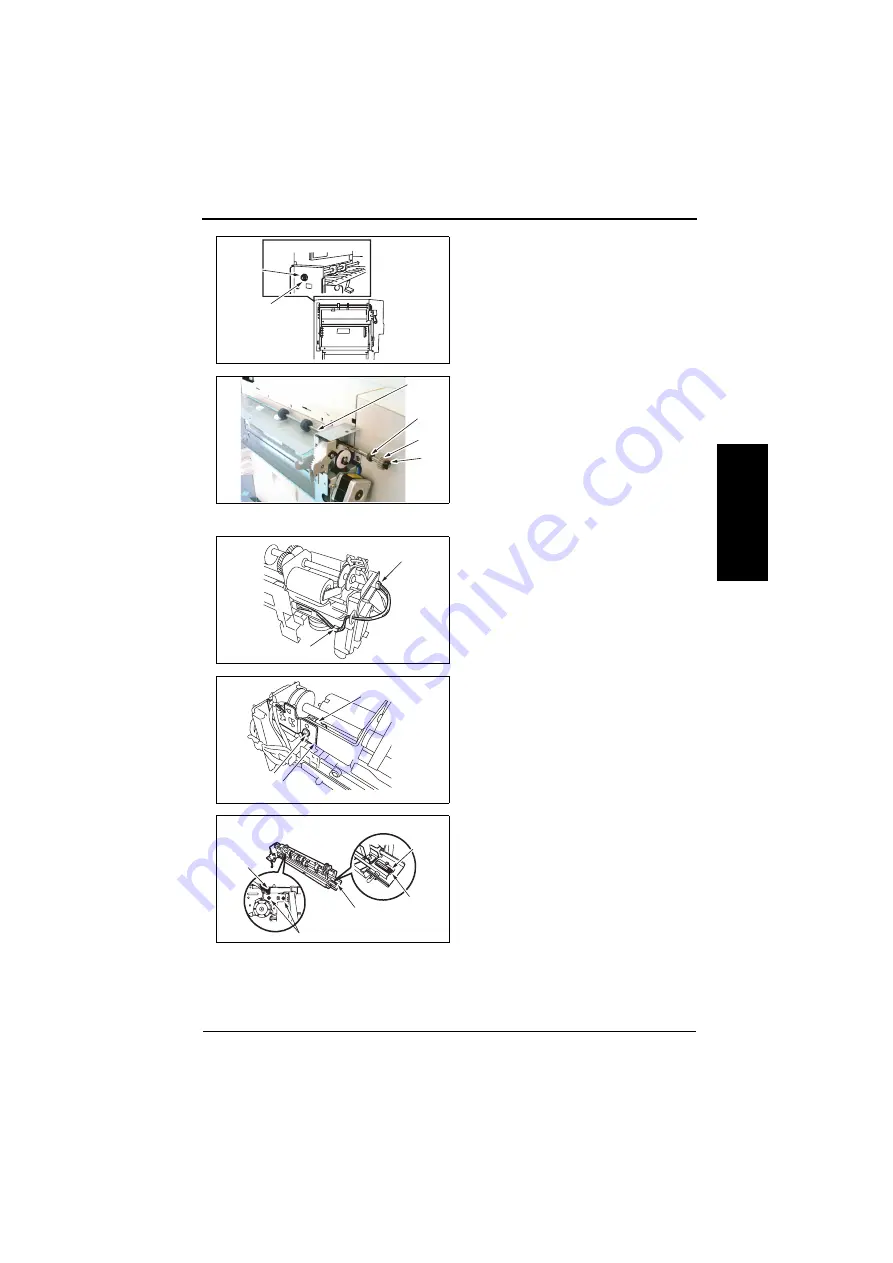
3.
Remove the C-clip[3], and remove
the bushing [4].
4.
Shift the Shaft Assy in the orientation
as shown on the left.
5.
Remove the C-clip [5], the Gear [6],
the bushing [7], and remove the Mid-
dle Transport Roller [8].
1.3.21
Punch Unit
1.
Remove the Punch Trash Box.
2.
Unplug the connector J1005 [1].
3.
Remove the Harness from the Har-
ness Guide [2].
4.
Unplug the connector [3].
5.
Remove the screw [4], and remove
the Sensor Support Plate [5].
6.
Remove the screw [6] and the
washer [7].
7.
Unplug the connector [8].
8.
Remove two screws [9], and remove
the base cover [10].
[4]
[3]
4583fs2582c0
[7]
[6]
4583fs2583c0
[8]
[5]
[2]
[1]
4583fs2586c0
[3]
[4]
[5]
4583fs2587c0
[9]
[10]
[7]
[6]
[8]
4583fs2588c0
Содержание FS-601
Страница 1: ...SERVICE MANUAL 2004 09 Ver 2 0 FS 601 THEORY OF OPERATION ...
Страница 2: ......
Страница 4: ......
Страница 10: ...Product specification FS 601 Theory of Operation Ver2 0 Sep 2004 1 4 I Outline Blank page ...
Страница 13: ...FS 601 Theory of Operation Ver2 0 Sep 2004 Paper path 2 3 II Composition Operation 3 Paper path ...
Страница 36: ...Mechanical operations FS 601 Theory of Operation Ver2 0 Sep 2004 2 26 II Composition Operation Blank page ...
Страница 37: ...SERVICE MANUAL 2004 09 Ver 2 0 FIELD SERVICE FS 601 ...
Страница 38: ......
Страница 40: ......
Страница 70: ...Other FS 601 Field Service Ver2 0 Sep 2004 2 22 I General II Maintenance Blank page ...
Страница 88: ...Board switch FS 601 Field Service Ver2 0 Sep 2004 3 18 III Adjustment Setting Blank page ...
Страница 112: ...Trouble code FS 601 Field Service Ver2 0 Sep 2004 4 24 IV Troublshoot ing Blank page ...


