Konica Minolta bizhub 360 Скачать руководство пользователя страница 399

Advanced Information

7

bizhub 360

7-35

Advan

c

ed I

n

fo

rm

at

ion

Chap

te

r 7

5

Touch [Close].

The Accessibility Setting Screen will be restored.

6

Touch [Close], or press [Accessibility] on the control panel.

The Basic Screen will be restored.

2

Note 

Touch [Cancel] on the Key Accept Sound Screen to cancel the setting 
change.

7.6.5

Adjusting the Position of Touch Sensor (Touch Panel Ad-
justment)

If touch panel keys do not respond correctly, the touch sensor may shift in 
position of the touch keys.
In this case, use this function to adjust the position of touch sensor.

To specify Touch Panel Adjustment

1

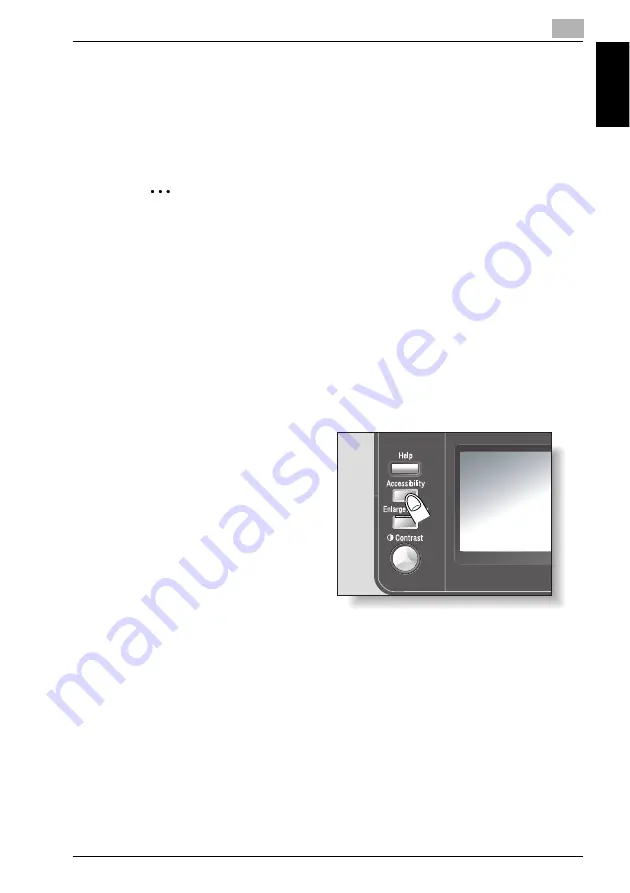
Press [Accessibility] on the control panel.

The Accessibility Setting Screen will be displayed.

Содержание bizhub 360

Страница 1: ......

Страница 2: ......

Страница 3: ...roubleshooting procedures In order to ensure that this machine is used correctly and efficiently carefully read this manual before using the machine After reading the manual store it in the designated...

Страница 4: ...st copy with the copier remaining in the ready to copy state during that time The time period for the low Power function can be set for 1 to 240 minutes in 1 minute increments Sleep This function achi...

Страница 5: ...TICULAR PURPOSE ARE DISCLAIMED IN NO EVENT SHALL THE AU THOR OR CONTRIBUTORS BE LIABLE FOR ANY DIRECT INDIRECT INCI DENTAL SPECIAL EXEMPLARY OR CONSEQUENTIAL DAMAGES INCLUDING BUT NOT LIMITED TO PROCU...

Страница 6: ...a cover page insertion x 21 Inserting copies of a different original at a specified location x 21 Copying with chapter title pages on the front side x 21 Separately copying a page spread x 22 Repeati...

Страница 7: ...eration Precautions 1 1 Safety Information 1 2 Warning and Precaution Symbols 1 2 Meaning of Symbols 1 2 1 2 Regulation Notices 1 9 CE Marking Declaration of Conformity for Users of the European Union...

Страница 8: ...tically Returning to the Priority Screen Automatic System Reset 2 33 2 4 To Use Machine When Power Save Indicator Lights 2 34 To activate the machine 2 34 Automatically Conserving Energy Low Power Mod...

Страница 9: ...ard size Custom Size 3 22 To store non standard size Custom Size 3 24 To specify paper type 3 27 3 7 Zoom Setting 3 30 To copy in full size 1 000 mode 3 30 To copy in slightly reduced magnification mo...

Страница 10: ...inal Direction 4 12 Function overview 4 12 To specify Original Direction 4 14 4 2 4 Specifying Position of Binding Margin Margin 4 17 Function overview 4 17 To specify Margin 4 18 4 3 Making Copy Qual...

Страница 11: ...tion 5 56 Function overview 5 56 To copy using Booklet Pagination 5 56 5 10 Making Multiple Page Signature Booklet Booklet 5 60 Function overview 5 60 To copy using Booklet 5 60 5 11 Reversing Color a...

Страница 12: ...in Stamp 5 102 To copy using Built in Stamp 5 102 5 15 5 Printing Watermark onto Copies Watermark 5 106 To copy using Watermark 5 106 5 15 6 Overlay an Image onto Each Page Copied in the Job Image Ov...

Страница 13: ...rogram name 7 17 To delete copy program 7 18 7 5 Displaying Screen for Operation Guide Help 7 20 7 5 1 Displaying Help Screen 7 21 To display Help Screen 7 21 7 6 Adjusting Control Touch Panel Accessi...

Страница 14: ...in Current Jobs and Job History 8 11 Procedure 8 12 8 2 2 Check the Settings of Jobs Active or Held in Current Jobs 8 14 Procedure 8 14 8 2 3 Delete Active and Held Jobs in Current Jobs 8 16 Procedur...

Страница 15: ...dust box of FS 511 10 22 To empty the dust box of PU 501 10 24 11 Troubleshooting 11 1 When the Message Malfunction Detected Appears Call Technical Representative 11 2 Display in Enlarge Display Mode...

Страница 16: ...8 Saddle Stitcher SD 502 13 9 Mailbin Kit MT 501 13 9 Finisher FS 511 13 10 Output Tray OT 501 13 11 Job Separator JS 502 13 11 Other Options 13 12 14 Utility User Setting 14 1 User Setting Outlines...

Страница 17: ...o specify the Copy Basic Screen Setting 14 24 14 3 8 8 Job List Default 14 25 To specify the Job List Default 14 25 14 4 3 Initial Setting 14 27 To specify the initial setting 14 27 14 5 4 Copier Sett...

Страница 18: ...Setting 15 42 To specify Date Setting 15 42 15 2 10 5 Weekly Timer Setting 4 Select Time for Power Save 15 44 To specify Select Time for Power Save 15 44 15 2 11 5 Weekly Timer Setting 5 Password for...

Страница 19: ...Account Track 15 84 User Authentication and Account Track 15 84 15 4 1 1 Authentication Method 15 86 To specify Authentication Method 15 86 15 4 2 2 User Authentication Setting 1 Administrative Settin...

Страница 20: ...y Operation 15 121 To specify Print Jobs During Copy Operation 15 121 15 6 9 Security Setting 15 123 15 6 1 1 Administrator Password 15 123 To specify Administrator Password 15 123 15 6 2 3 Administra...

Страница 21: ...os sepa rately Set Individual Zoom on page 3 37 Adjusting copies to the size of the paper The most appropriate zoom ratio can automatically be selected based on the size of the loaded original and the...

Страница 22: ...opying Mixed Size Original Mixed Original on page 4 8 Adjusting copies according to the image quality of the original The copies can be adjusted according to the image quality of the original For deta...

Страница 23: ...ferent original at a specified location An original page scanned from the original glass can be inserted between original pages scanned with the automatic document feeder and all copies can be fed out...

Страница 24: ...e 5 36 Repeating copy images An original image can be repeatedly printed on a single sheet of paper For details refer to Repeating Original Image on One Sheet Image Repeat on page 5 43 Splitting an or...

Страница 25: ...t on page 5 60 Copying with reversed colors An original can be copied with the light and dark colored areas of images inversed For details refer to Reversing Color and Gradation of Image Neg Pos Re ve...

Страница 26: ...of Copy Erase on page 5 74 Adjusting the image to fit the paper size Copies can be produced after specifying the position of the original image on the paper For details refer to Adjusting Position of...

Страница 27: ...ut put for Machine with Finisher on page 6 6 or Output for Machine with Sep arator on page 6 22 Stapling copies Copies can be stapled together before they are fed out For details refer to Stapling Out...

Страница 28: ...these screens the copy settings can also be changed For details refer to Checking Feature Selections before Copying Mode Check on page 7 6 Interrupting a copy job The copy job being printed can be int...

Страница 29: ...refer to Job Management Job List on page 8 2 Enlarging the size of text in touch panel screens The text and buttons in the touch panel can be displayed in a larger size that is easier to read allowing...

Страница 30: ...nsure safe use of this machine Warning indicates instructions that when not observed may result in fatal or critical injuries Caution indicates instructions that when not observed may result in seriou...

Страница 31: ...his manual the first value always refers to the width of the paper shown as Y in the illustration and the second to the length shown as X Paper Orientation Lengthwise w If the width Y of the paper is...

Страница 32: ...er s Guide for details on operating procedures for network functions and for using Scan to E Mail Scan to FTP and Scan to PC SMB User s Guide Box Operations This manual contains details on operating p...

Страница 33: ...on of the printer function equipped for the machine as option For operating procedures for printer functions refer to the user s guide PDF contained in User Software CD ROM or the quick guide printed...

Страница 34: ...ness Stock certificates Legal Documents Food stamps Postage stamps canceled or uncanceled Checks or drafts drawn by government agencies Internal revenue stamps canceled or uncanceled Passports Immigra...

Страница 35: ...1 Installation and Operation Precautions Chapter 1 Installation and Operation Precautions...

Страница 36: ...Make sure you observe all of the precautions appear in each section of this manual 2 Note Some parts of the contents of this section may not correspond with the purchased product Warning and Precauti...

Страница 37: ...lied in the pack age If a power cord is not supplied only use the power cord and plug that is specified in POWER CORD INSTRUCTION Failure to use this cord could result in a fire or electrical shock Us...

Страница 38: ...y result in fire or shock If proper wall outlet is not available the customer shall ask qualified electrician for the installation Do not use a multiple outlet adapter nor an ex tension cord in princi...

Страница 39: ...to do this could result in a fire or electrical shock CAUTION Do not tug the power cord when unplugging Pulling on the power cord could damage the cord resulting in a fire or electrical shock Remove...

Страница 40: ...call your authorized service representative CAUTION After installing this product mount it on a se cure base If the unit moves or falls it may cause personal injury Do not place the product in a dust...

Страница 41: ...power cord from the power outlet and then call your authorized service representative If you keep on using it as is a fire or electrical shock could result Do not keep using this product if this prod...

Страница 42: ...ar a floppy disk or watch that are susceptible to magnetism They could cause these products to malfunction When moving the machine CAUTION Whenever moving this product be sure to dis connect the power...

Страница 43: ...ommercial environment This equipment generates uses and can radiate radio frequency energy and if not installed and used in accordance with the instruction manual may cause harmful interference to rad...

Страница 44: ...rding to the instructions in this manual For Denmark Users ADVARSEL Usynlig laserstr ling ved bning n r sikkerhedsafbrydere er ude af funktion Undg uds ttelse for sr ling Klasse 1 laser produkt der op...

Страница 45: ...Operation Precautions 1 bizhub 360 1 11 Installation and Operation Precautions Chapter 1 gr nsen f r laserklass 1 Det h r r en halvledarlaser Den maximala effekten f r laserdioden r 10 mW och v gl ng...

Страница 46: ...ppareil dans une pi ce largement ventil e Une quantit d ozone n gligable est d gag e pendant le fonctionnement de l appareil quand celui ci est utilis normalement Cependant une odeur d sagr able peut...

Страница 47: ...ollow ing positions Be very careful that an accident does not occur when operations such as re moving paper misfeeds are performed The fixing unit is very hot To avoid getting burned DO NOT TOUCH CAUT...

Страница 48: ...ON This area is very hot To avoid getting burned DO NOT TOUCH To avoid injury DO NOT put your hand on the top of the printed sheets Be sure to hold both sides of the printed sheets when removing them...

Страница 49: ...bizhub 360 DK 501 23 2 590 12 6 320 17 432 15 3 387 8 63 3 1609 8 27 9 708 21 7 550 7 8 200 57 4 1458 45 3 1150 36 5 928 64 5 1637 49 5 1258 20 9 532 3 9 100 23 2 590 26 7 677 79 5 2019 20 8 530 25 3...

Страница 50: ...ine for the ventilation duct bizhub 360 PC 402 FS 511 LU 201 23 2 590 26 7 677 3 9 100 78 1 1985 16 5 418 15 6 397 49 1245 56 1 1425 64 5 1637 24 3 618 27 9 708 21 7 550 7 8 200 57 4 1458 26 8 680 23...

Страница 51: ...wer source with as little voltage or frequency fluctuations as possible Operating Environment The environmental requirements for correct operation of the machine are as follows Operating temperature 1...

Страница 52: ......

Страница 53: ...2 Before Making Copies Chapter 2 Before Making Copies...

Страница 54: ...chine Configuration External 5 1 2 6 7 8 9 10 11 12 13 14 16 15 17 18 19 20 21 22 23 24 3 4 No Name Description 1 Left partition glass Scans the original positioned in the ADF 2 Document scales Used t...

Страница 55: ...x unit 14 Release lever for the right side door of the main unit Pulled out to open the right side door of the main unit 15 Release lever for the vertical conveyance door of the main unit Slided to th...

Страница 56: ...2 Before Making Copies 2 4 bizhub 360 Before Making Copies Chapter 2 27 28 25 26 29 30 31...

Страница 57: ...plies power to the machine 28 Ventilation duct Releases exhaust heat from the machine 29 IEEE1284 port type C Used for connecting a parallel cable from the computer 30 USB port type B USB 2 0 1 1 comp...

Страница 58: ...2 Before Making Copies 2 6 bizhub 360 Before Making Copies Chapter 2 Internal 3 4 5 7 6 8 9 10 1 2...

Страница 59: ...r the paper during double sided printing 5 Automatic duplex unit door Held to open the Automatic duplex unit when clearing pa per misfeeds 6 Conveyance unit lever Held to open the Conveyance unit when...

Страница 60: ...t ML 503 Used to expand the telephone line for exclusive use of facsimile 4 Large Capacity Unit LU 201 Can be loaded with up to 2 000 sheets of paper 20 lb 5 Desk DK 501 Set up on the floor allowing t...

Страница 61: ...ed 16 Job Separator JS 502 Separates printed sheets Pull the lever when taking out the paper 17 Image Controller IC 204 Installed when the machine is used for network printing and network scanning 18...

Страница 62: ...2 Before Making Copies 2 10 bizhub 360 Before Making Copies Chapter 2 Paper Feed Cabinet PC 202 PC 402 1 2 3 7 6 5 8 9 10 11 13 12 4...

Страница 63: ...iling edge guide Slide the adjustable paper guides against the trailing edge of the copy paper 7 Adjustable paper guides Slide the adjustable paper guides against the side edges of the copy paper 8 Pa...

Страница 64: ...2 Before Making Copies 2 12 bizhub 360 Before Making Copies Chapter 2 Large Capacity Unit LU 201 2 Reminder Do not climb on or place objects on this unit to prevent any damage 1 3 4 2...

Страница 65: ...maximum of 2 000 sheets of plain paper 20 lb can be loaded 2 Upper door Opened when loading paper or clearing paper misfeeds 3 Lock release lever Held to slide the large capacity unit to the right wh...

Страница 66: ...ub 360 Before Making Copies Chapter 2 Finisher FS 510 Output Tray OT 601 Punch Unit PU 501 2 Reminder Do not place objects beneath the output tray to prevent any damage in curred by shock or other for...

Страница 67: ...U 501 option Collects punch dust Pull out to empty 6 Guide FN3 Pushed down after pulling out the punch dust box to clear paper misfeeds 7 Guide FN4 Pushed down when clearing paper misfeeds 8 Stapler S...

Страница 68: ...makes the entire set of trays move up and down This vertical movement be comes even larger when a saddle stitcher or mailbin is installed and any object placed on or beneath the finisher may cause dam...

Страница 69: ...1 Paper output tray Collects sheets 2 Lock release lever Pulled to slide to the left when clearing paper misfeeds No Name Description 1 Lower cover lever Pulled down to open when clearing paper misfe...

Страница 70: ...2 Before Making Copies 2 18 bizhub 360 Before Making Copies Chapter 2 Finisher FS 511 Relay Unit RU 502 3 1 2 4 5 6 7 8 9 10 15 16 11 12 13 14...

Страница 71: ...isher from the main unit in such cases as clearing paper misfeeds loading staples and emptying the punch dust box 6 Relay unit lever Pushed down when clearing paper misfeeds 7 Relay unit door Opened w...

Страница 72: ...e indicator on the Box key lights up in green For details refer to Box Operations of the bizhub 360 User s Guide 5 Fax key Press to enter the Fax mode While the machine is in the Fax mode the indicato...

Страница 73: ...een when a print job is queued for printing or when printing is in progress 15 Proof Copy key Press to print a single sample copy to be checked before printing a large number of copies 16 C Clear key...

Страница 74: ...7 18 19 20 3 11 No Name Description 1 Job List Touched to display the Job List Screen 2 Date and time display area Displays the current date and time Switches to the clock display when the weekly time...

Страница 75: ...r than fold ing The settings include Output tray paper orientation sort group and crisscross staple punch and positions the availability varies de pending on the options installed 14 Paper Touched to...

Страница 76: ...ay area Icon Description Indicates that data is being sent from the machine regardless of the cur rent mode Indicates that data is being received by the machine regardless of the current mode If the w...

Страница 77: ...y the Basic Screen to specify the basic functions 5 Combine Originals tab Touched to display the Combine Originals Screen to specify the type of originals to apply the Combine Origi nals settings or t...

Страница 78: ...ys the specified staple and punch hole settings 16 Simplex Duplex setting area Touching 1 2 2 2 or 2 1 will display the Bind Orig Direction key to allow settings for the orientation of positioned orig...

Страница 79: ...s Chapter 2 2 2 Adjusting Angle of the Control Panel The control panel can be adjusted to any of the following three angles Adjust the control panel to the angle that allows for easy operation 1 Upper...

Страница 80: ...e Making Copies Chapter 2 To adjust the angle of the control panel 1 Pull the control panel release lever toward you to unlock the current po sition 2 Move the control panel slightly to any direction...

Страница 81: ...ower is kept turned on The sub power switch turns on off the copying and scanning functions As for the printer function and data transmission output function of facsimile turning off the sub power swi...

Страница 82: ...up in orange and a screen indicating that the machine is starting up appears After a few seconds the message Now warming up Ready to scan is displayed and the indicator on Start key lights up in green...

Страница 83: ...cluding printing and receiving and outputting fac simile data 0 Do not turn off the main power while queued jobs or stored jobs are still pending to be printed Otherwise data that are yet to be printe...

Страница 84: ...is located inside the ma chine Open the front doors of the main unit and turn off the main power Open the front doors of the main unit and turn off the main power 2 Reminder When turning off and then...

Страница 85: ...ion is performed and whether or not it is performed can be set in the Utility mode For de tails refer to page 15 71 Automatically Returning to the Priority Screen Automatic System Re set If no operati...

Страница 86: ...machine to an operational state If the machine has been in the power save mode it becomes available for operaions If the machine has been applied the weekly timer the Basic Screen ap pears The messag...

Страница 87: ...key lights up in red and the touch panel and all the other indicators go off This is the Low Power mode The machine can receive jobs even when it is in the Low Power mode As the factory default the m...

Страница 88: ...is performed for a specified length of time the touch panel goes off and the energy consumption is reduced to under 2 2 W the state where the energy conserved is greater than the Low Power mode The P...

Страница 89: ...reappears and after the machine has finished warming up it is ready to operate again Detail Originals can be scanned while the machine is warming up For details refer to page 3 62 Detail The length of...

Страница 90: ...hold Power Save on the control panel As the factory default the machine enters Low Power mode Detail As the factory default settings pressing the Power Save key will turn the machine into the Low Powe...

Страница 91: ...before the machine enters the sleep mode can be changed While the machine is in the Sleep mode entering the password for non business hours and specifying the duration of operation will make it availa...

Страница 92: ...he Sleep mode 0 If the password for non business hours is set by the administrator this password must be entered before specifying the duration for user oper ations 1 Position original or press any ke...

Страница 93: ...s and 59 min utes 5 Touch OK The Basic Screen is displayed with the message Ready to copy Copy functions become available Detail If only one digit is to be specified for the duration make it two digit...

Страница 94: ...Administrator mode For details refer to page 15 86 Account track is specified in the Administrator mode For details refer to page 15 86 To enter a user name and password user authentication If the adm...

Страница 95: ...ed users who are not allocated a user name and password can use this machine by touching Public User Access If List is displayed the desired user name can be selected from the list of user names Touch...

Страница 96: ...Touch Password The Password Input Screen will be displayed 5 Enter the password and then touch OK The User Name Password Setting Screen will be restored 6 Press Access on the control panel The Basic...

Страница 97: ...longer operational To enter an account name and password account track If the administrator has specified the account track settings only users who belong to permitted accounts can use the machine 0...

Страница 98: ...The Account Name Password Setting Screen will be displayed If the Account Password Setting Screen is displayed proceed to Step 5 2 Touch Account Name The Account Name Input Screen will be displayed 3...

Страница 99: ...aking Copies Chapter 2 4 Touch Password The Account Password Input Screen will be displayed 5 Enter the password and then touch OK 6 Press Access on the control panel The Basic Screen will be displaye...

Страница 100: ...ter 2 8 When you have finished operating the machine press Access on the control panel again A message appears requesting confirmation to log off 9 Touch Yes The Account Name Password Setting Screen i...

Страница 101: ...nish paper appears To continue the output job using another paper tray touch Paper Tray Set ting to display the Paper Setting Screen then select the desired tray Checking the Amount of Paper Remaining...

Страница 102: ...u need to load a different type of paper than the specified one change the Paper Tray Setting from the User Setting Screen in the Utility mode For details refer to page 14 10 Do not use treated paper...

Страница 103: ...be loaded Pushing the paper guide lock release lever move the later al guides along the appropriate size guides for the paper to be loaded Re lease the pressure applied to the paper guide lock release...

Страница 104: ...paper Push both ends of the trailing edge guide until it aligns with the paper Re lease the pressure applied to the ends of the trailing edge guide to lock it again 5 Fully push in the paper tray The...

Страница 105: ...cated at the right hand end of the tray If it is ac cidentally bent or folded this will cause paper to be fed incorrectly To load paper in tray 3 Follow the procedure described below to load paper int...

Страница 106: ...ter 2 2 Further pull out the paper feed cabinet Hold both ends of the paper feed cabi net and pull it out 3 Load paper into the right side of the cabinet Position 8 1 2 11 paper in the portrait orient...

Страница 107: ...s Chapter 2 4 Load paper into the left side of the cabinet Position 8 1 2 11 paper in the portrait orientation v and align it with the two partitions in the cent er of the cabinet di viding the left a...

Страница 108: ...or folded this will cause paper to be fed incorrectly Do not close the paper feed cabinet with too much force otherwise the weight of the cabinet and paper may apply an impact to the machine that may...

Страница 109: ...ith the left side lining of the tray 3 Close the upper door of the large capacity unit 2 Reminder Make sure that the paper is not loaded above the point where the paper guide starts to bend to prevent...

Страница 110: ...erhead pro jector transparencies or label sheets 0 Use the Paper screen to specify the size of the paper that is not detect able automatically for example paper in A3 or A4 size or custom size paper o...

Страница 111: ...per as much as possible into the feed slot Pa per can be loaded up to 150 sheets 20 lb paper of thickness 3 Align the lateral guides with the paper The size of the paper loaded in the bypass tray is i...

Страница 112: ...ure that the lateral guides are aligned exactly with the paper Oth erwise the paper size may not be identified automatically or the printed image may become tilted Flatten the paper before loading it...

Страница 113: ...nvelopes are flattened with flaps folded Otherwise any air remaining in the envelopes or open flaps may cause creases on the envelopes or misfeeds Load envelopes in portrait w orientation Do not load...

Страница 114: ...pter 2 A maximum of 10 sheets of envelopes can be loaded 2 Reminder Load labels with the printable surface facing down Load one sheet at a time For details of the setting orientation consult your serv...

Страница 115: ...Before Making Copies 2 bizhub 360 2 63 Before Making Copies Chapter 2 2 Reminder Load letterheads with the printable surface facing up A maximum of 150 sheets of letterheads can be loaded...

Страница 116: ...d first is higher than that for the setting specified next the machine prompts the user with the message stating that the settings must not be combined and then cancels the second setting To give prio...

Страница 117: ...le setting As an example the procedure for selecting the 2 Position Staple setting after setting the Booklet function is described below 1 Set the Booklet function 2 Select the 2 Position Staple setti...

Страница 118: ......

Страница 119: ...3 Basic Copy Operations Chapter 3 Basic Copy Operations...

Страница 120: ...re is basic and not always applicable to the oper ation of selected copy conditions When using a specific function be sure to follow the procedure described in each section 1 Press Copy on the control...

Страница 121: ...Basic Copy Operations 3 bizhub 360 3 3 Basic Copy Operations Chapter 3 2 Position the original...

Страница 122: ...ppropriate paper size automatically by Auto Paper Select function The illustration in the left side area of the screen will vary depending on where the original is positioned 3 Enter the desired print...

Страница 123: ...ex Duplex 1 1 Original Image Type Text Photo For details of each setting refer to the following pages Density page 3 14 Paper page 3 16 Zoom page 3 30 Simplex Duplex page 3 46 Combine Originals page 4...

Страница 124: ...c Screen in order to provide the information about set quantity and number of output pages during the print operation This setting can be specified in User Setting selected from the Utility Counter Sc...

Страница 125: ...page 9 13 0 Be sure to position the original in the specified orientation For details see Specifying Orientation of Original Original Direction on page 4 12 0 Adjust the paper guides to the original...

Страница 126: ...2 Position the original FACE UP with page one UP in the ADF 3 Adjust paper guides The original size will be detected automatically and displayed in the message area of the Basic Screen while an appro...

Страница 127: ...ct the original size positioned on the original glass then select an appropriate paper size by Auto Paper Select function 0 Be sure to position the original in the specified orientation For details se...

Страница 128: ...left corner with its top toward the rear side 3 Align the original with the mark in the rear left corner of measuring guide For bound original spread over two fac ing pages such as a book or magazine...

Страница 129: ...d in the message area of the Basic Screen while an appropriate paper size will be selected automatically by Auto Paper Select and displayed in the Paper area 2 Reminder When Book Copy Auto Original Si...

Страница 130: ...t to copy one grouped set as factory default With two or more of print quantity specified the Sort mode will be automat ically selected 0 Print quantity can be entered in any instance of the procedure...

Страница 131: ...llow the procedure below to change the print quantity that has been al ready entered 1 Press C Clear on the control panel The quantity displayed on the touch panel will return to 1 2 Enter the correct...

Страница 132: ...justments are provided Density Select the exposure level of print image from nine levels Background Removal Select the exposure level of the background color of the colored original from nine levels D...

Страница 133: ...original density level and select the optimum exposure for printing 3 Select the desired background density level Nine levels are provided to adjust the density of the background color of colored orig...

Страница 134: ...hine selects the same paper size as the orig inal If other magnification ratio is selected the machine automatically specifies an appropriate paper size according to the magnification ratio selected 0...

Страница 135: ...Touch Auto Paper Select 3 Touch OK The Basic Screen will be restored with Auto Paper Select displayed on the Paper key 2 Note If no other setting is desired the copy job can be started using the set t...

Страница 136: ...om can be used to automatically select an appropriate magnification ratio according to the original size and specified paper size For details see To select a magnification ratio automatically Auto Zoo...

Страница 137: ...e is initially set to enable Auto Zoom immediately after the original is loaded in the ADF However positioning the original on the original glass does not automat ically activate Auto Zoom as factory...

Страница 138: ...trays Detail Special paper type can also be loaded in the other trays on a regular ba sis The paper type setting for these trays is provided in User Setting of the Utility Counter Screen See page 14...

Страница 139: ...ic Copy Operations Chapter 3 2 Touch the bypass tray key to highlight it then touch Change Tray Set tings The Change Tray Settings Screen will be displayed 3 Touch Auto Detect to highlight it 4 Touch...

Страница 140: ...paper Available range for each is as follows Side X 5 13 16 17 inch Side Y 3 5 8 11 11 16 inch 0 Five non standard sizes can be stored and recalled For details on storing non standard size see To sto...

Страница 141: ...5 13 16 17 inch Touch Y to highlight it then enter the size of side Y from the con trol panel keypad 3 5 8 11 11 16 inch To recall the stored non standard size touch one of memory 1 to memory 5 The na...

Страница 142: ...om Size Follow the procedure below to store up to five non standard paper sizes This function allows you to quickly select the non standard size that is often used dispensing with the size entry for e...

Страница 143: ...ge Tray Settings Screen will be displayed 3 Touch Custom Size The Custom Size Screen will be displayed 4 Enter the length X and width Y of the paper Check that X is highlighted then enter the size of...

Страница 144: ...ct value 5 Touch Store The Store Custom Size Screen will be displayed 6 Store the entered sizes The name displayed on the custom size key can also be changed Touch one of memory 1 to memory 5 to store...

Страница 145: ...ray from being fed automatically when Auto Paper Select or Auto Tray Switch functions When using OHP transparencies or any special paper be sure to specify this setting to avoid unexpected feeding 0 T...

Страница 146: ...r Screen will be displayed 2 Touch the bypass tray key to highlight it then touch Change Tray Set tings The Change Tray Settings Screen will be displayed 3 Specify the special paper type Touch the des...

Страница 147: ...e restored 5 Load paper of specified type into the bypass tray 2 Reminder When loading special paper into the bypass tray be sure to specify the corresponding paper type otherwise paper misfeed may be...

Страница 148: ...re spective of the paper size to be used 0 The full size 1 000 mode is initially specified as default If setting change has been made follow the procedure below to specify this mode 0 Pressing Reset o...

Страница 149: ...creen To copy in slightly reduced magnification mode Minimal A document Image can be printed slightly smaller 0 930 than the original document size 0 The Minimal ratio is set to 0 930 as factory defau...

Страница 150: ...yed 2 Touch Minimal to highlight it 3 Touch OK The Basic Screen will be restored with the specified magnification ratio displayed on the Zoom key 2 Note If no other setting is desired the copy job can...

Страница 151: ...ginal Select an appropriate ratio according to the original and copy paper sizes 0 Four types each for enlargement 1 214 1 294 1 545 2 000 and reduction 0 785 0 772 0 647 0 500 0 Use the and keys on t...

Страница 152: ...desired magnification ratio can be specified within the range from 0 250 to 4 000 in order to make a copy in the same height to width proportion as the original 0 Use the control panel keypad to enter...

Страница 153: ...Chapter 3 The Zoom Screen will be displayed 2 Touch XY Zoom The XY Zoom Screen will be displayed 3 Enter the desired magnification ratio 0 250 to 4 000 from the con trol panel keypad Entered ratio wi...

Страница 154: ...trol panel then reenter the correct value 4 Touch OK Touching Cancel will clear the magnification ratio entered on the XY Zoom Screen The Zoom Screen will be restored 5 Touch OK The Basic Screen will...

Страница 155: ...ratio within the range from 0 250 to 4 000 in 0 001 in crements 0 The Individual Zoom ratio cannot be registered 0 The and keys on the Zoom Screen cannot be used to make a fine adjustment on the spec...

Страница 156: ...oom Screen will be displayed 2 Touch XY Zoom The XY Zoom Screen will be displayed 3 Touch the X icon key in the Set Individual Zoom area to highlight it then enter the desired magnification ratio 0 25...

Страница 157: ...nification ratio 0 250 to 4 000 from the con trol panel keypad Entered ratio will be displayed on the right side of the Y icon key What should be done if the message Input Error is displayed and enter...

Страница 158: ...recall the stored magnification ratio 0 The factory default provides three types 4 000 2 000 0 500 of the proportional zoom ratio 0 The stored ratio can be altered For details see To store a zoom rat...

Страница 159: ...ratio Follow the procedure below to register proportional zoom ratios to be often used or to change the ratio provided as Minimal 0 Three proportional zoom ratios can be stored within the range from 0...

Страница 160: ...portional zoom ratio enter the value within the range from 0 250 to 4 000 When changing the Minimal ratio setting enter the value within the range from 0 900 to 0 999 Entered ratio will be displayed i...

Страница 161: ...h OK twice The Basic Screen will be restored To select a magnification ratio automatically Auto Zoom Use this function to automatically select an appropriate magnification ratio according to the origi...

Страница 162: ...ons Chapter 3 2 Touch Auto Zoom to highlight it The Paper Screen will be displayed 3 Touch the desired tray key to highlight it 4 Touch OK The Basic Screen will be restored The appropriate magnificati...

Страница 163: ...rations 3 bizhub 360 3 45 Basic Copy Operations Chapter 3 2 Note If no other setting is desired the copy job can be started using the set tings currently specified without touching OK to return to the...

Страница 164: ...oaded in the ADF For details see Specifying Orientation of Original Original Direction on page 4 12 0 With 2 2 selected the desired copy result may not be obtained from the following types of double s...

Страница 165: ...Basic Copy Operations 3 bizhub 360 3 47 Basic Copy Operations Chapter 3 1 Position the original in the ADF 2 Touch Simplex Duplex on the Basic Screen The Simplex Duplex Screen will be displayed...

Страница 166: ...rection to display the Original Direction Screen Select one of the original direction key according to the orientation of positioned original then touch OK 5 Specify the binding direction of original...

Страница 167: ...desired key for each of the original and copy then touch OK 6 Touch OK The Basic Screen will be restored 7 Select additional copy conditions as desired For details on specifying the binding margin fo...

Страница 168: ...perations 3 50 bizhub 360 Basic Copy Operations Chapter 3 2 Note If no other setting is desired the copy job can be started using the set tings currently specified without touching OK to return to the...

Страница 169: ...ate Scan mode will function automatically 0 Specify the Original Direction according to the orientation of the original positioned on the original glass For details see Specifying Position of Binding...

Страница 170: ...uplex Screen will be displayed 4 Touch 1 2 or 2 2 to highlight it 5 Specify the original set direction according to the orientation of posi tioned original Touch Original Direction to display the Orig...

Страница 171: ...ouch OK The Basic Screen will be restored 8 Select additional copy conditions as desired For details on specifying the binding margin for double sided cop ies see Creating Margin of Copy Image Page Ma...

Страница 172: ...ata in memory will be output to make double sided copies 2 Note If no other setting is desired the copy job can be started using the set tings currently specified without touching OK to return to the...

Страница 173: ...ginal loaded in the ADF For details see Specifying Orientation of Original Original Direction on page 4 12 0 The desired copy result may not be obtained from the following types of double sided origin...

Страница 174: ...x Duplex Screen will be displayed 3 Touch 2 1 to highlight it 4 Specify the original set direction according to the orientation of posi tioned original Touch Original Direction to display the Original...

Страница 175: ...irection to display the Binding Direction Screen Touch the desired key then touch OK 6 Touch OK The Basic Screen will be restored 7 Select additional copy conditions as desired For details on specifyi...

Страница 176: ...the ADF and original glass can also be combined into a single job To use Separate Scan mode 0 Note that the maximum number of the original available in the ADF does not change in this mode Do not load...

Страница 177: ...Basic Copy Operations Chapter 3 When using the ADF load the original arranged in page order with page one on the top 2 Touch Separate Scan on the Basic Screen 3 Select additional copy conditions as de...

Страница 178: ...al The original image will be scanned into memory When completed the message Scanning stopped Press Start to continue will be displayed in the message area 5 Replace the original then press Start Repe...

Страница 179: ...ol panel All the data in memory will be output Detail To delete the scanned image data press Stop For details see To Stop Resume Delete a Job on page 3 67 2 Note The memory indicator in the upper righ...

Страница 180: ...s The sub power switch is turned on See page 2 29 Power Save is pressed to release the Sleep mode See page 2 37 Weekly Timer mode is interrupted with a password entered See page 2 40 1 Check that the...

Страница 181: ...ee Positioning the Original on page 3 7 For details on setting the print quantity see Setting Print Quantity on page 3 12 The machine can be set to leave some settings made for the previous job in ord...

Страница 182: ...original and starts printing Job reservation is unavailable while scanning for the current job is still in process 0 The Copy Operating Screen may appear when the job reservation be comes available In...

Страница 183: ...starts In this case touch Program Next Job on the screen to proceed 2 Position the original for the next job 3 Select copy conditions and enter the print quantity for the next job 4 Press Start on the...

Страница 184: ...ity on page 3 12 The machine can be set to leave some settings made for the previous job in order to utilize them when scanning for the next job For details see page 15 74 The standby jobs can be chec...

Страница 185: ...ning and printing To stop resume the job in process 0 This procedure is effective only for the current job in process 0 The reserved job which already started scanning cannot stop its opera tion Touch...

Страница 186: ...To delete a suspended job 0 This procedure is effective only for suspended jobs 0 The scanned data of reserved job can be deleted by touching Job List to cancel printing For details see Section 8 Job...

Страница 187: ...Basic Copy Operations 3 bizhub 360 3 69 Basic Copy Operations Chapter 3 2 Touch and highlight the job to be deleted then touch Delete Selected job will be deleted...

Страница 188: ...ace User Letterhead Postcard Thin Paper Thick Paper Colored Paper Envelope Auto Zoom x 1 0 Preset Zoom Zoom Ratio Independent Zoom Basic Density Auto Background Removal Density Paper Auto Paper Select...

Страница 189: ...ed original single sided copies double sided copies 2in1 4in1 8in1 Mixed Original Original Direction Settings Margin Basic Density Auto Background Removal Density Paper Auto Paper Select 3 Paper Tray...

Страница 190: ...g No Rotation Original Size Setting Custom Size Originals Set Numbering Page Date Time Built in Stamp Watermark Basic Density Auto Background Removal Density Paper Auto Paper Select Paper Tray Large c...

Страница 191: ...nored Copy Conditions Incompatible with Basic Settings Finishing Folding Sort Group Offset Staple Punch Output Tray Fold Staple Half Fold Crisscross Shifted Basic Density Auto Background Removal Densi...

Страница 192: ......

Страница 193: ...4 Combine Originals Original Image Type Chapter 4 Combine Originals Original Image Type...

Страница 194: ...d copy a fixed number 2 4 or 8 of pages onto one sheet of copy paper so that the paper use can be saved Function overview The following functions are provided to Combine Pages The direction of the pag...

Страница 195: ...images onto one sheet The page arrangement Numbering Direction can be specified Horizontal order left binding Horizontal order right binding Vertical order left binding Vertical order right binding S...

Страница 196: ...d zoom ratio in order to accept the ratio entered manually For details see page 14 31 8 in 1 Select this setting to print eight original images onto one page The page arrangement Numbering Direction c...

Страница 197: ...tio manually 0 The tray selection will accord with the order specified in Tray Priority For details of Tray Priority setting see page 14 12 0 With Right selected for the original page margin the layou...

Страница 198: ...on the Basic Screen The Combine Originals Screen will be displayed 3 Select the desired Combine Pages mode When selecting 4 in 1 or 8 in 1 touch Horizontal or Vertical to specify the direction of pag...

Страница 199: ...elease Combine Pages touch the highlighted key again to deselect it or press Reset on the control panel 2 Note If no other setting is desired the copy job can be started using the set tings currently...

Страница 200: ...s to be mixed depends on the widest original width width of the ADF original guides For details see page 9 14 0 Adjust the paper guides to the original securely If incorrectly loaded the original may...

Страница 201: ...ion auto matically To copy to a single and desired paper size manually specify Auto Zoom Select For details see To select a magnification ratio auto matically Auto Zoom on page 3 43 1 Arrange the mixe...

Страница 202: ...d Original touch the highlighted key again to deselect it or press Reset on the control panel 2 Note If no other setting is desired the copy job can be started using the set tings currently specified...

Страница 203: ...iginal Image Type Chapter 4 0 The length of the first page of the original is detected and all pages of the original are scanned at that size 1 Position the original to be copied 2 Touch Combine Origi...

Страница 204: ...riginal Original Direction Specify the orientation of the original placed on the ADF or on original glass Without this setting the copy results may not be obtained as expected es pecially when making...

Страница 205: ...e original is positioned Select for the original positioned in the ADF with the top toward the left side of the machine Or select for the original positioned on the original glass with the top toward...

Страница 206: ...iginal Place the original in the ADF or on the original glass 2 Touch Combine Originals tab on the Basic Screen The Basic Screen with the original loaded in the ADF The Basic Screen with the original...

Страница 207: ...e original loaded in the ADF The Original Direction Screen with the original placed on the original glass 5 Touch OK then touch Basic tab The Basic Screen will be restored Detail The Original Directio...

Страница 208: ...ote Touch Cancel on the Original Direction Screen to cancel the setting change Press Reset on the control panel to restore the factory default setting 2 Note If no other setting is desired the copy jo...

Страница 209: ...ecify the binding position of double sided original The longer side will be selected for 8 1 2 11 or smaller original sizes while the shorter side will be selected for 8 1 2 14 or larger sizes auto ma...

Страница 210: ...plex setting 0 The Margin setting will not be cleared after a job completion until the re set function is activated The machine can be set to reset the Margin setting to the factory default each time...

Страница 211: ...uch OK then touch Basic tab The Basic Screen will be restored 2 Note Touch Cancel on the Page Margin Screen to cancel the setting change Press Reset on the control panel to restore the factory default...

Страница 212: ...he original composed of text only In this mode the edges of copied text will be sharpened to provide higher legibility Select for copying the original including both text and photo image This mode is...

Страница 213: ...Original Image Type Screen will be displayed 3 Select the original type according to the positioned original 4 Touch OK then touch Basic tab The Basic Screen will be restored 2 Note Press Reset on th...

Страница 214: ...Combine Originals Combine Pages 2in1 4 4 4 4 4 4in1 4 4 4 4 4 8in1 4 4 4 4 4 Original Mixed Original Original Direction Settings Margin Quality Text Text Photo Photo Dot Matrix Copy Conditions Incomp...

Страница 215: ...et Pagination Image Repeat Page Margin Edit Margin Erase Image Adjustment Booklet Stamp Set Range Auto Original Size Detect Repeat Erase Center Erase Non Image Area Erase Centering No Rotation Origina...

Страница 216: ......

Страница 217: ...5 Application Functions Chapter 5 Application Functions...

Страница 218: ...ncies from sticking together due to the heat inside the machine an interleaf can be inserted between the trans parencies The interleaf can be kept blank or copied from the same original as transparenc...

Страница 219: ...ied Auto Zoom and Sort are automatically se lected 0 Print quantity will be fixed to 1 and cannot be changed 0 If the machine is equipped with the Finisher FS 511 option printed trans parencies will b...

Страница 220: ...ass tray key on the Paper Screen then touch Change Tray Settings Touch OHP to highlight it then touch OK The Paper Screen will be restored 4 Load copy paper in any tray other than bypass tray to match...

Страница 221: ...Screen will be displayed 7 Specify the tray loaded with paper for interleaf Touch to highlight the tray key loaded with paper for interleaf in step 3 8 Select Copy or Blank To copy the original image...

Страница 222: ...s desired 11 Press Start on the control panel 2 Note To release the selected application function touch OFF To release all the application functions touch Reset To resume the initial setting for all s...

Страница 223: ...iginal will be printed onto the front cover When making double sided cop ies the second page of the original will be printed onto the back side of front cover Front Blank A blank sheet for front cover...

Страница 224: ...etails see page 15 118 0 The front and back covers can be fed from different tray source for each 0 When using thick paper for covers load it into the bypass tray then make paper setting for bypass tr...

Страница 225: ...under Front Cover and Back Cover to specify the de sired cover type To attach the front cover touch either Front Copy or Front Blank to highlight it If no front cover is needed deselect both keys To...

Страница 226: ...the back cover tray source touch Back Cover Paper The Cover Paper Screen for each will be displayed 8 Select the tray loaded with cover paper in step 3 9 Touch OK to complete the setting on each scre...

Страница 227: ...ch OFF To release all the application functions touch Reset To resume the initial setting for all settings including application function press Reset on the control panel 2 Note If no other setting is...

Страница 228: ...original are copied onto both sides of the insertion which will be the 3rd sheet of copied set With page 6 specified the 5th page of the single sided original is sim plex copied onto copy paper while...

Страница 229: ...inal is simplex copied With page 6 specified a blank insertion will be added as the 4th sheet of copied set after the 5th and 6th pages of single sided original are du plex copied 2 2 A blank insertio...

Страница 230: ...tray on the Insert Paper Screen The initial setting can be changed in the administrator setting For details see page 15 118 The tray source cannot be specified individually for each insertion loca tio...

Страница 231: ...b 360 5 15 Application Functions Chapter 5 5 Touch Application tab on the Basic Screen The Application Screen will be displayed 6 Touch Sheet Cover Chapter Insert then touch Insert Sheet The Insert Sh...

Страница 232: ...aller number Not necessary The page numbers entered at random will be sorted automatically What if the same page number is entered twice The copy result will not change The page number entered twice o...

Страница 233: ...Application Functions 5 bizhub 360 5 17 Application Functions Chapter 5 Touch Insert Paper select the insertion tray source to highlight it then touch OK...

Страница 234: ...Confirm settings on the Insert Sheet Check Screen and make setting change if desired To change the insertion tray source return to step 8 To change the insertion type return to step 9 To change inser...

Страница 235: ...ch OFF To release all the application functions touch Reset To resume the initial setting for all settings including application function press Reset on the control panel 2 Note If no other setting is...

Страница 236: ...rtion locations Simplex Duplex Description 1 1 The first scanned image will be inserted after page 2 of the original and the second scanned image will be inserted after page 5 1 2 The first scanned im...

Страница 237: ...serted 0 Up to 30 locations can be specified for the original from 1 to 999 pages 1 Load the original in the ADF Be sure to arrange the original in page order and then place it with the first page fac...

Страница 238: ...by entering page number Touch P to highlight it then enter the desired page number from the control panel keypad Touch up down arrow keys to scroll the screen to use all 30 keys Touch Select The Inse...

Страница 239: ...control panel 7 Check the locations on the Insert Image Check Screen and make set ting change if desired To change the image insertion locations touch Edit and return to step 6 8 Touch OK to return t...

Страница 240: ...s Start on the control panel The machine will start printing when ready for output 2 Note To release the selected application function touch OFF To release all the application functions touch Reset To...

Страница 241: ...d title page in order to locate it on the front side of double sided copy e g Specifying pages 2 and 5 as title pages Simplex Duplex Description 1 2 Chapter paper None A blank page is automatically ad...

Страница 242: ...e changed individually for each title page 1 Position the original When using ADF be sure to arrange the original in page order and then place it with the first page faceup otherwise the copy result m...

Страница 243: ...izhub 360 5 27 Application Functions Chapter 5 4 Touch Application tab on the Basic Screen The Application Screen will be displayed 5 Touch Sheet Cover Chapter Insert then touch Chapters The Chapters...

Страница 244: ...ct to display the Chap ters Check Screen Proceed to step 8 What if an entered page number is larger than the total original page count The entered page number will be ignored What if the same page num...

Страница 245: ...for printing title pages to highlight it Touch OK to return to the Chapters Screen then touch Select to display the Chapters Check Screen 8 Check the locations on the Chapters Check Screen and make s...

Страница 246: ...control panel The machine will start scanning the original then printing when ready for output 2 Note To release the selected application function touch OFF To release all the application functions t...

Страница 247: ...then all copies can be printed together To copy using Program Job 0 The Separate Scan mode will function automatically 0 Once specified paper size setting cannot be changed for another JOB 0 Finishin...

Страница 248: ...pplication tab on the Basic Screen The Application Screen will be displayed 3 Touch Sheet Cover Chapter Insert then touch Program Job 4 Select the desired copy settings and then press Start on the con...

Страница 249: ...ation that scanning of the original is finished To delete the scanning data touch Retry 6 Position the next document batch and then touch Change Setting 7 Select the desired copy settings and then pre...

Страница 250: ...last part of the data and print or delete all of the docu ment data To cancel changes to the settings touch Cancel Change Scanning begins After scanning is finished select Fix and then touch OK Is th...

Страница 251: ...e scanned original Is there more information about the settings Refer to the appropriate section 11 Using the keypad type in the desired number of copies 12 Touch Execute or press Start on the control...

Страница 252: ...thout image division performed and all the original pages will be output in correct order The page spread original can also be copied without image division Function overview Mode key Description Book...

Страница 253: ...paper size Auto Paper Select will not function 0 Specify the binding position of the original This setting will be effective with Separation Front Cover or Front and Back Cover selected but null for t...

Страница 254: ...iginal glass Keep the ADF open When using Book Spread or Separation mode place the first page of spread original When using Front Cover or Front and Back Cover mode place the front cover facedown When...

Страница 255: ...sic Screen to display the Paper Screen Touch the desired tray key to highlight it Without this tray selection the machine will automatically use copy paper loaded in tray 1 to print 5 Touch Applicatio...

Страница 256: ...or Front and Back Cover to highlight it When selecting Separation Front Cover or Front and Back Cover mode also select the binding position of the original by touching Left Bind or Right Bind in the...

Страница 257: ...ions as desired When Separation is selected and separated original size is different from selected paper size specify the desired magnification To use Centering function in combination touch Image Adj...

Страница 258: ...o perform incorrectly if the lighting in the work place is directly over the original glass In this case consult your service repre sentative about an appropriate place for installation 2 Note To rele...

Страница 259: ...ts from de tected original image size and paper size The original image size can be both detected automatically Auto Detect or specified manually Set Range Also select whether to print the defective i...

Страница 260: ...60 Application Functions Chapter 5 Function overview Function Mode Description Auto Repeat Auto Detect With Margin Auto Detect Without Margin Set Range With Margin Set Range Without Margin 2 4 8 Repea...

Страница 261: ...ion Close the ADF 0 Use Set Range mode to repeat a part of the original not the entire image by specifying the scanning area Select the standard size or enter the dimensions of custom size Available d...

Страница 262: ...e Paper Screen Touch Paper on the Basic Screen to display the Paper Screen Touch the desired tray key to highlight it Without this tray selection the machine will automatically use copy paper loaded i...

Страница 263: ...bizhub 360 5 47 Application Functions Chapter 5 6 Touch Book Copy Repeat then touch Image Repeat The Image Repeat Screen will be displayed 7 Specify the desired Layout mode Touch With Margin or Withou...

Страница 264: ...dard Size Screen then select the desired scanning area Use up down arrow key to scroll to the desired size if necessary To enter the dimensions of scanning area touch Custom Size on the Standard Size...

Страница 265: ...tion The number of repeats will be determined automatically from spec ified scanning area selected paper size and magnification ratio 11 Press Start on the control panel The machine will start printin...

Страница 266: ...2 mm each from left and right edges of selected paper size When Without Margin is selected the original image will be repeated to the margin area in which an image loss is likely 0 With 2 Repeat sele...

Страница 267: ...bizhub 360 5 51 Application Functions Chapter 5 5 Touch Application tab on the Basic Screen The Application Screen will be displayed 6 Touch Book Copy Repeat then touch Image Repeat The Image Repeat S...

Страница 268: ...o display the Standard Size Screen then select the desired scanning area Use up down arrow key to scroll to the desired size if necessary To enter the dimensions of scanning area touch Custom Size on...

Страница 269: ...Image Repeat Screen The 2 4 8 Repeat Screen will be displayed 9 Specify the number of repeats Touch 2 Repeat 4 Repeat or 8 Repeat to highlight it Select 2 Repeat to repeat the original image twice on...

Страница 270: ...copy of the original image will be re peated twice from the edge of copy paper When the Repeat Interval Setting is specified the two copy images are positioned equally apart from the center of copy pa...

Страница 271: ...elease all the application functions touch Reset To resume the initial setting for all settings including application function press Reset on the control panel 2 Note If no other setting is desired th...

Страница 272: ...tion is available for the landscape type original only Portrait type original cannot be used The original size will be detected automatically when loaded in the ADF 0 Original Direction and Margin set...

Страница 273: ...Specify the paper tray on the Paper Screen Touch Paper on the Basic Screen to display the Paper Screen Touch the desired tray key to select the tray loaded with A4v B5v and 8 1 2 11 v paper 5 Touch Ap...

Страница 274: ...ition of the spread original For the spread original to read from the left page to the right page touch Left Bind to highlight it On the contrary if the spread original reads from the right page to th...

Страница 275: ...To release the selected application function touch OFF To release all the application functions touch Reset To resume the initial setting for all settings including application function press Reset on...

Страница 276: ...py paper To use this function properly the binding position of the finished set should be specified To copy using Booklet 0 Load the original in the ADF If the number of original sheets exceeds 80 use...

Страница 277: ...also stapled in the center For details see Folding Copies at the Center Binding Copies at the Center Half Fold Fold Staple on page 6 19 1 Load the original in the ADF 2 Enter the desired print quanti...

Страница 278: ...necessary Use the Page Interval function to make the specified amount of blank space in the center between the two images on a page Use or control panel keypad to enter the desired amount then touch O...

Страница 279: ...his case the recommended magnification ratio of 0 647 will be changed to 1 000 automatically Simplex Duplex setting is automatically specified as 1 2 If the double sided original is loaded in the ADF...

Страница 280: ...Reverse Use this function to reverse the image from black on white to white on black and vice versa Function overview To copy using Neg Pos Reverse 1 Position the original 2 Enter the desired print q...

Страница 281: ...t scanning the original then printing when ready for output 2 Note To release the selected application function touch OFF To release all the application functions touch Reset To resume the initial set...

Страница 282: ...ding position of double sided copies the image orientation of the back side of copies can be changed Also use this function to adjust the position of copy image on both front and back sides when makin...

Страница 283: ...0 Available range for the margin is 1 16 to 3 4 in in 1 16 in increments 0 With Auto selected the machine automatically selects the binding posi tion according to the orientation of loaded original W...

Страница 284: ...n Touch the desired binding position key to highlight it 6 Specify the binding margin Use and to enter the desired value in 1 16 in increments When None is highlighted the margin is automatically set...

Страница 285: ...Cancel on the Page Margin Screen to cancel the setting change 8 Select additional copy conditions as desired 9 Press Start on the control panel The machine will start scanning the original then printi...

Страница 286: ...To copy using Edit Margin 0 The position of scanned image can be shifted both in lengthwise direc tion Top Bottom Shift and in widthwise direction Left Right Shift 0 Available range for the shift amou...

Страница 287: ...Application Functions 5 bizhub 360 5 71 Application Functions Chapter 5 4 Touch Page Margin then touch Edit Margin The Edit Margin Screen will be displayed...

Страница 288: ...o clear the setting touch No Shift Press C Clear on the control panel to clear the setting in both directions Proceed to the next step to adjust the position of the back side im age If this adjustment...

Страница 289: ...Screen to cancel the setting change 8 Select additional copy conditions as desired 9 Press Start on the control panel The machine will start scanning the original then printing when ready for output...

Страница 290: ...this function to eliminate them from the copies and lower the toner con sumption at the same time Function overview The following three modes are provided for the Erase function These are compatible...

Страница 291: ...marks along bor ders To copy using Erase 0 Available range for the erasure amount is 1 16 to 12 in in 1 16 in incre ments 0 The erasure amount can be specified both collectively for all four sides an...

Страница 292: ...erasure amount collectively for all four sides touch Frame to highlight it To specify the erasure amount individually for each side touch the desired side key to highlight it Use and to enter a fract...

Страница 293: ...available to change the side to be erased even if the erasure amount is already specified No 6 Touch OK to return to the Application Screen Touch Cancel on the Erase Screen to cancel the setting chang...

Страница 294: ...this function also for the original already having black marks along the center fold To copy using Center Erase 0 Available range for the erasure amount is 1 16 to 4 in in 1 16 in incre ments 0 Avail...

Страница 295: ...In order to specify a fraction touch the bidirectional arrow key to move the cursor then use and to enter the desired val ue in 1 16 in increments Do you want to change the currently entered value us...

Страница 296: ...plication function press Reset on the control panel 2 Note If no other setting is desired the copy job can be started using the set tings currently specified without touching OK to return to the Appli...

Страница 297: ...Screen will be displayed 4 Touch Erase on the Application Screen The Erase Screen will be displayed 5 Touch Non Image Area Erase on the Erase Screen to highlight it 6 Touch OK to return to the Applic...

Страница 298: ...panel 2 Note If no other setting is desired the copy job can be started using the set tings currently specified without touching OK to return to the Application Screen or Basic Screen 2 Reminder Non...

Страница 299: ...e copy as if using size 8 1 2 11 copy paper loaded in crosswise v orientation by rotating the original image 90 Also the large original such as 11 17 or 8 1 2 14 to be positioned only landscape w can...

Страница 300: ...the ADF open Non Image Area Erase functions automatically 0 With Centering selected the machine will operate Auto Detect automat ically The Standard Size setting is incompatible 0 Auto Zoom is incomp...

Страница 301: ...per to display the Paper Screen then touch the desired tray key to highlight it 8 Press Start on the control panel The machine will start scanning the original then printing when ready for output 2 No...

Страница 302: ...riate place for installation 5 14 2 Disabling Rotation Function No Rotate Follow the procedure below to turn off on the Rotation function To specify No Rotate 0 Available paper size for Rotation 8 1 2...

Страница 303: ...he Application Screen Touch Cancel on the Image Adjustment Screen to cancel the set ting change 2 Note To release the selected application function touch OFF To release all the application functions t...

Страница 304: ...time Page Specify a format and print position to print page number from the speci fied number Set Numbering Print four digit distribution number to fill the background of each copied set Built in Stam...

Страница 305: ...bizhub 360 5 89 Application Functions Chapter 5 Function overview The following five modes are provided for the Stamp function These are compatible with each other Mode Description Date Time Page Set...

Страница 306: ...5 Application Functions 5 90 bizhub 360 Application Functions Chapter 5 Built in Stamp Watermark Image Overlay Store Overlay Mode Description ABCD ABCD ABCD ABCD ABCD ABCD ABCD ABCD...

Страница 307: ...e selected from nine areas If required make fine adjustment of the selected position both in lengthwise and widthwise directions by entering a value from 1 16 to 1 15 16 in in 1 16 in increments 0 Sel...

Страница 308: ...one of the five keys under Date Type to highlight it Select either of the two time types under Time Type If the time in dication is not desired touch None to highlight it Touch either of the two keys...

Страница 309: ...5 93 Application Functions Chapter 5 6 Touch Print Position on the Date Time Screen to specify the desired print position Touch one of the nine Print Position keys to highlight it If fine adjustment...

Страница 310: ...hen use or con trol panel keypad to enter whole number part of the desired value Similarly touch Top or Bottom under Top Bottom Adjustment to highlight it then enter the desired value To deactivate th...

Страница 311: ...rrently specified without touching OK to return to the Application Screen or Basic Screen 5 15 2 Printing Page Number Page To copy using Page 0 Specify the start number Use a minus value if required F...

Страница 312: ...tion Functions Chapter 5 2 Enter the desired print quantity from the control panel keypad 3 Touch Application tab on the Basic Screen The Application Screen will be displayed 4 Touch Stamp Overlay the...

Страница 313: ...l to switch the value from plus to minus and vice versa Touch one of the five keys under Page No Type to highlight it To make settings for printing page number onto covers proceed to the next step To...

Страница 314: ...ng Screen then specify the page number settings for Cover Mode Insert Sheet function For Cover Mode select one from the three options to highlight it Touch OK to complete the setting 7 Touch Print Pos...

Страница 315: ...ate these adjustment touch No Adj for each Do you want to change the currently entered value using control panel keypad Press C Clear on the control panel then enter the correct value What if the valu...

Страница 316: ...o return to the Application Screen or Basic Screen 5 15 3 Printing Distribution Number Set Numbering To copy using Set Numbering 0 Specify the start number Available range for this setting is 0 9999 T...

Страница 317: ...o print Enter the desired start number from the control panel keypad to display it under Start Number Touch one of the four keys under Text Density to highlight it Touch either of the two keys under P...

Страница 318: ...ial setting for all settings including application function press Reset on the control panel 2 Note If no other setting is desired the copy job can be started using the set tings currently specified w...

Страница 319: ...izhub 360 5 103 Application Functions Chapter 5 3 Touch Application tab on the Basic Screen The Application Screen will be displayed 4 Touch Stamp Overlay then touch Built in Stamp The Built in Stamp...

Страница 320: ...o highlight it Touch Change Size to select Large Size or Small Size To change or make fine adjustment on the print position currently specified as indicated on the Print Position key proceed to the ne...

Страница 321: ...value To deactivate these adjustment touch No Adj for each Do you want to change the currently entered value using control panel keypad Press C Clear on the control panel then enter the correct value...

Страница 322: ...nel 2 Note If no other setting is desired the copy job can be started using the set tings currently specified without touching OK to return to the Application Screen or Basic Screen 5 15 5 Printing Wa...

Страница 323: ...en touch Watermark The Watermark Screen will be displayed 5 Select the desired watermark type Touch one of the eight keys to highlight it 6 Touch OK to return to the Application Screen Touch Cancel on...

Страница 324: ...unction press Reset on the control panel 2 Note If no other setting is desired the copy job can be started using the set tings currently specified without touching OK to return to the Application Scre...

Страница 325: ...atically released and 1 000 100 is selected as a magnification ratio To specify the desired copy conditions for overlaying original touch OK to continue 4 Press Start on the control panel The original...

Страница 326: ...ion function press Reset on the control panel 2 Note If no other setting is desired the copy job can be started using the set tings currently specified without touching OK to return to the Application...

Страница 327: ...360 5 111 Application Functions Chapter 5 2 Touch Application tab on the Basic Screen The Application Screen will be displayed 3 Touch Stamp Overlay then touch Store Overlay The Overlaying Image Sele...

Страница 328: ...omatically To specify the de sired size touch Standard Size to select it The registration area will also be designated automatically If desired touch Specify One Touch to select the desired registrati...

Страница 329: ...nter another name is dis played the entered name cannot be used Touch OK then repeat the procedure to enter a new name Administrator can specify whether to allow or restrict the Changing Image Overlay...

Страница 330: ...ata key to highlight it 12 Touch OK to restore the Application Screen Select additional copy conditions as desired 13 Press Start The original to be overlaid will be scanned into memory 14 Touch Compl...

Страница 331: ...functions touch Reset To resume the initial setting for all settings including application function press Reset on the control panel 2 Note If no other setting is desired the copy job can be started u...

Страница 332: ...Label Trace User Letterhead Postcard Thin Paper Thick Paper Colored Paper Envelope Auto Zoom x 1 0 Preset Zoom Zoom Ratio Independent Zoom Application OHP Interleave Cover Mode Insert Sheet Insert Ima...

Страница 333: ...e sided originals double sided original single sided copies double sided copies 2in1 4in1 8in1 Mixed Original Original Direction Settings Margin Application OHP Interleave Cover Mode Insert Sheet Inse...

Страница 334: ...Erase Centering No Rotation Original Size Setting Custom Size Originals Set Numbering Page Date Time Built in Stamp Watermark Application OHP Interleave Cover Mode Insert Sheet Insert Image Chapters N...

Страница 335: ...in Combine Originals or Booklet Copy Conditions Incompatible with Application Functions Finishing Folding Sort Group Offset Staple Punch Output Tray Fold Staple Half Fold Crisscross Shifted Applicatio...

Страница 336: ......

Страница 337: ...6 Finishing Folding Chapter 6 Finishing Folding...

Страница 338: ...he copies of each page in a multi page original Sort and Offset Select this setting to rotate every other set by 90 upon exit provided the same paper size is loaded in two trays one tray with paper lo...

Страница 339: ...Finishing Folding 6 bizhub 360 6 3 Finishing Folding Chapter 6 Function overview Mode Sample Sort Group Sort and Offset Group and Offset...

Страница 340: ...orientation v in one paper tray and with the lengthwise orientation w in other tray Auto Paper Select setting is selected The Auto Paper Select setting is not selected when the Mixed Original setting...

Страница 341: ...he Basic Screen will be restored 7 Specify any necessary copy settings Auto Paper Select may be released automatically depending on the setting you made When using Crisscross sorting or Crisscross gro...

Страница 342: ...each page in a multi page original Sort Offset Select this setting to output multiple copies of the original set each sort ed set will be offset by 1 18 in upon exit Secondary tray tray 1 of Finisher...

Страница 343: ...Finishing Folding 6 bizhub 360 6 7 Finishing Folding Chapter 6 Function overview Mode Sample Sort Group Sort Offset Group Offset 4 1 2 3 4 4 4 4 3 3 3 3 2 2 2 2 1 1 1 1 1 18 in 1 18 in...

Страница 344: ...be sure that the Secondary sub tray is selected as an output tray 0 Each output tray of Finisher FS 510 and FS 511 has a limit in capacity Be careful not to exceed the limit For details see Paper Tra...

Страница 345: ...peration of the trays become greater DO NOT allow any object to interfere with the operation of the tray around the finisher as any interference may cause damage to the finisher Finisher FS 511 tray 2...

Страница 346: ...Note Finisher FS 510 is initially equipped with two exit trays and one optional exit tray OT 601 can be installed Contact your service representative if desired Already installed in the above illustr...

Страница 347: ...Finishing Folding 6 bizhub 360 6 11 Finishing Folding Chapter 6 Key Sample...

Страница 348: ...ger side for 8 1 2 11 copy paper or to the shorter side for copy paper larger than 8 1 2 11 0 Available paper weight is 16 to 24 lb For details of other specifications see page 9 3 0 Using excessively...

Страница 349: ...ll be displayed 5 Select the staple position To staple at a corner touch Corner to highlight it To staple along the edge touch 2 Position to highlight it 6 Select staple position Touch Position to dis...

Страница 350: ...ration of the tray around the finisher as any interference may cause damage to the finisher Finisher FS 511 tray 2 main tray gradually goes down while printed ma terials output DO NOT allow any object...

Страница 351: ...Unit PU 501 option is installed 2 Note Finisher FS 510 is initially equipped with two exit trays and one optional exit tray OT 601 can be installed Contact your service representative if desired Alrea...

Страница 352: ...the paper otherwise the copies may not be punched in position 0 Available paper weight for Punch Unit PU 501 mounted on Finisher FS 510 is 15 to 24 lb while paper weight for Finisher FS 511 is 16 to...

Страница 353: ...ge 4 17 When completed touch Basic tab to return to the Basic Screen 4 Touch Finishing on the Basic Screen The Finishing Screen will be displayed 5 Touch 2 Hole or 3 Hole to highlight it Group and Off...

Страница 354: ...operation of the trays become greater DO NOT allow any object to interfere with the operation of the tray around the finisher as any interference may cause damage to the finisher Finisher FS 511 tray...

Страница 355: ...ion which will be automatical ly selected in combination In the Half Fold mode each copied sheet is creased and output to the Saddle stitcher tray In the Fold Staple mode each copied set is creased an...

Страница 356: ...ter saddle stitch pitch 120 mm 4 mm staple width 11 mm Max number of sheets in Fold Staple mode 15 sheets 20 lb paper 0 Paper size 11 17 w 8 1 2 14 w 8 1 2 11 w Paper weight 16 to 24 lb For details of...

Страница 357: ...depending on the tray selected With Saddle stitcher SD 502 or Mail bin kit MT 501 the operation of the trays become greater DO NOT allow any object to interfere with the operation of the tray around t...

Страница 358: ...ed in crosswise orientation v and the other tray with paper loaded in length wise orientation w e g 8 1 2 11 or 5 1 2 8 1 2 size paper Group Offset Select this setting to rotate every other grouped se...

Страница 359: ...Paper Select setting is selected The Auto Zoom setting is used when the Mixed Original setting is se lected 0 The tray 1 upper tray capacity is max 100 sheets and tray 2 lower tray capacity is max 250...

Страница 360: ...set Group in alternating crisscross pattern touch Group and Offset to highlight them 6 Select the desired output tray Touch Tray 1 or Tray 2 to highlight it 7 Touch OK The Basic Screen will be restor...

Страница 361: ...2 Note To cancel changes to the settings touch Cancel on the Finishing Screen To cancel all settings press Reset If no other setting is desired the copy job can be started using the set tings current...

Страница 362: ...6 6 6 6 6 6 6 6 6 Staple 6 6 6 6 6 6 6 6 6 6 6 6 Punch 6 6 6 6 6 6 6 6 6 6 6 6 Output Tray 6 6 6 6 6 6 6 6 6 6 6 6 Folding Fold Staple 6 6 6 6 6 6 6 6 6 6 6 6 Half Fold 6 6 6 6 6 6 6 6 6 6 6 6 Copy C...

Страница 363: ...bination Copy Conditions Incompatible with FinishingFolding Application Book Copy Booklet Pagination Image Repeat Page Margin Edit Margin Erase Image Adjustment Booklet Stamp Set Range Auto Original S...

Страница 364: ......

Страница 365: ...7 Advanced Information Chapter 7 Advanced Information...

Страница 366: ...a convenient and cost effective way of viewing the results of the copying selections To make a proof copy 0 Proof copy is to be made when multiple sets of copies are required from two or more sheets o...

Страница 367: ...s satisfactory result proceed to step 9 To change any settings proceed to the next step 5 Touch Change Setting on the Proof Copy Screen The Change Setting Screen will be displayed 6 Make the setting c...

Страница 368: ...ng will be restored 7 Repeat the steps 3 to 6 until the desired copy result is obtained If the desired setting cannot be changed delete the current job and restart the job setting from the first step...

Страница 369: ...zhub 360 7 5 Advanced Information Chapter 7 Detail To stop scanning printing for the proof copy or to stop printing after proof copying press Stop on the control panel For details see To Stop Resume D...

Страница 370: ...isplay the Mode Check Screen to check and change the feature selections you made To use Mode Check function 1 Position the original and enter the desired print quantity 2 Select the desired copy condi...

Страница 371: ...number for the current page is indicated in the center of the upper part of the screen Touch Back or Fwd to scroll to the desired page If setting change is desired proceed to the next step If setting...

Страница 372: ...ed Follow the procedure specified for each function To make more than one setting change repeat the steps from 3 to 6 7 Press Start on the control panel The machine will start printing Detail To stop...

Страница 373: ...Increase Priority for Printing an Active Job in Current Jobs on page 8 17 0 The Interrupt mode cannot be entered while the machine is scanning the original Press Interrupt after scanning is completed...

Страница 374: ...Start on the control panel The interrupt copying will start 6 When the interrupt printing job is completed press Interrupt again The Interrupt LED goes off and the settings of the initial job will be...

Страница 375: ...name on page 7 17 0 The contents of stored program cannot be altered for reentry However setting change is available for the program once recalled to make a copy and those job settings can be stored a...

Страница 376: ...n The Program Name Screen will be displayed 4 Enter the desired program name Up to 16 characters can be entered Use right left arrow keys to move the cursor and use Shift to enter upper case letters o...

Страница 377: ...copy program Follow the procedure below to recall the stored copy program The job set tings can be checked before recalling them 0 The job settings cannot be changed from the Check Job Screen If any...

Страница 378: ...he program without checking job settings proceed to step 8 4 Touch Check Job The Check Job Screen will be displayed 5 Check the settings The Check Job Screen comprises four different pages The screen...

Страница 379: ...Advanced Information 7 bizhub 360 7 15 Advanced Information Chapter 7 The functions which have been changed from the factory default appear highlighted on the screen...

Страница 380: ...t it 8 Touch OK on the Recall Copy Program Screen The job settings of the selected program will be recalled on the re stored Basic Screen 9 Press Start on the control panel The machine will start copy...

Страница 381: ...ock the programs so that the given name cannot be edited In this case the Edit Name key will disap pear from the Recall Copy Program Screen to disable the procedure For details see page 15 48 1 Press...

Страница 382: ...ols 4 Touch OK The Recall Copy Program Screen will be restored with the edited pro gram name displayed To delete copy program Follow the procedure below to delete the stored copy program 0 The adminis...

Страница 383: ...emory on the control panel The Recall Copy Program Screen will be displayed 2 Touch to highlight the copy program key to be deleted 3 Touch Del The confirmation screen will be displayed 4 Touch Yes Th...

Страница 384: ...The Help Screens can be rec ognized by the question mark at the upper left corner of the screen The following control panel keys will be disabled while the Help Screen is displayed Start Stop C Clear...

Страница 385: ...ss of the service representative or administrator Maintenance Provides information on adding toner adding staples and emptying punch waste basket 7 5 1 Displaying Help Screen Follow the procedure belo...

Страница 386: ...ontrol panel keypad can also be used to enter the desired menu number for getting the same result 3 Touch the desired key to display specific information Touch 5 Functionality Map to display the Funct...

Страница 387: ...provided on that screen Touch Back or Fwd to scroll if provided To view a detailed description touch Detail To jump to the screen in a higher level of the structure touch the return arrow key 5 Touch...

Страница 388: ...Panel Adjustment Auto Reset Notification Enlarge Display Confirmation Screen 7 6 1 Specifying Key Response Time in Enlarge Display Mode Key Repeat Start Interval Time This adjustment is effective onl...

Страница 389: ...m 0 1 to 3 0 seconds in 0 1 second increments 0 Specified start interval time will be in effect only when the Enlarge Display mode is activated 1 Press Accessibility on the control panel The Accessibi...

Страница 390: ...displayed in each area 4 Touch OK The Accessibility Setting Screen will be restored 5 Touch Close or press Accessibility on the control panel The Basic Screen will be restored 2 Note Touch Cancel on...

Страница 391: ...the Enlarge Display mode in the case of Auto Re set Also specify the period of time to display the confirmation popup menu if it is desired To specify Enlarge Display Timer Setting 0 The Enlarge Displ...

Страница 392: ...Timer Setting or press 2 on the control pan el keypad The Enlarge Display Timer Setting Screen will be displayed 3 Touch OFF or the desired timer key to highlight it Select OFF for deactivate the Enla...

Страница 393: ...ls of the Enlarge Display mode refer to the User s Guide En large Display 7 6 3 Specifying Error Message Display Time Message Display Time Specify the period of time for an error message to be display...

Страница 394: ...ss 3 on the control panel key pad The Message Display Time Screen will be displayed 3 Select the desired display time Touch 3 sec or 5 sec to highlight it 4 Touch OK The Accessibility Setting Screen w...

Страница 395: ...r the control touch panel keys Warning Sound Specify whether or not to enable the warning sound when the machine stops due to paper jam or empty tray etc and also specify the sound du ration from 2 se...

Страница 396: ...7 Advanced Information 7 32 bizhub 360 Advanced Information Chapter 7 2 Touch 4 Sound Setting or press 4 on the control panel keypad The Sound Setting Screen will be displayed...

Страница 397: ...nable key tones Touch 1 Key Accept Sound Key Refuse Sound or press 1 on the control panel keypad The Key Accept Sound Key Refuse Sound Screen will be dis played Touch ON to activate or OFF to deactiva...

Страница 398: ...Chapter 7 Touch 2 Warning Sound or press 2 on the control panel keypad The Warning Sound Screen Will be displayed Touch ON to activate or OFF to deactivate When selecting ON select one from 3 sec 5 s...

Страница 399: ...h Cancel on the Key Accept Sound Screen to cancel the setting change 7 6 5 Adjusting the Position of Touch Sensor Touch Panel Ad justment If touch panel keys do not respond correctly the touch sensor...

Страница 400: ...nel Adj key does not function use the control panel keypad to select it The Touch Panel Adjustment Screen will be displayed 3 Touch the four check keys to check the buzzer tone When a check point is t...

Страница 401: ...Press C Clear on the control panel then touch the four check keys again Do you want to cancel the adjustment Press Stop on the control panel The Basic Screen will be re stored 4 Press Start on the co...

Страница 402: ...ng confirmation to reset the settings in Enlarge Display mode To specify Auto Reset Notification 0 The Enlarge Display Auto Reset Notification Screen will not be displayed as factory default 0 Even if...

Страница 403: ...ation or press 6 on the control panel key pad The Auto Reset Notification Screen will be displayed 3 Touch the key for the desired display time To not display the message requesting confirmation to re...

Страница 404: ...ation Chapter 7 4 Touch OK to return to Accessibility Screen 5 Touch Close or press Accessibility on the control panel The Basic Screen will be restored 2 Note For details on the Enlarge Display mode...

Страница 405: ...Screen When the Enlarge Display key is pressed to change the display of the screen a message can be displayed requesting confirmation to reset the settings to their defaults To specify Enlarge Display...

Страница 406: ...the con trol panel keypad The Enlarge Display Confirmation Screen will be displayed 3 Select whether or not the message is displayed To cancel changes to the settings touch Cancel 4 Touch OK to retur...

Страница 407: ...d fax functions With the Enlarge Display mode text and illustrations are displayed at a larger size so that they can be seen more easily For details on the Enlarge Display mode refer to the User s Gui...

Страница 408: ......

Страница 409: ...8 Job Management Job List Chapter 8 Job Management Job List...

Страница 410: ...med To display the Job List Screen touch Job List at any time except when the machine is under the following status Displaying the Help screen with the Help key pressed Setting the Accessibility mode...

Страница 411: ...Jobs list The Job History list includes the Deleted Jobs list the Finished Jobs list and the Active Jobs list that comprises the first two lists Details will be explained in this section Job List Scr...

Страница 412: ...t Jobs list to print Description of the Job List Screen displayed after touching the Print tab Job List screen displayed after touching the Print tab Current Jobs Ac tive Jobs 5 6 9 14 1 2 4 10 11 12...

Страница 413: ...us of active jobs and held jobs displayed in the Current Jobs list 13 Displays jobs not displayed in a screen when there are more jobs than the five that can be displayed at one time 14 Displayed Item...

Страница 414: ...above table for detailed description of No User Name of Pgs and of Sets Result Displays the result of the operation Job Complete Error Cleared Deleted by User Mode cancelled from conflict 15 Deleted...

Страница 415: ...Current Jobs The list of received print jobs for Copy mode and for computer printing is dis played The Current Jobs list displays the Active Jobs list and the Held Jobs list sep arately The Held Jobs...

Страница 416: ...tive Jobs Lists jobs being active in the Current Jobs list Held Jobs Lists jobs being held in the Current Jobs list The specified Current Jobs list will be displayed Detail The Current Jobs list displ...

Страница 417: ...istory list displays the three types of job lists respectively Deleted Finished and Active 1 Touch Job List on the touch screen When the Current Jobs list using the Print functions is not dis played t...

Страница 418: ...d from the Job History list be fore printing was completed Finished Jobs Lists jobs being completed correctly from the Jobs History list Active Jobs Lists all jobs in the Job History list The list of...

Страница 419: ...Name User Name Time of Storage of pgs of Sets Output Tray Job History of the Print tab Result Job complete Error cleared Deleted by User Deleted Due To Er ror Error Detail File Name User Name Time of...

Страница 420: ...ray File Name Procedure 0 Jobs whose details are checked can be deleted from the Check Detail Screen 1 Touch Job List on the touch screen When the current list of jobs using the Print functions is not...

Страница 421: ...checked and then touch Detail Touch or to scroll the job keys and search the job to be checked Touch the desired job key and then touch Detail The Check Detail Screen will be displayed What to do if a...

Страница 422: ...press Reset from the control panel 8 2 2 Check the Settings of Jobs Active or Held in Current Jobs The settings of jobs that is active or held in the Current Jobs list can be checked Procedure 0 The...

Страница 423: ...key for the selected job again to deselect it 4 Check the contents of the Check Job Details screen The number to the left of Back indicates the number of the cur rently displayed screen the total numb...

Страница 424: ...Print tab The current list of jobs using the Print functions will be displayed 2 Select the type of jobs to be deleted from the Current Jobs lists To check the jobs that have been held touch Held Job...

Страница 425: ...output priority of jobs cannot be changed Increase Priority does not appear and the out put priority of the jobs cannot be specified For details refer to page 15 51 0 If the output priority of jobs is...

Страница 426: ...ch or to scroll the job keys and search the job to be checked Touch the desired job key and then touch OK The selected job moves to the top of the list and printing of the job be gins When printing fo...

Страница 427: ...automatically reset during proof copying and jobs that have been performed proof printing using the Box functions Prints a single held job in the Current Jobs list and checks its output result Proced...

Страница 428: ...ouch the key for the selected job again to deselect it How to stop from printing a proof copy before outputting the proof copy Touch Cancel The Release Held Job Screen is quit and the Cur rent Jobs li...

Страница 429: ...using the Box functions Jobs in the Held Jobs list is printed The settings of jobs being held can be changed Procedure 1 Touch Job List on the touch screen When the current list of jobs using the Prin...

Страница 430: ...e selected job again to deselect it How to stop normal printing before outputting the job Touch Cancel The Release Held Job Screen is quit and the Cur rent Jobs list of the job that has being held wil...

Страница 431: ...e setting screen and then change the settings of each screen To cancel changes to the copy settings touch Cancel Touch OK on each setting screens and return to the Release Held Job Screen Can a proof...

Страница 432: ...he job being held is moved to the Current Jobs list of jobs being ac tive and is printed How to stop printing Press Stop on the control panel 9 Close the Job List Screen To return to the screen that w...

Страница 433: ...9 Paper and Original Information Chapter 9 Paper and Original Information...

Страница 434: ...t PC 202 Tray 3 and 4 Paper Feed Cabinet PC 402 Tray 3 Large Capacity Unit LU 201 Also the following equipment is provided for conveying delivering copies ADU Automatic Duplex Unit built in to the mai...

Страница 435: ...uplex Unit 16 to 28 lb Finisher FS 510 Sort and Group settings 13 to 56 lb Offset Sort and Offset Group settings 15 to 24 lb Staple 15 to 24 lb Finisher FS 510 Saddle Stitcher SD 502 Staple Half Fold...

Страница 436: ...sparent film Labels Trace Paper 1 sheet Envelope 10 sheets Equipment Capacity Automatic Duplex Unit Unlimited Finisher FS 510 See page 9 5 Mailbin Kit MT 501 Max 125 sheets 20 lb per bin Finisher FS 5...

Страница 437: ...according to each tray configuration type See the following tables The former of the two values with a slash in between represents the capacity for A4 8 1 2 11 or smaller sizes and the latter rep res...

Страница 438: ...et Sort and Offset Group settings 200 sheets or 20sets 500 250 sheets or 50 sets 25 sets Staple Fold Staple 200 sheets or 20 sets 200 sheets 20 sets Tray 1 Tray 2 Op tional output tray Tray 3 Saddle s...

Страница 439: ...utput tray OT 601 and Mailbin MT 501 4 mail bins 3 output trays Tray 1 Tray 2 op tional output tray Tray 3 Mail bins Sort and Group settings 200 sheets 200 sheets 200 100 sheets 500 sheets Offset Sort...

Страница 440: ...11 w v 5 1 2 8 1 2 v Custom Size 182 mm 139 7 mm v to 297 mm 431 8 mm w Finisher FS 510 Saddle Stitcher SD 502 Half Fold Fold Staple Standard Size 11 17 w 8 1 2 11 w Custom Size 182 mm 257 mm w to 297...

Страница 441: ...er paper tray is automatically selected so printing can continue If the optional large capacity unit LU 201 is installed a maximum of 5 650 copies can be made continuously The paper tray is automatica...

Страница 442: ...tails on the paper setting for bypass tray see To specify paper type on page 3 27 The paper type setting for trays is provided in User Setting of the Utility Screen See page 14 10 for detail No Paper...

Страница 443: ...etails contact your service representative 8 Recycled Select this setting when recycled paper is loaded 9 Colored Paper Select this setting when colored paper is loaded 10 Letterhead Select this setti...

Страница 444: ...remely smooth or extremely rough paper or paper with an uneven surface Paper that has been treated such as carbon backed heat sensitive pressure sensitive paper or inkjet printer paper Paper that has...

Страница 445: ...ed folded curled or torn original Highly translucent or transparent original such as overhead transparen cies or trace paper Coated original such as carbon backed paper Original printed on paper thick...

Страница 446: ...can be used with the Mixed Original setting Item Description Original paper weight Single sided original 9 1 4 lb to 34 lb Double sided original 13 lb to 34 lb Original size 128 mm 139 7 mm to 297 mm...

Страница 447: ...custom sized original is positioned select the size of the paper to be copied If highly translucent or transparent original such as overhead transpar encies or trace paper are positioned the original...

Страница 448: ......

Страница 449: ...10 Supplies Handling Chapter 10 Supplies Handling...

Страница 450: ...ge Replenish paper is displayed Check which paper tray appears highlighted in the touch panel and then load it with paper To load paper in tray 1 2 see page 2 50 To load paper into a paper feed cabine...

Страница 451: ...5 Detail Some copies can be printed between the time that the message Toner Cartridge needs to be replaced is displayed until the time that the mes sage Replace the Toner is displayed However it is r...

Страница 452: ...e toner is empty the following screen is displayed in enlarge display mode Touch to display the message enlarged 7 WARNING Precaution for the empty toner cartridge If it is thrown into a fire the tone...

Страница 453: ...r clothes or hands If your hands become soiled with toner immediately wash them with soap and water If toner gets in your eyes immediately flush them with water and then seek professional medical atte...

Страница 454: ...stops 3 Withdraw and pull up the used toner cartridge to remove it 4 Loosen toner by tapping bottom of the new toner cartridge on a solid surface at least five times Remove the new ton er cartridge f...

Страница 455: ...es Handling Chapter 10 5 Loosen toner by tapping top of the new toner cartridge on a solid sur face at least five times 6 Shake the new toner cartridge by turning it over about five times 7 Remove the...

Страница 456: ...first making sure that it is correctly oriented Be sure the Up ar row mark on the toner cartridge is shown on the top otherwise the toner cartridge cannot be set properly 9 Return the cartridge holde...

Страница 457: ...ge 10 10 When the staple cartridge of the Finisher FS 510 is empty the Basic Screen displays the following message in the message area To replace the staple cartridge for Finisher FS 510 see page 10 1...

Страница 458: ...y in Enlarge Display Mode When the staple cartridge is empty the following screen is displayed in en large display mode To replace the staple cartridge for Finisher FS 511 0 Be sure to replace the sta...

Страница 459: ...e finisher right door FN7 3 Turn the dial to the left until the two staplers come to the center 4 Pull up then forward the staple holder to remove it from the stapler Please check the message which st...

Страница 460: ...USH buttons of the staple holder to slide the top cover upward then remove the empty staple car tridge 6 Install the new staple cartridge into the staple cartridge Push the staple car tridge and then...

Страница 461: ...ng 10 bizhub 360 10 13 Supplies Handling Chapter 10 8 Remove the lock tape from the cartridge 9 Return the staple holder to the stapler and push it down until it clicks in place 10 Close the finisher...

Страница 462: ...510 0 Be sure to replace the staple cartridge after displaying the message oth erwise the machine may be dameged 0 When replacing the staple cartridge touch Add Staples to move the sta pler toward th...

Страница 463: ...ler deeply positioned inside the finisher moves toward the finisher front door When moving toward completely the Check Stapler Screen will be dis played 3 When the Check Stapler Screen is displayed op...

Страница 464: ...er 5 Remove the empty staple cartridge from the staple cartridge holder Push the two PUSH buttons of the staple holder to slide the top cover upward then remove the empty staple car tridge 6 Install t...

Страница 465: ...0 10 17 Supplies Handling Chapter 10 7 Push down the top cover to return it to its original position 8 Remove the lock tape from the cartridge 9 Return the staple holder to the stapler and push it dow...

Страница 466: ...to replace the saddle staple cartridge after displaying the mes sage otherwise the machine may be dameged 1 Pull the saddle stitcher tray open and hold it as it is It is not possible to leave the tray...

Страница 467: ...staple car tridge 1 rear side Saddle staple car tridge 2 front side Gently return the saddle stitcher tray to its original position 3 Remove the empty saddle staple cartridge Push the two PUSH button...

Страница 468: ...bizhub 360 Supplies Handling Chapter 10 5 Push down the top cover to return it to its original position 6 Remove the lock tape from the cartridge 7 Return the staple holder to the stapler Hold the sta...

Страница 469: ...n the staple holder to its original position then pull it up until it clicks in place Gently return the saddle stitcher tray to its original posi tion 8 Open the stapling part of the saddle stitcher t...

Страница 470: ...ted on the Finisher FS 510 the following message will be displayed on the screen and the fin ished set will be output without being punched To empty the dust box see page 10 24 To empty the dust box o...

Страница 471: ...Supplies Handling 10 bizhub 360 10 23 Supplies Handling Chapter 10 2 Open the finisher right door FN7 3 Pull out the punch dust box 4 Empty the punch dust box...

Страница 472: ...360 Supplies Handling Chapter 10 5 Return the punch dust box then close the finisher right door FN7 6 Slide the finisher to the right to return it to its original position To empty the dust box of PU...

Страница 473: ...ndling 10 bizhub 360 10 25 Supplies Handling Chapter 10 2 Pull out the punch dust box 3 Empty the punch dust box 4 Return the punch dust box then close the finisher front door Firmly reinstall the pun...

Страница 474: ......

Страница 475: ...11 Troubleshooting Chapter 11 Troubleshooting...

Страница 476: ...ted Please call your Technical Representative is dis played Call Technical Representative Screen The phone number and fax number for the usual technical representative is displayed on the center of th...

Страница 477: ...11 3 Troubleshooting Chapter 11 Touch to display the message shown in the following illustration To call the technical representative 1 Write down the malfunction code for example C 0001 in the Call T...

Страница 478: ...em of the malfunction code Detail If CS Remote Care is being operated from the service representative the service representative is automatically notified of the malfunction code After the message Mal...

Страница 479: ...and arrow indicate locations where the paper mis feed should be cleared first Clear the paper misfeeds according to the messages that appear in the guid ance display area 2 Reminder Before clearing p...

Страница 480: ...the right side door and conveyance cover are opened it is possible to touch the drum Do not touch or scratch the surface of the drum Do not leave opened the conveyance cover for a long time The drum m...

Страница 481: ...e right side door of the machine In order to reduce the risk of electric shock do not touch any part in this unit when clearing paper misfeeds 7 CAUTION Precaution for high temperature The fusing unit...

Страница 482: ...s been deleted Not enough remaining memory is displayed if the memory be comes full while copying Continue the operation according to the corresponding instructions Memory Becomes Full While Scanning...

Страница 483: ...euing a Job This message is displayed when the memory becomes full and the scanned job was deleted while scanning a document for a job to be queued Display in Enlarge Display Mode Check the number of...

Страница 484: ...y density page 3 14 Is the paper damp Replace the paper with new pa per The printed output is too dark Is the copy density set too dark Touch Light in the Density Screen to copy at the desired copy de...

Страница 485: ...f the docu ment Was curled paper load ed into the paper tray Flatten the paper before loading it The printed page is curled Was paper that curls easily as with recycled paper used Remove the paper fro...

Страница 486: ...fications page 9 13 Is the document cor rectly loaded Position the document correctly page 3 7 Finisher The finisher cannot be used Is there a paper mis feed in the finisher If there is a paper misfee...

Страница 487: ...machine is unable to make copies Remove all copies from the in dicated tray Input User Name and Pass word to login User authentication settings have been specified Copies cannot be made unless a user...

Страница 488: ...erformed contact your service representative Misfeed detected Since a paper misfeed oc curred the machine is unable to make copies Clear the paper misfeed Malfunction detected Please call your Service...

Страница 489: ...12 Machine Maintenance Chapter 12 Machine Maintenance...

Страница 490: ...ting in dark lines on the copies Raise the ADF and clean the left partition glass by wiping it with a soft dry cloth 2 Reminder Never use solvents such as benzene or thinner to clean the left partitio...

Страница 491: ...with a soft dry cloth 2 Reminder Never use solvents such as benzene or thinner to clean the document pad Cleaning the paper take up roller Keep the roller clean other wise soil marks may be cop ied r...

Страница 492: ...the main front door then withdraw and push in the writ ing unit glass cleaning knob and the corona wire cleaning knob several times Firmly push in these knobs then close the machine front door Cleanin...

Страница 493: ...ng the control panel Clean the control panel by wiping it with a soft dry cloth 2 Reminder Pressing too hard on the control panel or the touch panel may damage them Never use a mild household detergen...

Страница 494: ...t indication of the following items as a list List items Total No of Originals No of Prints Total Duplex The detailed counter can be verified to touch Details in the sub display area The list of count...

Страница 495: ...Machine Maintenance 12 bizhub 360 12 7 Machine Maintenance Chapter 12 2 Touch Details in the sub display area...

Страница 496: ...if desired Touch Print Select the desired paper tray and simplex duplex then press Start on the control panel 3 Touch Close on the Utility Counter Screen The Basic Screen will be restored 2 Note The l...

Страница 497: ...e Time Is Displayed After a set number of copies 225 000 copies have been made on your ma chine Preventive maintenance will be required for maintaining optimal per formance If the message Preventive m...

Страница 498: ......

Страница 499: ...13 Specifications Chapter 13 Specifications...

Страница 500: ...v 5 1 2 8 1 2 w v A3 w B4 w A4 w v B5 w v Detectable sizes for ADF 11 17 w 8 1 2 14 w 8 1 2 11 w v 5 1 2 8 1 2 w v A3 w B4 w A4 w v B5 w v Paper types Normal paper 16 lb to 28 lb thin paper 13 lb to...

Страница 501: ...sheets min 5 1 2 8 1 2 w Magnification ratios Full size 1 000 1 0 or less Enlargement Fixed Zoom 1 214 1 294 1 545 2 000 Reduction Fixed Zoom 0 500 0 647 0 772 0 785 Minimal Copy 0 930 Zoom with Const...

Страница 502: ...sided double sided Original paper types Single sided original 9 1 4 to 34 lb Double sided original 13 1 4 to 34 lb Original sizes 128 mm 139 7 mm to 297 mm 431 8 mm Detectable sizes 11 17 w 8 1 2 14 w...

Страница 503: ...heets 20 lb Lower tray tray 4 500 sheets 20 lb Power requirements Supplied from main unit Maximum power consumption 15 W or less Dimensions 570 W 548 D 263 H mm Weight Approx 57 3 lb Configuration 2 p...

Страница 504: ...Normal paper 16 to 28 lb Paper sizes 8 1 2 11 v Paper tray capacity 2 000 sheets 20 lb Power requirements Supplied from main unit Maximum power consumption 30 W or less Dimensions 356 W 515 D 299 H mm...

Страница 505: ...etc Staple 15 to 24 lb paper Punch 16 to 34 lb paper when optional Punch Unit PU 501 is installed Paper sizes Sort group Standard sizes 11 17 w to 5 1 2 8 1 2 w v Custom sizes 100 mm 139 7 mm w to 29...

Страница 506: ...Item Description Name PU 501 Function Punches file holes in copies Number of holes 2 holes 3 holes Auto change Hole diameter 0 315 0 020 8 0 mm 0 5 mm Hole pitch 2 hole 2 75 0 020 70 mm 0 5 mm 3 hole...

Страница 507: ...Supplied from finisher Maximum power consumption 66 W or less Dimensions 445 576 when trays are pulled out W 203 281 D 478 H mm Weight Approx 20 5 lb Consumables Staples 2 sets of MS 2C Binding max 1...

Страница 508: ...9 7 mm w to 314 mm x 457 2 mm w Sort and offset group and offset Standard sizes 11 17 w to 8 1 2 11 w v Custom sizes 182 mm 182 mm to 314 mm 457 2 mm w Staple Standard sizes 11 17 w to 8 1 2 11 w v Cu...

Страница 509: ...er output tray for main unit Paper types Normal paper 16 to 24 lb thick paper 25 to 115 lb thin paper 13 to 15 lb overhead projector transparencies en velopes labels etc Output tray capacity 100 sheet...

Страница 510: ...Unit RU 502 Image Controller IC 204 Mounting Kit MK 708 Multiple Line Expansion Kit ML 503 Fax Kit FK 502 Hard Disk HD 505 Stamp Unit SP 501 Staple MS 2C Staple MS 5D Key Counter Kit TBD Key Counter K...

Страница 511: ...14 Utility User Setting Chapter 14 Utility User Setting...

Страница 512: ...unter key on the control panel is pressed are generally referred to as Utility Screen The top menu referred to as Utility Counter Screen appears right after Util ity Counter is pressed The Utility Scr...

Страница 513: ...played on the touch panel mm Numerical Value inch Numerical Value inch Frac tion inch Fraction 3 Paper Tray Setting 1 Paper Type Specify the paper size and type for each tray Normal User Recycled Colo...

Страница 514: ...ction For details see the User s Guide Fax Operations 5 Copy Screen Select whether or not to display a specific screen while printing ON OFF OFF 6 Fax Active Screen Specify the setting concerning fax...

Страница 515: ...t ON When Fold Staple Set the machine to automatically select the Booklet func tion when Fold Staple is selected Auto Select Booklet OFF Auto Select Booklet Auto Zoom for Combine Booklet Set the machi...

Страница 516: ...n the touch panel The initial setting is English To specify Language Selection 1 Press the Utility Counter to display the Utility Counter Screen 2 Touch 2 User Setting to display the User Setting Scre...

Страница 517: ...Setting Chapter 14 5 Touch the desired language key to highlight it 6 Touch OK to complete the setting To cancel the change touch Cancel In either case the System Setting Screen will be restored 7 If...

Страница 518: ...by user and to be displayed on the touch panel To specify Measurement Unit Setting 1 Press the Utility Counter to display the Utility Counter Screen 2 Touch 2 User Setting to display the User Setting...

Страница 519: ...er Setting Chapter 14 5 Touch the desired unit key to highlight it 6 Touch OK to complete the setting To cancel the change touch Cancel In either case the System Setting Screen will be restored 7 If f...

Страница 520: ...type for each tray To specify Paper Type 1 Press the Utility Counter to display the Utility Counter Screen 2 Touch 2 User Setting to display the User Setting Screen 3 Touch 1 System Setting then touc...

Страница 521: ...in the left side area of the screen 6 Touch Paper Type The Paper Type Screen will be displayed 7 Touch the desired paper type key to highlight it 8 Touch OK to complete the setting To cancel the chang...

Страница 522: ...cted by Auto Tray Switch To specify Auto Tray Select Setting 1 Press the Utility Counter to display the Utility Counter Screen 2 Touch 2 User Setting to display the User Setting Screen 3 Touch 1 Syste...

Страница 523: ...itch functions The selected trays will be displayed as tray keys under Tray Priority in the right side area of the screen 6 Specify the priority of the trays to be detected in Auto Tray Switch us ing...

Страница 524: ...Tray Switch function ON or OFF To specify Auto Tray Switch ON OFF 1 Press the Utility Counter to display the Utility Counter Screen 2 Touch 2 User Setting to display the User Setting Screen 3 Touch 1...

Страница 525: ...uto Tray Switch ON OFF Screen will be displayed 6 Touch Allow to use Auto Tray Switch or Restrict to deactivate this function 7 Touch OK to complete the setting To cancel the change touch Cancel In ei...

Страница 526: ...selected the machine ceases the current operation With Switch Trays Tray Priority selected the machine makes a search for another tray loaded with the same paper type as that has been used then contin...

Страница 527: ...Matching Paper in Tray Setting Screen will be displayed 6 Touch Stop Printing Tray Fixed or Switch Trays Tray Priority to highlight it 7 Touch OK to complete the setting To cancel the change touch Ca...

Страница 528: ...the sales counter In addition single sided or double sided printing can be selected To specify Print Lists 1 Press the Utility Counter to display the Utility Counter Screen 2 Touch 2 User Setting to d...

Страница 529: ...nt Lists Screen will be displayed 6 Touch the desired tray key to highlight it and touch either 1 Sided or 2 sided 7 Touch OK to complete the setting To cancel the change touch Cancel In either case t...

Страница 530: ...etting value or simple job list to be displayed in the sub area left side of the Basic Screen 1 Press the Utility Counter to display the Utility Counter Screen 2 Touch 2 User Setting to display the Us...

Страница 531: ...y Change Setting Screen will be restored 7 If further changes are required touch the desired key 14 3 2 2 Copier Setting Select whether or not No Rotate appears in the Basic Screen To specify Copier S...

Страница 532: ...OFF under Job Setting on the right side area of the screen 6 If further changes are required touch the desired key 14 3 3 3 Scan Basic Screen Default Setting Specify the settings concerning scanner f...

Страница 533: ...the next job by touching Next Job Reservation With OFF selected the Basic Screen Copy mode appears while printing job is in progress directly allowing the user to reserve the next job To specify Copy...

Страница 534: ...ls refer to the Us er s Guide Fax Operations 14 3 7 7 Copy Initial Screen Setting Specify the default display for the Basic Screen in Copy mode TYPE 1 Key for selecting functions and the current setti...

Страница 535: ...r TYPE 2 6 If further changes are required touch the desired key 14 3 8 8 Job List Default Select the job list displayed as the default in the Job List Screen Current Setting The Current Job List appe...

Страница 536: ...ter 14 3 Touch 2 Display Setting The Display Change Setting Screen will be displayed 4 Touch 8 Job List Default The Job List Default Screen will be displayed 5 Select either Current Print Jobs or Prin...

Страница 537: ...y operation becomes available after the user account authen tication has been successfully made when a key counter or copy card is inserted when Reset on the control panel is pressed 2 Note Factory de...

Страница 538: ...etting The Initial Setting Screen will be displayed 5 Touch Current Setting or Factory Default to highlight it 6 Touch OK to complete the setting To cancel the change touch Cancel In either case the U...

Страница 539: ...t function when Fold Staple is selected To specify Auto Booklet ON When Fold Staple 1 Press the Utility Counter to display the Utility Counter Screen 2 Touch 2 User Setting to display the User Setting...

Страница 540: ...Setting Chapter 14 5 Touch either Auto Select Booklet or OFF to highlight it 6 If further changes are required touch the desired key 2 Note This setting is available only for the machine with Finishe...

Страница 541: ...play Zoom Ratio selected 0 647 for 2 in 1 Booklet 0 500 for 4 in 1 Booklet 0 323 for 8 in 1 Booklet With OFF selected Not selected automatically To specify Auto Zoom for Combine Booklet 1 Press the Ut...

Страница 542: ...bizhub 360 Utility User Setting Chapter 14 5 Touch either Auto Display Zoom Ratio or OFF to highlight it The magnification ratio to be selected for each mode is as follows 6 If further changes are re...

Страница 543: ...will automatically select the Group mode if original count is one or select the Sort mode if original count is two or more With OFF selected The machine will not select the finishing mode automat ical...

Страница 544: ...en turned on the feature allows the machine to automatically rotate and enlarge an 8 5 x11 or 5 5 x8 5 original image to match the short edge fed 11 x17 or 8 5 x14 paper size To specify Enlarged Rotat...

Страница 545: ...360 14 35 Utility User Setting Chapter 14 4 Touch Enlarged Rotation The setting menu will be displayed on the right side of the Screen 5 Touch either ON or OFF to highlight it 6 If further changes are...

Страница 546: ......

Страница 547: ...15 Utility Administrator Setting Chapter 15 Utility Administrator Setting...

Страница 548: ...tting of the Utility Counter Screen and setting procedure of these items The Administrator Setting can only be specified by the administrator after a specific administrator password is entered How to...

Страница 549: ...nistrator password then touch OK The Administrator Setting Screen will be displayed 4 Set each function item How to use Close Exit and layer keys Touch Close to return to the previous screen Touch the...

Страница 550: ...ssified into two levels according to its importance With Level 2 settings allowed the users can perform more administrative settings For details and procedure of the settings allowed in the User Setti...

Страница 551: ...ect 2 Text 2 Fax 1 Address Book 1 Addr Dial 2 E Mail 3 User Box 2 Group 3 Program 4 Subject Text for E mail 1 Subject 2 Text 3 User Box 1 Public Per sonal User Box 2 BulletinBoard User Box 3 Relay Use...

Страница 552: ...ensity 2 Display Set ting p 14 20 1 Sub Screen Display ON OFF 2 Copier Set ting Not Rotate Key Dsp of Proof Copy 3 Scan Basic Screen Default Setting Default Tab Program Default Address Book Default In...

Страница 553: ...ADF Select Tray when APS OFF Select Tray for Insert Sheet Separate Scan Output Setting Print Jobs During Copy Operation 5 Scanner Set ting Black Com pression Level 6 Printer Set ting 1 Basic Set ting...

Страница 554: ...onfiguration Page Demo Page PCL Font List PS Font List 3 Administrator Set ting p 15 2 1 System Set ting p 15 25 1 Power Save Setting Low Power Mode Setting Level 1 Sleep Mode Setting Level 1 Power Sa...

Страница 555: ...and Changing Addresses Changing Zoom Ratio Changing the From Address Changing Image Overlay 4 Restrict Op eration Setting Restrict Fax Broadcasting 7 Expert Adjustment 1 Original Im age Density 2 Eras...

Страница 556: ...Setting 1 Delete Un used User Box 2 Delete Se cure Print Doc uments 3 Auto Delete Secure Docu ment 2 Standard Size Setting Original Glass Original Size Detect ADF Original Size Detect Original Glass...

Страница 557: ...Person al User Box 2 BulletinBoard User Box 3 Program List 4 E Mail Sub ject Text List 4 One Touch Registration 1 Address Book List 2 Group List 3 Program List 4 E Mail Sub ject Text List 4 User Authe...

Страница 558: ...Setting 8 LDAP Setting 1 Enabling LDAP 2 Setting Up LDAP 3 Default LDAP Server Setting 9 E Mail Setting 1 E Mail TX SMTP 2 E Mail RX POP 0 Detail Setting 1 Device Setting 2 Time Adjust ment Setting 3...

Страница 559: ...x Setting 1 Network Fax Function Setting IP Address Fax Internet Fax 2 SMTP TX Setting 3 SMTP RX Setting 6 Copier Set ting p 15 113 Auto Zoom Platen Auto Zoom ADF Select Tray when APS OFF Select Tray...

Страница 560: ...ch Paper Pri ority Over A4 Print Paper Se lection Print Paper Size Incorrect User Box No Entry RX from Rejected Fax No Tray Selection for RX Print Min Reductioin for RX Print Print Separate Fax Pages...

Страница 561: ...Relay Request RX Report PC Fax TX Er ror Report Broadcast Re sult Report TX Result Re port Check 8 Job Settings List 9 Multi Line Setting 1 Telephone Line Setting Dialing Meth od NumberofRXCall Rings...

Страница 562: ...ministra tor Password 2 User Box Ad min Setting 3 Administrator Security Level 4 Security Details Password Rules Prohibit Func tion When Auth Error Manual Desti nation Input Print Data Capture Secure...

Страница 563: ...Setting 1 Print Fax Output Settings Specify the settings for printer fax function For details refer to the IC 204 User s Guide 2 Output Tray Setting Level 2 Copy Specify the output tray to be used as...

Страница 564: ...on while the machine is turned on according to the Weekly Timer setting ON OFF OFF 5 Password for Non Business Hours Set a password to turn on the machine temporarily while the machine power is shut d...

Страница 565: ...ge type and adjust the densi ty Function Copy Fax Original Type Text Photo Text Photo Dot Matrix Density Adjustment Text Photo 0 Light 5 Dark 3 Text 0 Light 5 Dark 3 Photo 0 Light 5 Dark 1 Dot Matrix...

Страница 566: ...ty Mode Copy Scan System Auto Reset Time 1 9 min OFF Priority Mode Copy System Auto Reset Time 1 min 2 Auto Reset Set the machine to restore the default copier scanner settings when the specified peri...

Страница 567: ...Password Only Synchronize User Authentication Account Track Synchronize Do Not Synchronize of Counters Assigned for Users 1 to 99 User Authentication OFF Public User Access Re strict Account Track OFF...

Страница 568: ...Account Track Counter 6 Copier Setting Auto Zoom Platen Specify whether or not to enable Auto Zoom when making a copy using the original glass ON OFF OFF Auto Zoom ADF Specify whether or not to enabl...

Страница 569: ...length of time Mode 2 Operations cannot be performed from the control panel if repeated authentication attempts can be set to between 1 and 5 times If operation of the control panel is restricted touc...

Страница 570: ...rd for the confidential document and then select the document Mode 2 Type in the ID for confidential document and then type in the password after the document is select ed Mode 1 Mode 2 Mode 1 Restric...

Страница 571: ...to the power saving condition after re ceiving a fax transmission during the Power Save mode To specify Power Save Setting 0 Low Power setting 1 to 240 min in 1 min increments factory default 1 min 0...

Страница 572: ...n page 15 2 to display the Administrator Setting Screen 2 Touch 1 System Setting then touch 1 Power Save Setting The Power Save Setting Screen will be displayed 3 Select the interval of time to elapse...

Страница 573: ...ous setting In either case the Power Save Setting Screen will be restored 4 Select the interval of time to elapse before Sleep operates automatical ly Touch Sleep Mode Setting to display the Sleep Mod...

Страница 574: ...w Power selected Energy saving condition will be entered with the touch panel blacked out Sleep selected More energy can be conserved than Low Power However it takes longer to recover the standby stat...

Страница 575: ...ay Setting Select the output tray of high priority for each job type Copy Print and Re ports To specify Output Tray Setting 1 Follow the procedure on page 15 2 to display the Administrator Setting Scr...

Страница 576: ...ed output tray 5 Touch OK to complete the setting To cancel the change touch Cancel In either case the Output Setting Screen will be restored 6 If further changes are required touch the desired key 2...

Страница 577: ...ot printed copies are fed out shifted while a finisher FS 510 FS 511 is installed To specify Offset Each Job Setting 1 Follow the procedure on page 15 2 to display the Administrator Setting Screen 2 T...

Страница 578: ...Utility Administrator Setting Chapter 15 The default setting is ON 4 Touch OK to complete the setting To cancel the change touch Cancel In either case the System Setting Screen will be restored 5 If f...

Страница 579: ...g Set the current date time and also the time difference Time Zone for the internal clock of the machine To specify Date Time Setting 1 Follow the procedure on page 15 2 to display the Administrator S...

Страница 580: ...the time difference information when an e mail is received Use and in the Time Zone area to specify the time difference between the Universal time and the local time in the machine set ting area Touc...

Страница 581: ...t saving time for the internal clock of the machine and also specify the minutes to gain The default setting for the summer time is OFF To specify Daylight Saving Time Setting 1 Follow the procedure o...

Страница 582: ...to enter the desired amount of time from 1 to 150 minutes in 1 minute increments Entered amount will be displayed on the right side of the screen 5 Touch OK to complete the setting To cancel the chan...

Страница 583: ...ime can also be programmed once a day while the machine is powered by Weekly Timer function A specific password can be set by the administrator and then used when Power Save on the control panel is pr...

Страница 584: ...ON OFF Setting Use this function to enable or disable the Weekly Timer To specify Weekly Timer ON OFF Setting 1 Follow the procedure on page 15 2 to display the Administrator Setting Screen 2 Touch 1...

Страница 585: ...ch Cancel In either case the Weekly Timer Setting Screen will be restored 5 If further changes are required touch the desired key 15 2 8 5 Weekly Timer Setting 2 Time Setting Use this function to set...

Страница 586: ...Utility Administrator Setting 15 40 bizhub 360 Utility Administrator Setting Chapter 15 2 Touch 1 System Setting 5 Weekly Timer Setting and then 2 Time Setting The Time Setting Screen will be display...

Страница 587: ...ed ON minute e g 07 for 7 min Similarly enter the OFF hour and OFF minute If wrong number is entered touch Clear to delete it then enter the correct number Press C Clear on the control panel to delete...

Страница 588: ...f for a given day of a given month Set the on off condition for specific days individually or collectively for all Mon days through Sundays of the given month To specify Date Setting 1 Follow the proc...

Страница 589: ...off Touch the bidirectional arrow key to switch ON OFF indication of the keys beside the day to be specified then touch it Touching ON will highlight all corresponding dates of the calendar while OFF...

Страница 590: ...own the power and then turn it on again while the machine is turned on according to the Weekly Timer setting Only one off time interval can be programmed The factory default of this setting is OFF To...

Страница 591: ...er the start time using the control panel keypad Similarly touch Power Save End Time to highlight it then enter the end time using the control panel keypad With OFF selected this function will be disa...

Страница 592: ...Timer function Establishing a password with this function you will be able to use the machine by entering the specified pass word after Power Save on the control panel is pressed To specify Password...

Страница 593: ...en The Password Creation Screen will be displayed Use the control panel keypad to enter the desired password Up to eight digits can be entered 5 Touch OK to complete the setting To cancel the change t...

Страница 594: ...programmed contents of Mode Memory in order to prevent it from being deleted during other store delete operations To specify Restrict Access to Saved Program Jobs 1 Follow the procedure on page 15 2...

Страница 595: ...ghlight it If more than one program is to be locked continue touching the de sired keys to highlight them all To release the lock touch the highlighted key to deselect it 4 Touch OK to complete the se...

Страница 596: ...Jobs Use this function to delete the registered jobs programmed contents of Mode Memory To specify Delete Saved Program Jobs 1 Follow the procedure on page 15 2 to display the Administrator Setting Sc...

Страница 597: ...estrict Access to Job Settings Select whether or not to allow the users to change the following job settings Changing Job Priority Allow Restrict to change the priority order in printing Deleting Othe...

Страница 598: ...tor Setting 15 52 bizhub 360 Utility Administrator Setting Chapter 15 2 Touch 1 System Setting 6 Restrict User Access and then 3 Restrict Access to Job Settings The Restrict Access to Job Settings Scr...

Страница 599: ...ng 15 bizhub 360 15 53 Utility Administrator Setting Chapter 15 3 Touch the desired item to highlight it then select Allow or Restrict in the right side area of the screen 4 If further changes are req...

Страница 600: ...o three levels lighter or three levels darker This function can be applied to each of three original image types Photo Text Dot Matrix in addition to the regular setting Text Photo To specify Original...

Страница 601: ...ide area of the screen to specify the desired adjustment level Repeat this step to make an adjustment for each original type 5 Touch OK to complete the setting To cancel the change touch Cancel In eit...

Страница 602: ...onditions in operating the Non Image Area Erase function and also specify the erase amount of the ADF Frame Erase function To specify Erase Adjustment 1 Follow the procedure on page 15 2 to display th...

Страница 603: ...een Select the desired condition to operate this function Always No condition is specified Only when Auto Size or 1 0 is selected Operates only when Auto Size or 1 0 magnification ratio is selected Do...

Страница 604: ...atically Specify Erase type and original density specified on this screen will be applied Five levels are provided to adjust the original densi ty Specify the erase type and original density Touch eit...

Страница 605: ...er Adjustment Use this function to make the following adjustments for finisher options Adjustment menu items may differ depending upon the configuration of the machine options being installed To speci...

Страница 606: ...ty Administrator Setting 15 60 bizhub 360 Utility Administrator Setting Chapter 15 2 Touch 1 System Setting 7 Expert Adjustment and then 3 Finisher Adjustment The Finisher Adjustment Screen will be di...

Страница 607: ...e Test Copy Screen will be displayed Press Start to make a sample copy When completed touch Close to return to the Center Staple Position Screen Compare the page widths of left and right pages to chec...

Страница 608: ...The Test Copy Screen will be displayed Press Start to make a sample copy When completed touch Close to return to the Half Fold Position Screen Compare the page widths of left and right pages to check...

Страница 609: ...unch Horizontal Position Screen Check the hole positions of the sample copy Change the adjust ment value if satisfactory result is not obtained Touch to increase the adjustment value for shifting the...

Страница 610: ...Punch Resist Loop Size Screen Check the hole positions of the sample copy Touch or to change the adjustment value if satisfactory result is not obtained Too much adjustment value may cause a fold at...

Страница 611: ...Counter 1 Management List Use this function to print out the machine management lists To specify Management List 1 Follow the procedure on page 15 2 to display the Administrator Setting Screen 2 Touc...

Страница 612: ...Touch the desired list key On the subsequent screen select paper and simplex duplex for printing the list then press Start on the control panel To suspend printing press Stop 4 Touch Close repeatedly...

Страница 613: ...ter Use this function to register up to ten combinations of paper size and type to be counted To specify Paper Size Type Counter 1 Follow the procedure on page 15 2 to display the Administrator Settin...

Страница 614: ...ting Chapter 15 3 Touch the number to clear the counter or change the setting 4 Touch Change Setting to change the setting Touch the desired paper type key to highlight it Touch change the paper size...

Страница 615: ...e machine can be set to automatically switch to the specified priority mode Copy or Scan after a certain period of machine inactivity This function is referred to as System Auto Reset Use this setting...

Страница 616: ...and then 1 System Auto Reset The System Auto Reset Screen will be displayed 3 Select the desired priority mode in the left side area of the screen Touch Copy Scan or Fax to highlight it In the right s...

Страница 617: ...be released while User Authentication Account Track function will be cancelled in one minute 15 2 219 Reset Setting 2 Auto Reset Auto Reset is the function to automatically restore the copier scanner...

Страница 618: ...g Chapter 15 2 Touch 1 System Setting 9 Reset Setting and then 2 Auto Reset The Auto Reset Screen will be displayed 3 Touch Input in each area of Copy Scan and Fax then use the control panel keypad to...

Страница 619: ...Setting Chapter 15 When touching OFF to highlight it Auto Reset for each is not activat ed 4 Touch OK to complete the setting To cancel the change touch Cancel In either case the Reset Setting Screen...

Страница 620: ...d Staple Setting Initializes specified conditions in Staple mode Original Set Bind Direction Initializes specified conditions in Original Direc tion and Margin Reset Data After Job Initializes all cop...

Страница 621: ...strator Setting Chapter 15 2 Touch 1 System Setting 9 Reset Setting and then 3 Job Reset The Job Reset Screen will be displayed 3 Specify the reset setting for account change Touch When Account is cha...

Страница 622: ...the right side of the screen Select Reset to initialize the previous job settings when original is loaded into the ADF Copy settings are to be made each time the original document is loaded into the A...

Страница 623: ...itialize the settings currently specified when a job is stopped for proof copying To specify System Auto Reset of Proof Copy 1 Follow the procedure on page 15 2 to display the Administrator Setting Sc...

Страница 624: ...78 bizhub 360 Utility Administrator Setting Chapter 15 4 Touch OK to complete the setting To cancel the change touch Cancel In either case the Reset Setting Screen will be restored 5 If further change...

Страница 625: ...is function to register an administrator name extension number and e mail address to be displayed on the Help Screen To specify Administrator Registration 1 Follow the procedure on page 15 2 to displa...

Страница 626: ...yphen can be entered Touch OK to complete the setting and return to the previous screen 4 Enter the extension number of the administrator from the control panel keypad Five digit number including a hy...

Страница 627: ...E Mail Address Input Screen will be displayed Use the touch panel keypad to enter the e mail address of the ad ministrator Touch OK to complete the setting and return to the previous screen 6 Touch OK...

Страница 628: ...s of the machine The registered address can be used as one of the From address for scan jobs and for receiving e mail to the machine s box To specify Input Machine Address 1 Follow the procedure on pa...

Страница 629: ...enter the machine name Up to eight characters including hyphen can be entered Touch OK to complete the setting and return to the previous screen 4 Touch E Mail to display the Machine E Mail Address I...

Страница 630: ...s User authentication Limits available functions copy operations scanning operations and printing Counts printing scanning made by each user Limits the number of printing pages Manages personal boxes...

Страница 631: ...used by multiple depart ments and every use of the machine by employees is to be managed also in terms of each department With this setup totals can be maintained not only on each employee each user b...

Страница 632: ...ine cannot discriminate between capitals and small letters so that the authentication procedure may not be completed prop erly 0 and cannot be used in a password specified for the external serv er 0 P...

Страница 633: ...h 1 Authenti cation Method The Authentication Method Screen will be displayed 3 Make the User Authentication setting Select OFF to disable user authentication then proceed to step 5 Select ON MFP to u...

Страница 634: ...nal Server Authentication Screen Touch Active Directory to display the Active Directory Screen Touch the desired registration key 1 20 to highlight it and then touch Registration Enter the desired def...

Страница 635: ...ntext name Complete the setting as described above then proceed to the next step 5 Make the Public User Access setting Select Restrict to prohibit the nonregistered users from using the machine Select...

Страница 636: ...use will be available with making user authentication only With Do Not Synchronize selected the user authentication and account track setting will be required each time of the machine use 9 Make the...

Страница 637: ...Permission If external server authentication is enabled functions available to authenti cated users can be limited Public User Key Select whether or not the public user is authenticated with the user...

Страница 638: ...2 bizhub 360 Utility Administrator Setting Chapter 15 2 Touch 4 User Authentication Account Track 2 User Authentication Setting and then 1 Administrative Setting The Administrative Setting Screen will...

Страница 639: ...g at the right of the screen 4 Touch Default Function Permission The Default Function Permission Screen will be displayed 5 Select either Allow or Restrict for each function 6 Touch Public User Key Se...

Страница 640: ...s machine For the machine mounted with HDD a total of 1 000 can be registered Contact your service representative if desired 0 If public user is set to Allow in the Authentication Method one Public ac...

Страница 641: ...r Setting 15 bizhub 360 15 95 Utility Administrator Setting Chapter 15 2 Touch 4 User Authentication Account Track 2 User Authentication Setting and then 2 User Registration The User Registration Scre...

Страница 642: ...g up to 64 alphanumerical charac ters 5 Touch User Password to display the User Password Screen enter a password and touch OK Passwords can be entered using up to 64 alphanumerical charac ters User Pa...

Страница 643: ...Max Allowance Set Screen will be displayed Select either Limit or No Limit If Limit is touched enter a maximum number using the numerical keypad then touch OK The maximum number will be set If All Us...

Страница 644: ...ion popup menu will be displayed Touch Yes to delete or No to cancel In either case the User Registration Screen will be restored 11 Touch OK to complete the setting To cancel the change touch Cancel...

Страница 645: ...printing will be displayed Copy The total number of printed pages made with the copier will be displayed Total The total number of printed pages made with the copier Large Size The total number of pri...

Страница 646: ...ty Administrator Setting Chapter 15 1 Follow the procedure on page 15 2 to display the Administrator Setting Screen 2 Touch 4 User Authentication Account Track 2 User Authentication Setting and then 3...

Страница 647: ...confirmation screen is touched all user counters will be cleared The maximum allowance value will not be cleared 4 Touch the desired item to check the counter If Clear Counter on the User Counter Scre...

Страница 648: ...et for each account using this machine This section describes an example of setting the account track authentica tion method to Account Name Password To specify Account Track Registration 1 Follow the...

Страница 649: ...rvice representative if desired 4 Touch Account Name The Account Name Entry Screen will be displayed Enter an account name up to 8 alphanumerical characters and touch OK The account name will be set I...

Страница 650: ...currently set One character password Example 11111111 Password of less than eight characters 6 Touch Max Allowance Set The Max Allowance Set Screen will be displayed If All Accounts is touched the cur...

Страница 651: ...Setting Chapter 15 8 Touch OK to complete the setting To cancel the change touch Cancel In either case the Account Track Registration Screen will be re stored 9 Touch Close to return to the Account Tr...

Страница 652: ...sed for printing will be displayed Copy The total number of printed pages made with the copier will be displayed Total The total number of printed pages made with the copier Large Size The total numbe...

Страница 653: ...Setting 15 bizhub 360 15 107 Utility Administrator Setting Chapter 15 2 Touch 4 User Authentication Account Track 3 Account Track Set ting and then 2 Account Track Counter The Account Track Counter Sc...

Страница 654: ...s touched all account track counters will be cleared The maximum allowance value will not be cleared 4 Touch the desired item to check the counter If Clear Counter on the Account Track Counter Screen...

Страница 655: ...allowed for unspecified us ers or accounts When allowed the number of printed pages will be counted as a public user To specify Print without Authentication 1 Follow the procedure on page 15 2 to dis...

Страница 656: ...ter 15 3 Select either Allow or Restrict on the Print without Authentication Screen 4 Touch OK to complete the setting To cancel the change touch Cancel In either case the User Authentication Account...

Страница 657: ...can be printed To specify Counter List 0 Counter List cannot be selected in the following situations User Authentication is set to OFF Account Track is set to OFF 1 Follow the procedure on page 15 2...

Страница 658: ...360 Utility Administrator Setting Chapter 15 3 Select the desired paper tray to print the list on the Counter List Screen 4 Touch Close to return to the User Authentication Account Track Screen If fur...

Страница 659: ...To specify Auto Zoom Platen 1 Follow the procedure on page 15 2 to display the Administrator Setting Screen 2 Touch 6 Copier Setting The Copier Setting Screen will be displayed 3 Touch Auto Zoom Plat...

Страница 660: ...15 114 bizhub 360 Utility Administrator Setting Chapter 15 2 Note The Auto Zoom Platen can be accessed also from the User Setting Screen if the Administrator Security Level in the Administrator Setti...

Страница 661: ...creen 2 Touch 6 Copier Setting The Copier Setting Screen will be displayed 3 Touch Auto Zoom ADF on the Copier Setting Screen Select either ON or OFF under Job Setting in the right side area of the sc...

Страница 662: ...lect Tray when APS OFF 1 Follow the procedure on page 15 2 to display the Administrator Setting Screen 2 Touch 6 Copier Setting The Copier Setting Screen will be displayed 3 Touch Select Tray when APS...

Страница 663: ...cified as factory default 4 Touch Close to return to the Administrator Setting Screen If further changes are required touch the desired key 2 Note The Select Tray when APS OFF can be accessed also fro...

Страница 664: ...h paper for Cover Mode and Insert Sheet functions To specify Select Tray for Insert Sheet 1 Follow the procedure on page 15 2 to display the Administrator Setting Screen 2 Touch 6 Copier Setting The C...

Страница 665: ...the change touch Cancel In either case the Copier Setting Screen will be restored 6 Touch Close to return to the Administrator Setting Screen If further changes are required touch the desired key 2 No...

Страница 666: ...g paper size To specify Image Rotation 1 Follow the procedure on page 15 2 to display the Administrator Setting Screen 2 Touch 6 Copier Setting The Copier Setting Screen will be displayed 3 Touch Imag...

Страница 667: ...the procedure on page 15 2 to display the Administrator Setting Screen 2 Touch 6 Copier Setting The Copier Setting Screen will be displayed 3 Touch the down arrow key to scroll to the next page then t...

Страница 668: ...receive print data 4 Touch Close to return to the Administrator Setting Screen If further changes are required touch the desired key 2 Note The Print Jobs During Copy Operation can be accessed also f...

Страница 669: ...tting 15 6 1 1 Administrator Password Set the new administrator password To specify Administrator Password 1 Follow the procedure on page 15 2 to display the Administrator Setting Screen 2 Touch 9 Sec...

Страница 670: ...e will be displayed on touching OK and any key on the control touch panel will be unavailable for the next five seconds Enter the correct password after five seconds Wrong operations will be recorded...

Страница 671: ...ty Level Specify the administrator settings to be allowed to general users To specify Administrator Security Level 1 Follow the procedure on page 15 2 to display the Administrator Setting Screen 2 Tou...

Страница 672: ...t Tray for Insert Sheet Level 2 Allow the general users to specify the Power Save Setting Output Setting Original Image Density Auto Zoom Platen Auto Zoom ADF Select Tray when APS OFF Select Tray for...

Страница 673: ...y Details To specify Security Details 1 Follow the procedure on page 15 2 to display the Administrator Setting Screen 2 Touch 9 Security Setting then touch 4 Security Details The Security Details Scre...

Страница 674: ...cel In either case the Security De tails Screen will be restored 4 Specify the Prohibit Functions When Auth Error Touch Prohibit Functions When Auth Error to display the Prohibit Functions When Auth E...

Страница 675: ...page Specify the Print Data Capture Setting if desired This is the setting concerning Printer function For details refer to the IC 204 User s Guide The setting of Secure Document Access Method is disp...

Страница 676: ...ted in use in order to enhance the security PC FX Transmission HDD TWAIN PageScope Box Operator PageScope Scan Direct PageScope Job Spooler To specify Network Function Setting 1 Follow the procedure o...

Страница 677: ...r not to use this function Select Use to use the network functions or Not Use to disable those functions 4 If further changes are required touch the desired key Detail For details of the network funct...

Страница 678: ......

Страница 679: ...16 Appendix Chapter 16 Appendix...

Страница 680: ...scribes how to use the keyboard that appears in the touch panel for typing in the names of registered accounts and custom paper sizes The keypad can also be used to type in numbers Any of the followin...

Страница 681: ...Appendix 16 bizhub 360 16 3 Appendix Chapter 16 Touching Shift switches the keyboard display between lowercase letters numbers and uppercase letters symbols...

Страница 682: ...o be typed in with the keypad The entered characters appear in the text box 2 Note To cancel changes to the settings touch Cancel To clear all entered text press C clear Detail To change a character i...

Страница 683: ...17 Index...

Страница 684: ...tting 15 42 Date Time Setting 15 33 Daylight Saving Time Setting 15 35 Default Function Permission 15 91 Delete Saved Program Jobs 15 50 Erase Adjustment 15 56 Expert Adjustment 15 54 Finisher Adjustm...

Страница 685: ...1 13 Caution notations and labels 1 13 Center Erase 5 78 Centering 5 84 Chapters 5 25 Cleaning 12 2 Clear key 2 21 Combine Pages 4 2 Consumables 1 8 Contrast dial 2 21 Control Panel 2 20 Control panel...

Страница 686: ...t Start Interval Time 7 24 Keypad 2 21 L large capacity unit 2 56 Large Capacity Unit LU 201 2 12 Laser Safety 1 10 Legal Restrictions on Copying x 32 Lengthwise x 29 Loading Paper 2 49 Low Power 15 2...

Страница 687: ...g 3 16 Paper Storage 9 12 paper type 3 27 Paper Weight 9 3 Paper empty indicator 2 3 Photo mode 4 20 Positioning the Original 3 7 Power cord 1 3 Power plug 1 5 Power Save Indicator 2 34 Power Save key...

Страница 688: ...2 User Setting 14 2 Auto Booklet ON When Fold Staple 14 29 Auto Reset 15 71 Auto Tray Select Setting 14 12 Auto Tray Switch ON OFF 14 14 Auto Zoom for Combine Booklet 14 31 Copier Setting 14 29 Copy S...

Страница 689: ...Index 17 bizhub 360 17 7 Z Folded Original 4 10 Zoom Setting 3 30...

Страница 690: ......

Страница 691: ......

Страница 692: ......

Отзывы: