


bizhub 367/287/227
2-25
2.6
Touch Panel
2
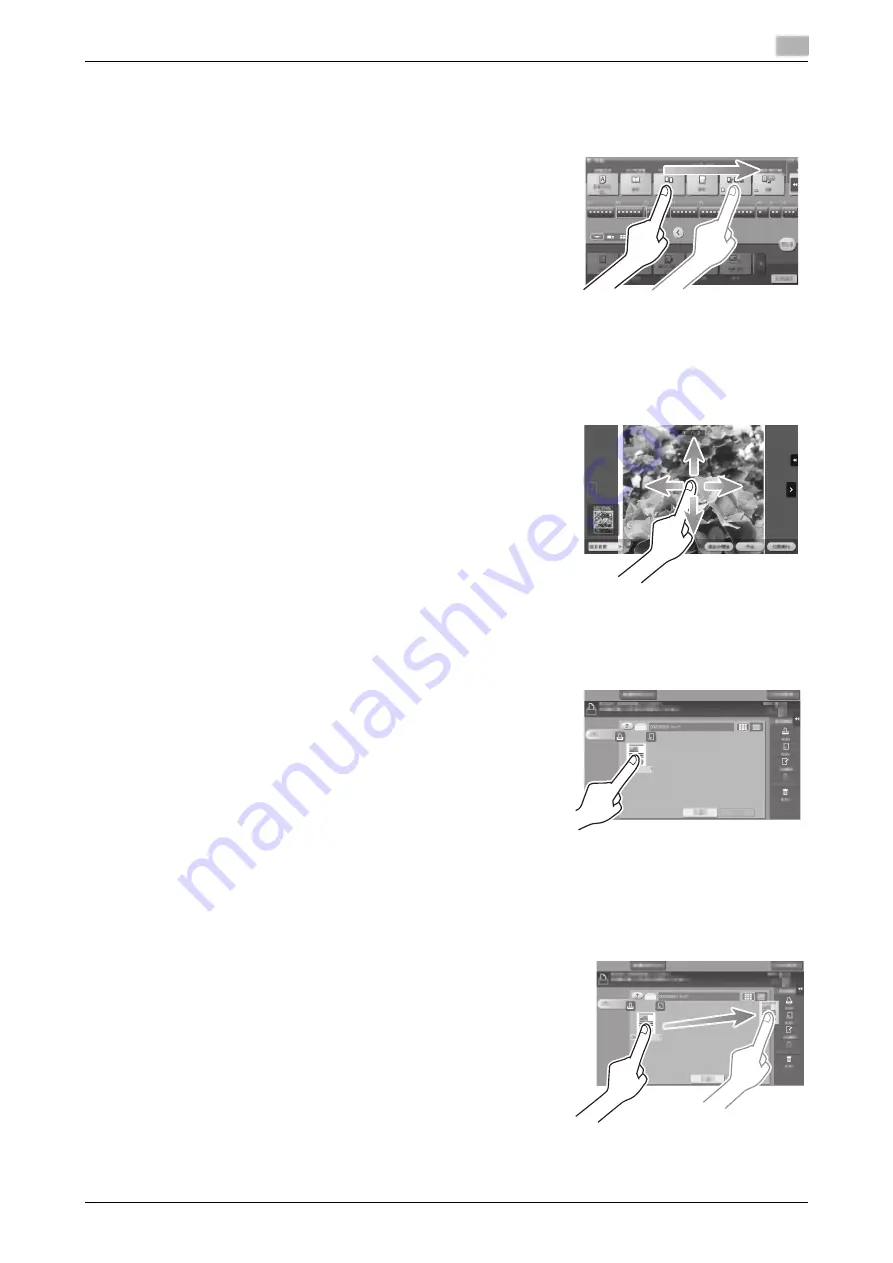
Drag
To move the scroll bar or document, place your finger on it and
move your finger. Used to move the scroll bar or document.
Pan
Slide your finger parallel in a front-to-back and side-to-side direc-
tion on the screen. Used to move to the intended display location if
data spans multiple screens.
Long-tap
Hold down the document by the finger. Used to display the icon re-
lated to the document.
Drag & Drop
Slide your finger to the intended place and release it while a docu-
ment is selected. Used to move the document to the intended place.
Содержание bizhub 227
Страница 1: ...bizhub 367 287 227 QUICK GUIDE ...
Страница 2: ... ...
Страница 8: ...Contents 6 bizhub 367 287 227 ...
Страница 9: ...1 Introduction ...
Страница 10: ......
Страница 34: ...1 26 bizhub 367 287 227 i Option LK 105 v4 searchable PDFs End User License Agreement 1 1 12 ...
Страница 35: ...2 About This Machine ...
Страница 36: ......
Страница 48: ...2 14 bizhub 367 287 227 About this machine 2 2 3 Job Separator JS 506 No Name 1 Output Tray ...
Страница 50: ...2 16 bizhub 367 287 227 About this machine 2 2 3 No Name 1 Punch Kit 2 Staple Cartridge 3 Folding Output Tray ...
Страница 75: ...3 Basic Settings and Operations ...
Страница 76: ......
Страница 102: ...3 28 bizhub 367 287 227 Scan to Send function 3 3 2 6 Tap Close ...
Страница 109: ...bizhub 367 287 227 3 35 3 2 Scan to Send function 3 Sending the original 1 Load the original 2 Tap Scan Fax ...
Страница 110: ...3 36 bizhub 367 287 227 Scan to Send function 3 3 2 3 Enter a destination 1 2 3 4 ...
Страница 116: ...3 42 bizhub 367 287 227 Fax function 3 3 3 Sending the original 1 Load the original 2 Tap Scan Fax ...
Страница 135: ...bizhub 367 287 227 3 61 3 5 Registering a destination 3 2 Narrow down destinations using index and address type 2 1 3 4 ...
Страница 145: ...bizhub 367 287 227 3 71 3 7 Using the guidance function 3 3 Narrow down the information you want to know ...
Страница 147: ...bizhub 367 287 227 3 73 3 7 Using the guidance function 3 3 Narrow down the information you want to know ...
Страница 151: ...4 Advanced Functions ...
Страница 152: ......
Страница 170: ...4 20 bizhub 367 287 227 Using the Web browser function 4 4 2 ...
Страница 171: ...5 Troubleshooting ...
Страница 172: ......
Страница 183: ...6 Index ...
Страница 184: ......
Страница 186: ...6 4 bizhub 367 287 227 Index by item 6 6 1 ...


