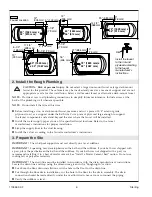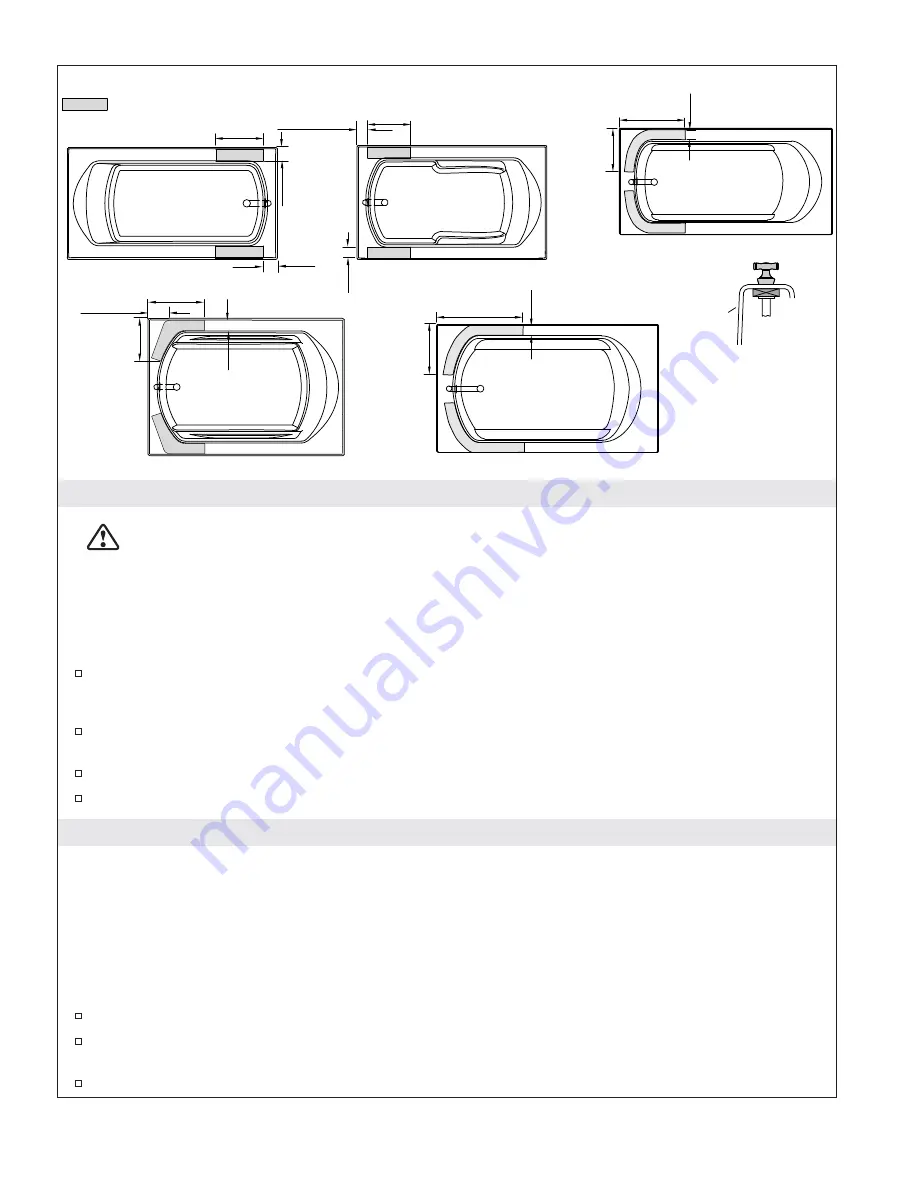
2. Install the Rough Plumbing
CAUTION: Risk of personal injury.
Do not select a large rim-mount faucet or large deck-mount
faucet for this product. These faucets may be inadvertently used as a means of support and are not
appropriate or safe for this installation. Select a wall-mount faucet or alternative deck-mount faucet.
NOTE:
Provide access to all plumbing connections to simplify future maintenance. Include access at the
back of the plumbing wall whenever possible.
NOTE:
Do not install the trim at this time.
Before installing a rim- or deck-mount faucet, measure and cut a piece of 3/4
″
exterior grade
plywood to act as a support under the bath rim. Cut a piece of plywood large enough to support
the faucet components and extend beyond the area where the faucet will be installed.
Install the water supply pipes at one of the specified faucet locations. Refer to the faucet
manufacturer’s instructions for proper installation.
Strap the supply lines to the stud framing.
Install the valves according to the faucet manufacturer’s instructions.
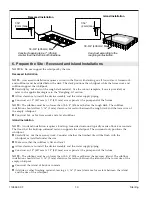
3. Prepare the Site
IMPORTANT!
The whirlpool supports must rest directly on a level subfloor.
IMPORTANT!
Squeaking may develop between the bath and the subfloor. If your bath was shipped with
a pad, place the pad between the bath and the subfloor. If your bath was not shipped with a pad, we
recommend installing it in a bed of mortar cement. See
″
Install a Mortar Cement Bed
″
section. Do not use
roofing felt or polyester materials.
IMPORTANT!
The drain line must be installed in accordance with the drain manufacturer’s instructions.
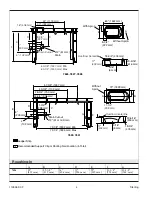
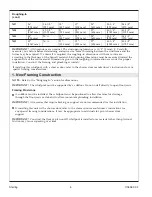
Locate the drain line and trap using the dimensions given in the
″
Roughing-In
″
section.
For above-the-floor drain installations, cut the hole in the floor for the drain line.
For through-the-floor drain installations, cut the hole in the floor for the drain assembly. The drain
connection should be made directly under the overflow drain. Leave room to connect the piping.
Verify the subfloor is level.
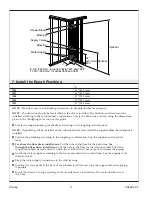
60" (1524 mm) x
32" (813 mm)
4" (102 mm)
3-1/8"
(79 mm)
3-1/8" (79 mm)
6-1/2"
(165 mm)
17-1/4"
(438 mm)
13"
(330 mm)
12"
(305 mm)
12"
(305 mm)
60" (1524 mm)
x 42" (1067 mm)
60" (1524 mm) x
36" (914 mm)
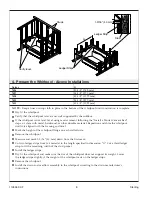
Install the faucet
to the rim and
plywood according
to the faucet
manufacturer's
instructions.
Faucet Location
Rim
72" (1829 mm) x
42" (1067 mm)
3"
(76 mm)
16"
(406 mm)
27" (686 mm)
72" (1829 mm) x
36" (914 mm)
14-1/2"
(368 mm)
23" (584 mm)
3"
(76 mm)
4" (102 mm)
3-1/8"
(79 mm)
1105582-2-F
6
Sterling
Содержание STERLING Whirlpool 7626 Series
Страница 65: ...1105582 2 F...
Страница 66: ...1105582 2 F...
Страница 67: ...1105582 2 F...
Страница 68: ...USA 1 800 STERLING 1 800 783 7546 M xico 001 877 680 1310 SterlingPlumbing com 2012 Kohler Co 1105582 2 F...


