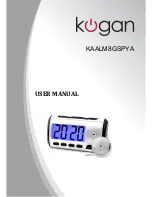
Video DVR Overview:
This alarm clock contains a hidden spy camera and is designed to provide snapshots,
audio recordings, video recordings or motion detection based video/audio recording onto a
microSD card that can be inserted in the slot on the side of the device. The video can then
be transferred to a PC using a standard mini USB cable (included) or by removing the
microSD card and inserting into a card reader attached to a PC.
This alarm clock has a high resolution 2 megapixel image sensor for a great colour picture.
It can record video in 720x480 at 30fps. It will support microSD cards up to 32GB. With a
built-in, rechargeable battery, you will be provided with up to 12 hours of continuous video
recording or up to 25 hours of continuous audio recording. The battery can be charged by
plugging the unit into a PC via the mini USB cable.
DVR Operation Instructions:
To access the DVR controls and microSD card slot, rotate the bottom of the cover on the
right side while facing the clock (as shown in diagram). For charging, set the master
switch to the “OFF” position. For recording, set the master switch to the “ON” position.
DVR Audio & Video Recording Control:
To power on the DVR, press the Power Button
on the remote control. This will put
the alarm into standby mode to await addition commands. (Blue LED is solid. Make sure
the microSD card has been inserted.)
For Video Recording:
To begin video recording from standby mode, press the Video Button on the remote
controller. This will start the video recording (continuous recording) to the microSD card.
The Blue LED will flash 3 times and then go out for the duration of the recording. Stop the
video recording by pressing the Video Button on the remote again. This will return the
clock to standby mode to await further instructions.
For Audio Recording:
To begin audio recording from standby mode, press the Audio Button
on the
remote controller. This will start the audio recording (continuous recording) to the microSD
card. The Blue LED will flash 3 times and then go out for the duration of the recording.
Stop the audio recording by pressing the Audio Button on the remote control again. This
will return the clock to standby mode to await further instructions.
Содержание KAALM8GSPYA
Страница 1: ...KAALM8GSPYA USER MANUAL...
Страница 3: ......


