RAMHD-230/734
Installation and Operation Manual
PG 37/41
REV: B (4/8/2021)
pushbutton retaining nut over both wires, then connect purple wire to one terminal of pushbutton and
red wire to other terminal. Install pushbutton into drilled hole and tighten nut on backside securely.
d.
Route 18-gauge red wire to a fused power source and connect.
e.
Insert all wiring into included wire loom and ensure loom is away from all sharp edges, hot vehicle parts
(i.e., exhaust, engine, radiator), and fasten securely to vehicle using zip ties, or equivalent.
REFERENCE: View these general
Kleinn Horn Button Install Manual
, and
Kleinn Factory Horn Button Manual
for additional information
10.4.
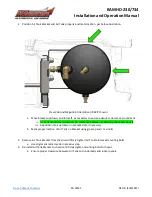
Connect Relay to Wiring
a.
Connect
Pin #87 to compressor’s Red power wire, using
supplied large Yellow female crimp connector.
b.
Connect Pin #85 to supplied 18-gauge black wire (12-18 inches in length), and attach to adequate
vehicle, or chassis ground, using supplied small blue ring terminal and self-tapping screw. Ensure ring
terminal is properly grounded by either touching bare metal, or via self-tapping screw.
c.
Connect Pin #86 to supplied Yellow wire and to pressure switch wire on Air Tank (either wire can be
connected). Connect remaining yellow wire to other wire on pressure switch, route to vehicle interior,
and connect it to a fused, 12v switched power source (i.e., open accessory spot on fuse block).
10.5.
Connect Air Horn Solenoid
a.
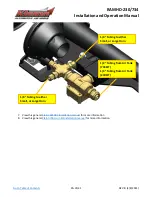
Remove single screw holding black plastic protective housing from solenoid and insert end of long
purple wire and short black wire into round port on housing; fasten wires to solenoid screws, per below
illustration
b.
Black ground wire from solenoid can be trimmed to length, and small blue ring terminal crimped
on, it can then be attached to a paint free surface (i.e., grounded), with supplied self-tapping screw.
c.
P
urple wire can be routed down frame rail and into vehicle interior; it will later be attached to horn
activation button.
d.
Install supplied 30-amp fuse into inline fuse holder
10.6.
Reconnect Vehicle Battery(s)
CAUTION:
Before connecting vehicle battery(s), verify all wiring is properly connected and no shorts exists.
Use of Multi-Meter, or Test Light is recommended to check continuity of all connections.


